I Tri and Craft

thoughts from a mother of boys, a marathoner, a triathlete, a crafter, a wife, and a scientist


Leave a comment

A Birthday Party Hollywood Style

Awhile ago my nieces made a parody music video which was apparently really funny.  They had been wanting to make another video with some of their friends and decided their 11th birthday party would be the perfect opportunity.

My sister came up with a Hollywood Movie theme with a casting call audition and she employed me to come up with some invitations for her.

Hollywood Invitation 
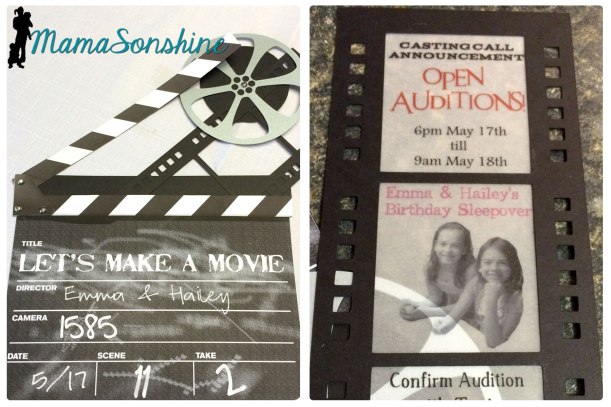
I wanted to make a movie clapper as the envelope, my sister wanted a casting call flyer as the invitation.

MSS_HollywoodParty01


I changed her mind.  I really wanted to make the invitation look like old 35 mm film.  I wanted to print the information on velum with a picture of the girls.

MSS_HollywoodParty04


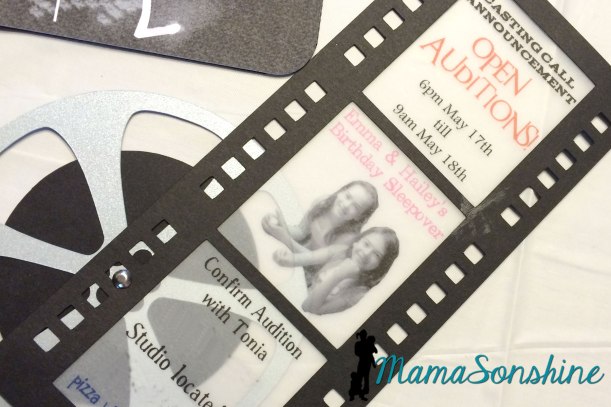
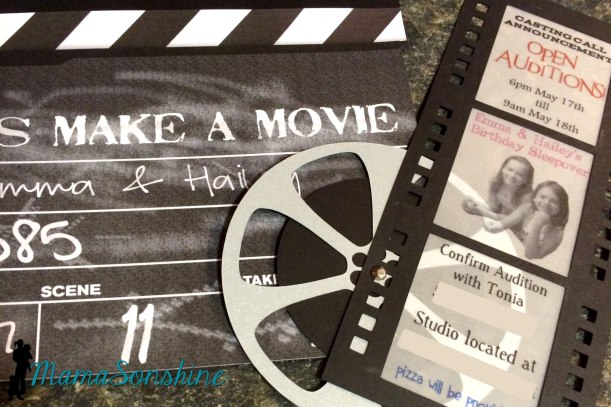
While the film was the length of the clapper, it wasn’t wide enough.  I didn’t want it to get lost in the envelope pocket so I added the film reel.

MSS_HollywoodParty02

I used Photoshop to make the clapper image look like a chalkboard.  I then used my Silhouette Cameo to cut all the components out.

MSS_HollywoodParty05


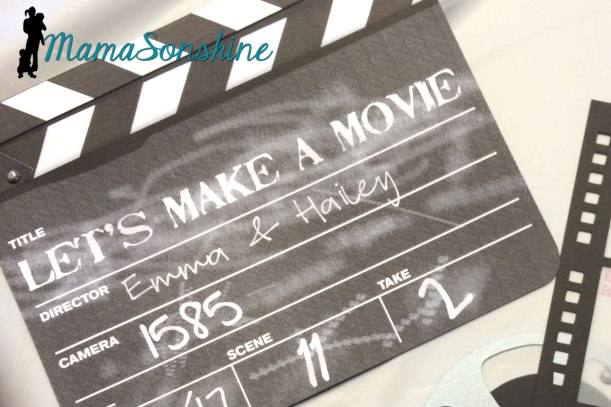
I used Silhouette’s print n’ cut feature for the front of the clapper, the back is black card stock.  I cut out the main part with the bottom strip as one piece, the triangle on the left and the top strip board were separate pieces.  I used brads to connect the three pieces and allow for movement of the top part.


These invitations are pretty big, and would have been more expensive to mail, but since they were just being handed out at school, we didn’t have to worry about that.

MSS_HollywoodParty15

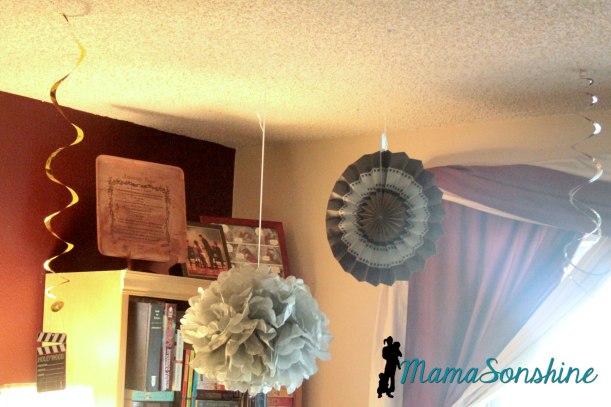
Luckily Party City had a ton of Hollywood Movie decorations that my sister was able to find.

MSS_HollywoodParty14

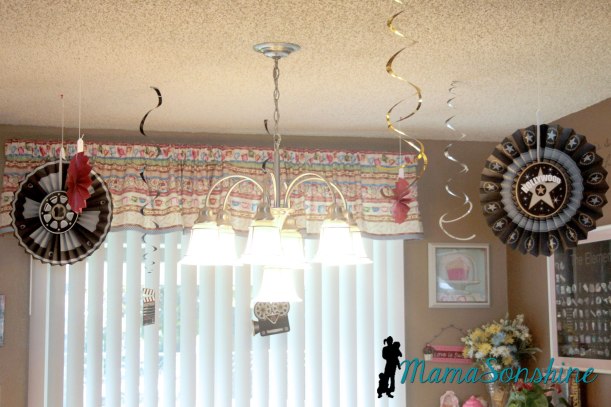
I know, typically I would have made all these, but time just flew by and before we knew it, it was time for the party and I had no decorations made.

MSS_HollywoodParty10

The family room was set up as a karaoke station.  I don’t know how many times we heard “Let it Go” that night.

MSS_HollywoodParty12

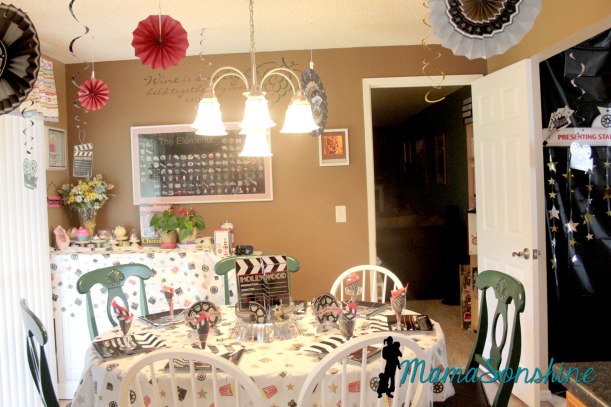
Since it was a slumber party my sister limited the number of guest and we were able to set the table for pizza.

MSS_HollywoodParty13

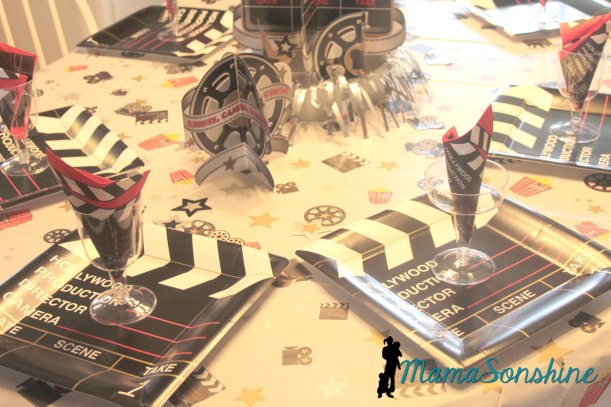
I have never had a party where we could do a table setting and it was fun!

MSS_HollywoodParty11

My nieces insisted on the plastic wine & champagne glasses.

MSS_HollywoodParty16

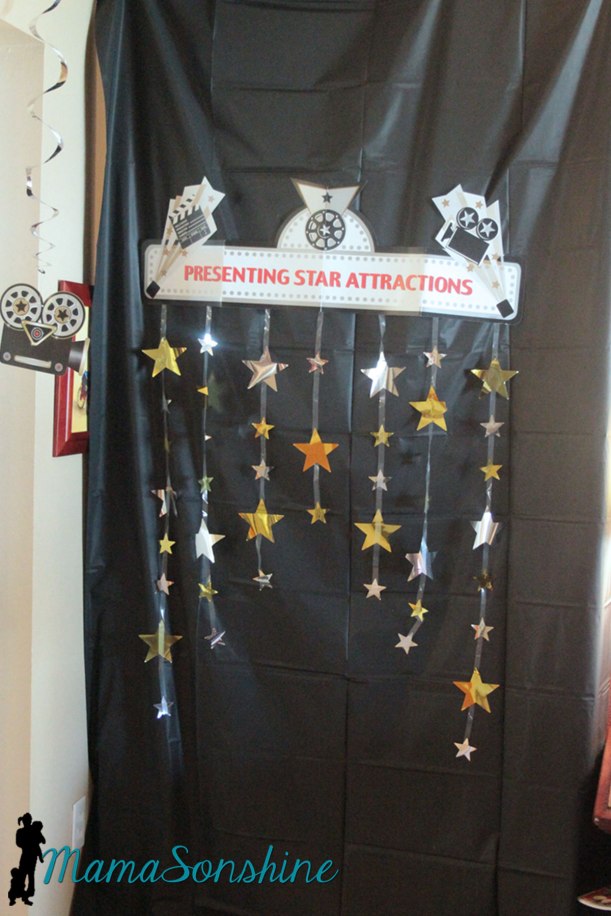
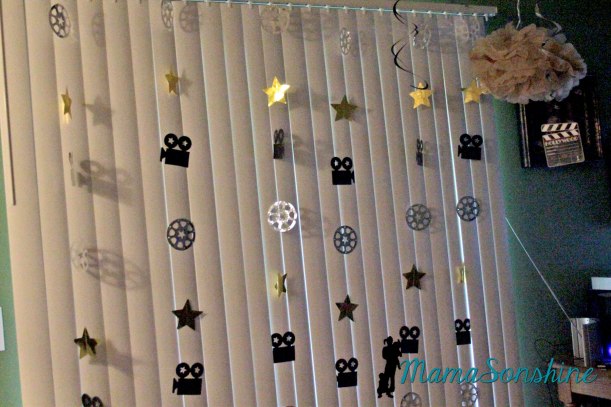
They also had a photo booth set up, and we used a black plastic table-cloth for the back drop.

Photo Booth Props

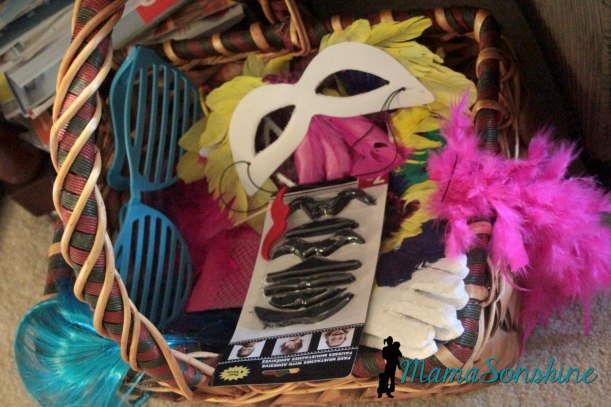
She had a basket full of photo props.

Guest Gifts

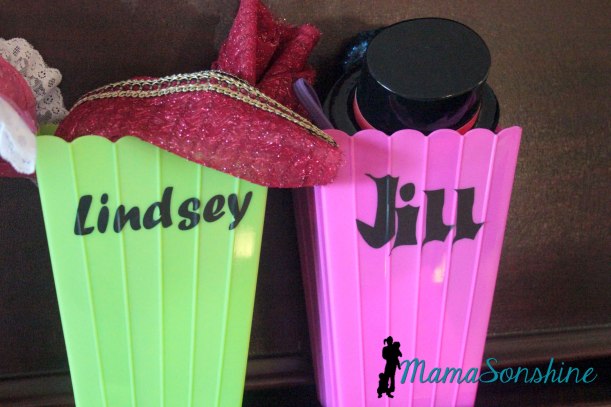
Each guest received a popcorn box full of other goodies, like scarves my mom made and little top hat head bands.

The girls decorated the cupcakes


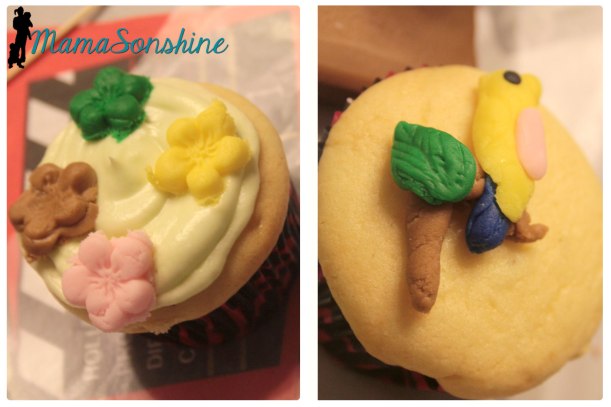
Since my nieces love playing with fondant, my sister decided to let the kids decorate the cupcakes.  It keeps them occupied and saves on the work for her.

The girls had a great time and got the new video made.  Since I am just the aunt I got to leave after they consumed all the sugar and got all giggly.


Thanks for visiting and remember to Shine On
Dawn Marie


facebook instagram pinterest parties by mamasonshine etsy bloglovin google+ email twitter Image Map

I linked up here:
Creative


3 Comments

Rainbow Brite Baby Shower

Hooray for Baby Season!

I love hosting baby showers and birthday’s and well any party really.  I don’t want to toot my own horn (OK, yes I do), but my sister and I throw some amazing parties.

One of my cousins, Bailey was expecting her first baby this month.  Our other cousin Darcy wanted to throw Bailey a shower, with the help of my sister and me.

A little background information for you, I have a boat load of cousins.  And it can kinda get confusing, as there are two that I am going to talk about, but they are not sisters, they are also cousins.

The three of us started brainstorming about themes, my sister and Darcy throwing down some great 80’s cartoon themes.  When Darcy says ‘Oh, I know! Rainbow Brite!’

A little side note: when Bailey found out they were having a girl she said “…she will wear and use anything that she is given but if you have color choices, go easy on the pink please we like the whole rainbow” so a rainbow theme was just perfect for her.  Plus there was a whole ton of Rainbow Brite playing going on whilst growing up.

So to work I went on the invitations.  I had less than a week to design, cut and send them out, so I went with a simple design.  We also kept the theme secret from the Mom-to-be.  That was really fun.  I of course use my Silhouette Cameo to make the invitations and other decorations.
Shower Invitation


I cut out different colored circles in various sizes and sewed them together.  This was my first time sewing paper, and I am now hooked!

MSS_RainbowBrite04


We really wanted some tissue paper pom-poms and decided to make some ourselves.  We got some tissue paper packs from the dollar store, instead of separating the tissue paper by color we decided to make them rainbows too.

MSS_RainbowBrite06


I think we bought two or three packs, and made about nine small ones and four large ones.  More than a dozen pom-poms for $3!

MSS_RainbowBrite05


They look great all clustered together.

MSS_RainbowBrite09


Of course I also had to make some rosettes, my other favorite party decoration.  I used plain colored card-stock and matched each of the Color Kids to the color of the rosette.  On the other side of the rosette the circle is the Sprite that matched the Color Kid.

MSS_RainbowBrite19


For the banner I cut out onesies and rainbow letters that “Welcome Baby” as the parents had not decided on a name yet.  For the banner spacers I used images of a few Rainbow Brite characters on the onesies.

MSS_RainbowBrite11


At the last shower we threw (for a different cousin) we gave these Cookie-in-a-Jar gifts, and everyone said they made wonderful cookies.  So we decided to do it again.  We made 40 of them….

MSS_RainbowBrite07


Luckily my mom had tons of rainbow-colored fabric to use on the lids.  We decided to use mini M&M‘s, instead of chocolate chips, because they were the most rainbow like candy.  The tags I made using my Silhouette and I was able to print on both sides of the tags.  The back has the instructions for baking.

MSS_RainbowBrite20


My most favorite decoration was the rainbow backdrop on the food table.

MSS_RainbowBrite10


I still love looking at pictures of the backdrop.

MSS_RainbowBrite16


Remember all those circles I sewed together?  This is where they ended up.  Looks great huh?

MSS_RainbowBrite15


We tried to stick to the rainbow theme with the food as well.

MSS_RainbowBrite18


Luckily Mother Nature loves colors as much as we do.  The two bowls of marshmallows are  the clouds that border the fruit rainbow.  And of course there is a bowl of Skittles on the table.

MSS_RainbowBrite17


We wanted to make a diaper cake, and just in time, SVG Cuts came out with this Tiny Miracle kit that had a diaper castle.  Rainbow Brite’s castle was yellow and had rounded tops, not pointed ones.  If I had more time, I might have tried to adjust the tops, but the castle still looked great as it was.

MSS_RainbowBrite22


Although I didn’t take pictures of the food tent labels, they also matched the rainbow theme.

MSS_RainbowBrite21


My sister made these wonderful rainbow cupcakes.  To which I added the cupcake toppers with all the characters.

MSS_RainbowBrite13


I also made the mom-to-be a souvenir invitation and framed it for her.  My mom had a couple of dolls, that belonged to my nieces, so we added them to the decor.

MSS_RainbowBrite14


My sister made some gluten-free chocolate cupcakes and some that were rainbow inside.

MSS_RainbowBrite01


Oh, so yummy!

MSS_RainbowBrite02


And of course here is my cousin in all her pregnant glow!

MSS_RainbowBrite23The guests played present bingo, when mom-to-be opens a present, you get to mark in on a Bingo card.  It is a fun way to get everyone involved in the presents and we play it at all our showers.

My cousin was just thrilled when she came and saw the theme and all the decorations.  Her baby girl has since arrived and everyone is doing wonderfully.


Happy Party Planning

horiz_sig copy

facebook instagram pinterest parties by mamasonshine etsy bloglovin google+ email twitter Image Map


Leave a comment

Happy Father’s Day

Happy Father’s Day!!!!

SPOILER ALERT!

Hey Dad, your cards are in this post, so if you keep reading you will see them.  Because, like always, they are not in the mail.  OK, I don’t know if the one my sister is sending you is in the mail yet or not, but I do know mine has not yet shipped.


Love you!


I made this card for my cousin to give her dad.

MSS_FathersDay05


This is just a basic card for dads, there is no theme, but I really like it.

MSS_FathersDay01

Inside is a simple pop-up that says “Dad” so from front to inside it reads “Happy Father’s Day Dad”

MSS_FathersDay04

I really like the way the front turned out.  I just used colored card-stock and a patterned scrapbook paper.  I made sure there was no distance between the rectangles when cutting the patterned paper.  I used Silhouette‘s print and cut feature for the front sentiment.

MSS_FathersDay02

I used sketch pens on the letters before cutting them out.


MSS_FathersDay06

I think the card is elegant and still masculine.

My sister asked me to make a card for our dad, but she requested it be different from the one I would give him.

MSS_FathersDay07

So I made this one for her to send.  I think it fits her and her family pretty good, as they are (well, really, we all are) huge Star Wars & LEGO fans.

The LEGO Darth Vader was also part of the blog hop I talked about here.

MSS_FathersDay08


I wanted to do something different for my dad, than just another card.  I have seen all the fun puns on Pinterest saying “World’s Best Pop” attached to a soda bottle.  But my Dad lives out-of-town, and really I didn’t want to give him some soda.

MSS_FathersDay09


At SVG Cuts I found this soda bottle in their Surf Shack kit and knew it would be perfect.

MSS_FathersDay10

Using the bottle, I made a custom label, for the base and the neck.  I also used the print and cut feature to decorate the bottle top.

MSS_FathersDay11

The base label says “Happy Father’s Day to the Worlds Best Pop” which I again used the print and cut feature.  I filled it with candy for him to enjoy.

I think it is quite a unique card and I had a blast making it.


Happy Crafting

horiz_sig copy

facebook instagram pinterest parties by mamasonshine etsy bloglovin google+ email twitter Image Map


4 Comments

Tips for Printable Heat Transfer Material

I may have mentioned once or twice how much I love the print and cut feature on my Silhouette Cameo.

Well, I am going to bring it up again.  Only this time I will be using a Heat Transfer Material to make a gift.

There are other brands out there that sell this kind of material, but I use Avery, because I can buy it just about anywhere.

Here is the concept, you print something out on your computer, cut it out and then iron it on to something made of fabric.  And viola! Your very own custom shirt, coat, bag, pillow, blanket, etc.

I wanted to make a six-year-old girl a bag with her favorite Monster High Character.   I could have made one by layering colored heat transfer vinyl (HTV) but the characters from Monster High have sooo many coloring shades, that it would either too much work (& too munch HTV) or it wouldn’t give me the same look I was going for.

Lagoona Blue Tote Bag


I have used this material in the past, so I am very familiar with it, but as with all projects, I ran into some trouble.  I figured it would be beneficial to others if I shared my snafu, so you will not make the same mistake.

Here are a few tips for using the printable heat transfer material:

  • Know your printer.  Printer inks are different and behave differently.  If you have an ink jet printer, get the material designed for ink jet printers.  If it is a laser printer, there is a different material for that, as well as the other inks, like UV.  If you choose the wrong type your ink will not set and will either run or fade.
    • Print a test page on regular paper to see how your image will fit, and line up.  You don’t want to waste any of the transfer material.Print a test page first
  • There are two different kinds of transfer material.  One for light-colored fabrics and one for dark.
    • The one for light-colored fabrics is an actual ink transfer material.  It will transfer the ink on to your shirt, so the places in your design that are white, will be transparent, meaning the shirt will show through.  The material that it is printed on will adhere to the fabric, so there is a protective layer between the ink and the outside world.  You must also remember to flip your design on the horizontal plane when using this material.
    • The one for dark-colored fabrics is like a sticker.  It is a white material and so the white areas in your design will remain white.  Plus, there is no need to flip the design.  It is the one I like to use the best.Dark Fabric Material
    • Weed carefully, this material can tear easily.  But it is not sticky, so you can do it in sections.
    • Don’t use the shade of fabric alone to make the decision on which one to use.  Think about what you want your project to look like in the end.  I use the material for dark fabrics all the time, even on light-colored fabric like this tote bag.Light colored bag, but using dark fabric transfer material
  • Your iron must be hot and dry.  If you use this to iron out the wrinkles in your clothes, dump out the water.  Set your iron to the hottest setting.  It is also not recommended you not use an ironing board.  This could be because you don’t want an uneven surface, but it is also because of the reflective heat material under the cover.  Heat on the bottom of the material may interfere with it bonding to the fabric.  I place a folded, ironed sheet on my kitchen counter.MSS_HTM_MHbag09
  • Cool removal or not?  Some heat transfer material requires you to wait until the design has cooled before removing the transfer plastic.  If it does and you rush it, you can peel off your design with the transfer plastic, so be patient.Sometimes you have to wait for it to cool before removing protective/transfer layer
  • Don’t be discouraged when it takes longer to adhere than the instructions say.  I have held the iron in place for minutes, when the instructions say 45-60 seconds.
  • Apply constant high pressure.  You are not ironing out the wrinkles, so don’t move your iron around.  You can mess up your design, as I did.What can happen when you move your iron around
    • But not all is lost if you do.  Here is something you might not know: the heat that put it on, can take it off.
      • Apply heat back to the design and quickly use something to scrap away the design before it cools.  I first used my weeding tool to pull the design, but that was taking too long.  I then thought of my scrapping tool (a used Sil gift card), when the design was still hot I just scrapped it off.  You have to keep applying heat to small areas and scrapping, and repeating.  The scrapping doesn’t take too long, and within 10 minutes, it was gone.  There is a slight bit of ‘glue’ left, it’s not really glue, but there is a residue, it’s kind of like a shiny outline of your design.  MSS_HTM_MHbag07
    • That’s OK, because you are going to reprint your design and reapply.  This time, not moving the iron around.MSS_HTM_MHbag08


It turned out just the way I wanted it to, and the birthday girl was happy.

MSS_HTM_MHbag01


The bag went perfectly with the personalize Monster High water bottle & Lagoona Blue card I made.

MSS_HTM_MHbag11


Happy Crafting

signature-black
facebook instagram pinterest parties by mamasonshine etsy bloglovin google+ email twitter Image Map


Enhanced by Zemanta