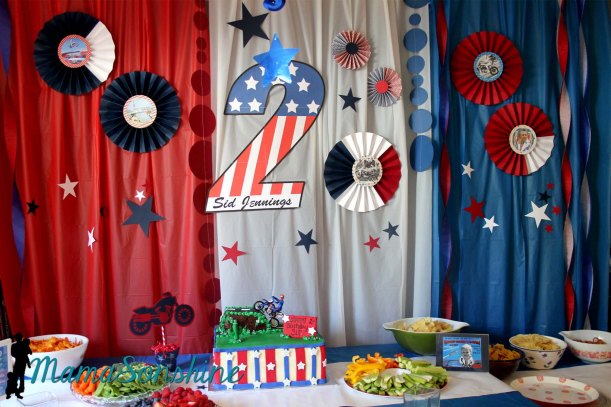
When Sid turned two we had an Evel Knievel themed birthday party for him. This seemed perfect for our little daredevil. Admittedly when discussing this theme with Ian he was a little concerned. It took me a while to figure out why, and then I explained to him that Evel is a person’s name and that he was not evil, and when I say ‘daredevil’ I also don’t mean someone who is bad. I just love how kid brains process things.
Originally I wanted to make Sid an Evel Knievel suit. And when I say ‘I wanted to make’, I really mean I wanted my mom to make him one (see picture).
But it was so hot and we had lots of water activities at his party that he wouldn’t really be wearing it…..so I scratched that idea.
I also thought of just making him a shirt that looks like the top of Evel’s suite. Think tuxedo shirt….
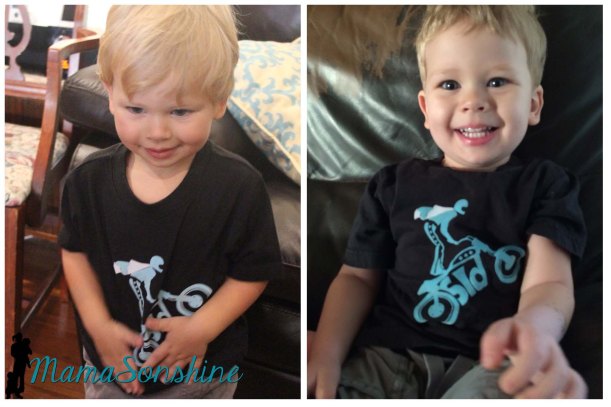
But I still wasn’t sold on that idea. Then I found an image somewhere on Google that I thought would be great for his shirt and a whole new idea was formed.
I wanted to customize Sid’s shirt so I took the image traced and altered it. (As I do with everything I make.)
It is convenient that Sid’s name only has three letters and fit under the motorcycle in place of the engine. I used two colors of flocked HTV (HTV=Heat Transfer Vinyl), it’s the kinda fuzzy stuff. I personally think it holds up better than regular HTV by the way.
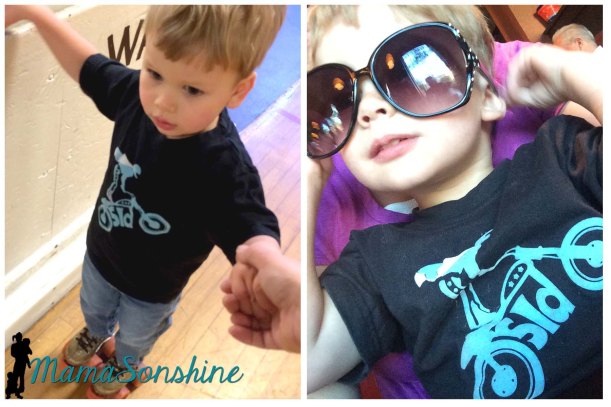
It was a little difficult to get a picture of him in his shirt on his birthday (left) but he still wears this shirt all the time (he’s three and a half now).
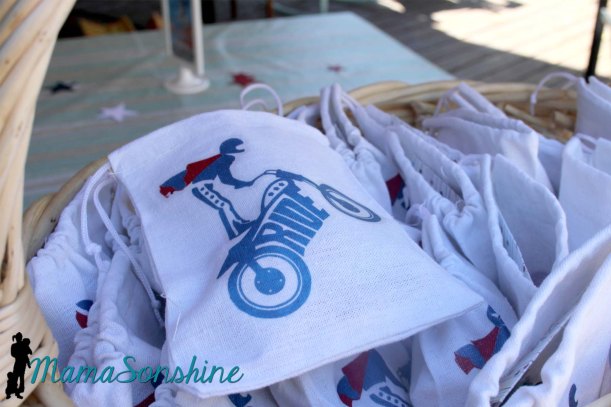
I went ahead and used the same image for his party favors. I simply replaced Sid with Ride, as I felt people wouldn’t want to take home bags that say “Sid” on them. For the bags I used the printable HTV for light colors (there is a difference between the one for light fabric and the one for dark fabric, I explain it in this post) and had my Cameo cut around the outside of the image, and the larger pieces inside.
Inside the bag is a matching tattoo and sticker also made with my Silhouette Cameo.
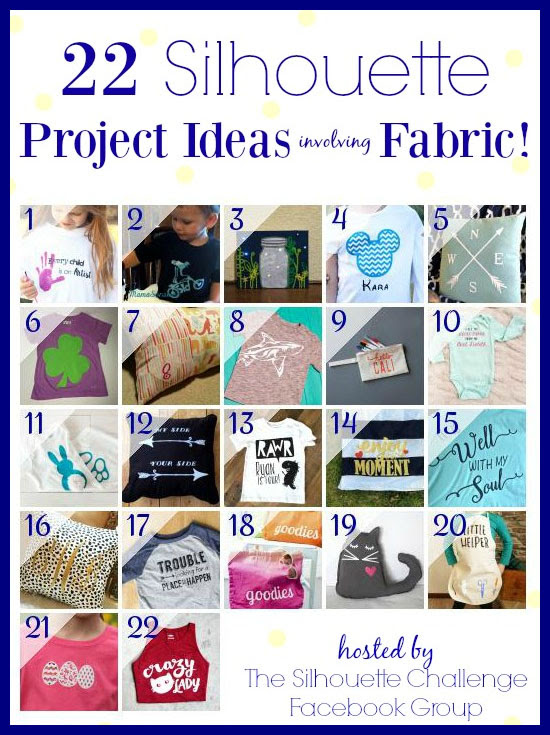
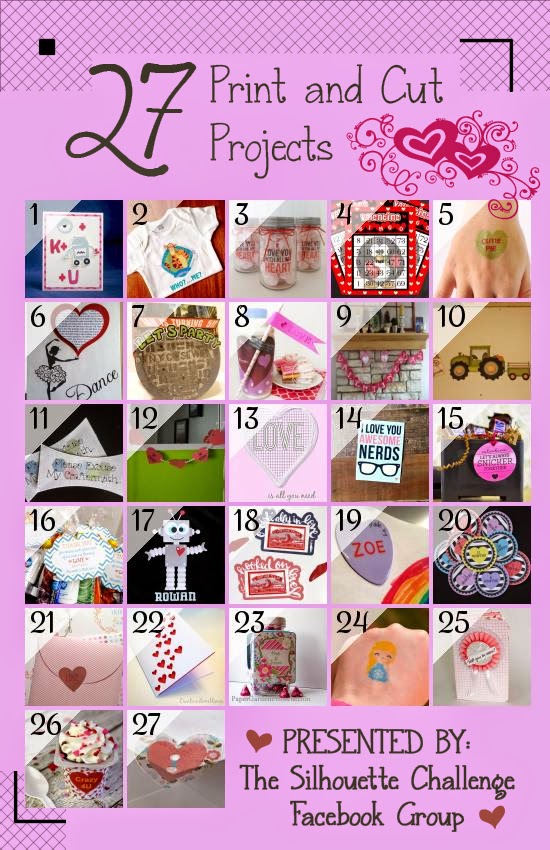
Turns out that this Silhouette Challenge theme was all about Fabrics! So I just knew this project would fit in perfectly. Now since using HTV is only one option with working with your Silhouette and fabrics these wonderful ladies have come up with some other amazing ideas for you. My Silhouette Challenge buddies and I are all sharing projects on our blogs today, so peruse the projects below for a wealth of Silhouette inspiration!
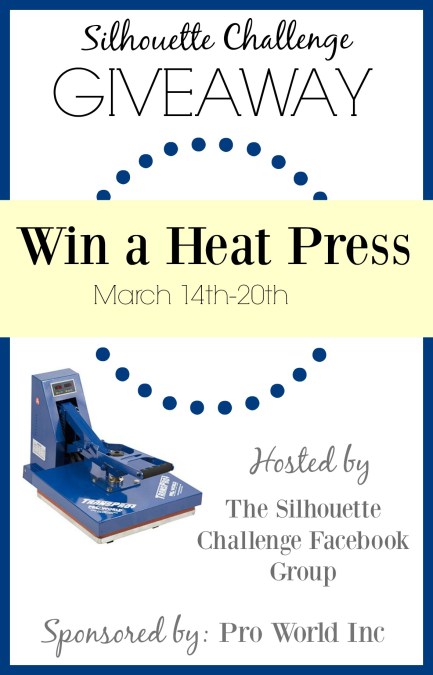
Because really if you are going to be working with HTV you really want a heat press and right now you have a chance to win one!
Heat Press Giveaway
click on picture to enter contest
Pro World Inc is giving one lucky reader a Heat Press Valued at $300!
Pretty sweet, huh? To enter: just complete the entries in the Rafflecopter link below. You have 26 potential entries, which means a lot of winning power. So, hurry up and enter!
{This giveaway runs from today through Monday, March 21st at 11:59p eastern and is open to anyone 18 years of age or older with a lower 48 U.S. mailing address. You can read the rest of the terms and conditions in the widget below, click through the link below.}
This year my running club and I will be participating in the Hood to Coast Relay Race as a fundraising team. We will be raising money for Providence Cancer Center to help #FINISHCANCER. Click on the picture below (or here) to donate today.
As some of may have noticed I love to make party decorations.
This is great, as both my kids are young and have many more birthday for me to decorate.
Ian’s birthday is in March and I make him start deciding on a theme in December and verify it in January. This might seem difficult for a 4 (soon to be 5!) year old boy…..But Ian is different. Basically when he decides something, that’s it. He picks his Halloween costumes out 3 months in advance and doesn’t change his mind. So I know that if he decides he wants a Teenage Mutant Ninja Turtle party for his 5th birthday, that’s the party he is going to get.
I loved TMNT growing up and I love that Ian does too. Now they are different and I am not entirely sold on them yet, but it’s the thought right?
I couldn’t wait to share all the projects I made for Ian’s birthday and this months Silhouette Challenge “Party” fit so perfectly. I already shared how I made his pretty awesome invitations so I am not going to go into that again.
Here are the decorations from the party we had in March, I know….March was moths ago, don’t judge. (I will warn you, this post is heavy with pictures)
I actually had plans to make rosettes with all the turtles, but only got Mikey done. I was really please how the turtle head turned out after tracing and cutting with my Silhouette Cameo.
For Ian’s Superhero Party I made a city-scape backdrop for the food table, which of course I didn’t keep. Since I had to make a new one, I used my Silhouette and cut a stencil out of contact paper. It made painting the building super easy.
I just used white duck tape for the road lines on the black table cloth. The sewer grate and decorations on the colored circles hanging down were made with the Print and Cut feature.
I had this grand idea for the food labels, instead of using the table tents, like I normally do. I would make them like large cupcake toppers and just stick them in the food.
This is where planning ahead is important. I already had my menu planned, so it was easy to print and cut the food labels prior to the party.
My idea mostly worked, but a few things needed giant marshmallows as stands.
I was really happy how my pennant banner turned out. I used the sketch pens to draw the face before cutting out the triangle and then used the Print and Cut feature for the masks.
For Ian’s “Happy Birthday” Banner I wanted to use the same face as I did for the giant rosette. I ended up adding the black outer layer to give it more dimension. I just had to trace the image in three parts.
The pieces that had letter on them did not get the black outline, or white eyes. I didn’t want to take away from the letters.
Since there are four turtles I wanted to have all of them up there, so I made a turtle shell to go in between happy & birthday.
Because the number of letters in my banner is odd, I didn’t have a symmetrical color pattern. Don’t look too closely.
The turtles all started with some toxic ooze so we needed a warning sign. Using a wood sign, scrapbook paper, and distressing ink I made a sign for the vinyl letters and danger symbols.
I was going to use vinyl for the green ooze, but decided to try some paint. After painting on the drips, I just went ahead and let the paint drip down the sign. It was one of those “umm…why didn’t I do this earlier? because it is so much easier” moments.
It gets hung on the front of my mom’s house (Party Local), which is where I hang all my party signs.
When Ian decided to have a TMNT party I was at Target and they had these buckets in the dollar spot. I decided not to wait till the month of his party to buy them. So glad I did, cause they were gone the next time I went. We filled them with stickers, candy, TMNT fruit snacks, little pens, and Toxic Ooze (of course).
With my Silhouette I made “Thanks for shell-abrating” tags for the buckets.
The stickers for the ooze were made with Silhouette’s clear sticker paper. I had the kids all help make the ooze and fill the cups.
I bought this cute little pizza box design from the Silhouette store and used the Print and Cut feature to cut them out. I put all the stickers for their buckets in the pizza boxes.
We also made masks & turtle shells for all the kids to wear and take home.
The windows on the box buildings were cut using my Silhouette. I was trying to decided between a stencil and paper, and the paper was easier.
My wonderful aunt who makes our birthday cakes was sick, so we went with cupcake for this party. I didn’t have time to make all the cupcake wrappers but there was about a dozen that had them.
I had been collecting the mini-pizza boxes to use at the party and we put some of the cupcakes in them.
For the top cupcake I made a big topper with Ian’s favorite turtle. I also used some plastic TMNT cups that I bought as center pieces. I cut out designs and inserted them in the cups with florist foam. Unfortunately I don’t have a great picture of them.
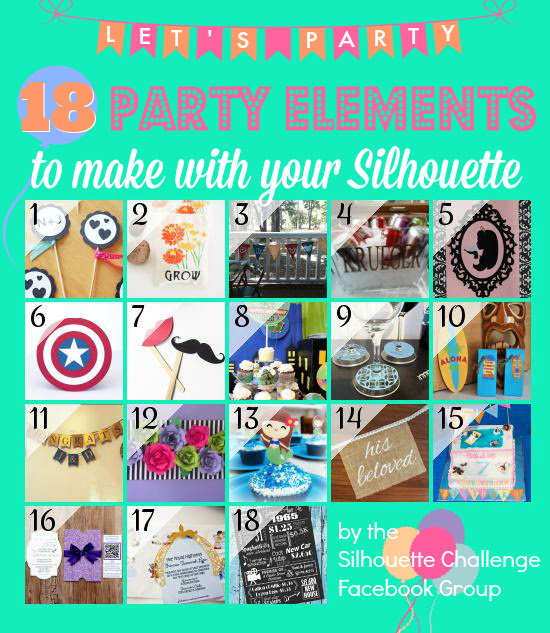
Want to Check Out More Silhouette Projects?
My Silhouette Challenge buddies and I are all sharing projects on our blogs today, so peruse the projects below for a wealth of Silhouette inspiration!
I feel a little behind this year. Ian’s birthday is next month and I have only been working on his invitations for about a week.
Ian decided in December that he wanted a Ninja Turtle birthday party. I knew it was on the list of parties but didn’t know he wanted it this year. (He has the next six birthday’s planned, yep, he takes after me.)
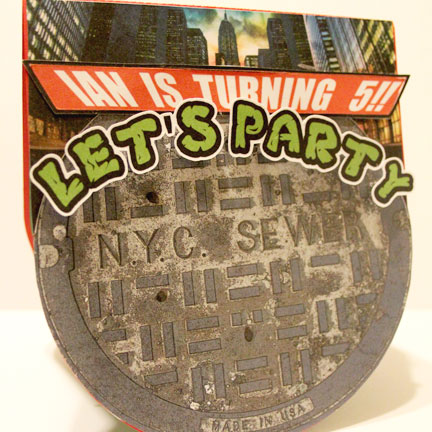
I decided I wanted his invitations to be a pop-up card with the front as a sewer cover. I designed them knowing I would need to use my favorite thing about the Silhouette. It’s Print ‘N Cut feature!
It is the main reason I got it and it just so happens that this month’s Silhouette Challenge was to make a project using this very thing I love so much.
I started with a picture of a NYC manhole cover. I used Photoshop to make the sewer cover look a little more comic-booky. I couldn’t find a TMNT one with out words on it, and while I could have altered it in Photoshop to remove the words, I just didn’t want to go the trouble, this was easier.
I had thought about having just a circle card, but the pop-up part would have been to small, or the circle card would have been too big. So I used a card template from SVG CutsHaunted Forest kit.
I needed something above the manhole cover, and I didn’t want to use a solid color so I used a picture of NYC that I found on one of the TMNT sites. Since the angle of the city is from the street it worked perfectly. For that part and the sewer cover I used the fill with pattern feature, or more accurately, I dragged and dropped the pictures into the shapes.
I used foam dimensional tabs to raise the ‘Let’s Party’ text.
I didn’t want to apply the letters individually to each invitation. I connected them with the offset tool, I made the offset as small as possible while still maintaining connections between each letter.
It was still in two parts, but that was better than 9 parts.
I made the “Ian is turning 5” part in Photoshop and traced it in Studio.
But a TMNT party invitation would not be complete with out some Ninja Turtles!
p.s. I decided to use the Old-School version from my childhood because I like them the best.
I traced a PNG copy of a picture of the four of them coming out of a sewer. This was the part that I wanted to use as a pop-up.
It is pretty amazing how close and accurately the Silhouette cuts with the print ‘n cut feature. I could even cut out the little spaces on the bottom that would have been white after printing. There is no way I would have been able to cut that out by hand.
The party information will be printed out on vellum and attached to the bottom of the inside. I decided on vellum because I didn’t want the inside to be white. I could have printed it on colored paper, but with the size of the card I couldn’t get two on one page, and I hate wasting paper.
Stay tuned for how the party turned out and all the other things I will make, although you will have to wait till a couple of months.
Want to Check Out More Silhouette Projects?
My Silhouette Challenge buddies and I are all sharing projects on our blogs today, so pursue the projects below for a wealth of Silhouette inspiration! With a heavy emphasis on hearts!
The theme for this month’s Silhouette Challenge is “my favorite things” meaning my favorite Silhouette supplies.
The main reason I got my Silhouette Cameo was to cut paper and make party decorations. I love to make party decorations and have always gone a little over board, but now that I have my Silhouette, I go hog-wild.
This past March we had my oldest son’s fourth birthday party and I just knew this month’s challenge would be the perfect opportunity to share them with you. Or should I say, the perfect opportunity to force motivate me to finally get around to writing this {wink-wink}….And let me warn you, this post is full of pictures.
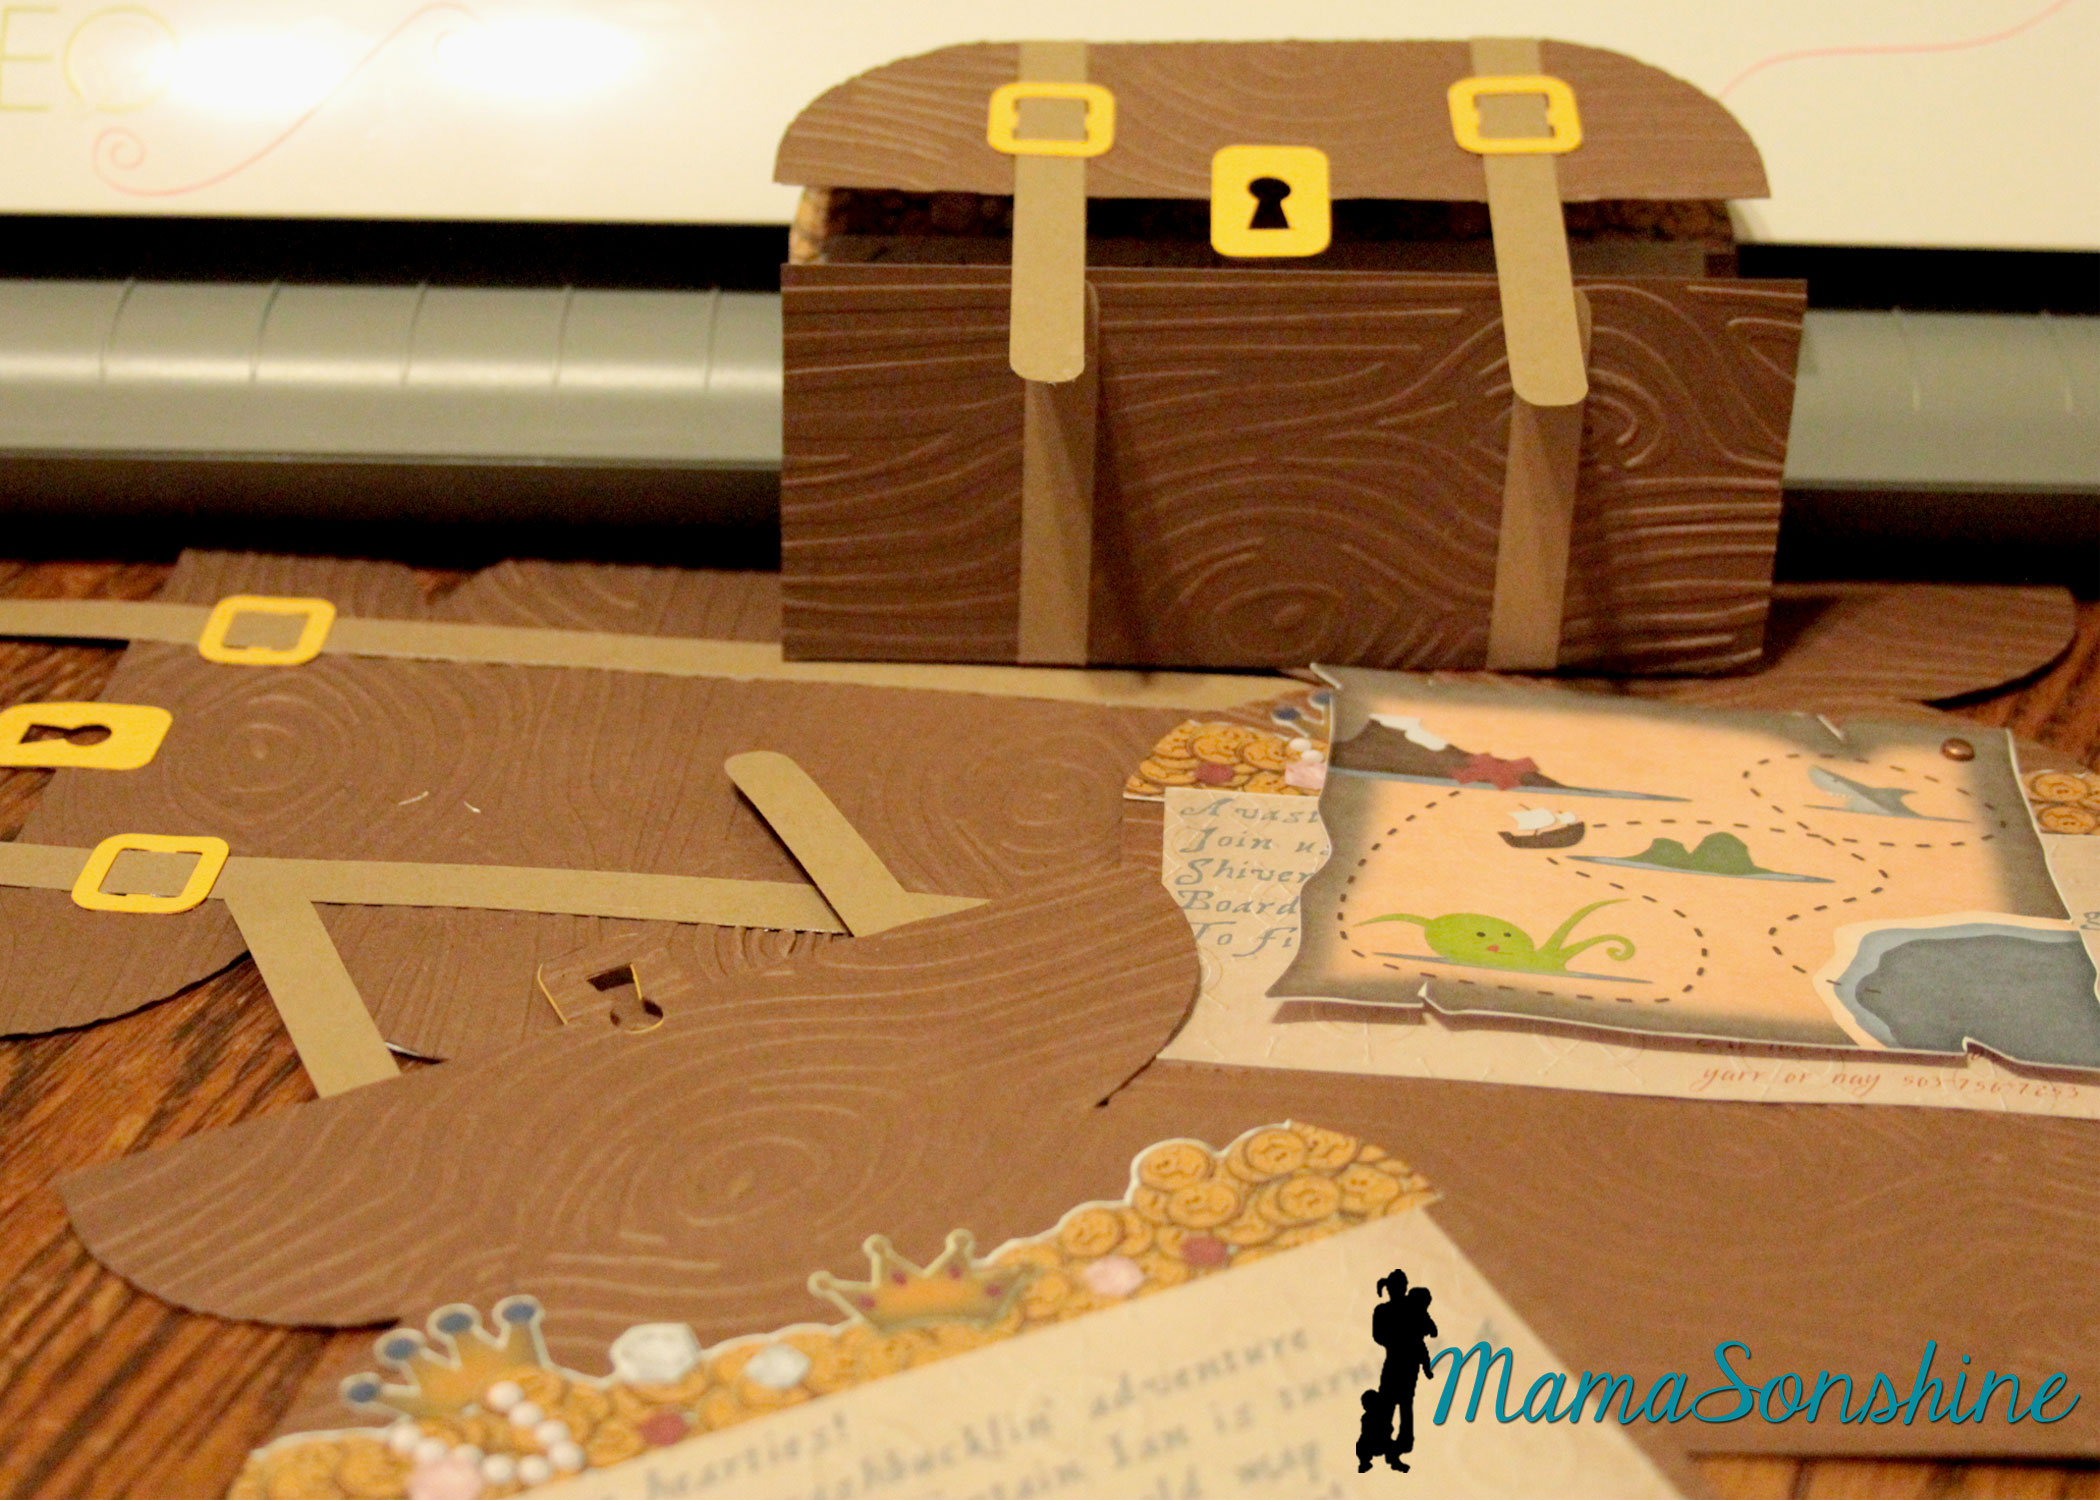
Ian decided he wanted a pirate party for his birthday, so I got to work, starting in January.
The invitations were treasure chests that opened to show a map, some treasure and the party info. The exterior of the invitation was a cut file I purchased through the Silhouette store. I used my Cuttlebug to give it the wood grain look. I used elements from Just So Scrappy’sYo-Ho Pirate digital scrapbook kit to make the map and as a background for the information section. I used graphics from this kit in almost everything I did for this party.
I designed the coin and jewel pile and used Silhouette’s print and cut option to cut them out.
I love making rosettes for parties, and this party was no exception.
This slideshow requires JavaScript.
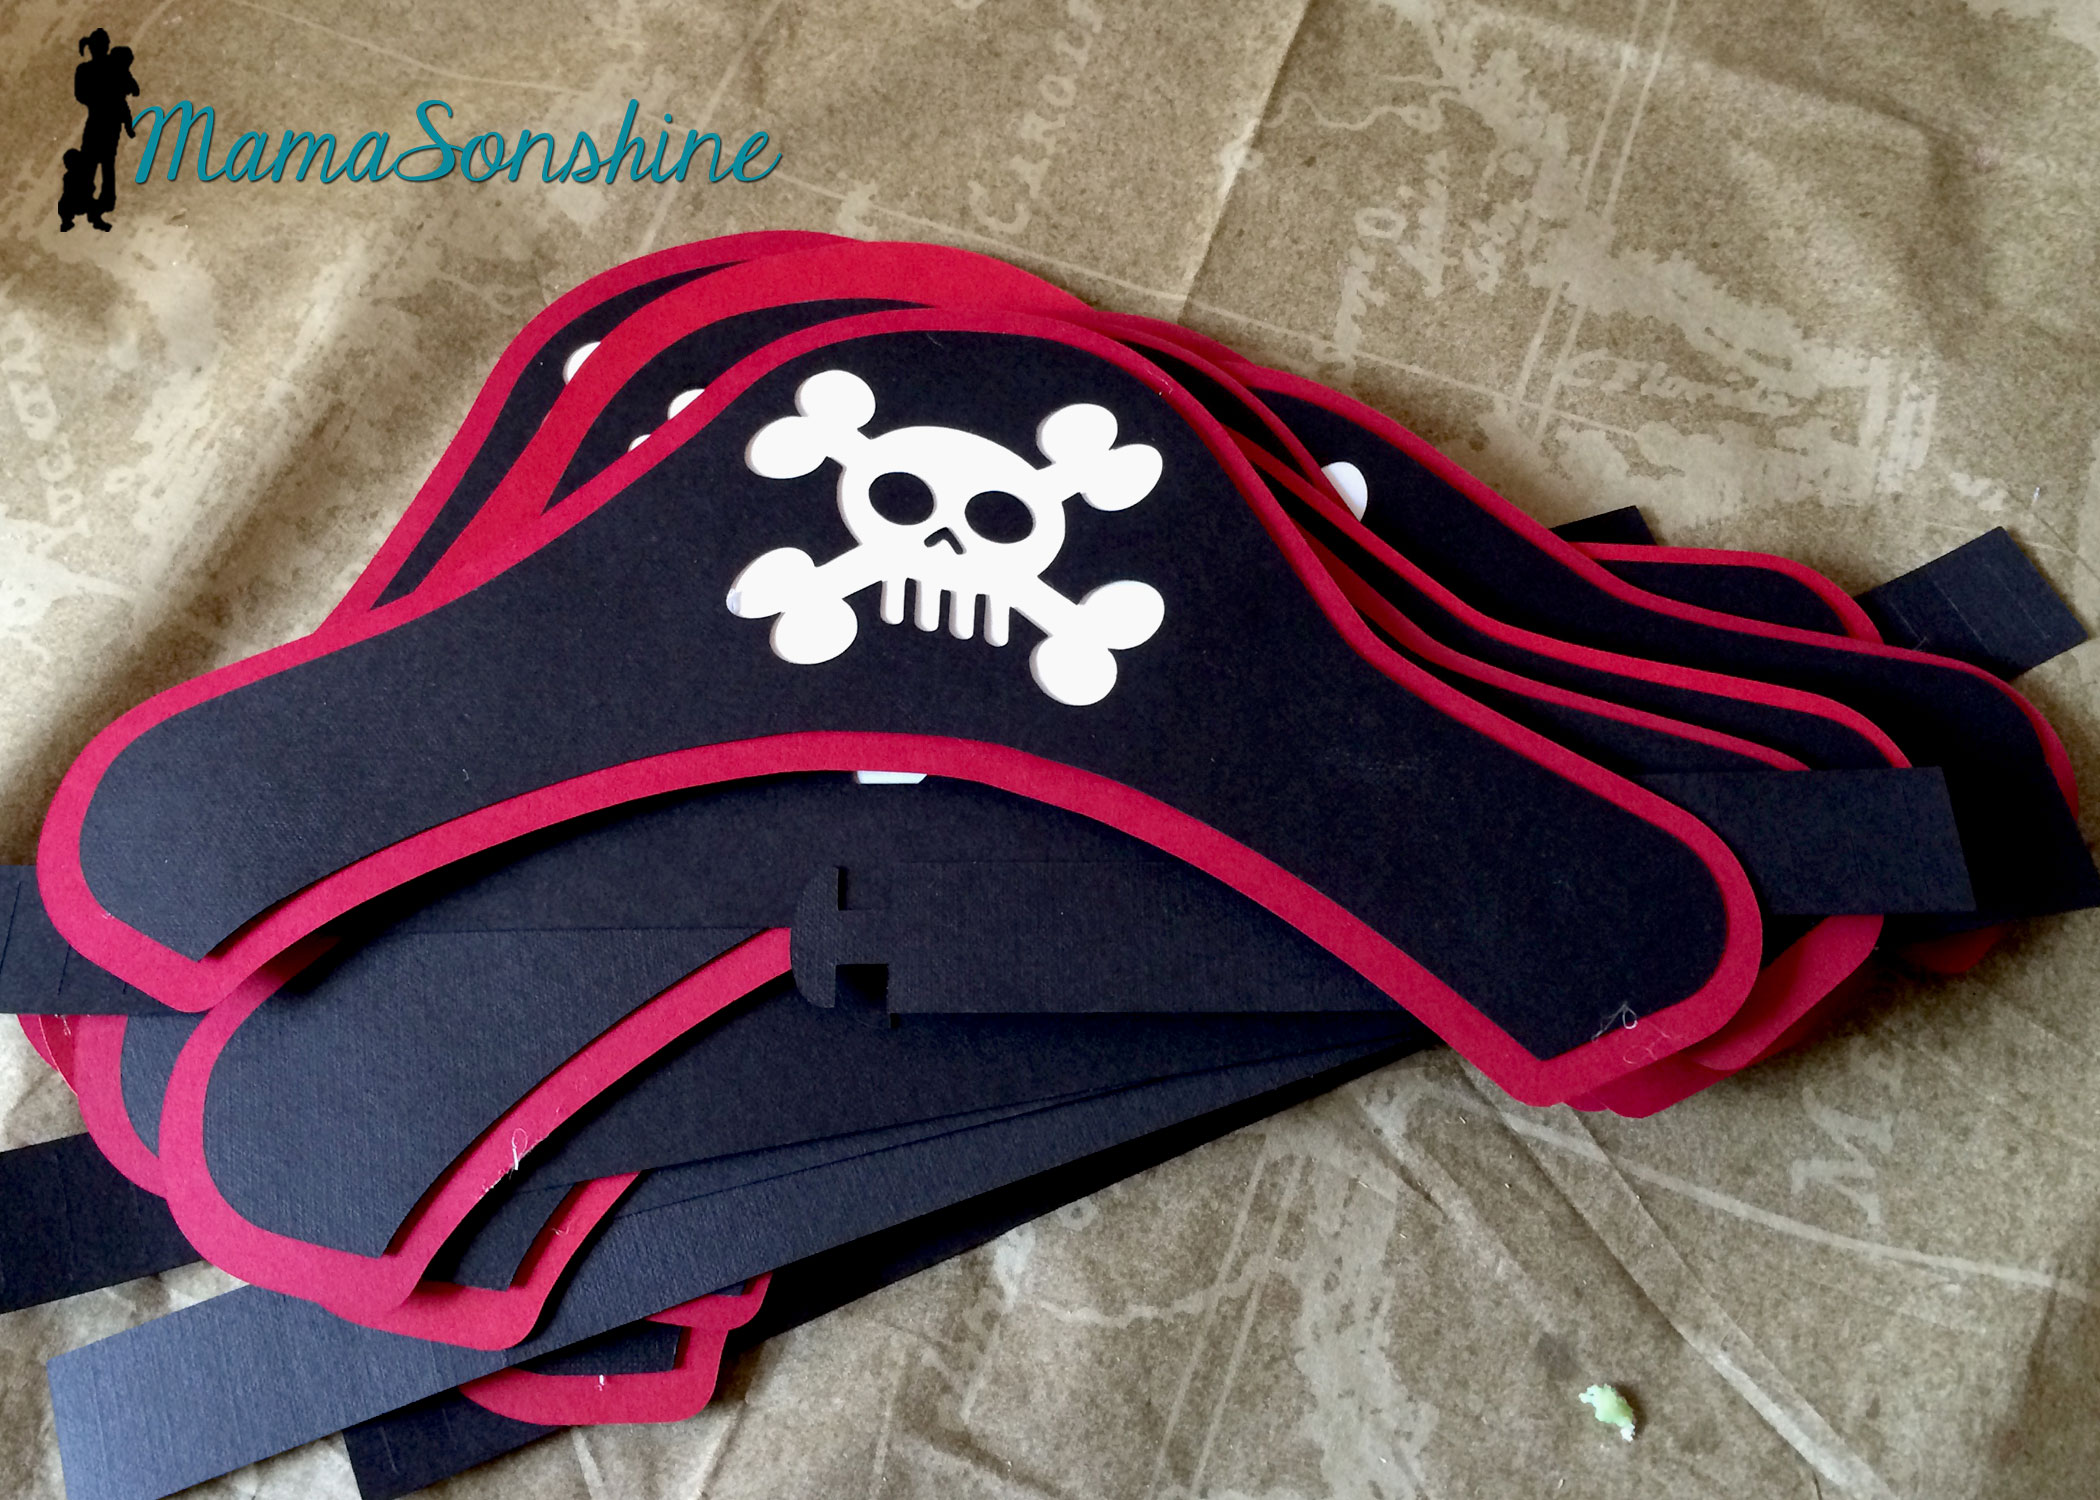
I created these party hats for the kids. This skull and cross-bones was from the a flag in the scrapbook kit. I used some of the negative skull and cross bone cut outs in other decorations, like the bunting flags (see below).
I don’t think I would have been able to make a dozen pirate party hats with out my Cameo.
I really loved these flag topiaries. I cut the flags out from the kit and used the digital papers to make the each base.
This slideshow requires JavaScript.
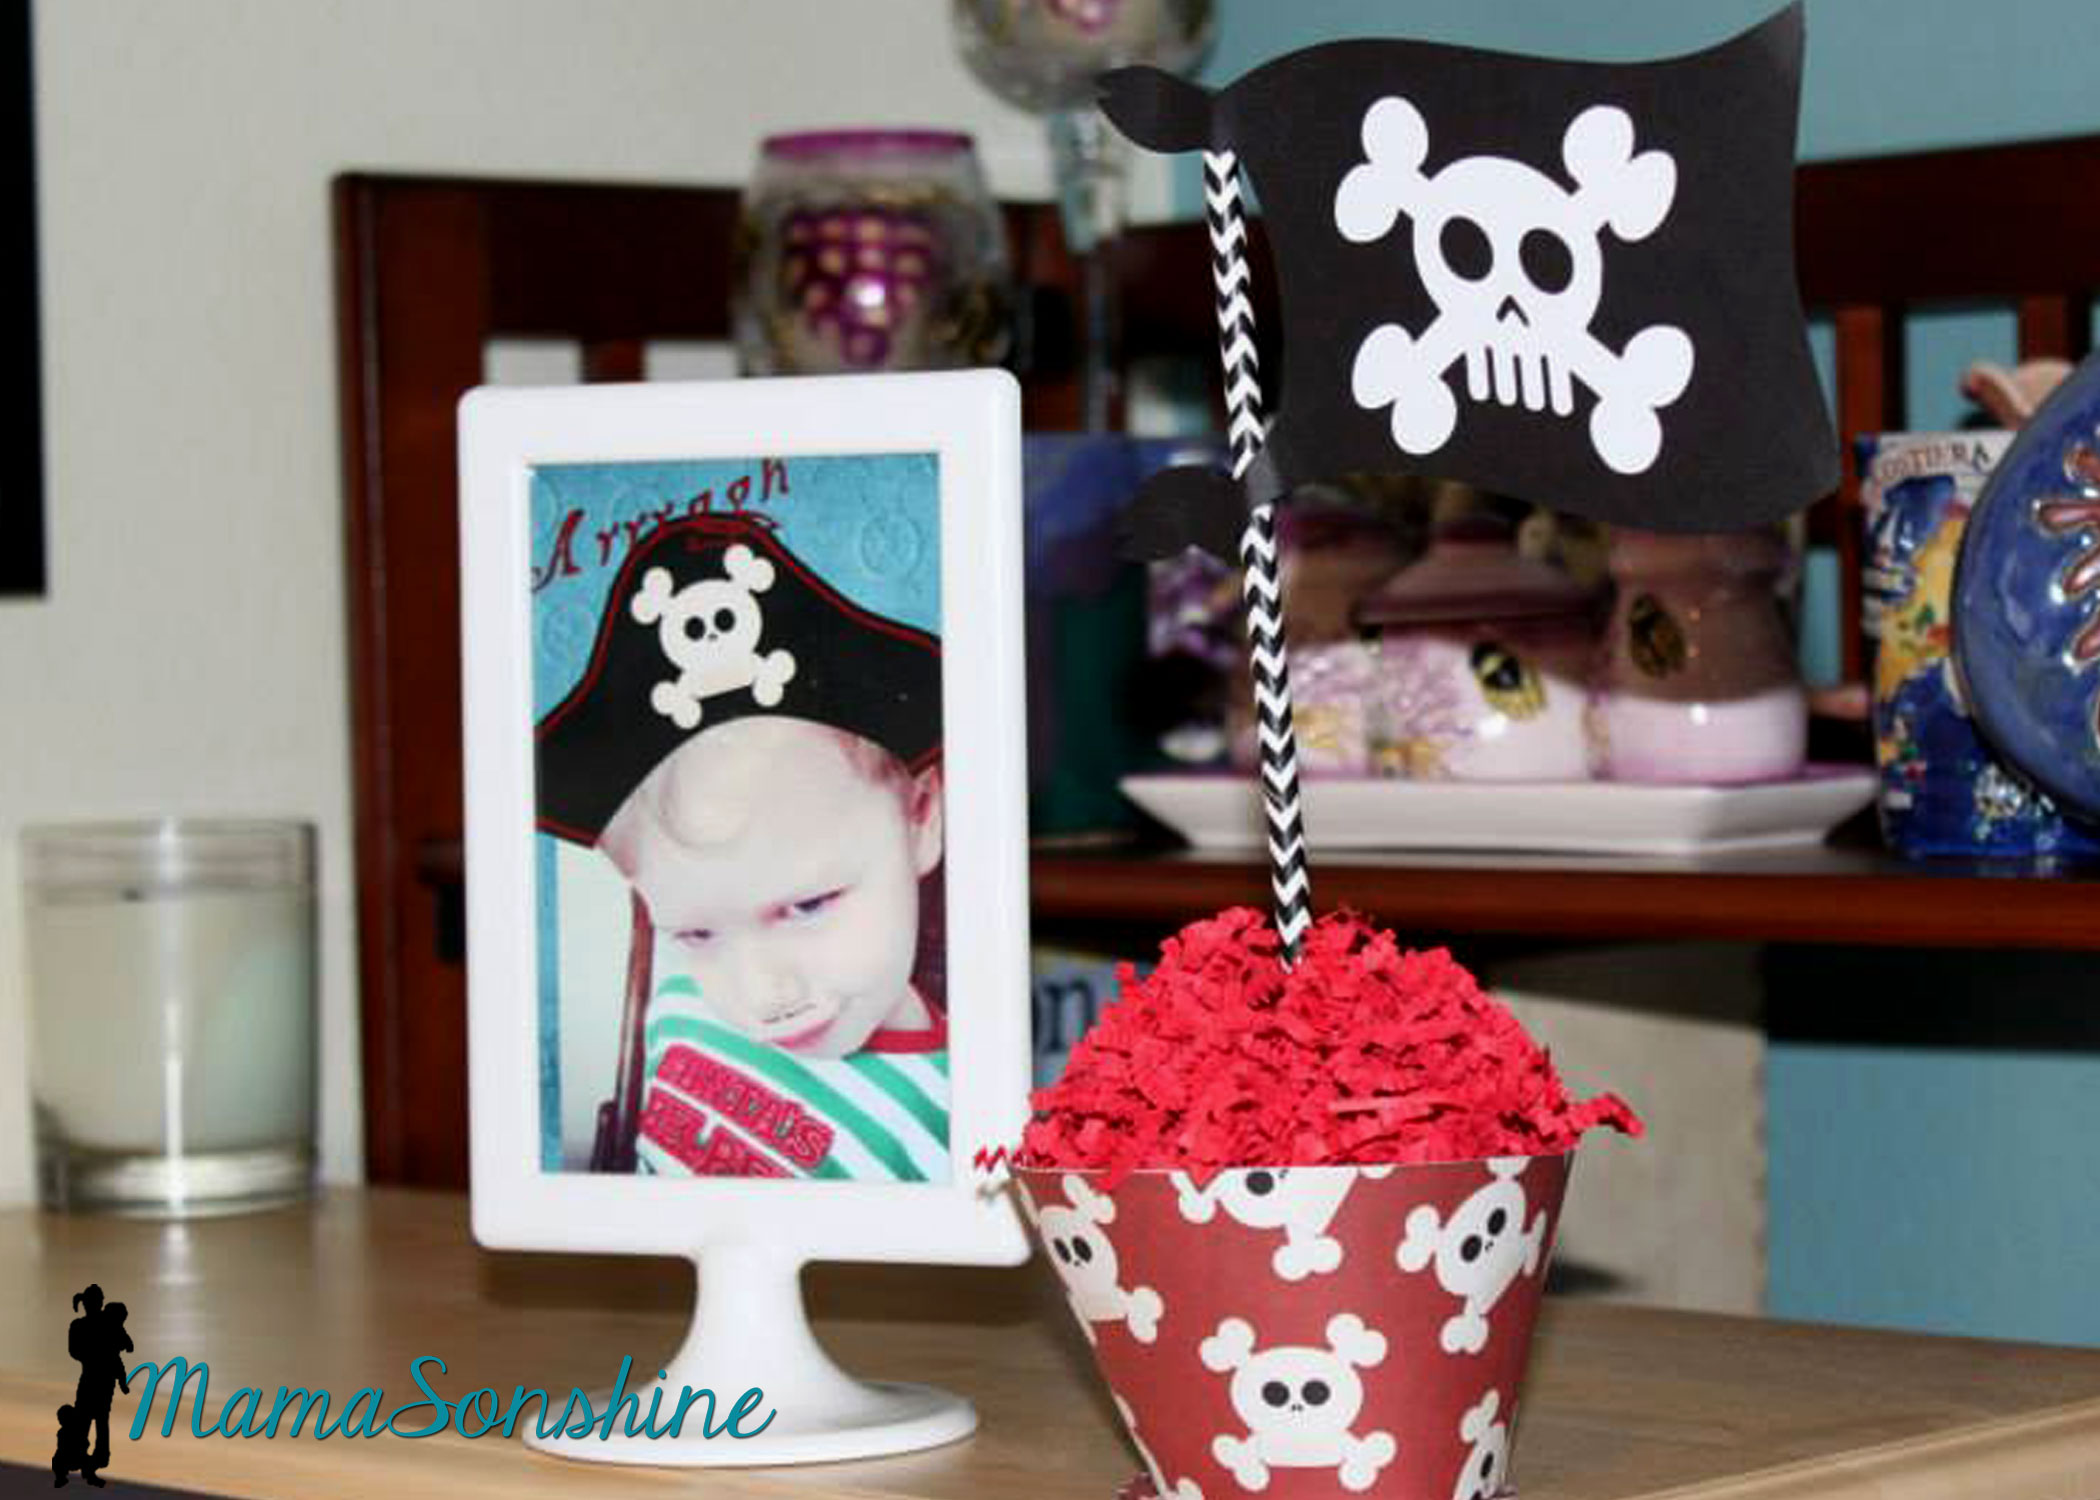
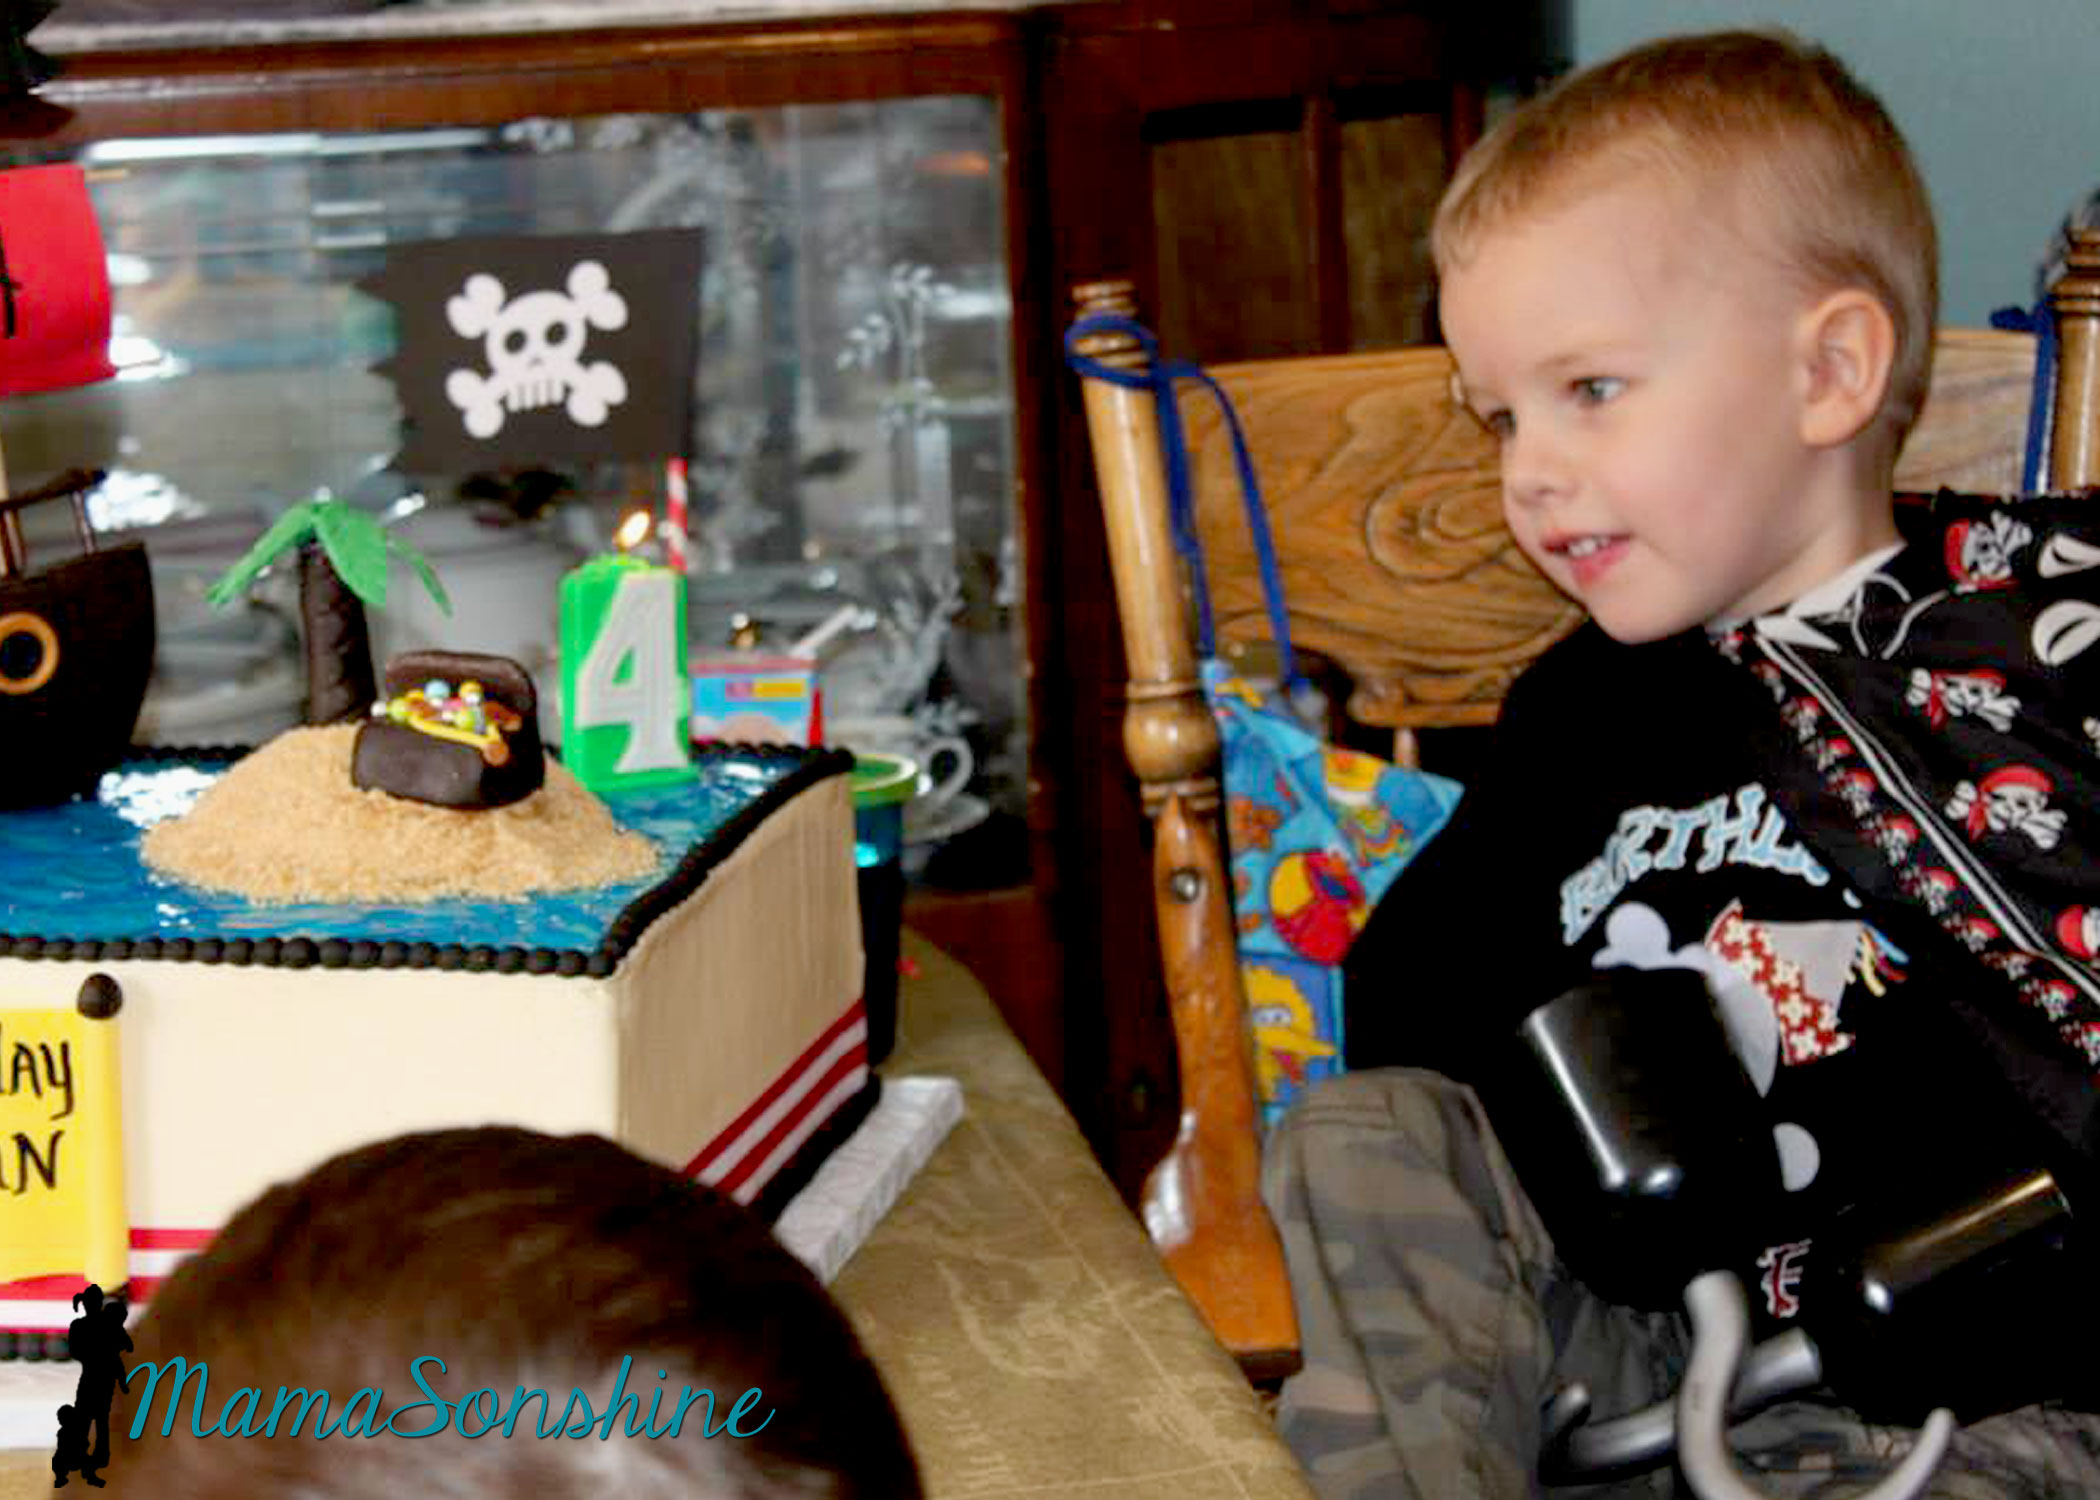
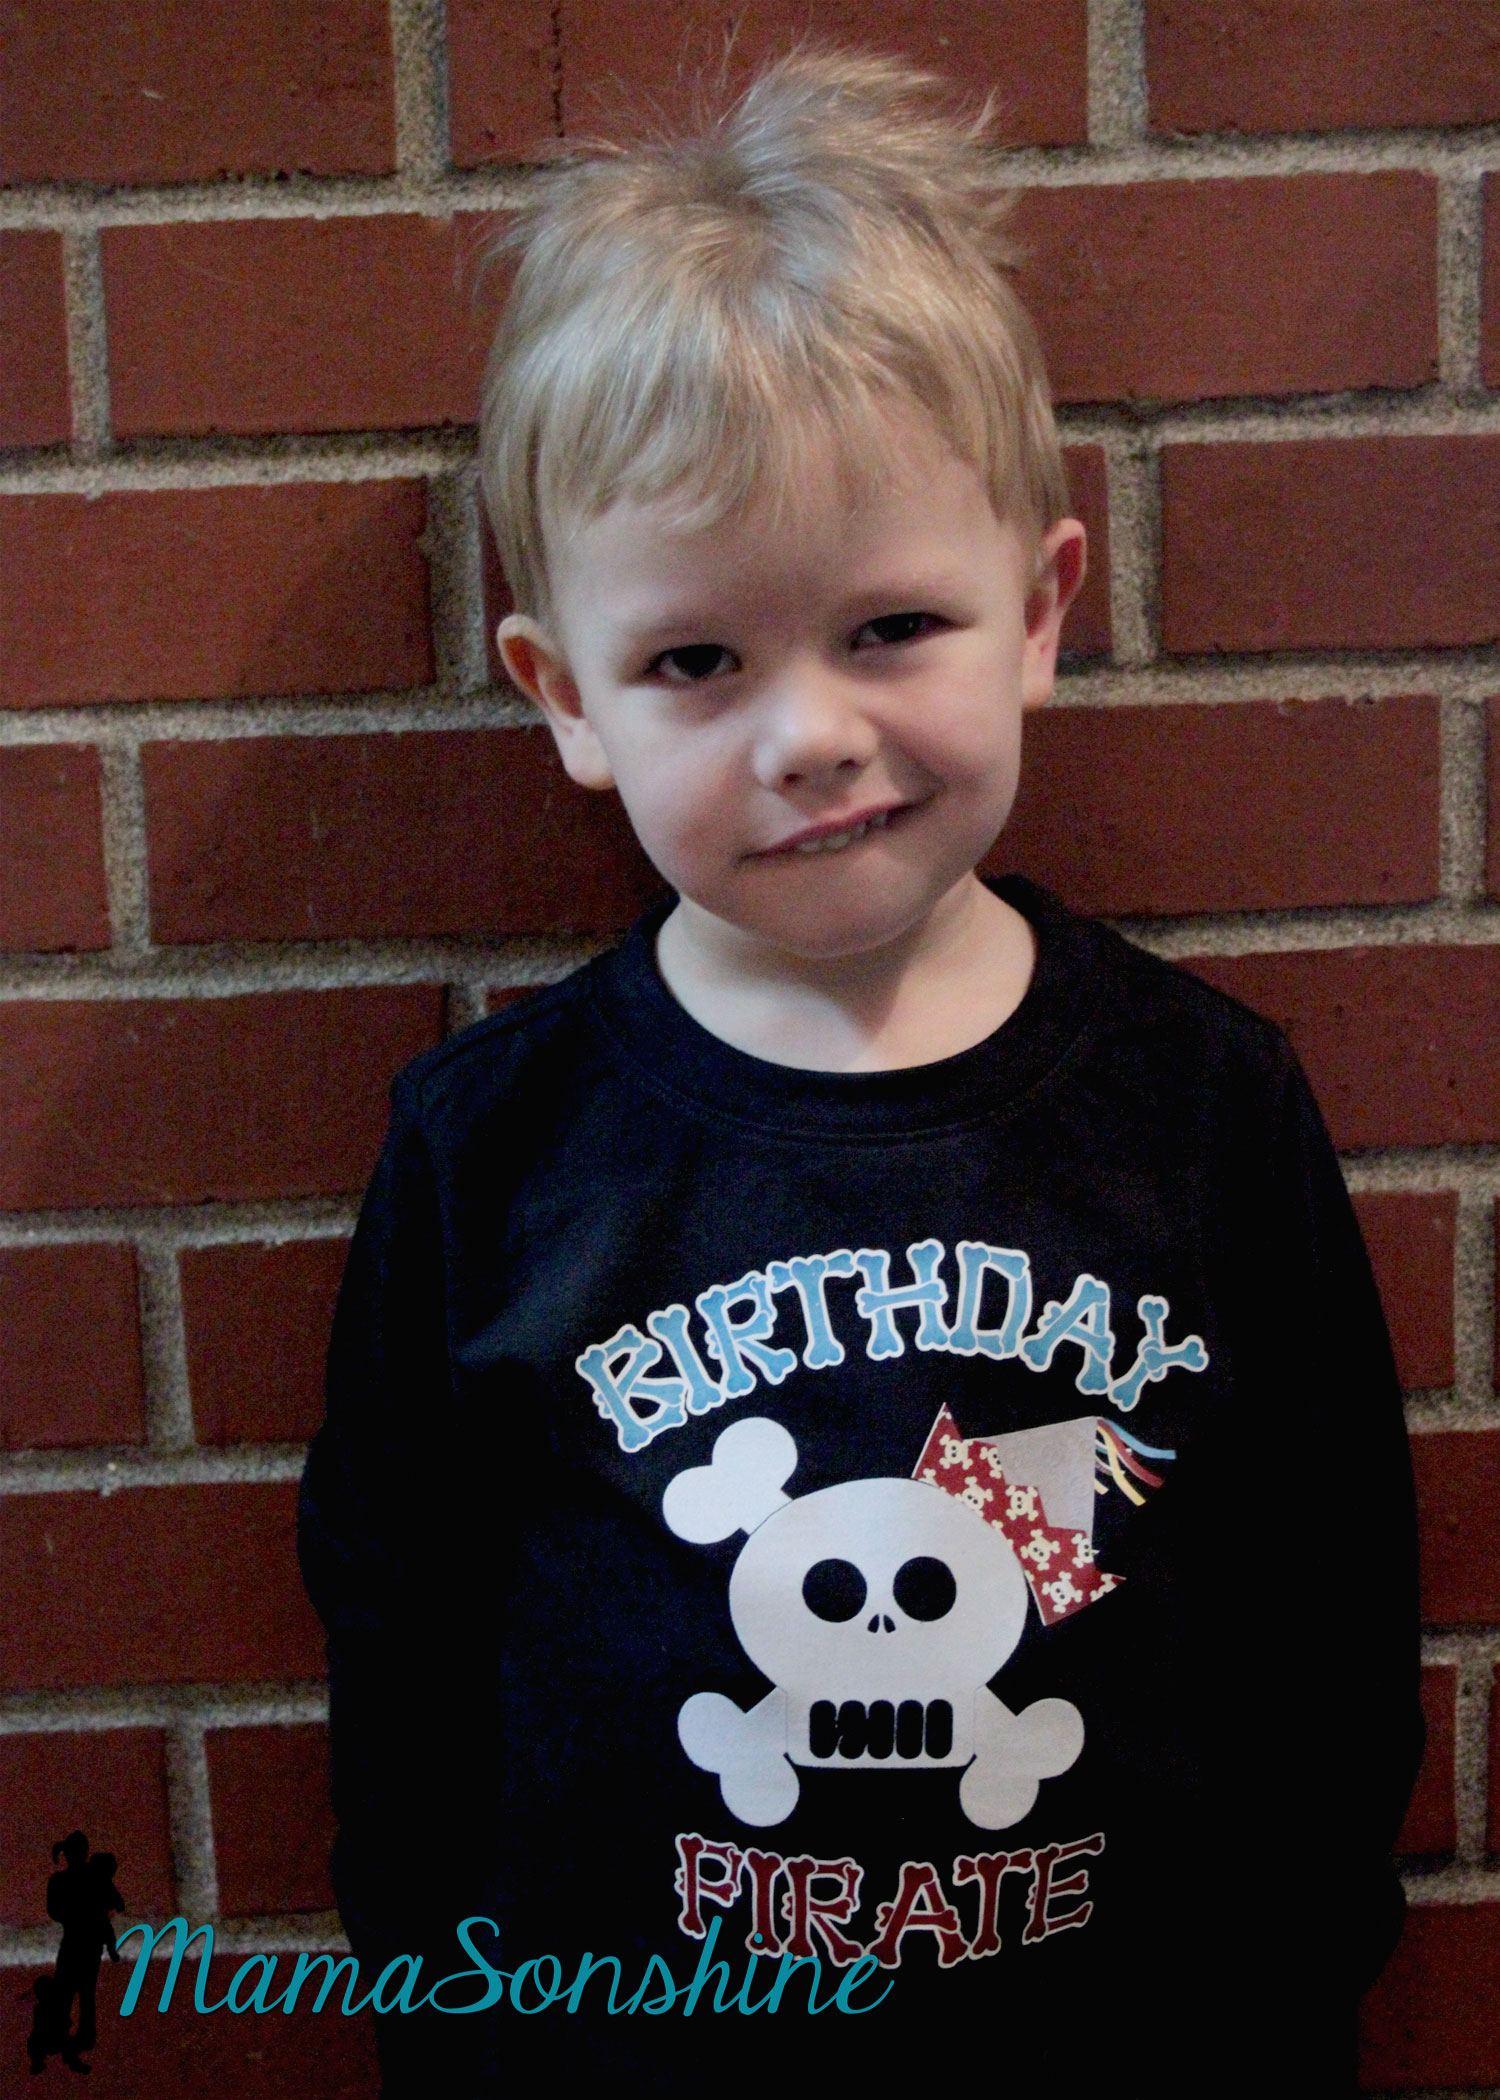
Of course there has to be a picture of the Birthday Pirate!
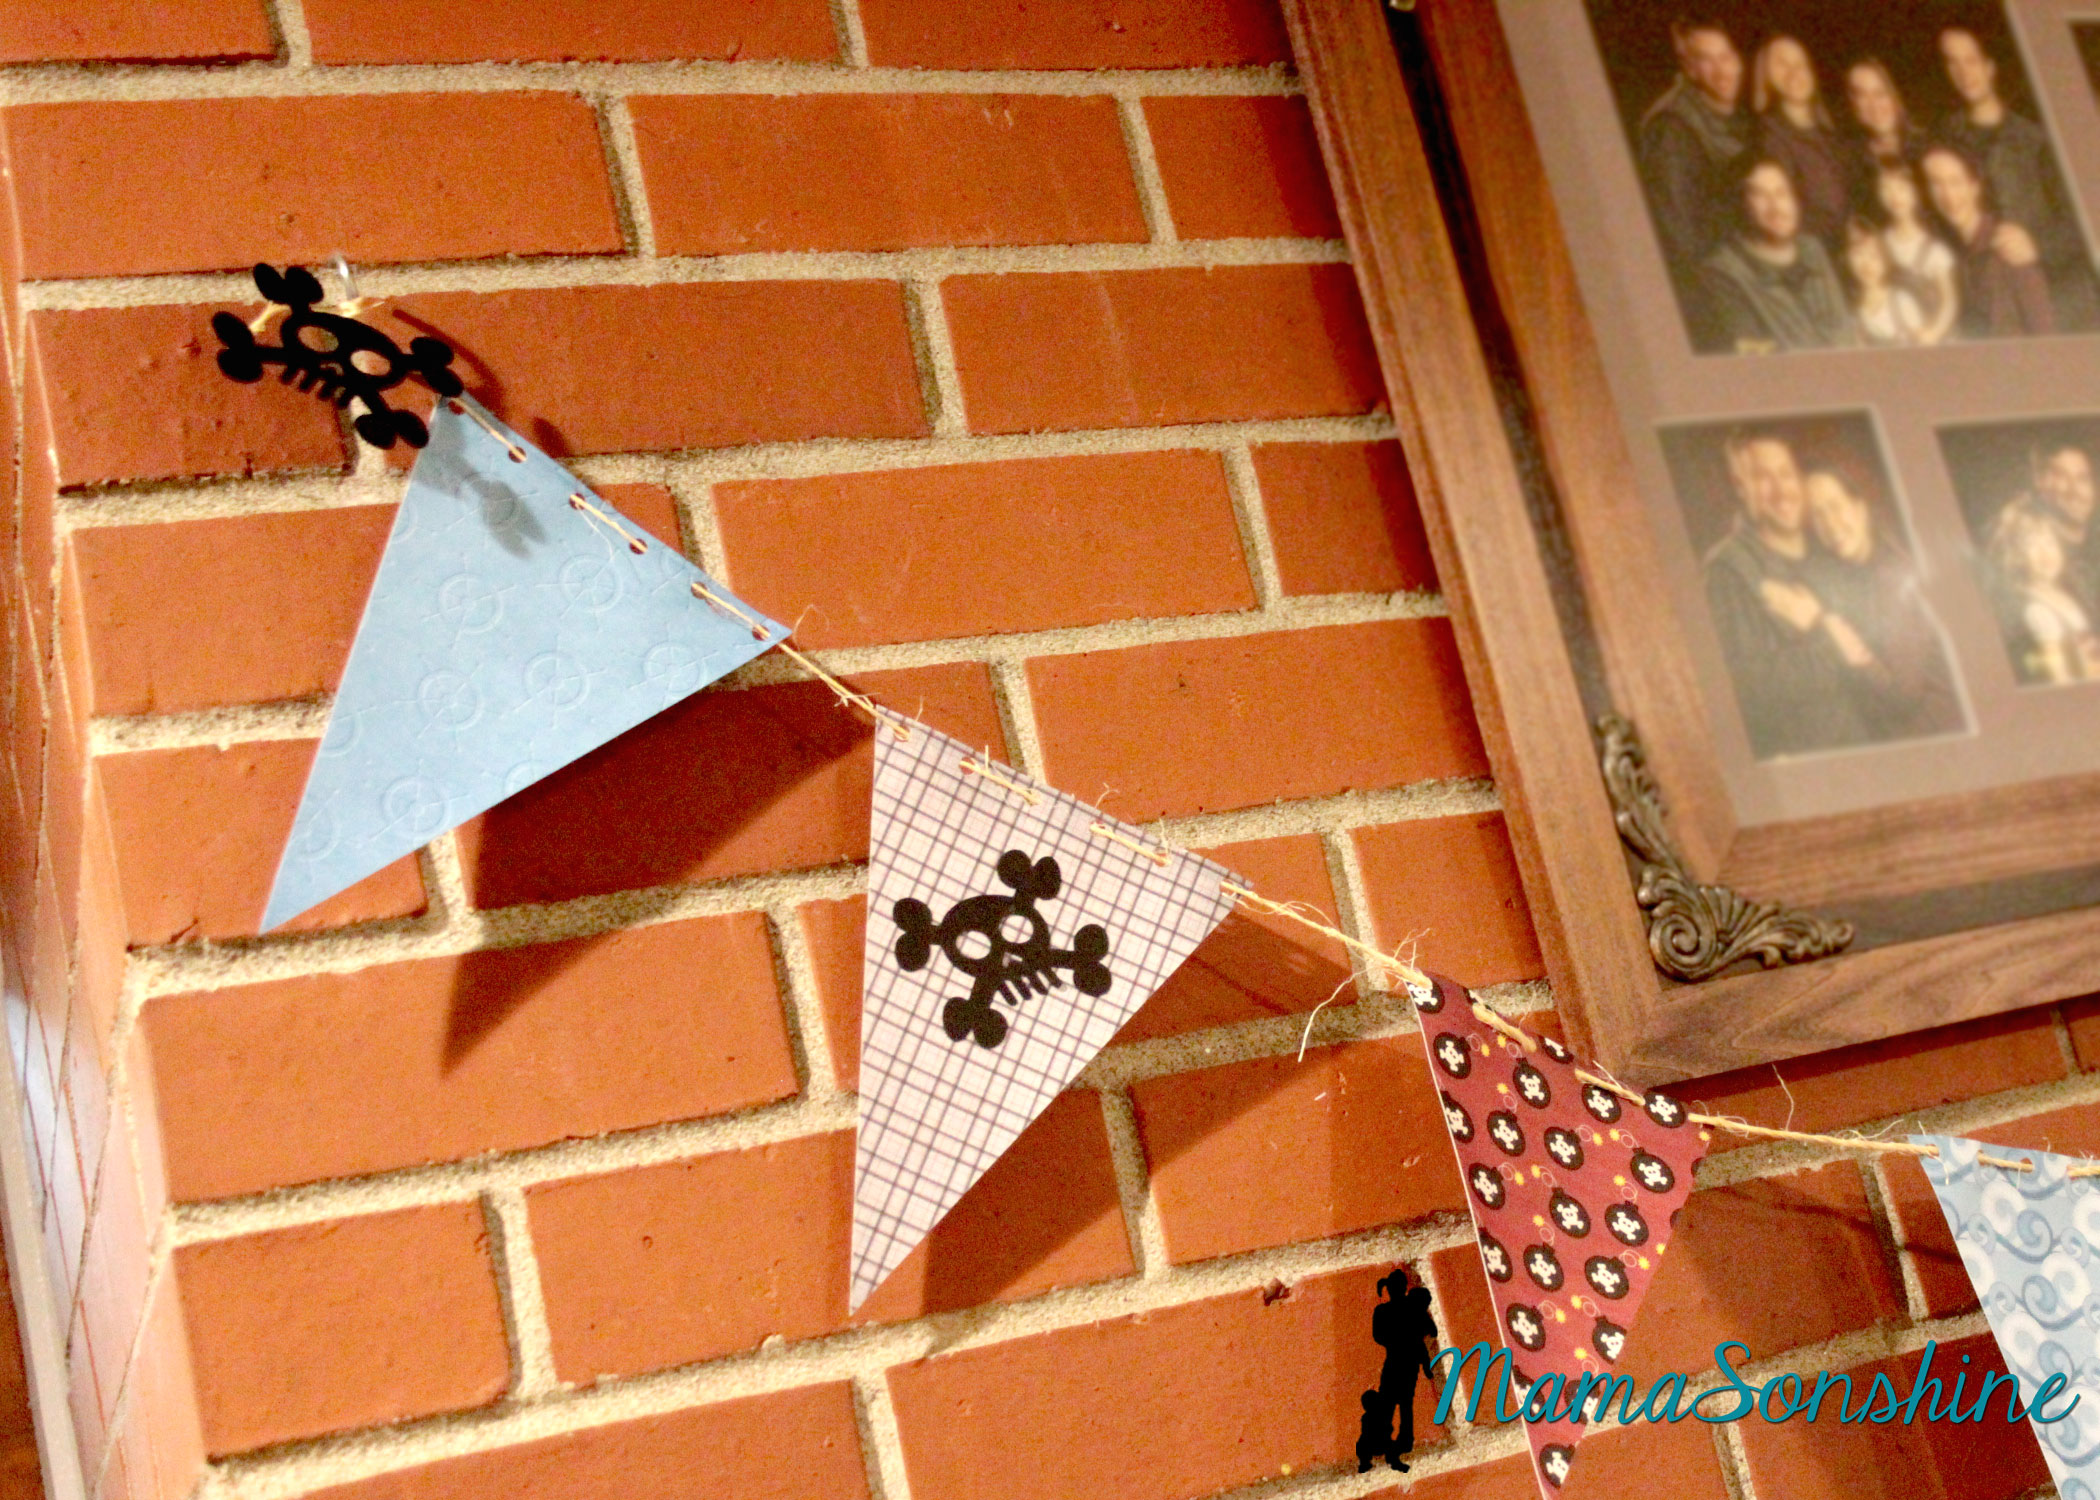
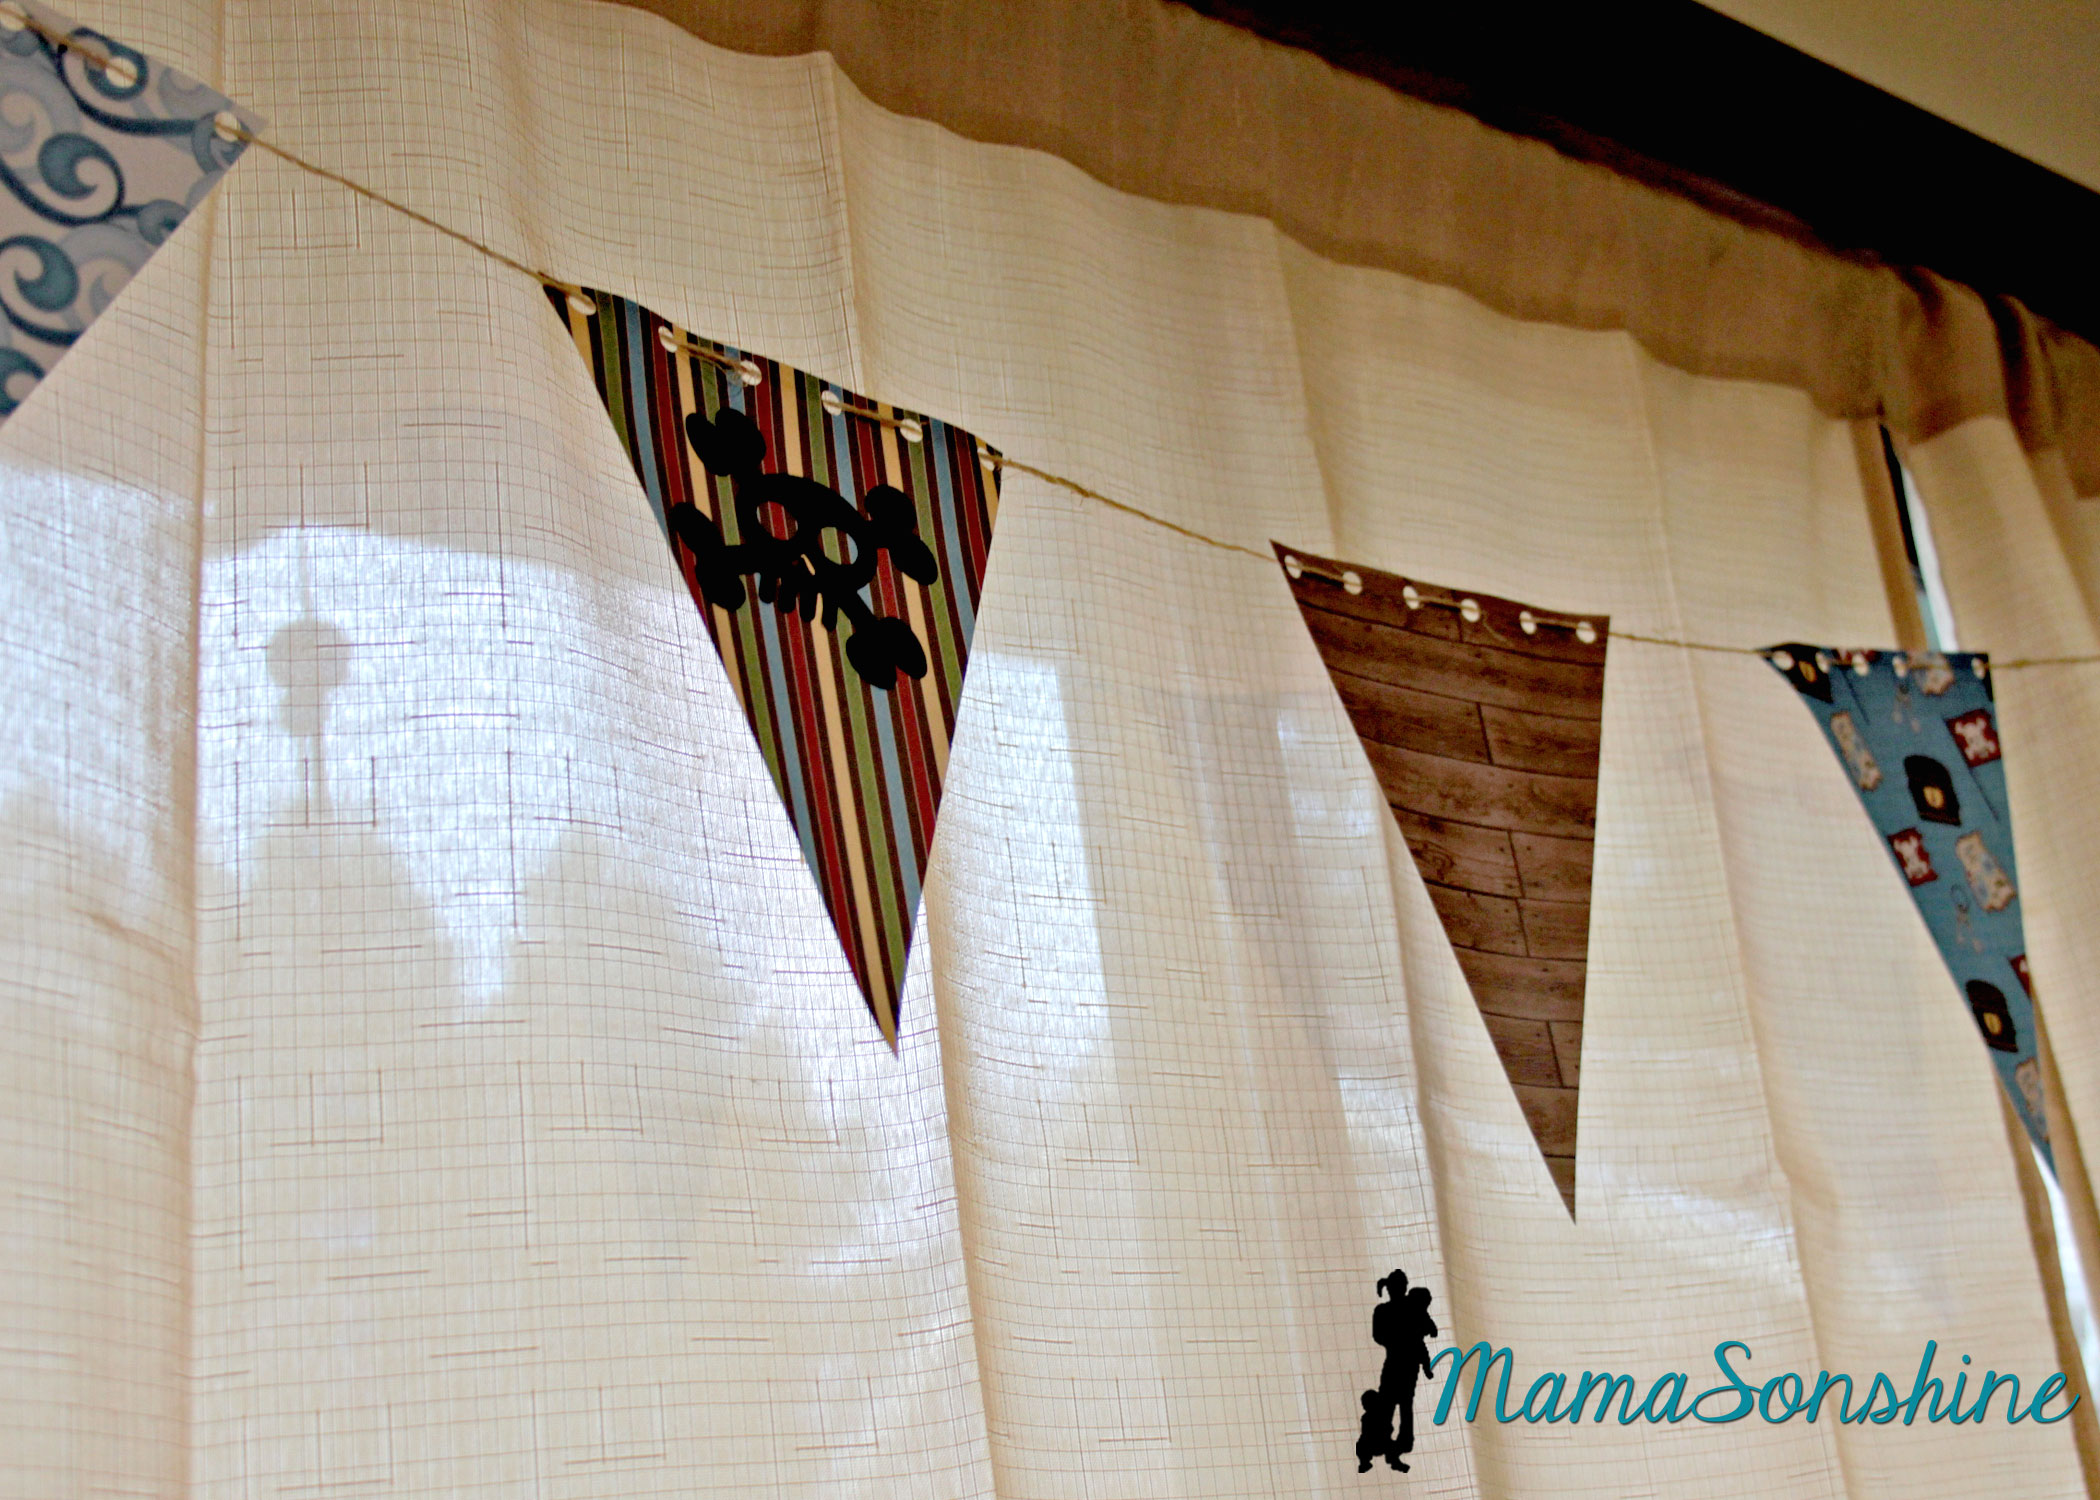
The bunting flags were made with the digital papers and cut with my cameo. I used twine to string them all together.
You can see where I added the negative skull and cross-bones from the party hats.
I decided to use the sketch feature in the Studio software to make the skull and cross-bones for these straw rosettes.
This slideshow requires JavaScript.
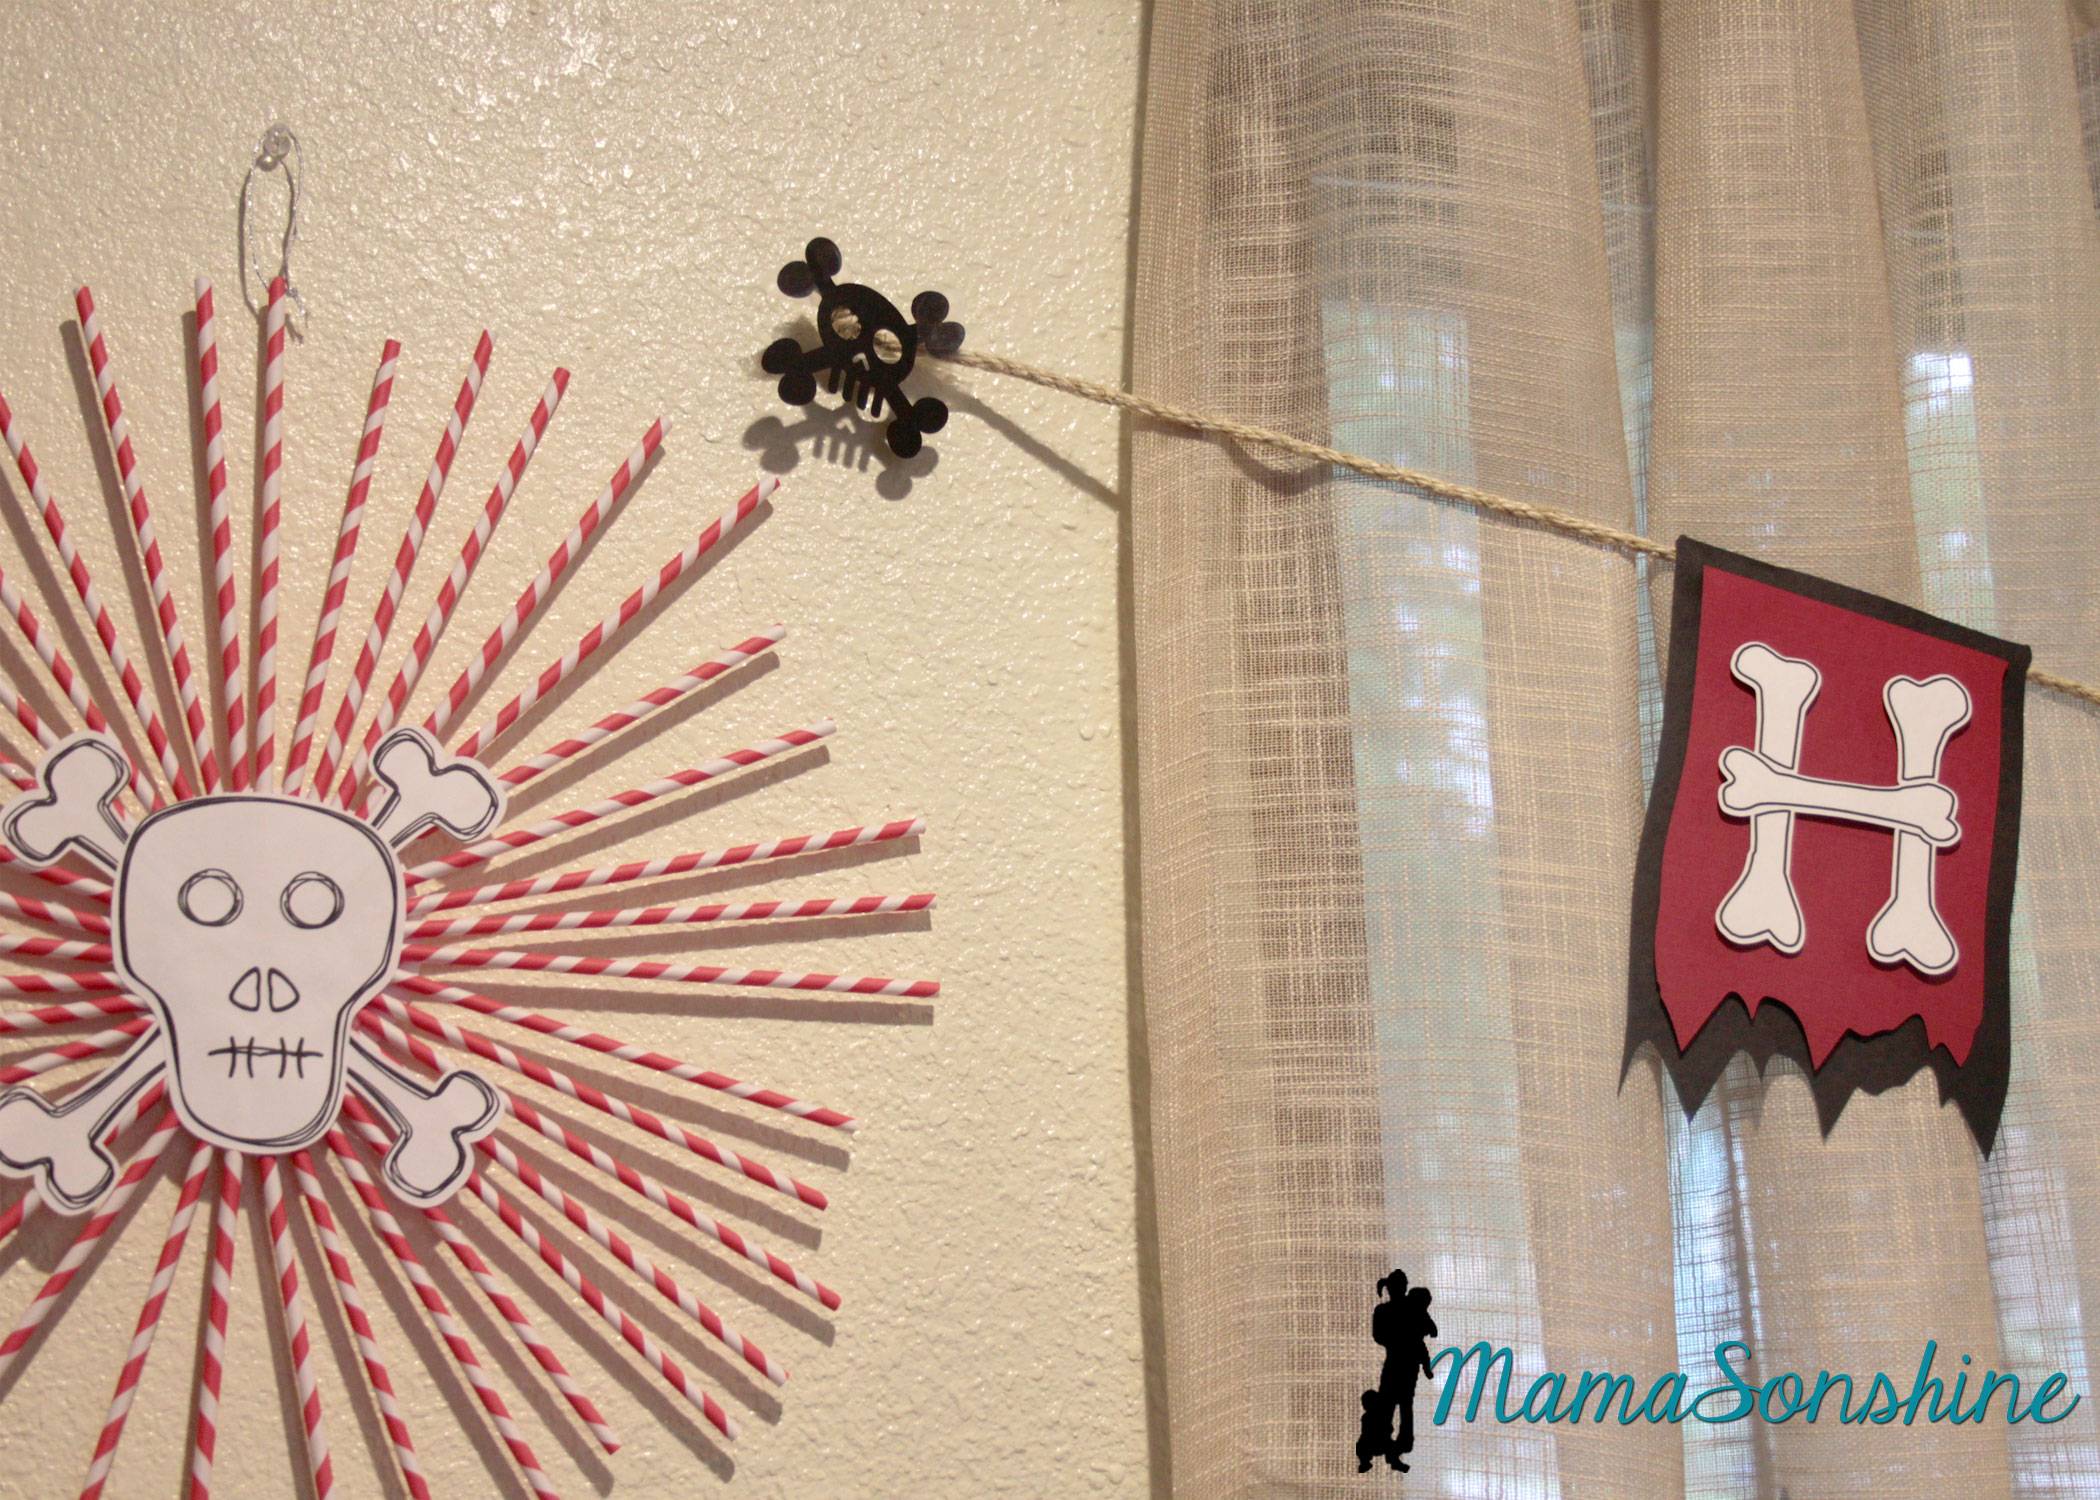
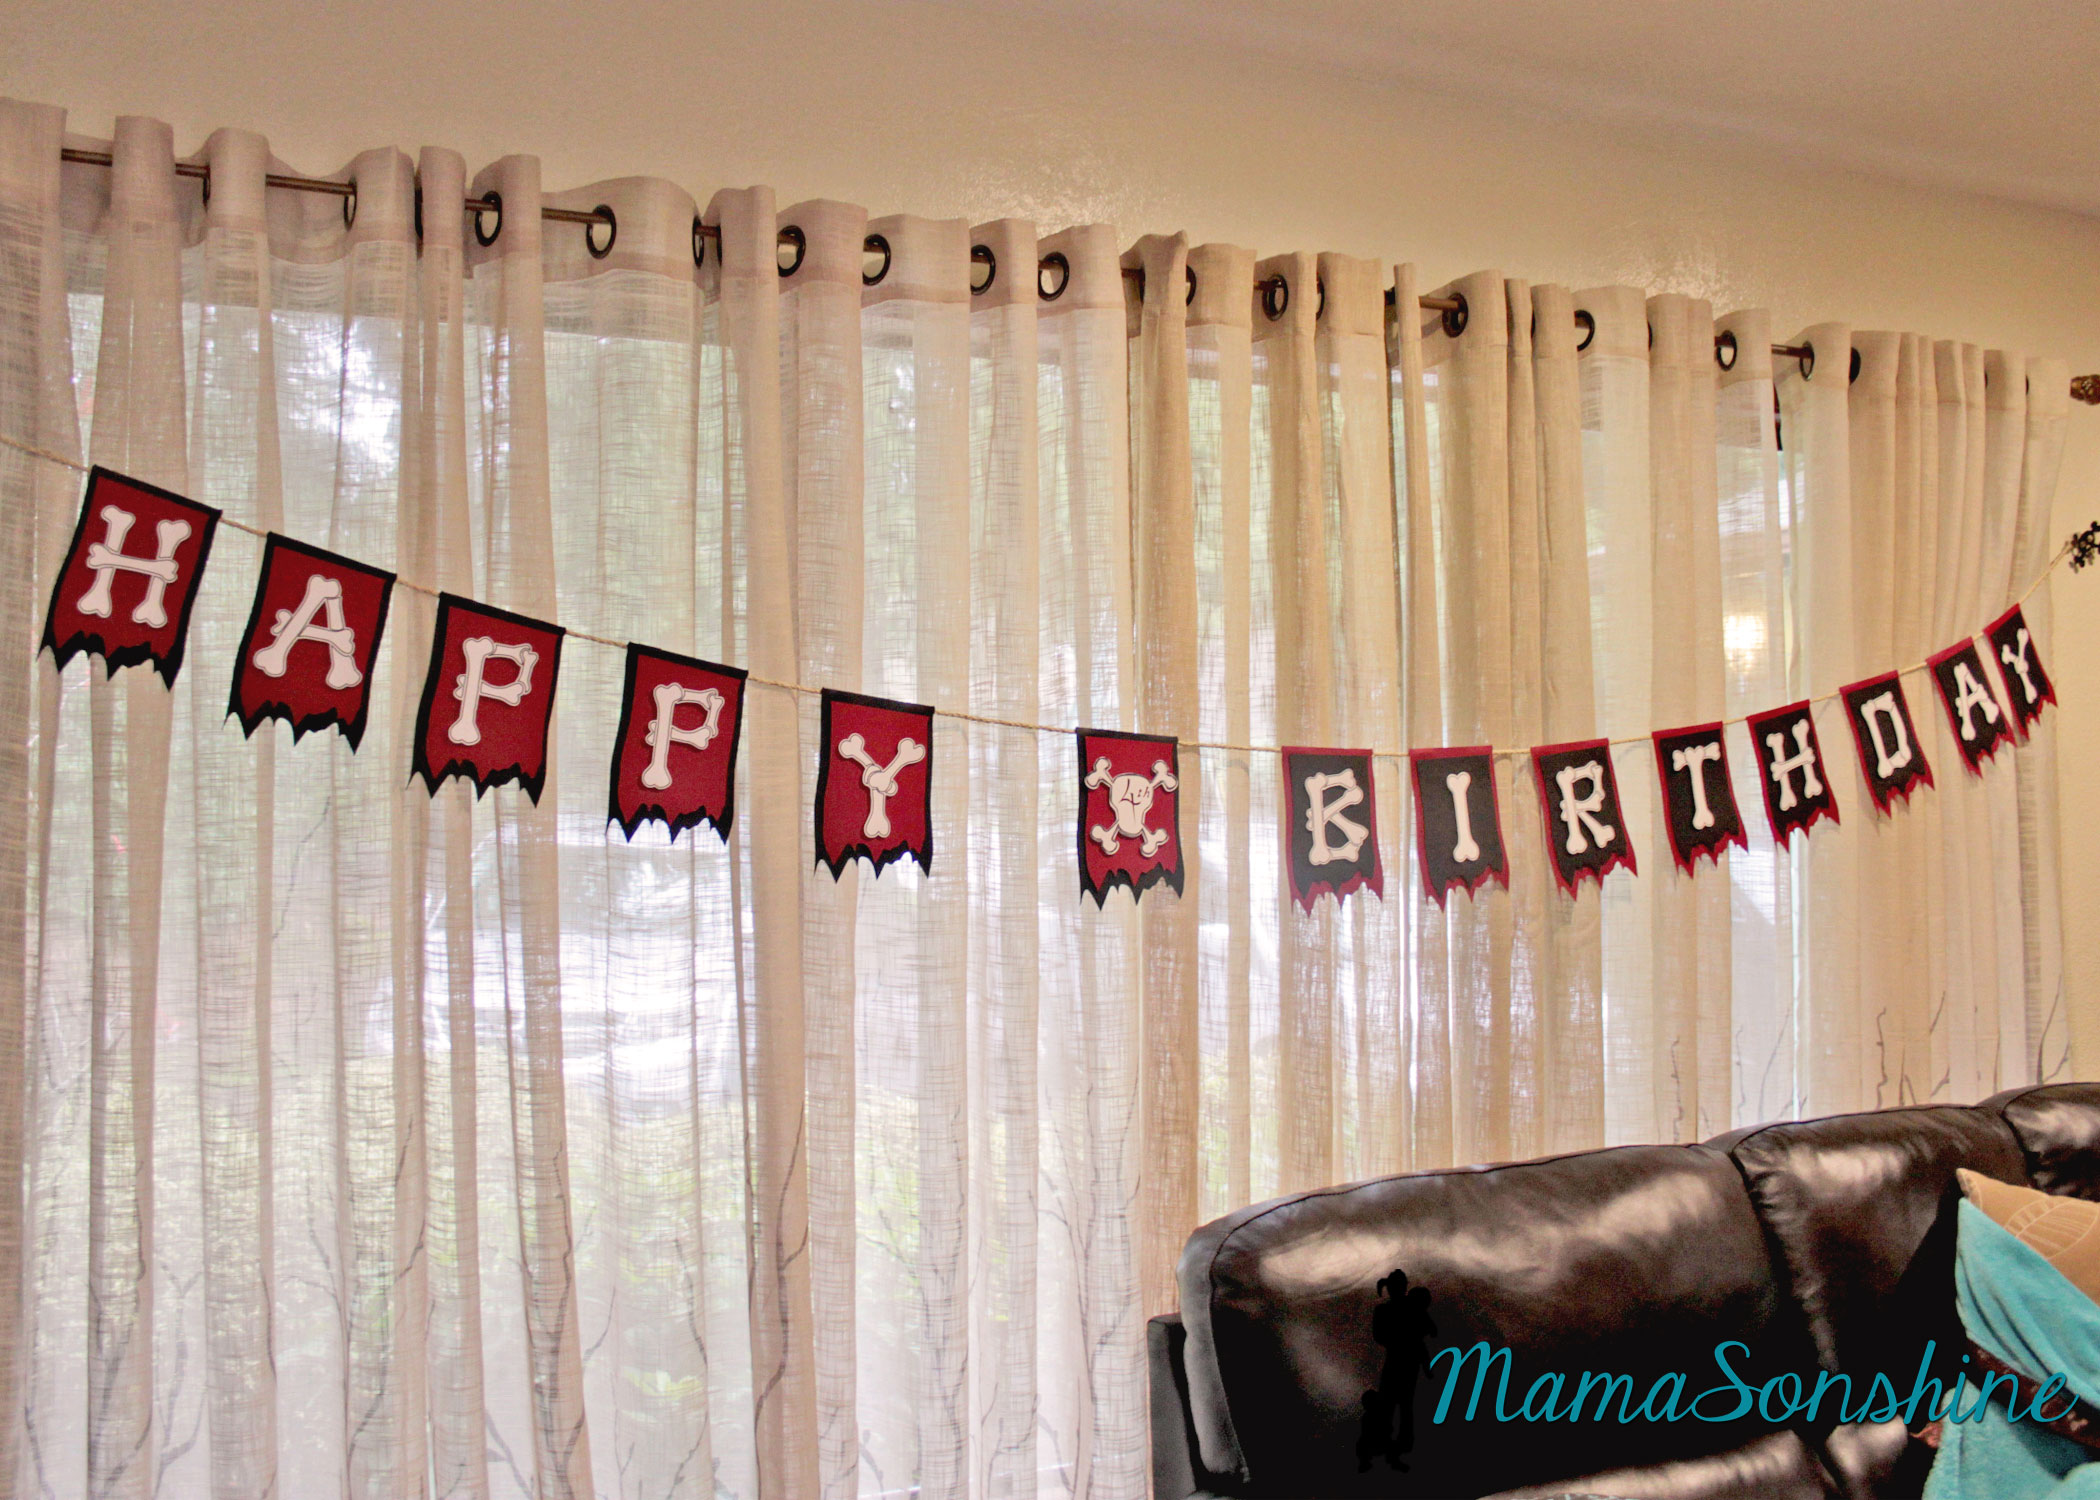
One of my favorite things from this party was the “Happy Birthday” banner.
I really like how the layered flags turned out.
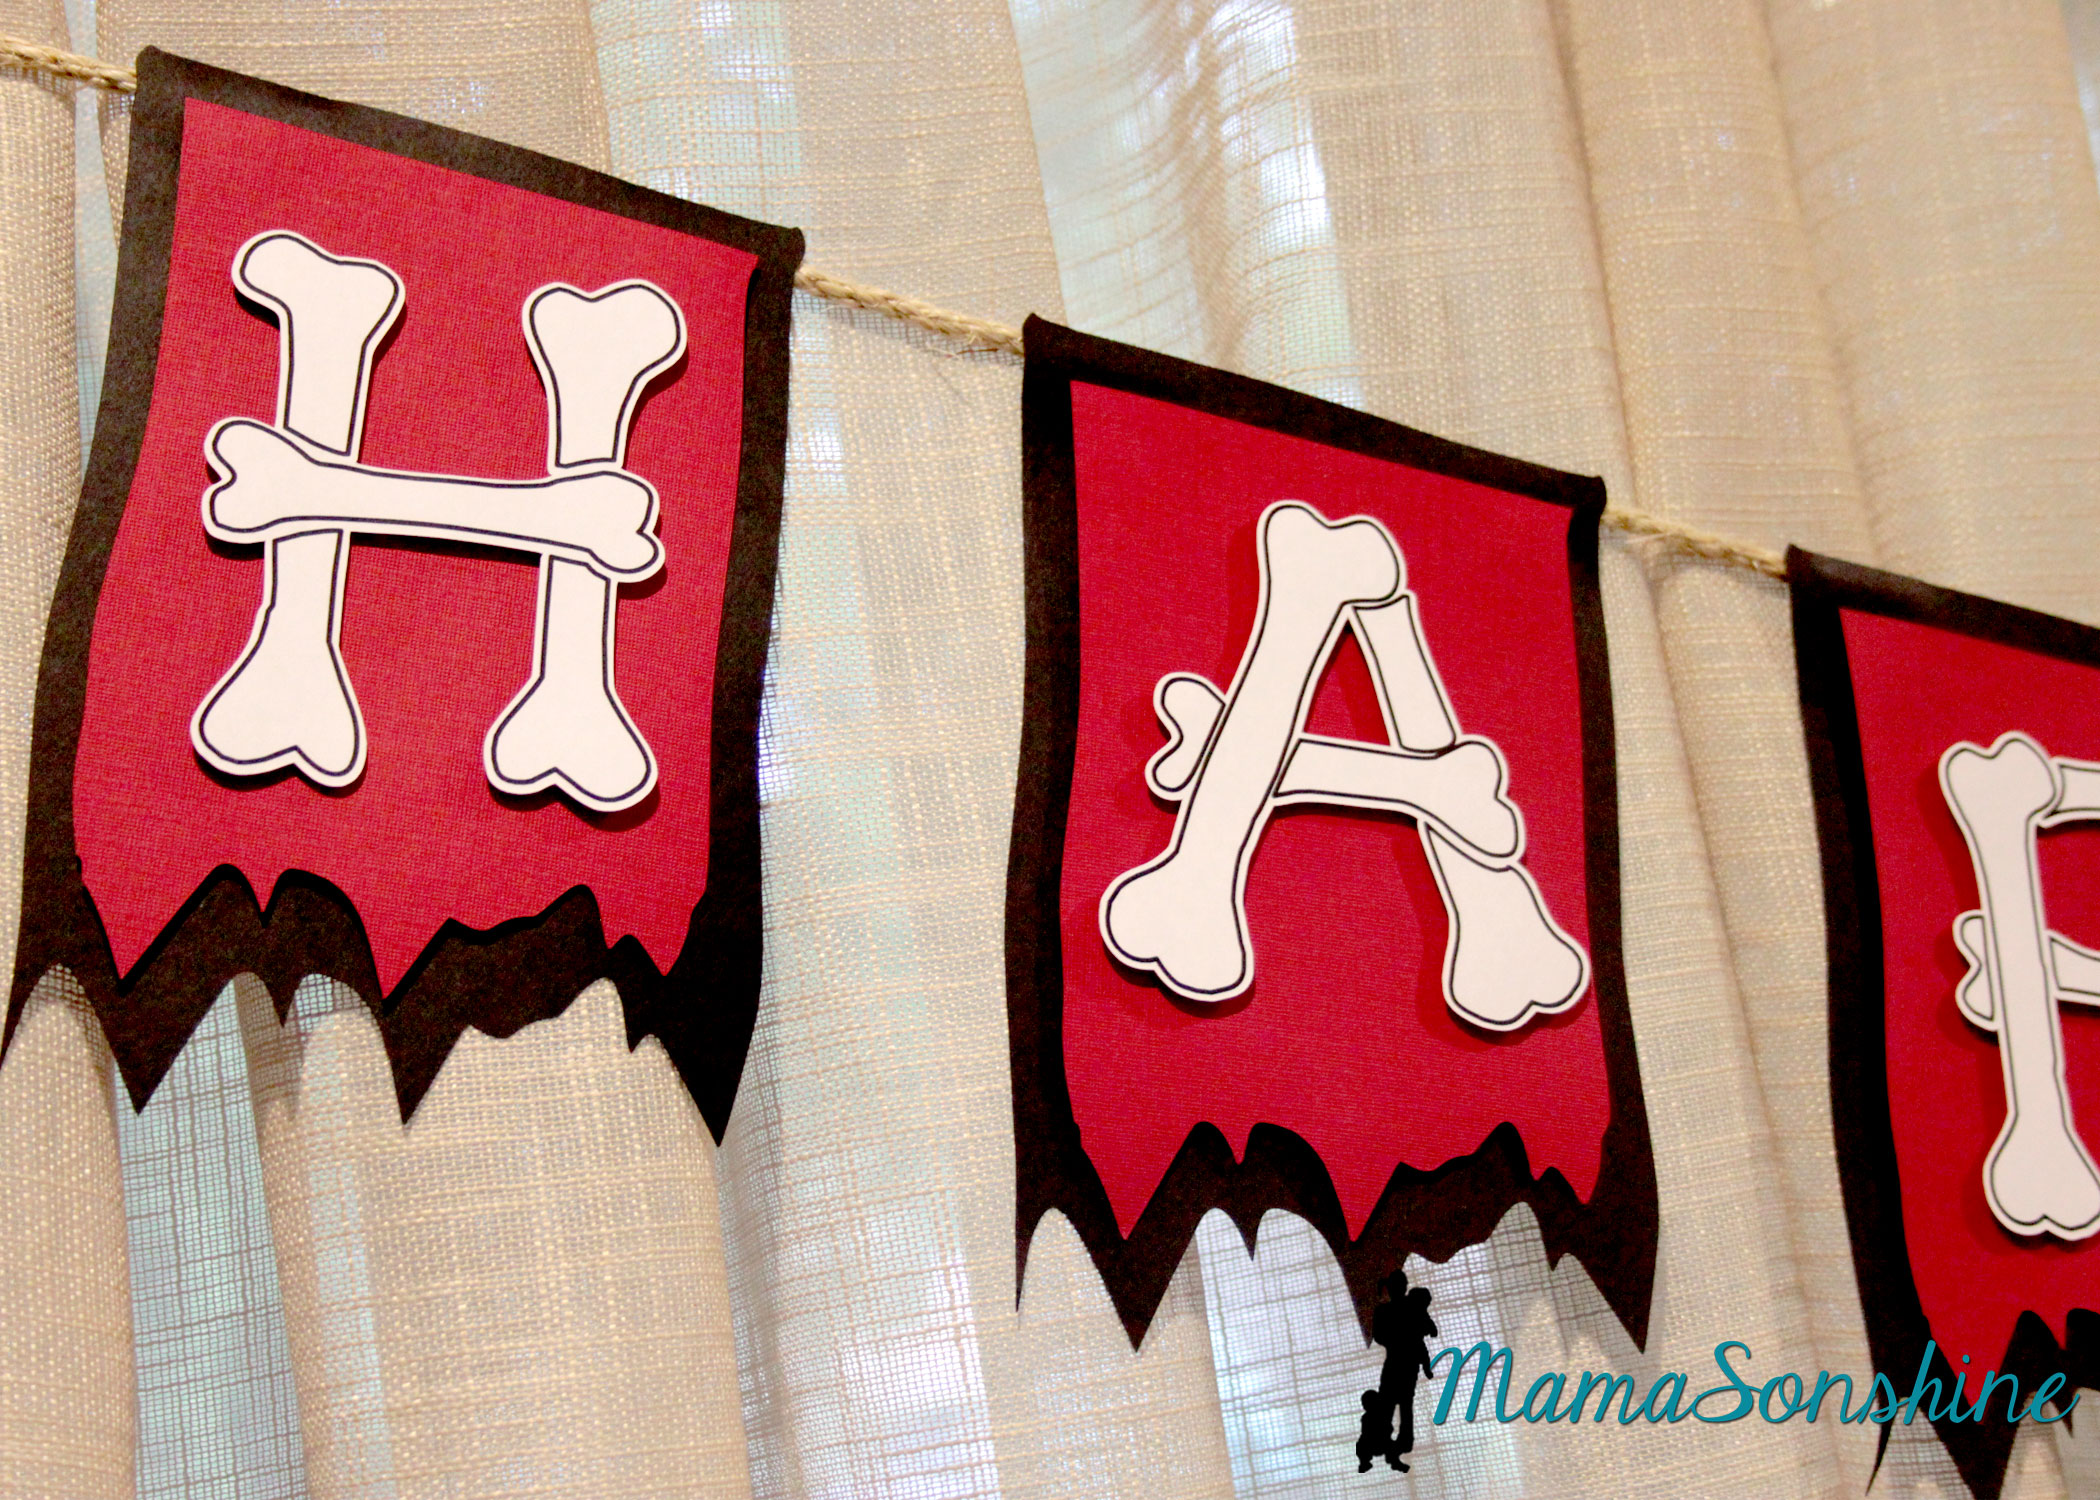
I wanted to use this bone font but each piece of bone on one letter is a cut line, so I used the offset tool to cut all around the letter. I could have used a sketch pen, but I just printed them.
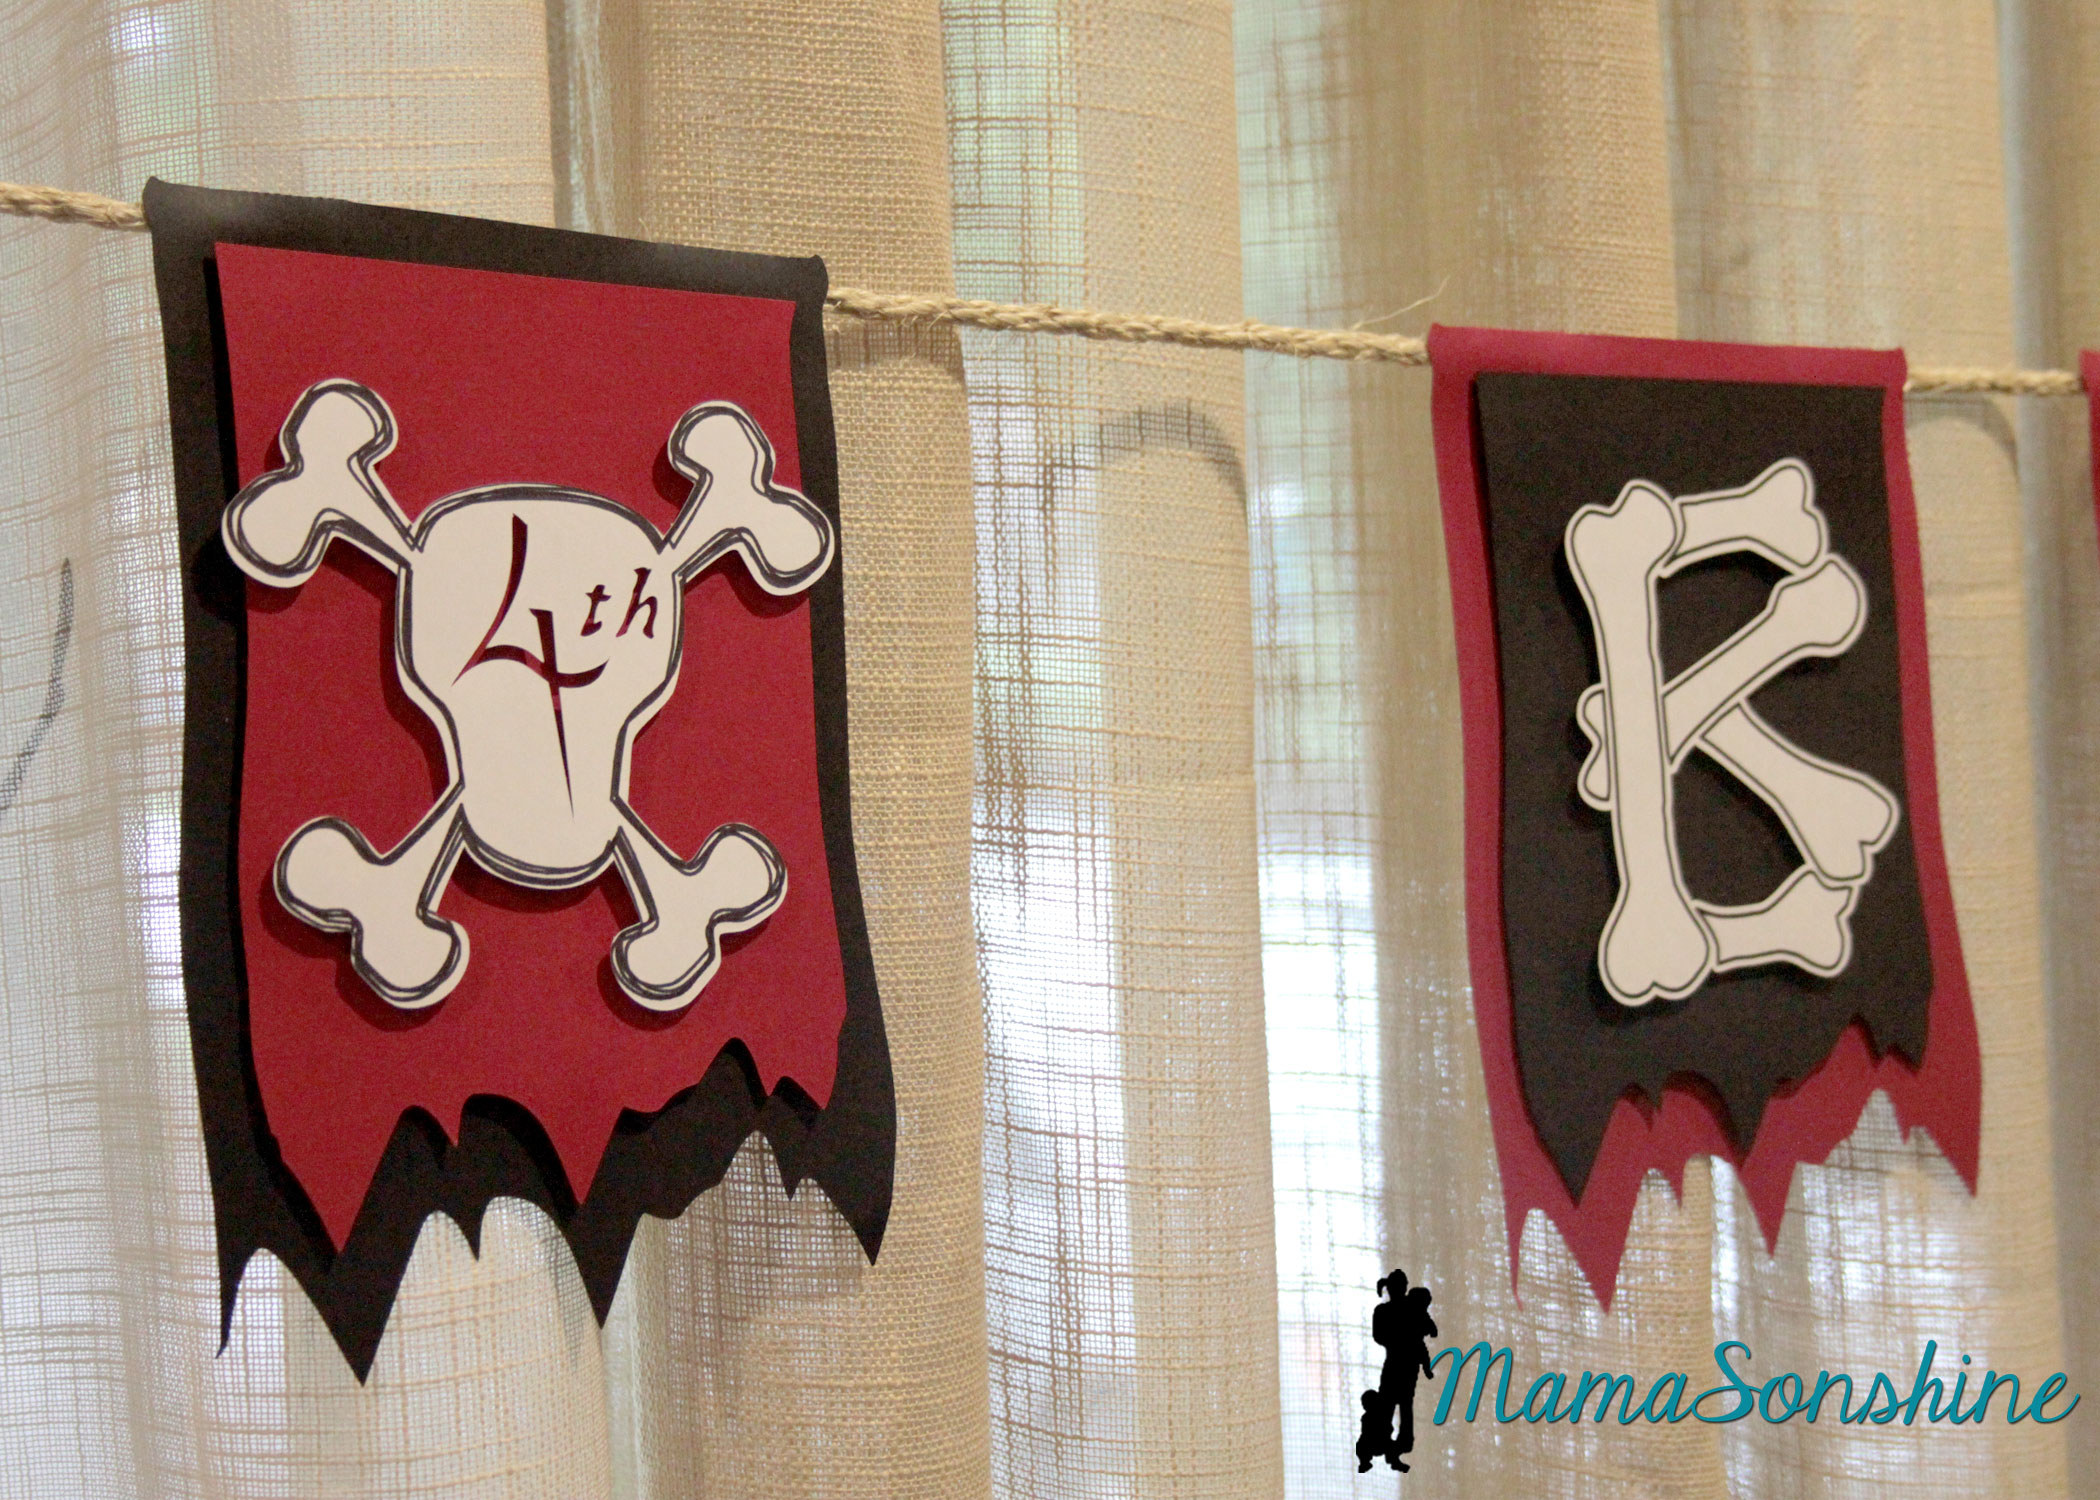
I used the custom design tool and the sketch feature to make the skull and cross-bones for the number part of the banner. Instead of writing the number, I cut it out, so you can see the background color. I used sisal rope to hang the banner across the window.
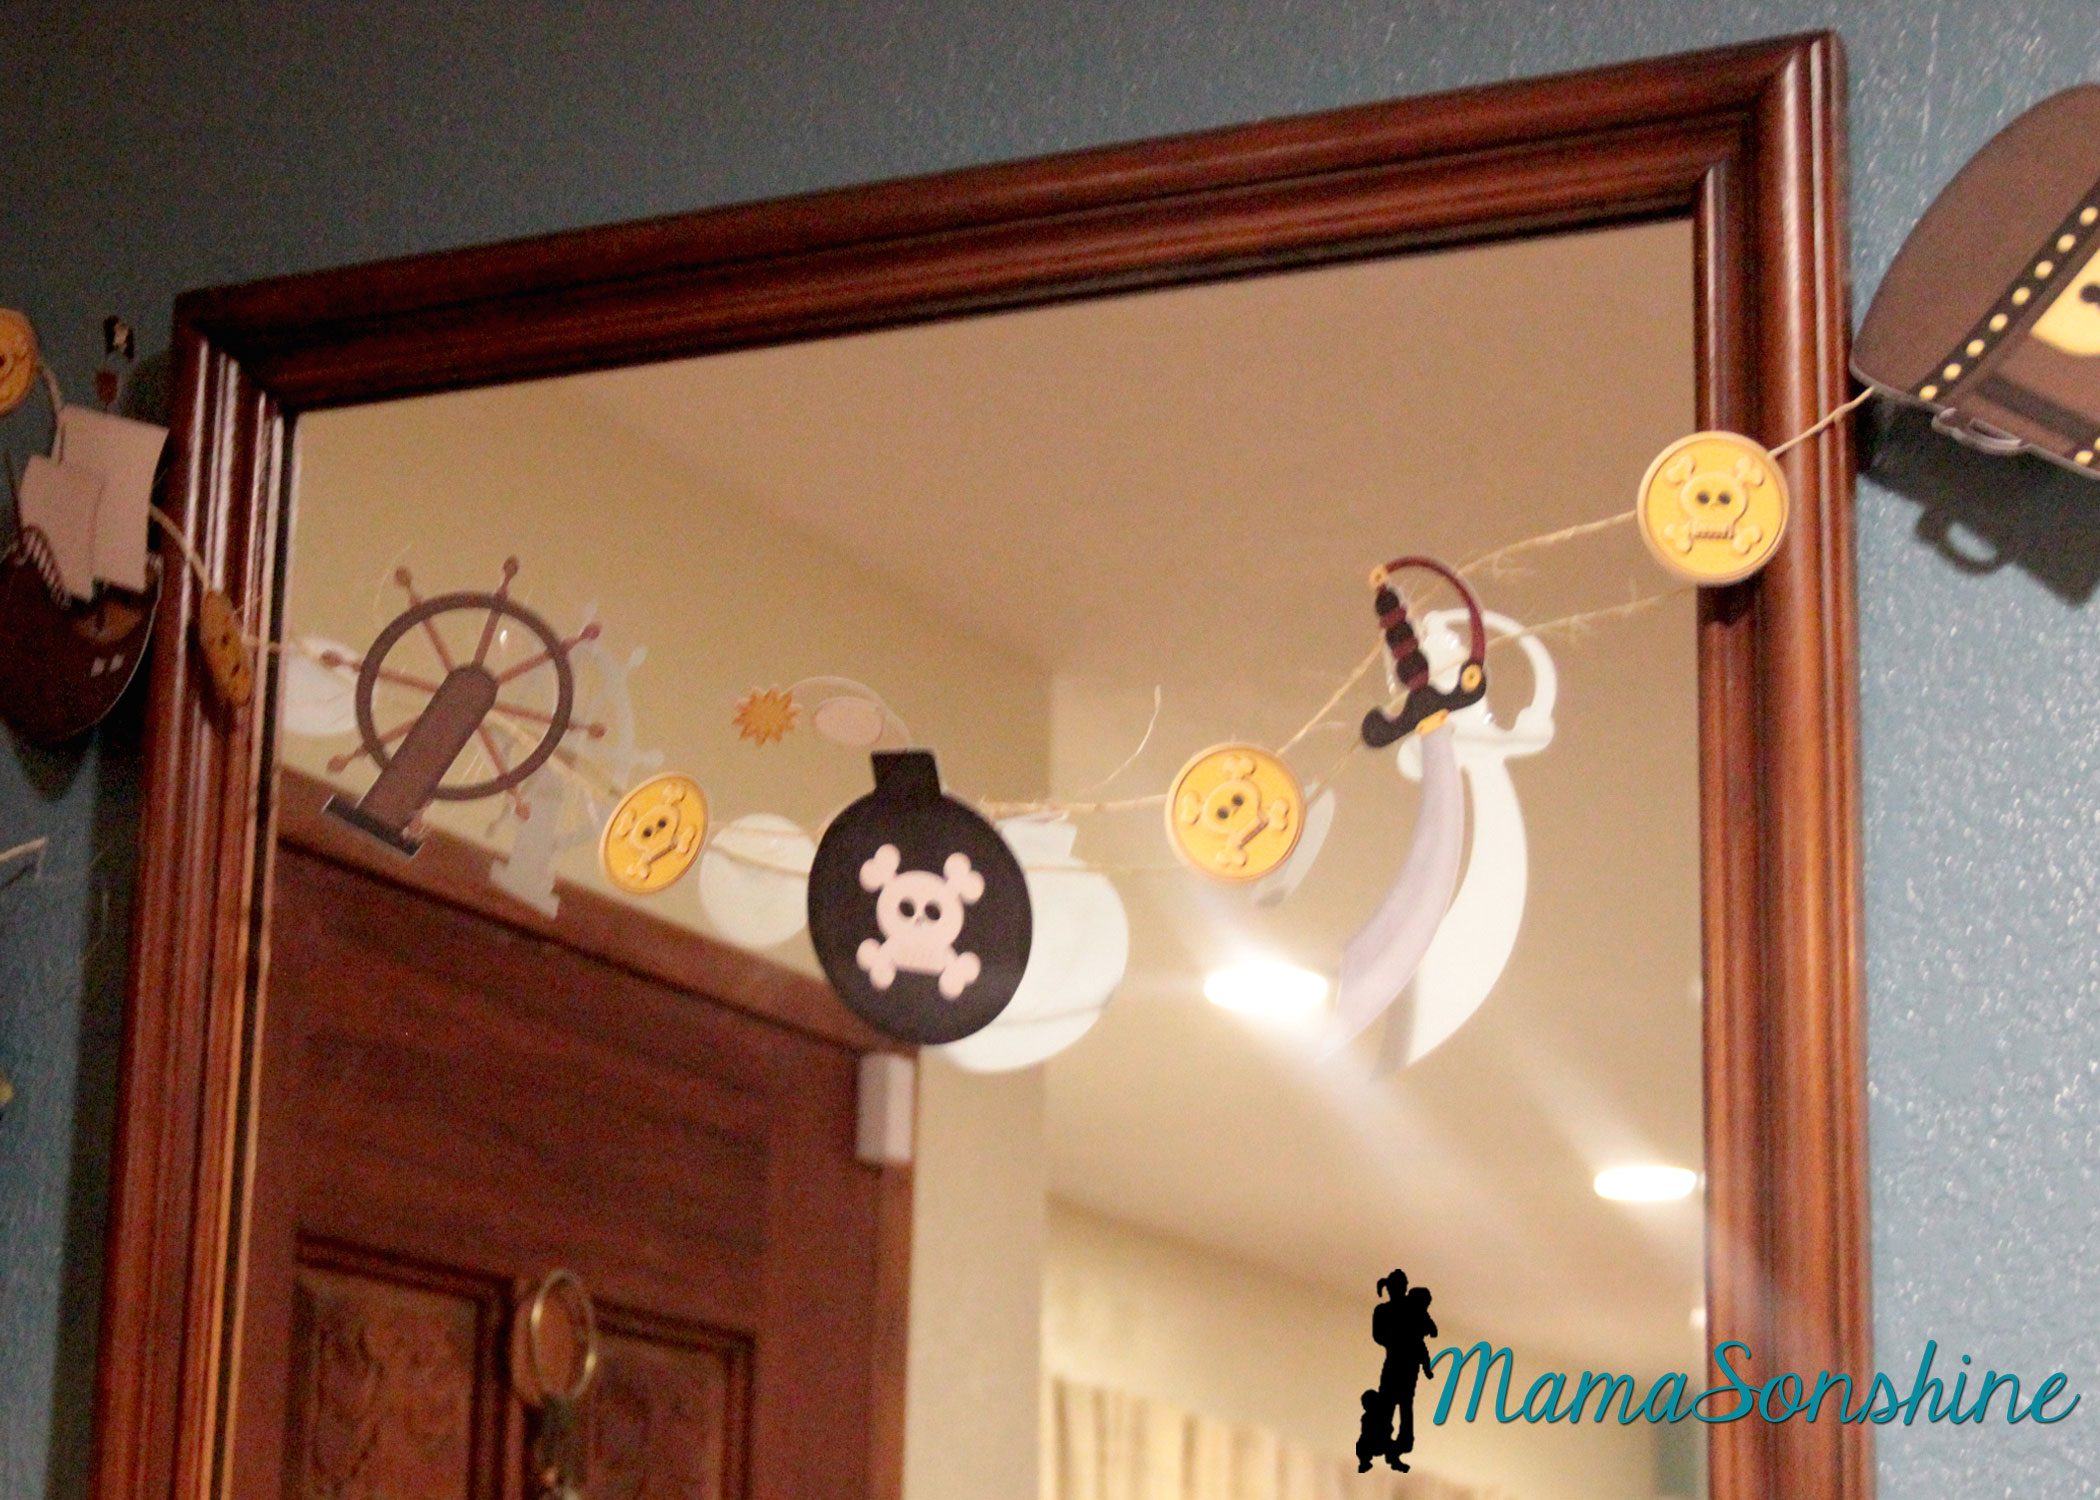
I also used the print and cut feature on the elements from the kit to make other banners.
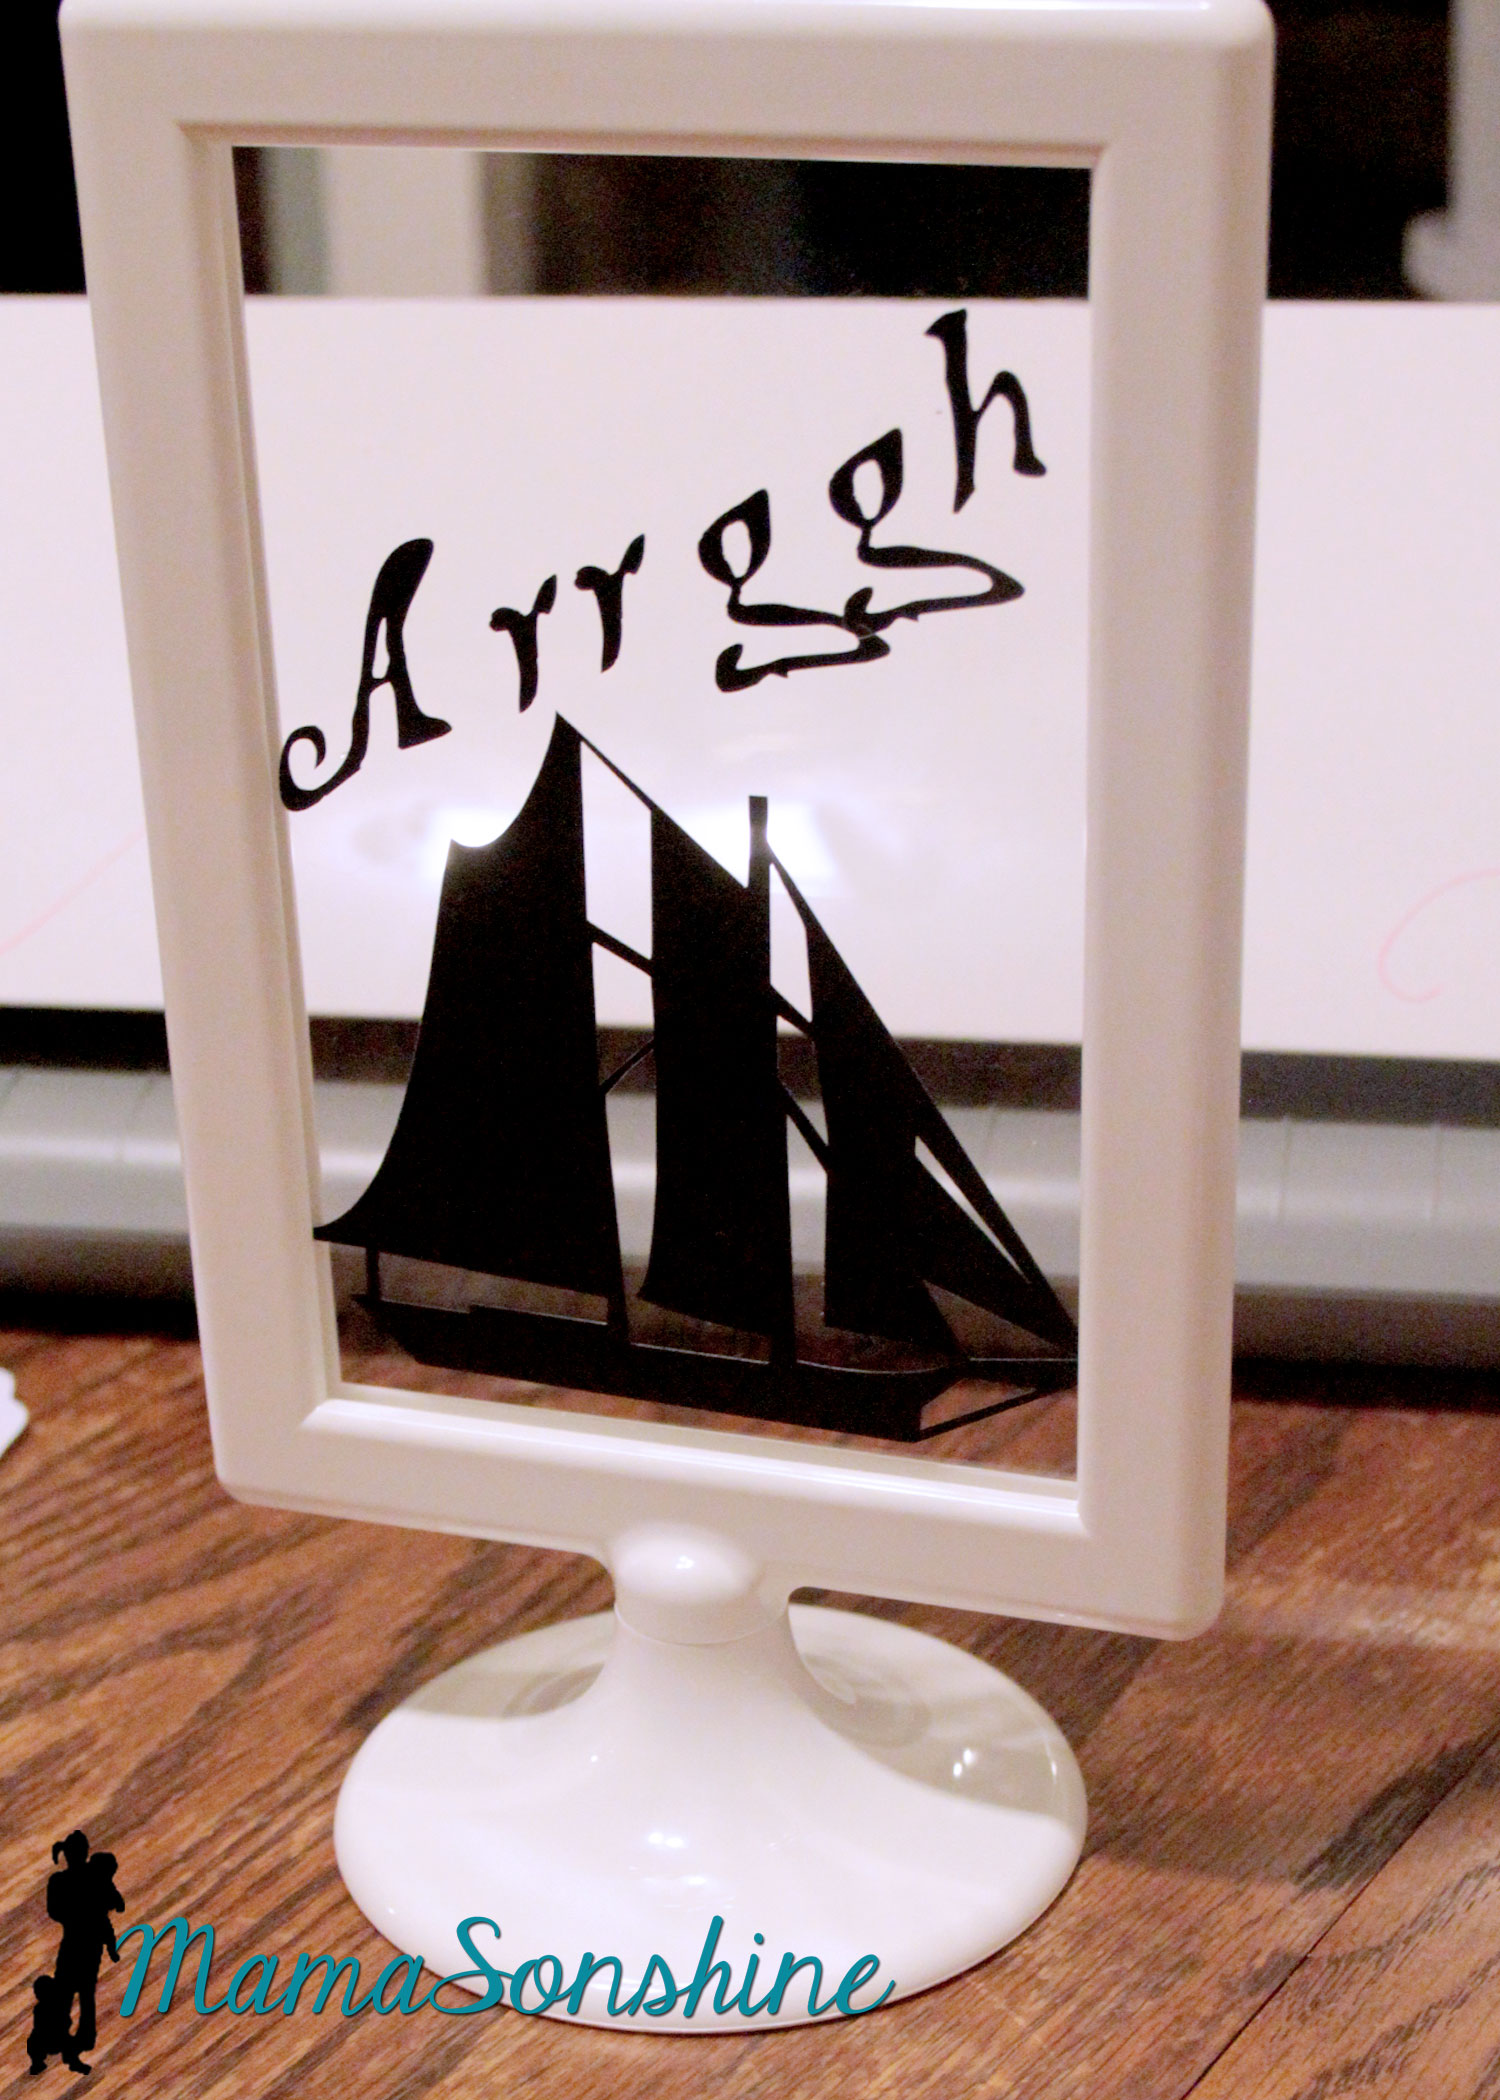
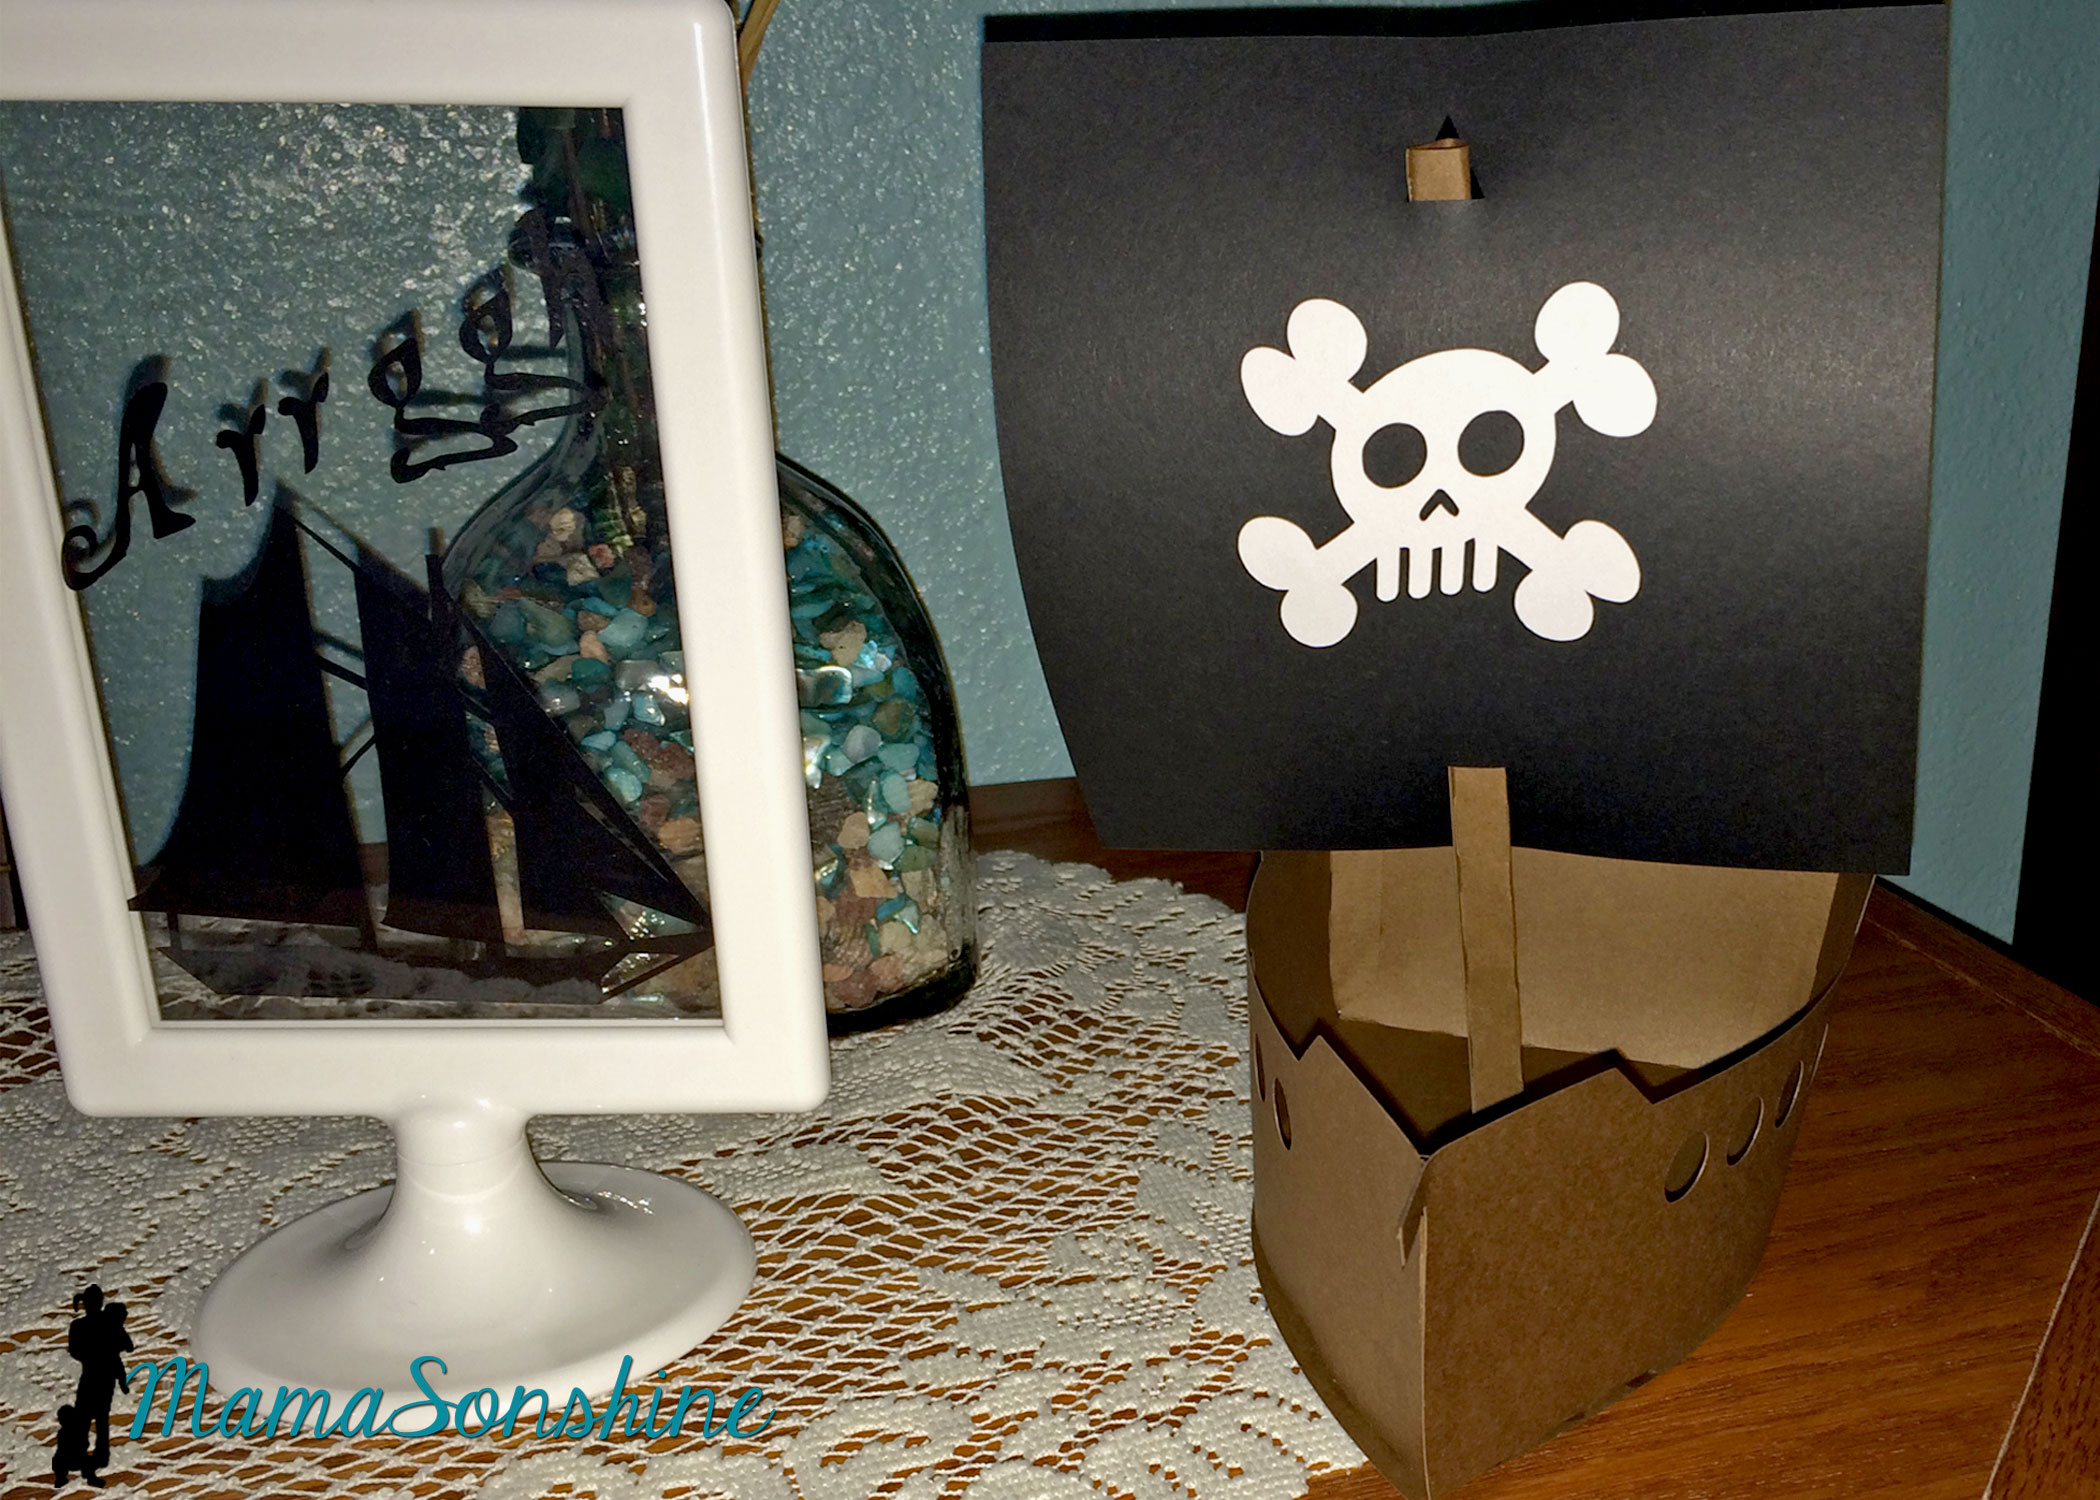
I cut out some pirate items as silhouettes and put them in these Tolsby frames from Ikea.
These are my new favorite party items, and they are really inexpensive and simple to adapt to any party.
I used black vinyl to keep the silhouette look.
I also purchased this 3-D pirate ship, from the Silhouette store with the idea that I would enlarge it for the center piece. I had so much other work to do, that I just decided to use it as decorations.
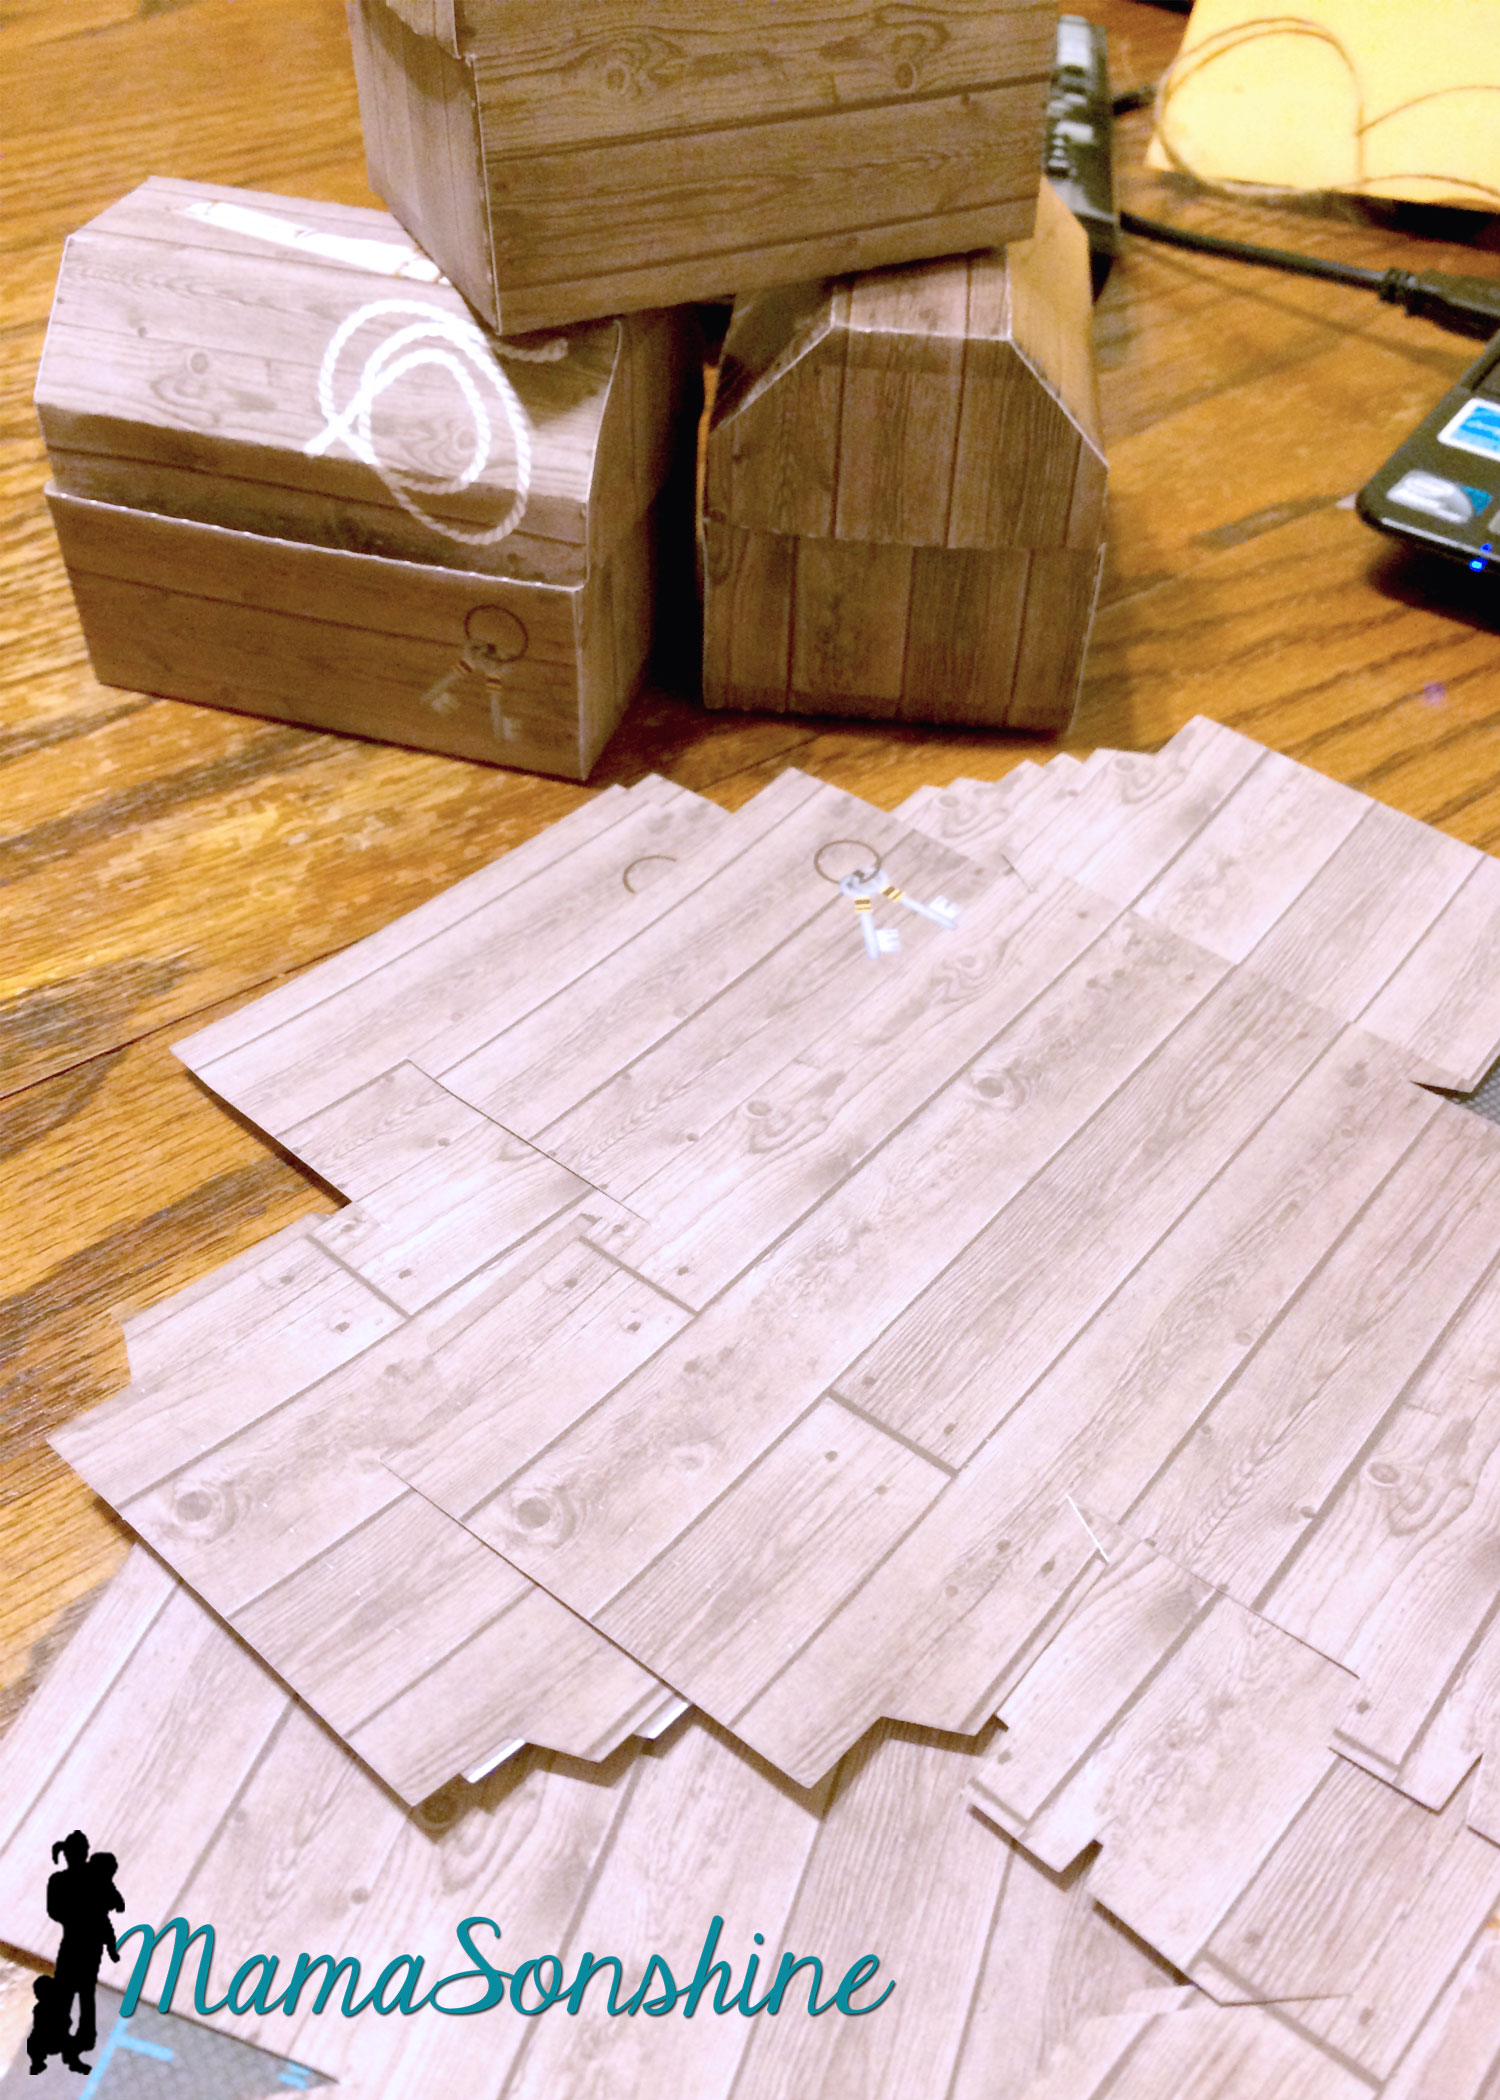
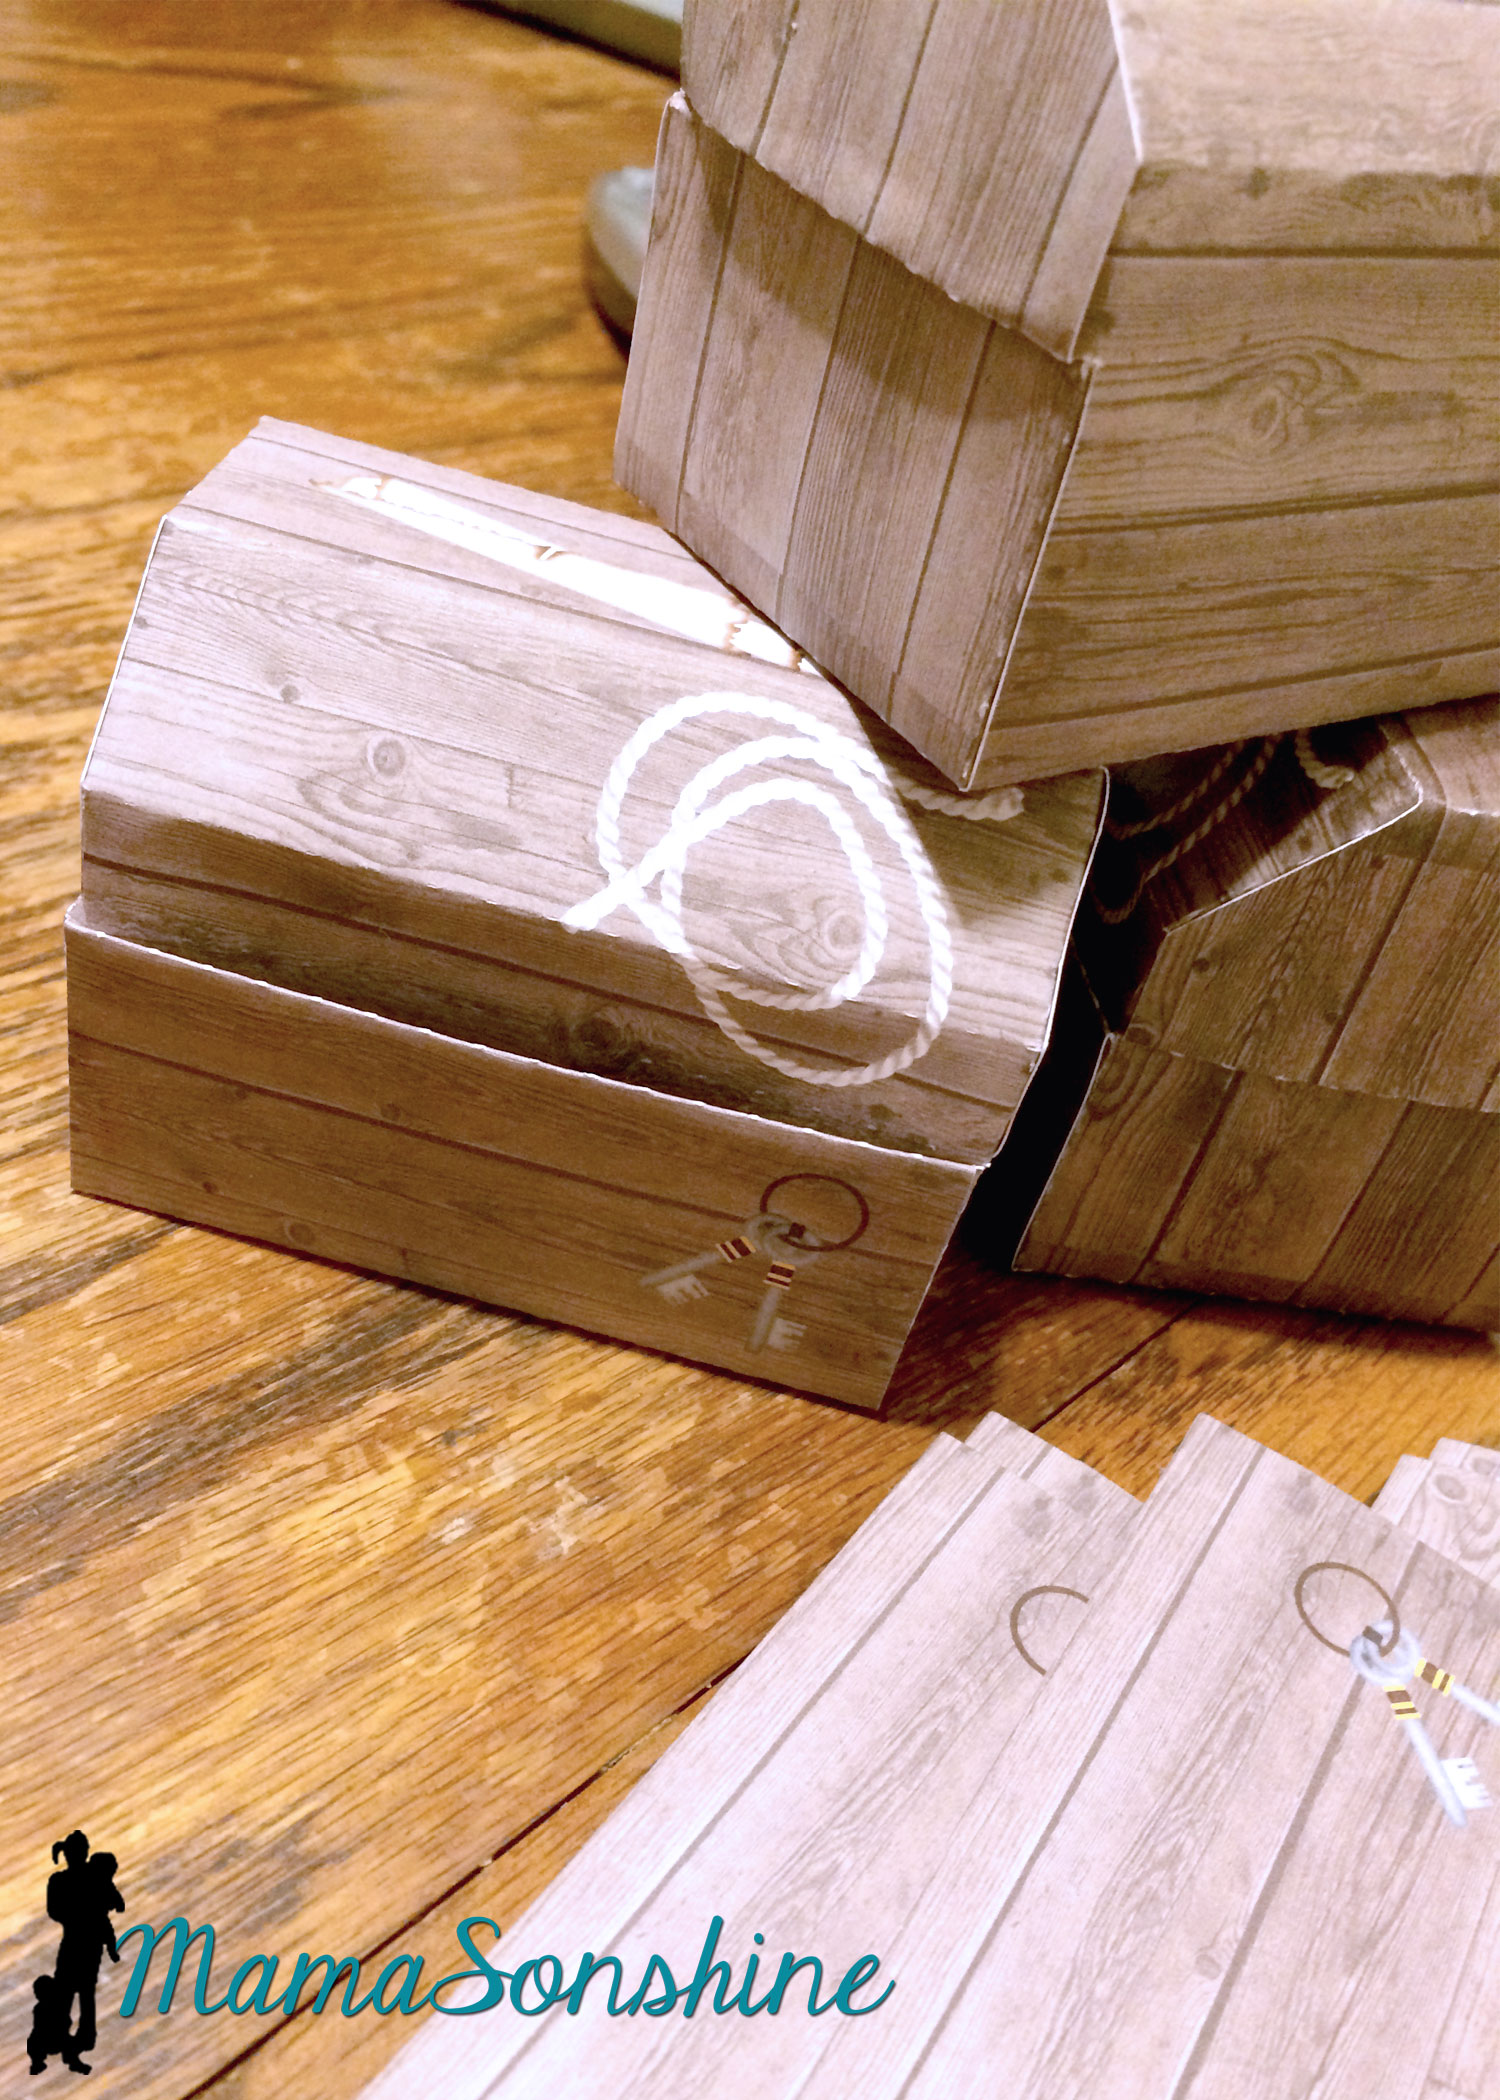
These treasure boxes were too small to be used as the gift boxes, but they made great decorations.
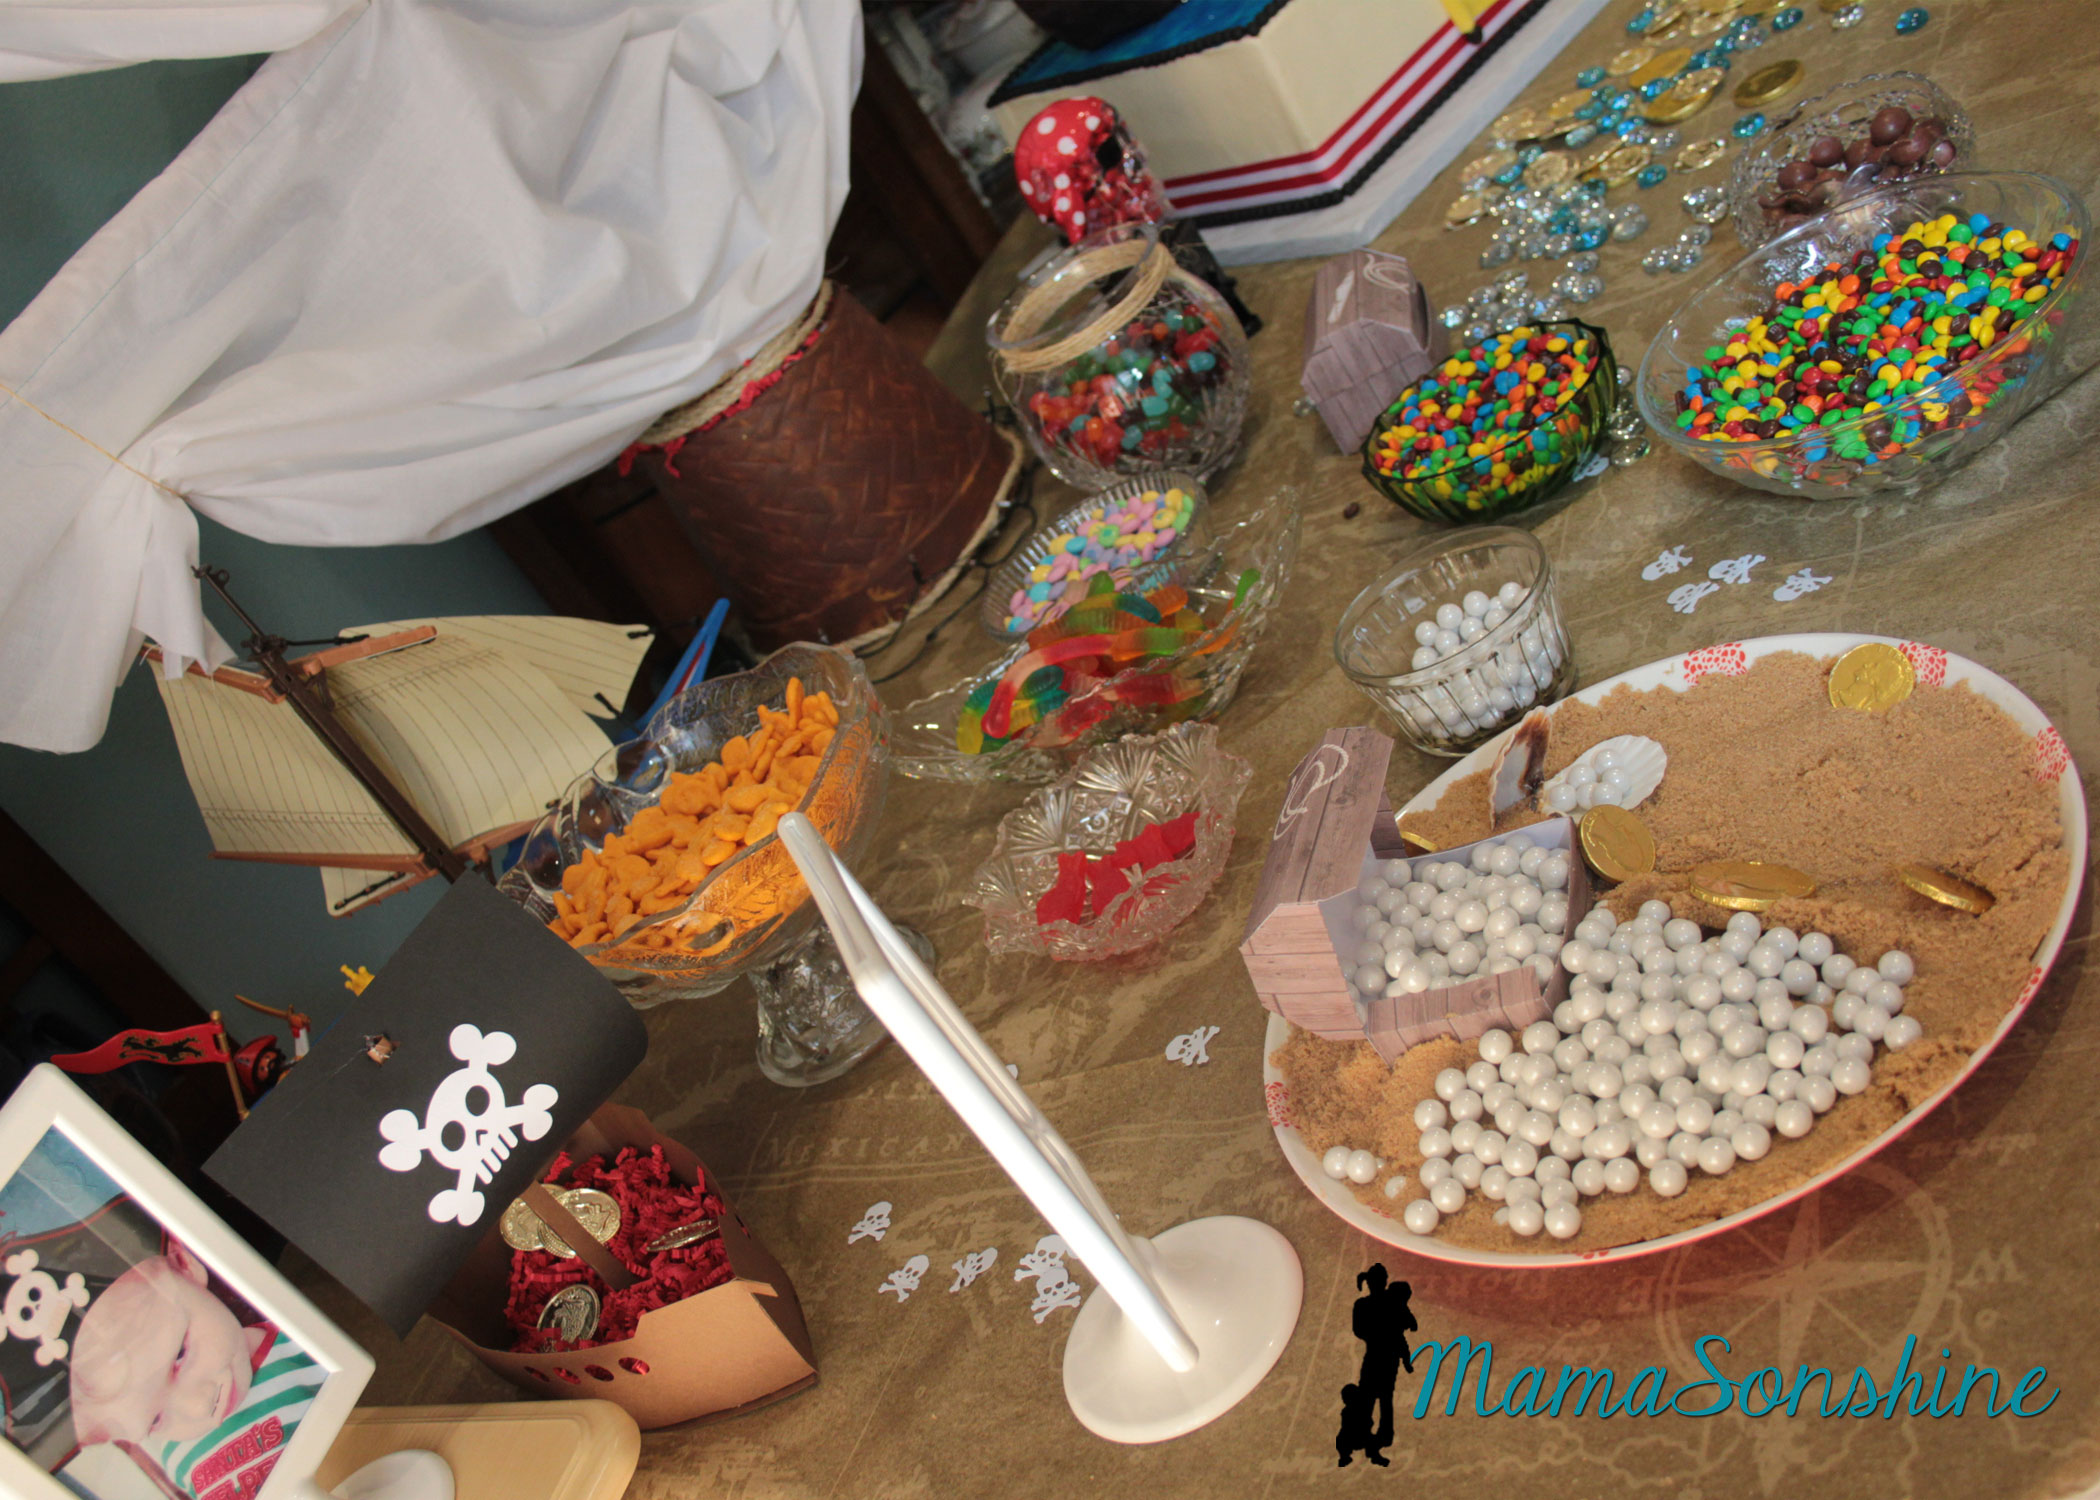
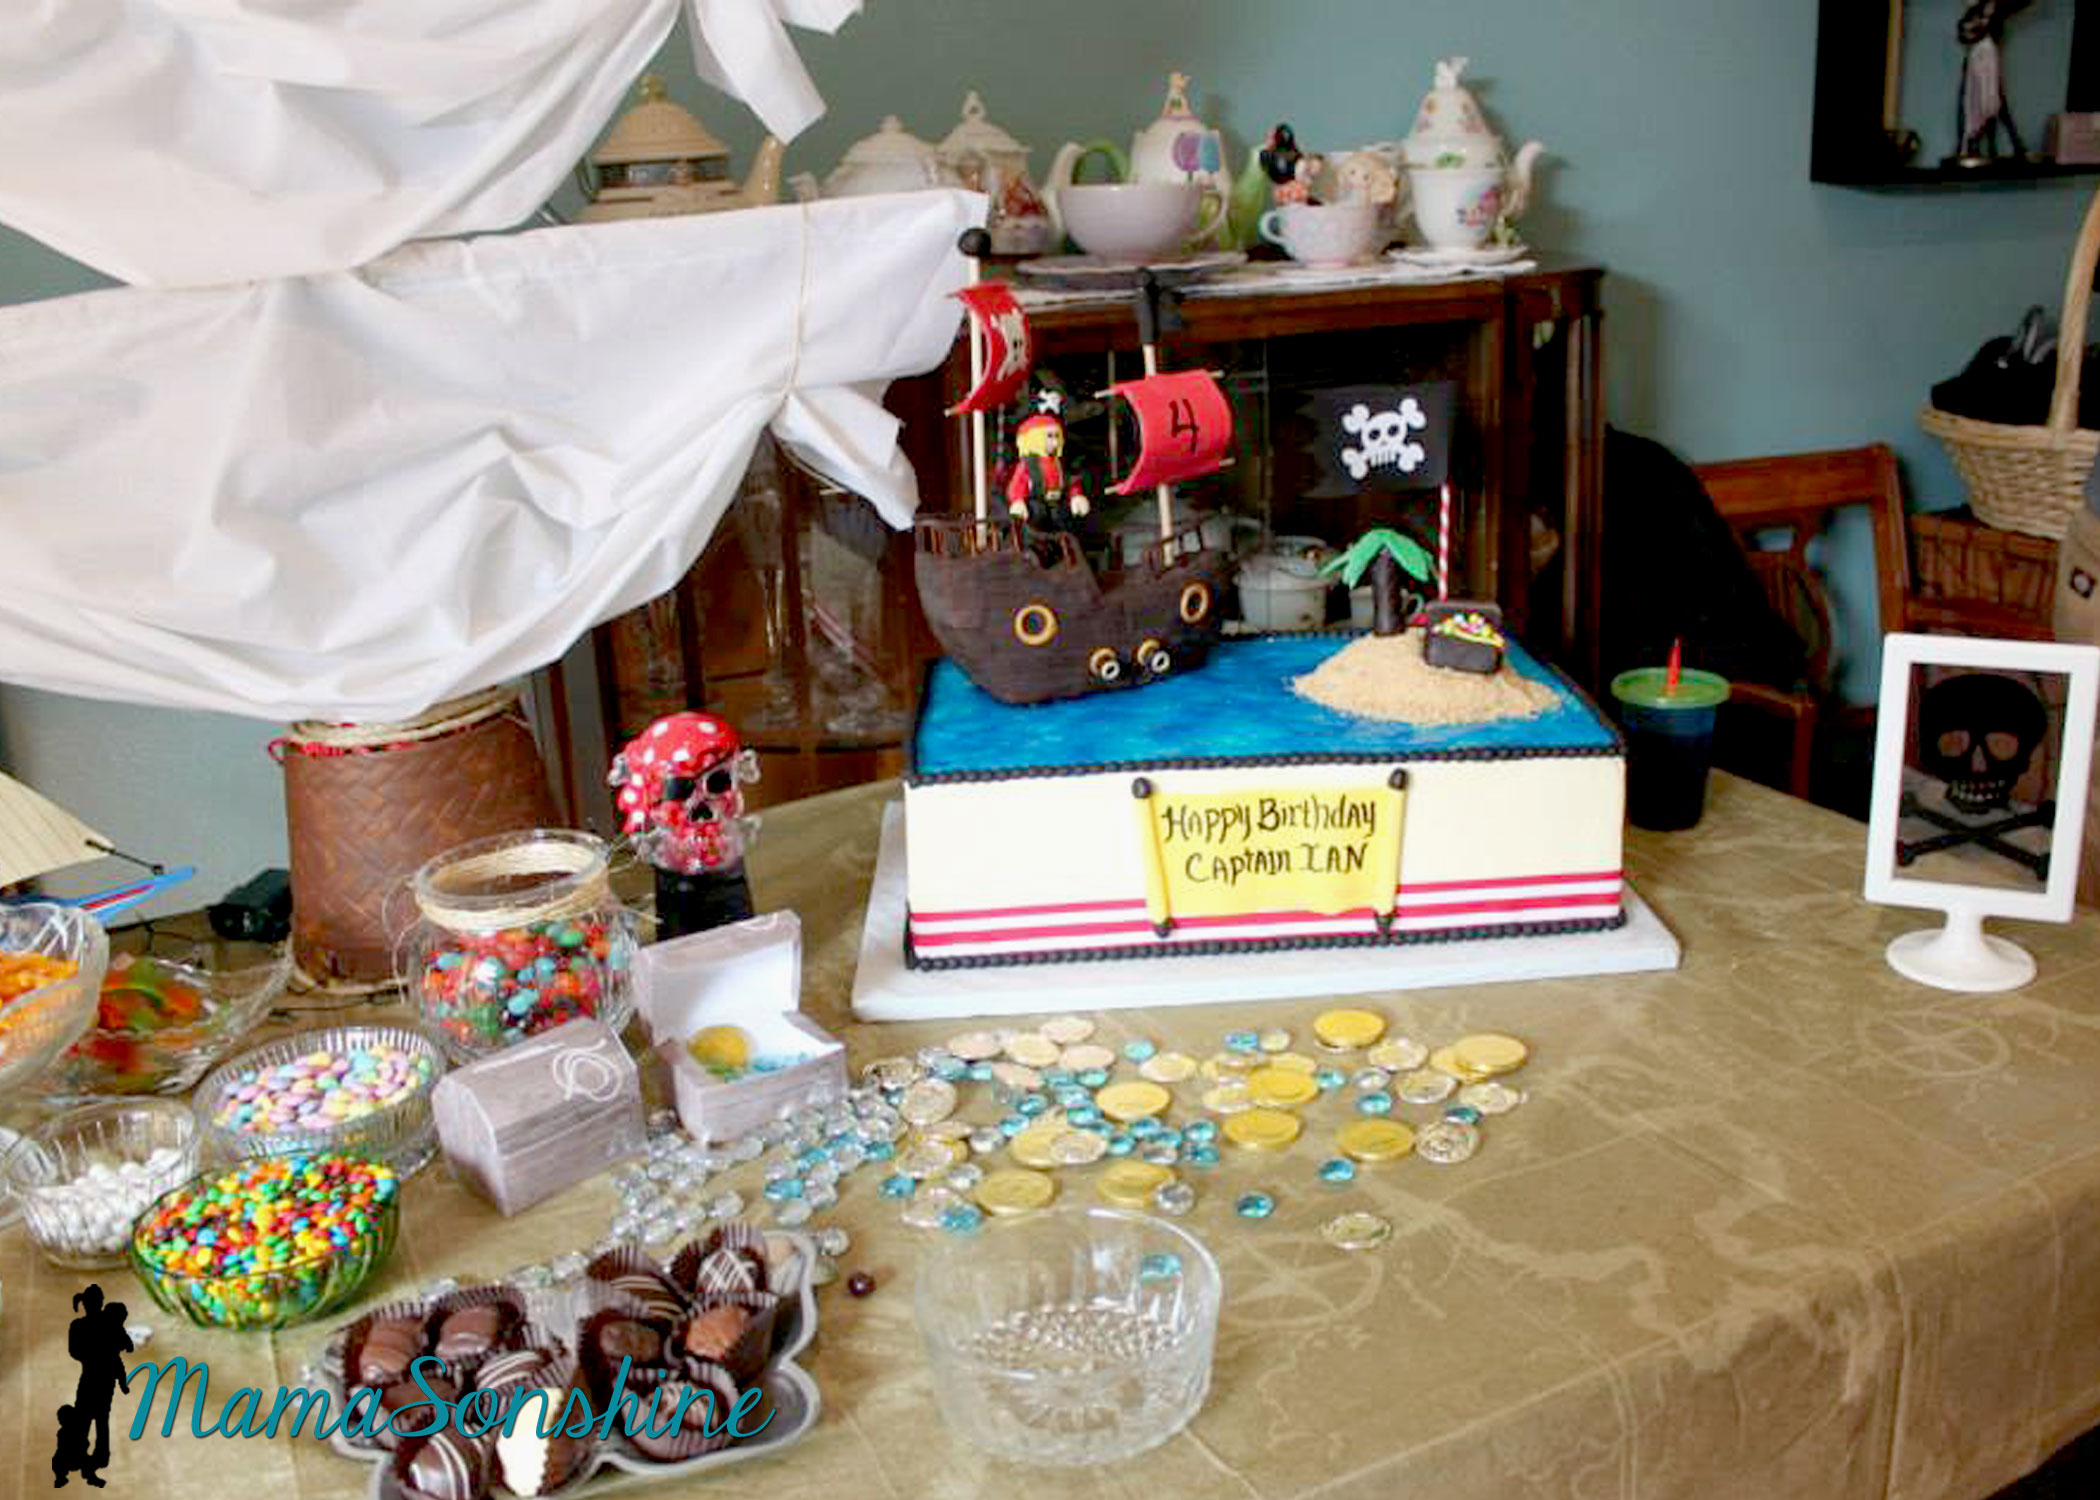
I filled them with glass stones and chocolate gold coins, and had them through out the house.
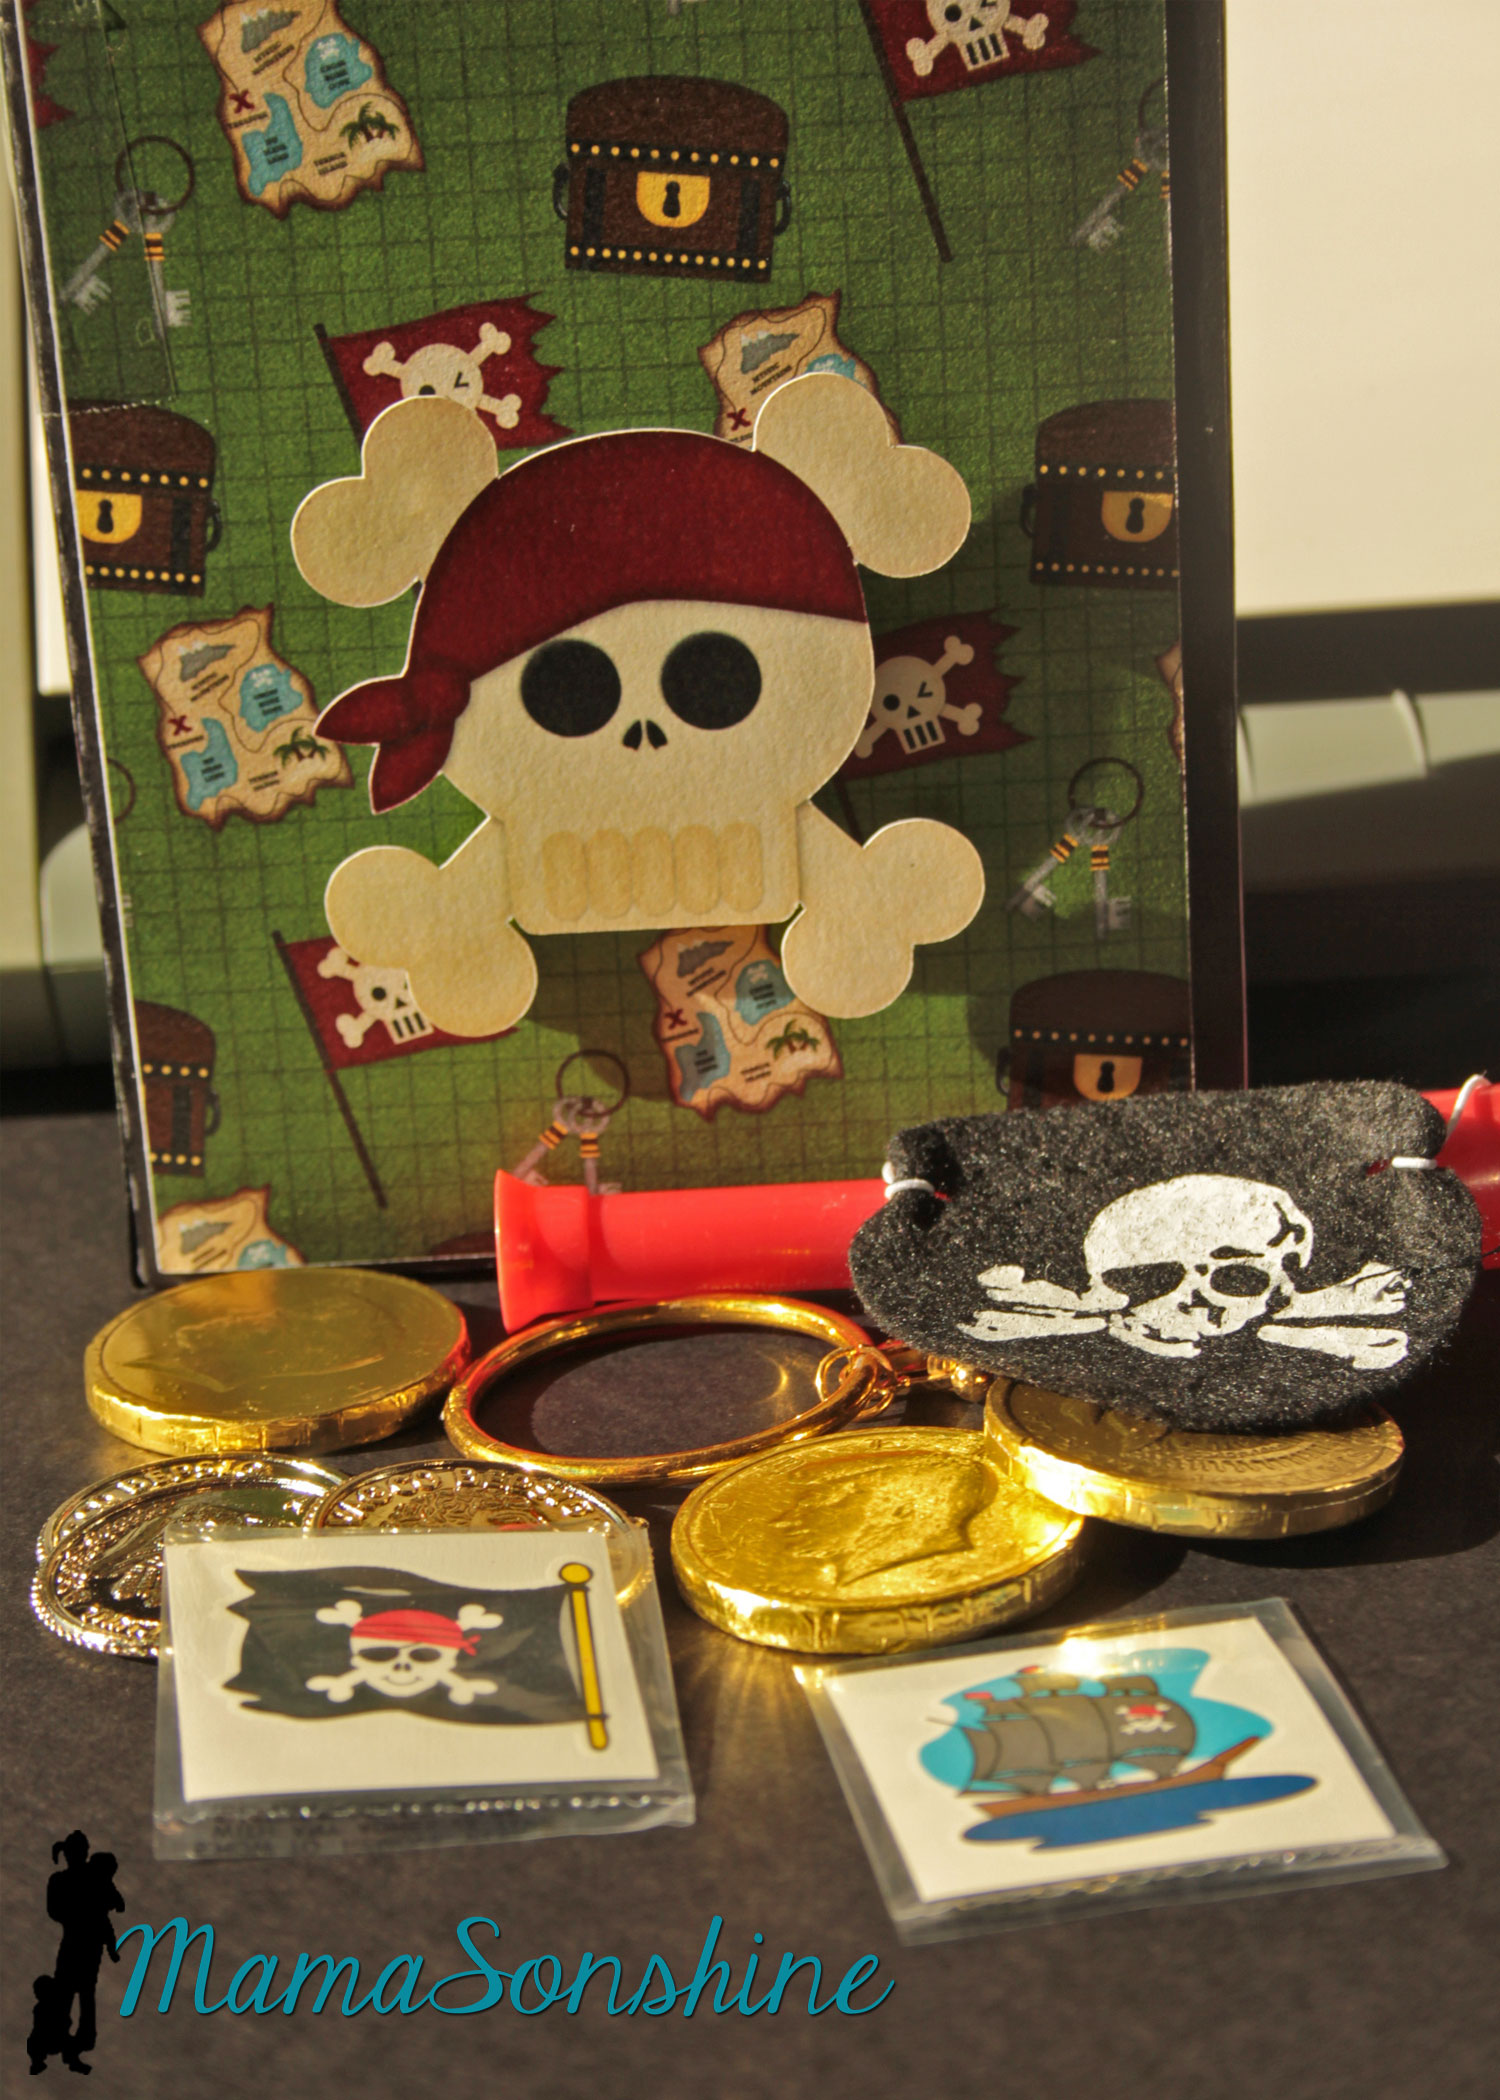
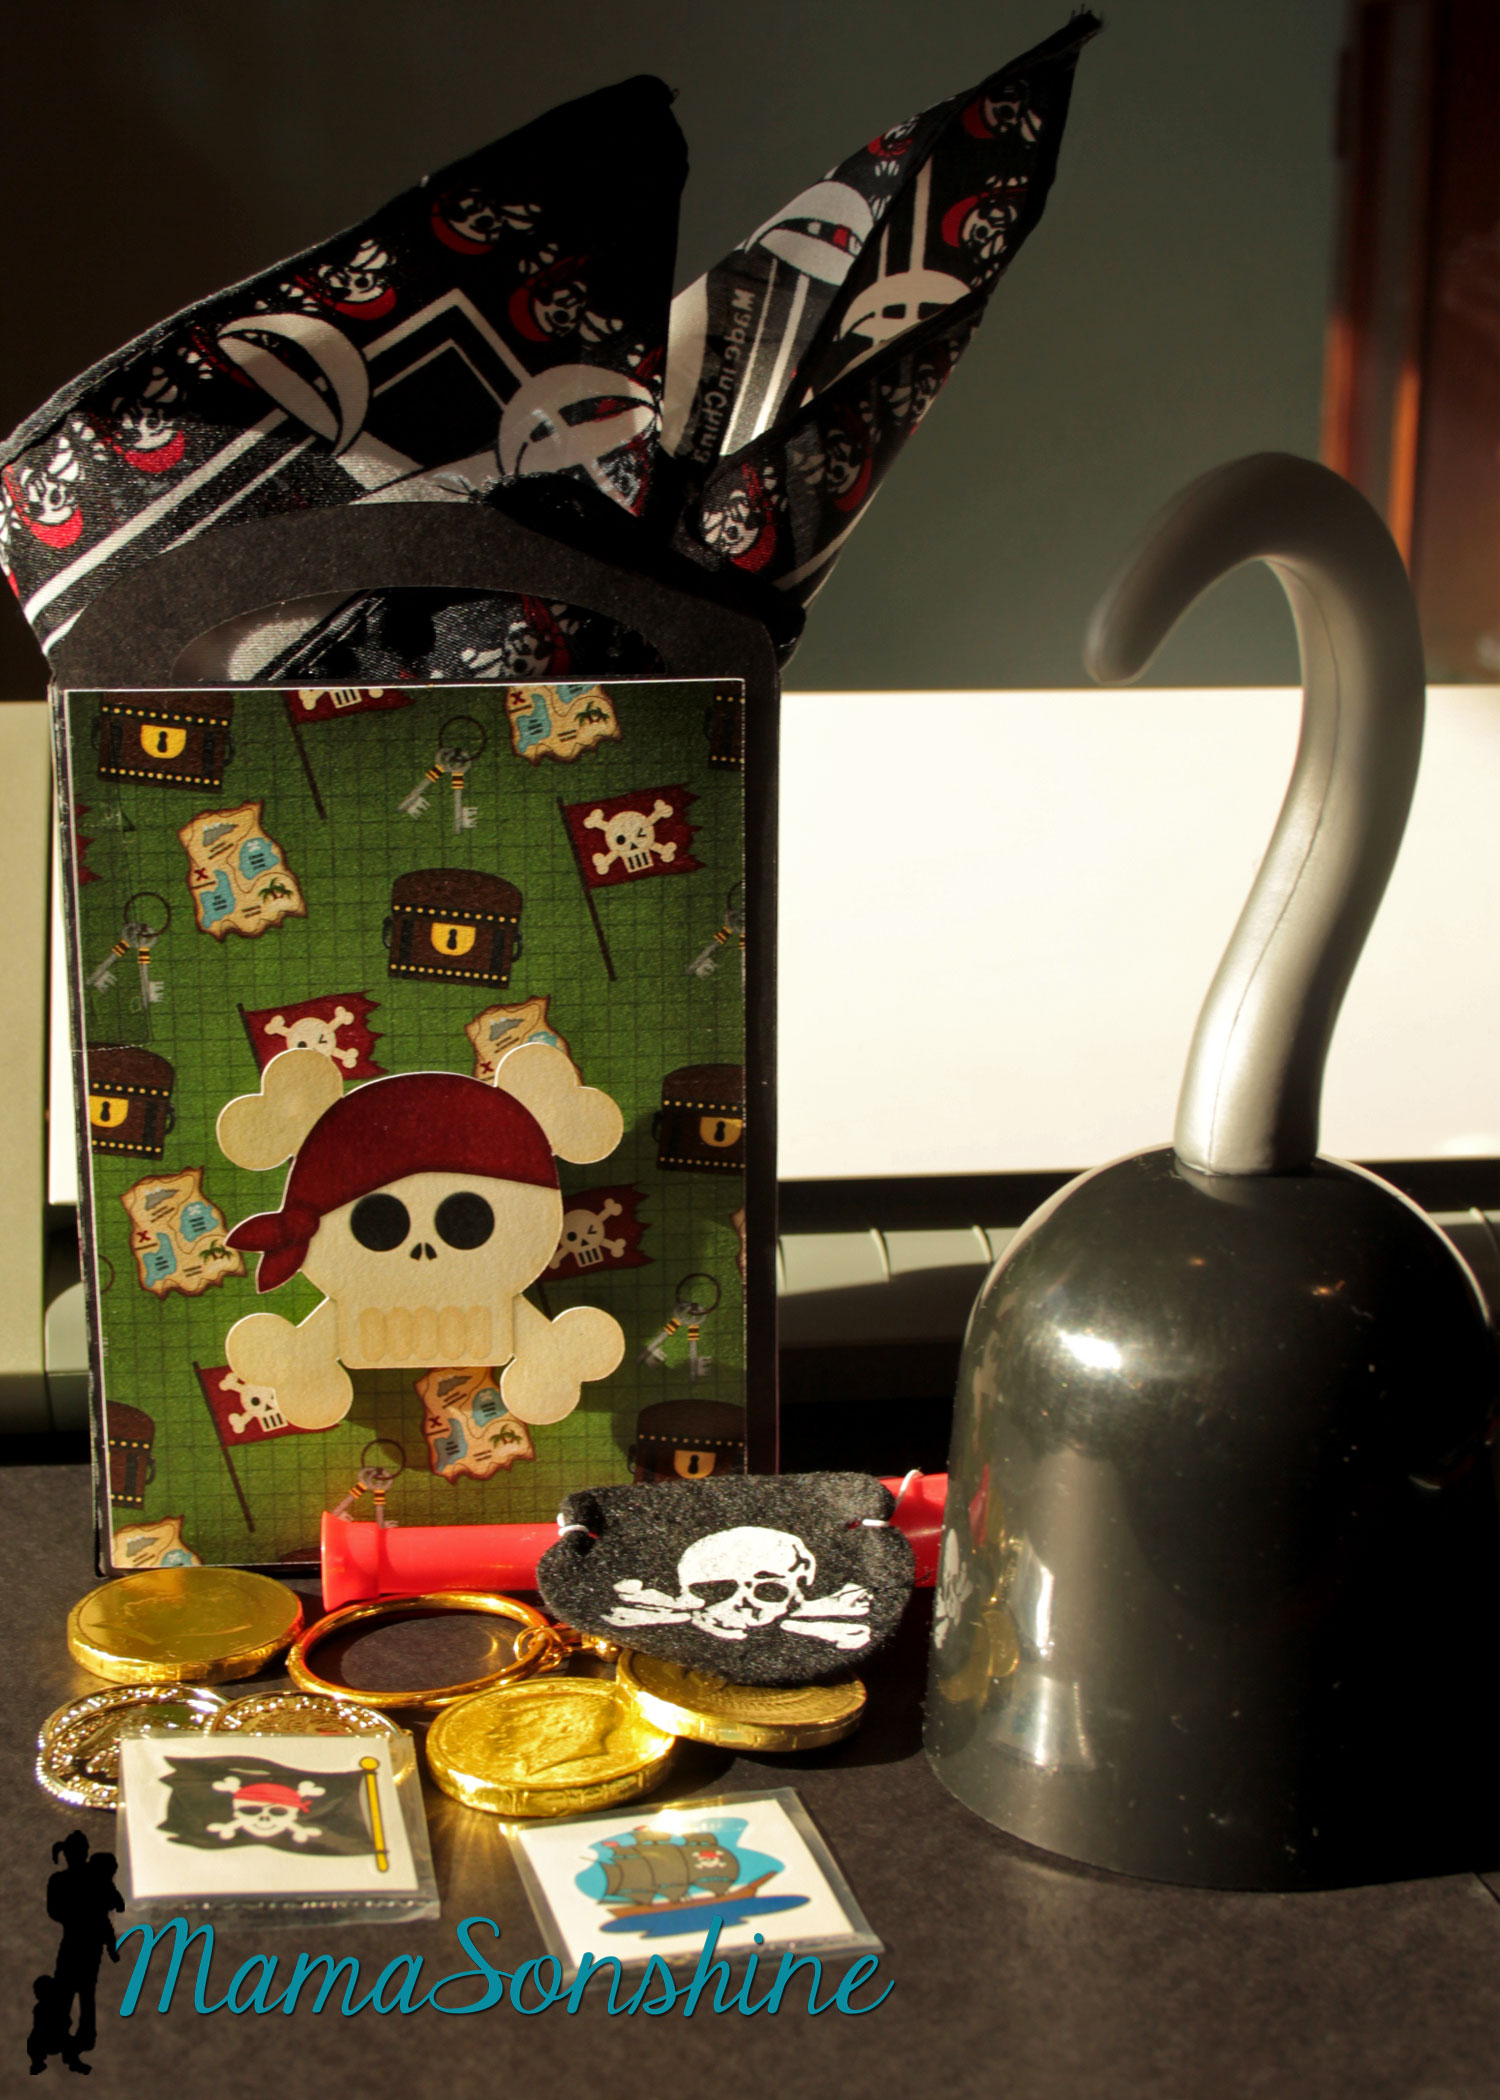
As a guest gift each kid got to take home a hook and a Thank You bag.
The tags say “Thanks me hearties!” I also made the gift bags using the digital papers as the panels for the bags and black card stock for the bag base. I used a variety of the papers included in the kit. The skull was attached with foam dimensional tabs.
Each bag had a pirate bandanna, an eye patch, a pirate ear-ring, some tattoos, cold coins, chocolate coins, and a telescope.
The hooks wouldn’t fit in the bag, so the kids got to get them out of a basket.
The Table
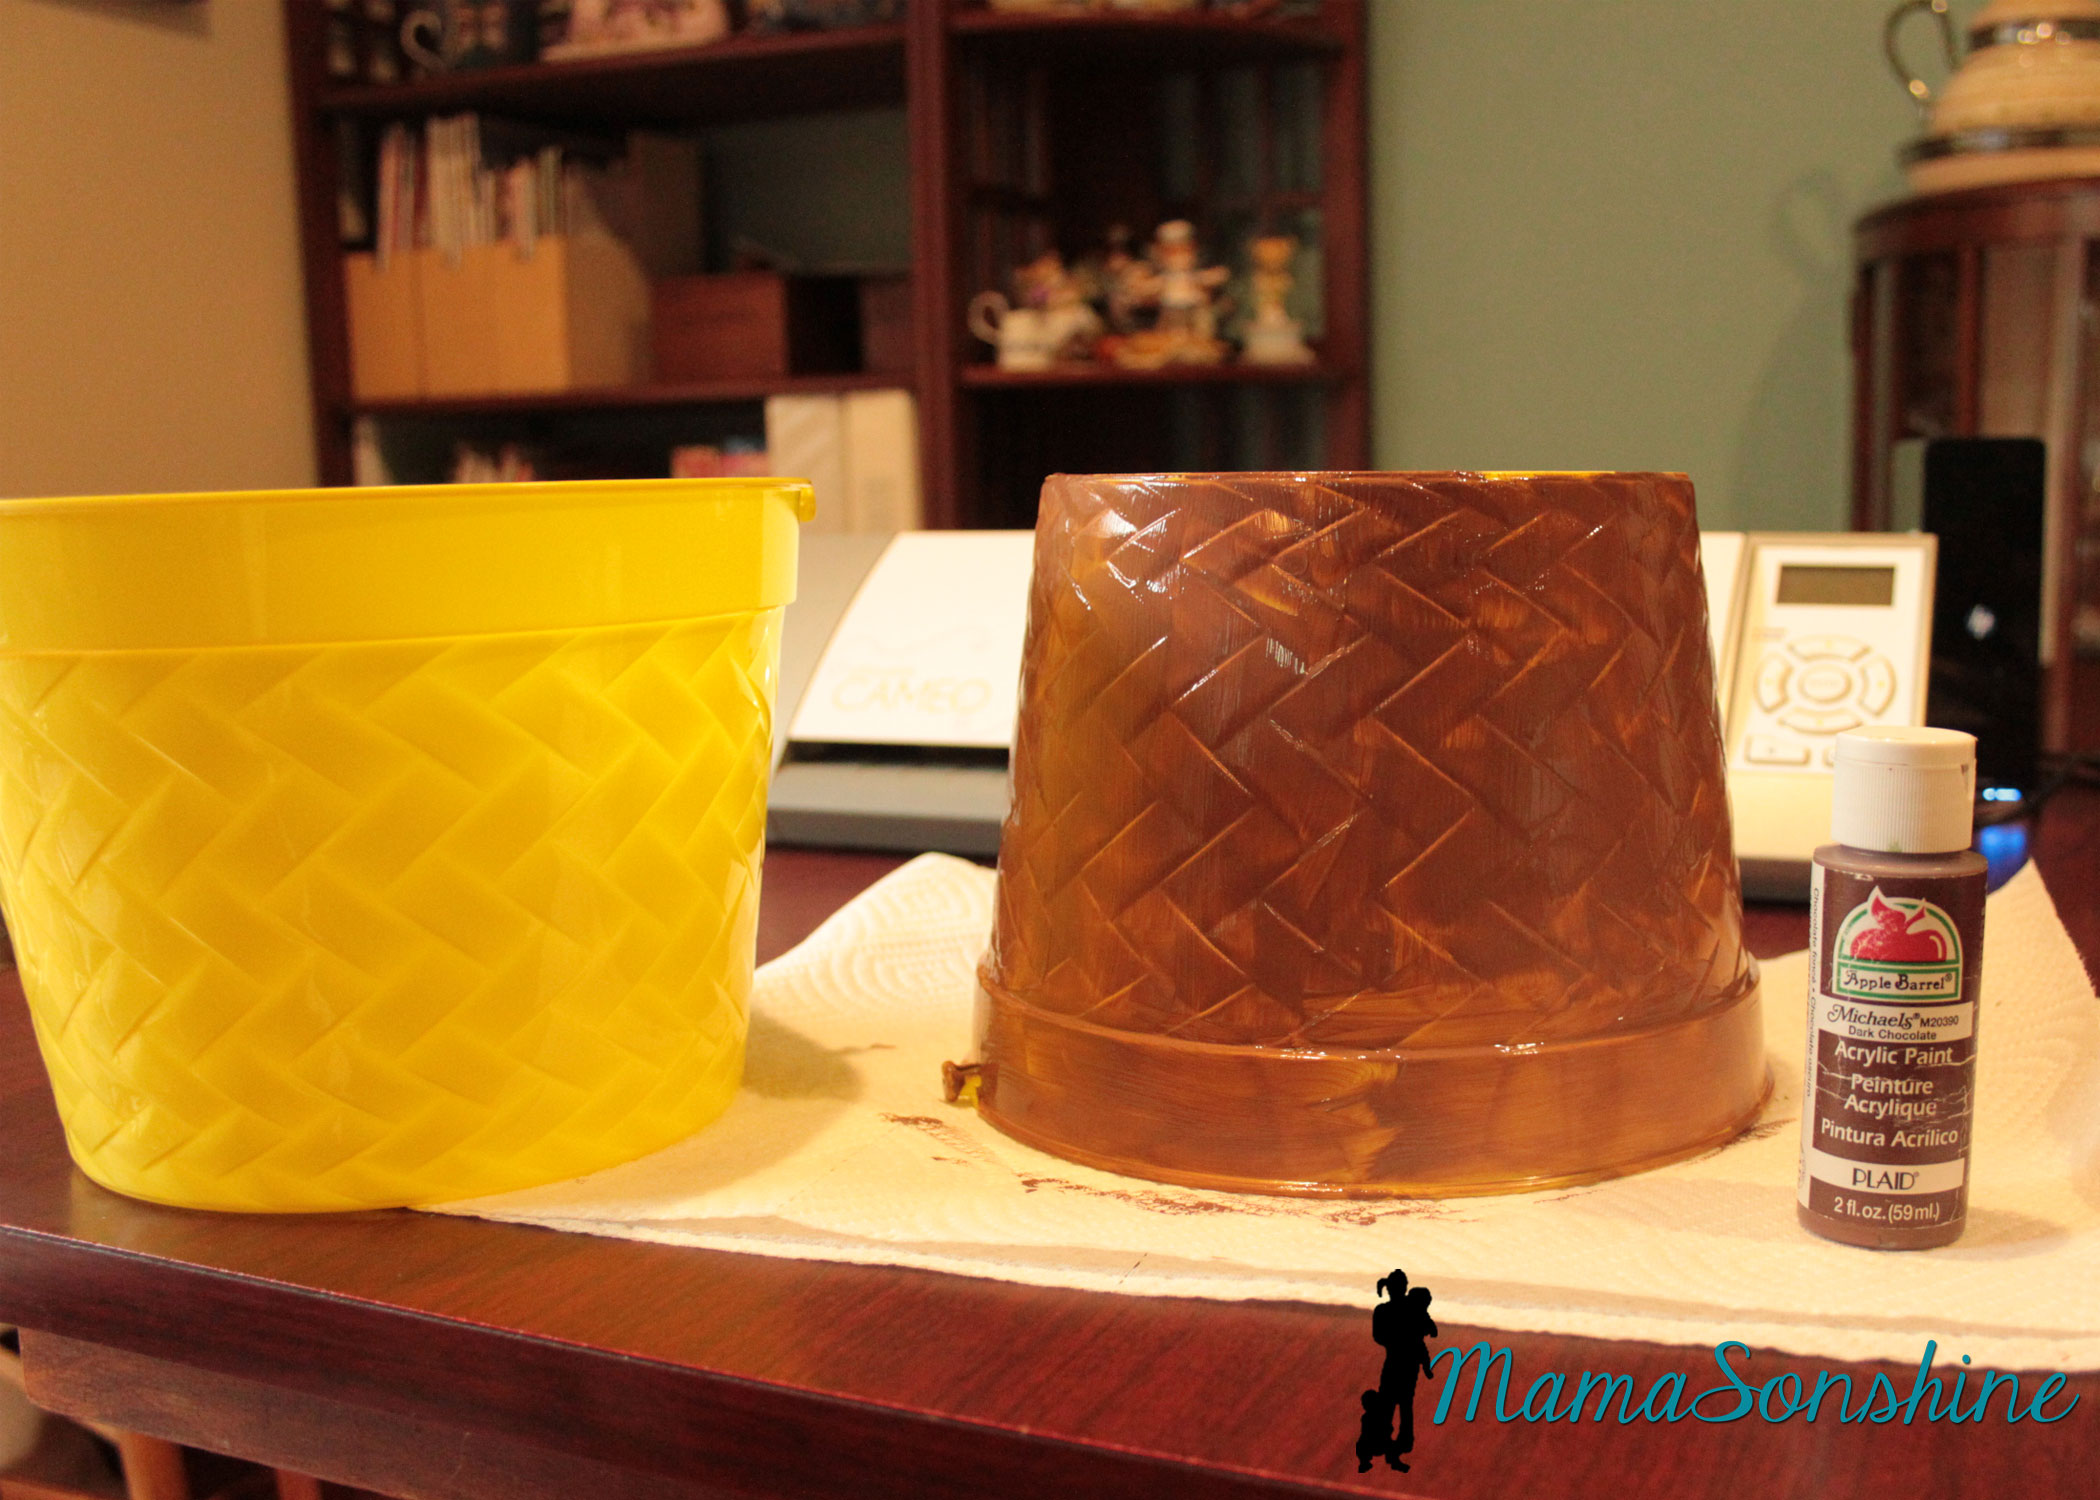
For the table center piece I took these Easter buckets I got at the dollar store and transformed them in to a mast from a boat.
I actually envisioned it much bigger, but the wooden dowels I had, limited the size.
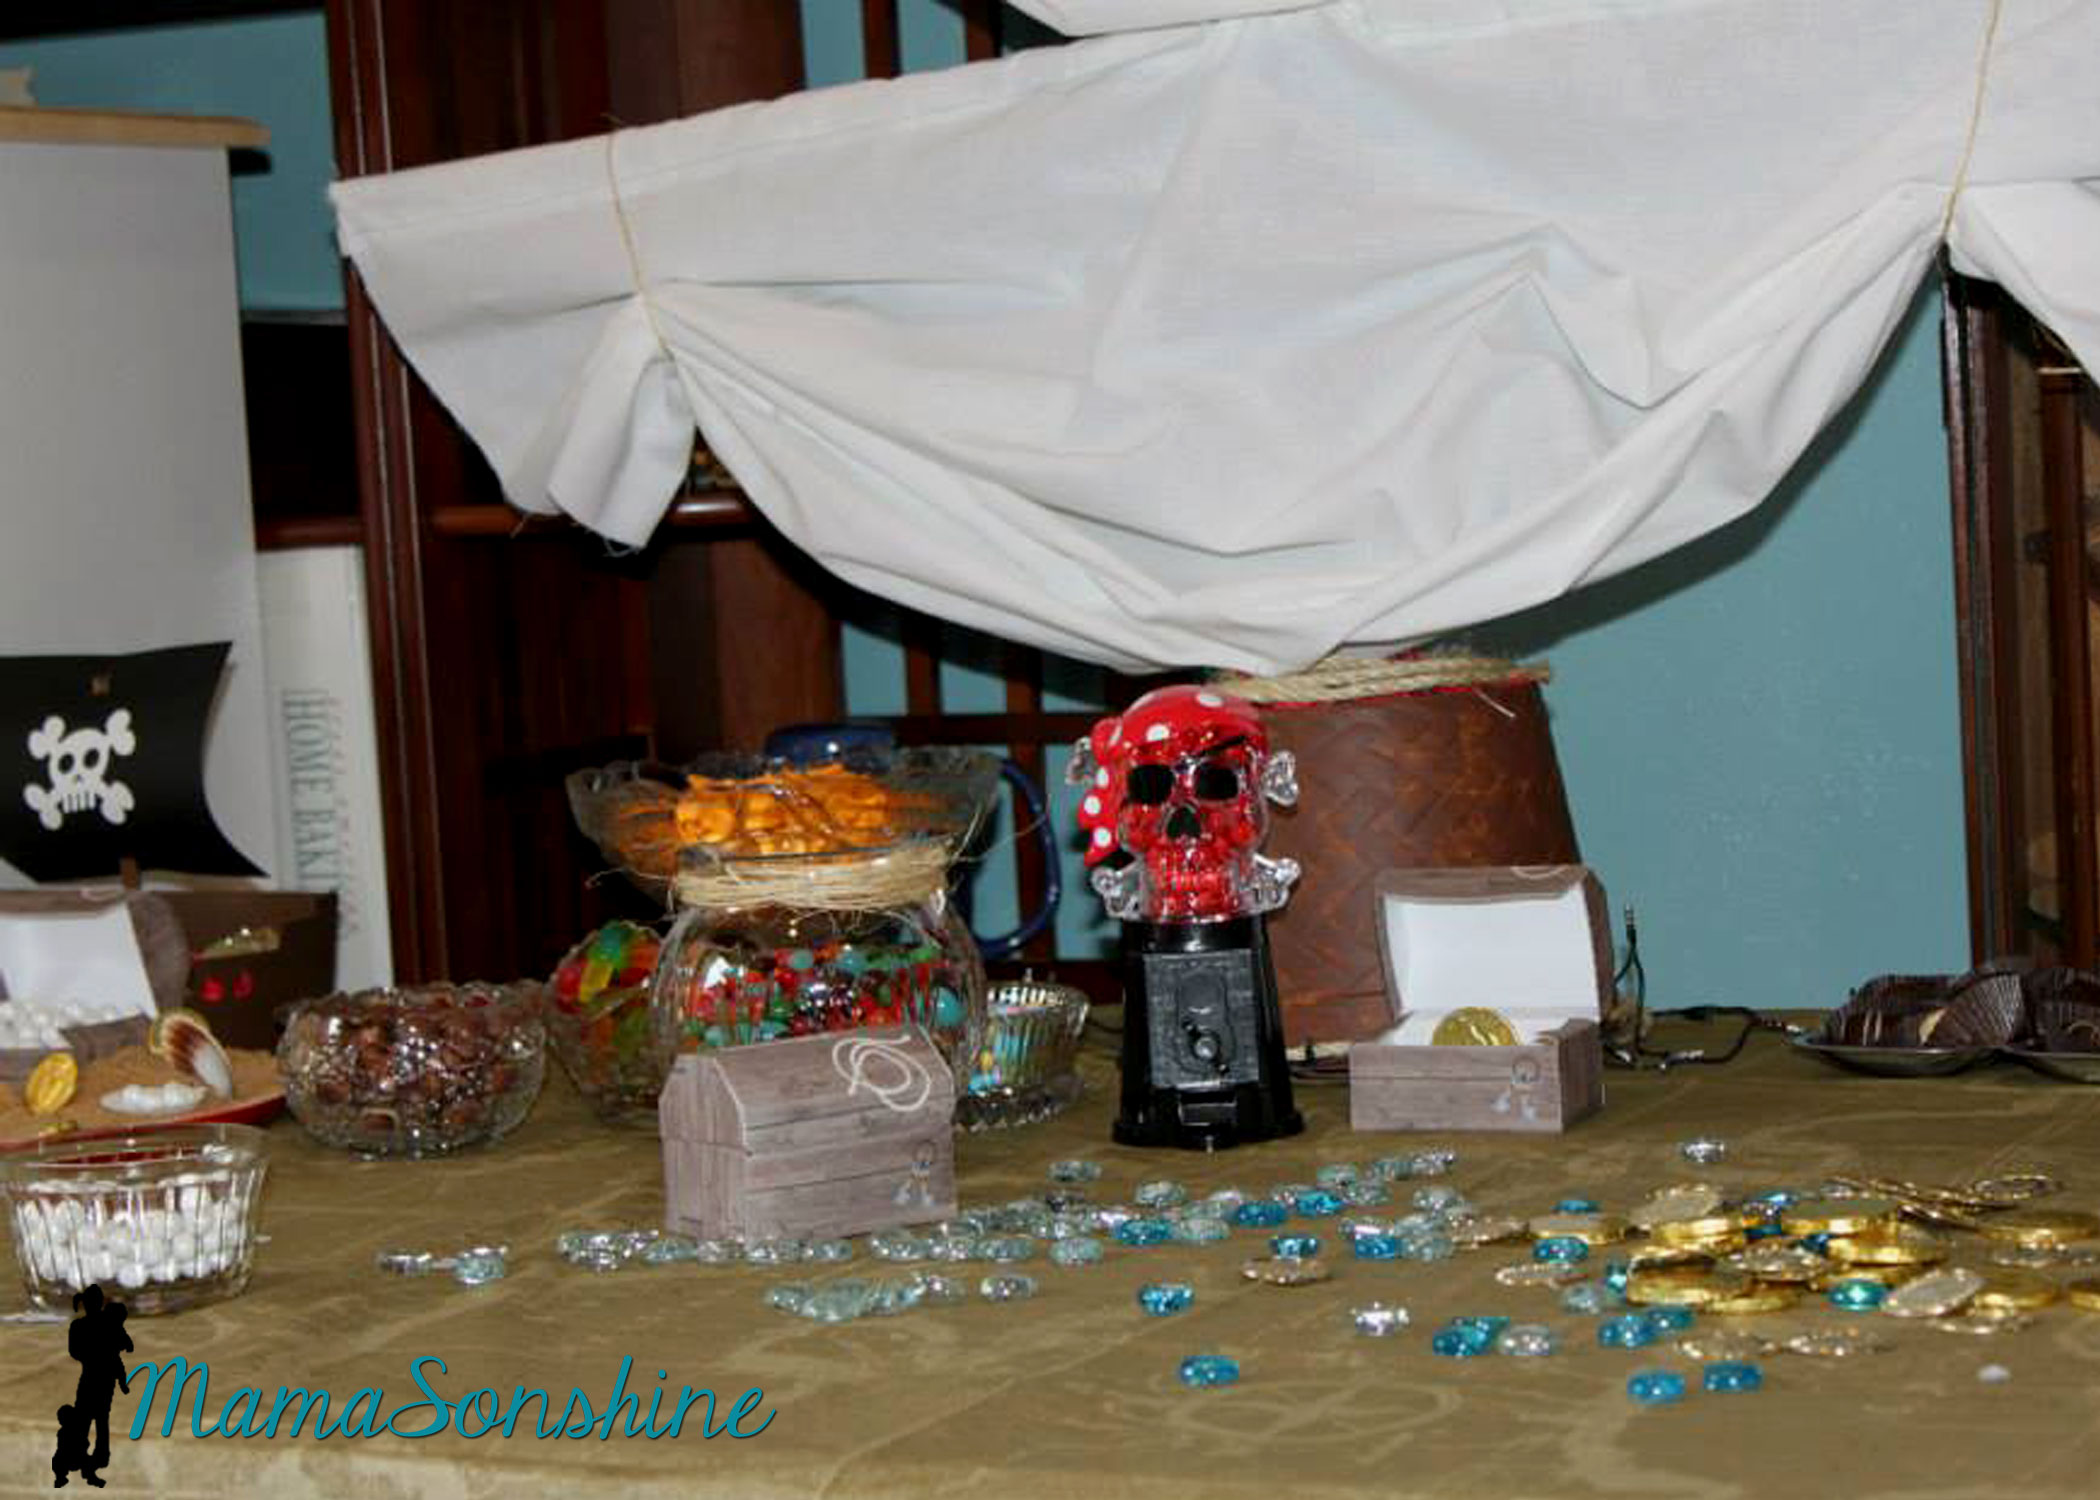
Using the idea from Sid’s beach party, I made a plate with brown sugar sand and pearls (Sixlets) coming out of one of the paper treasure chests.
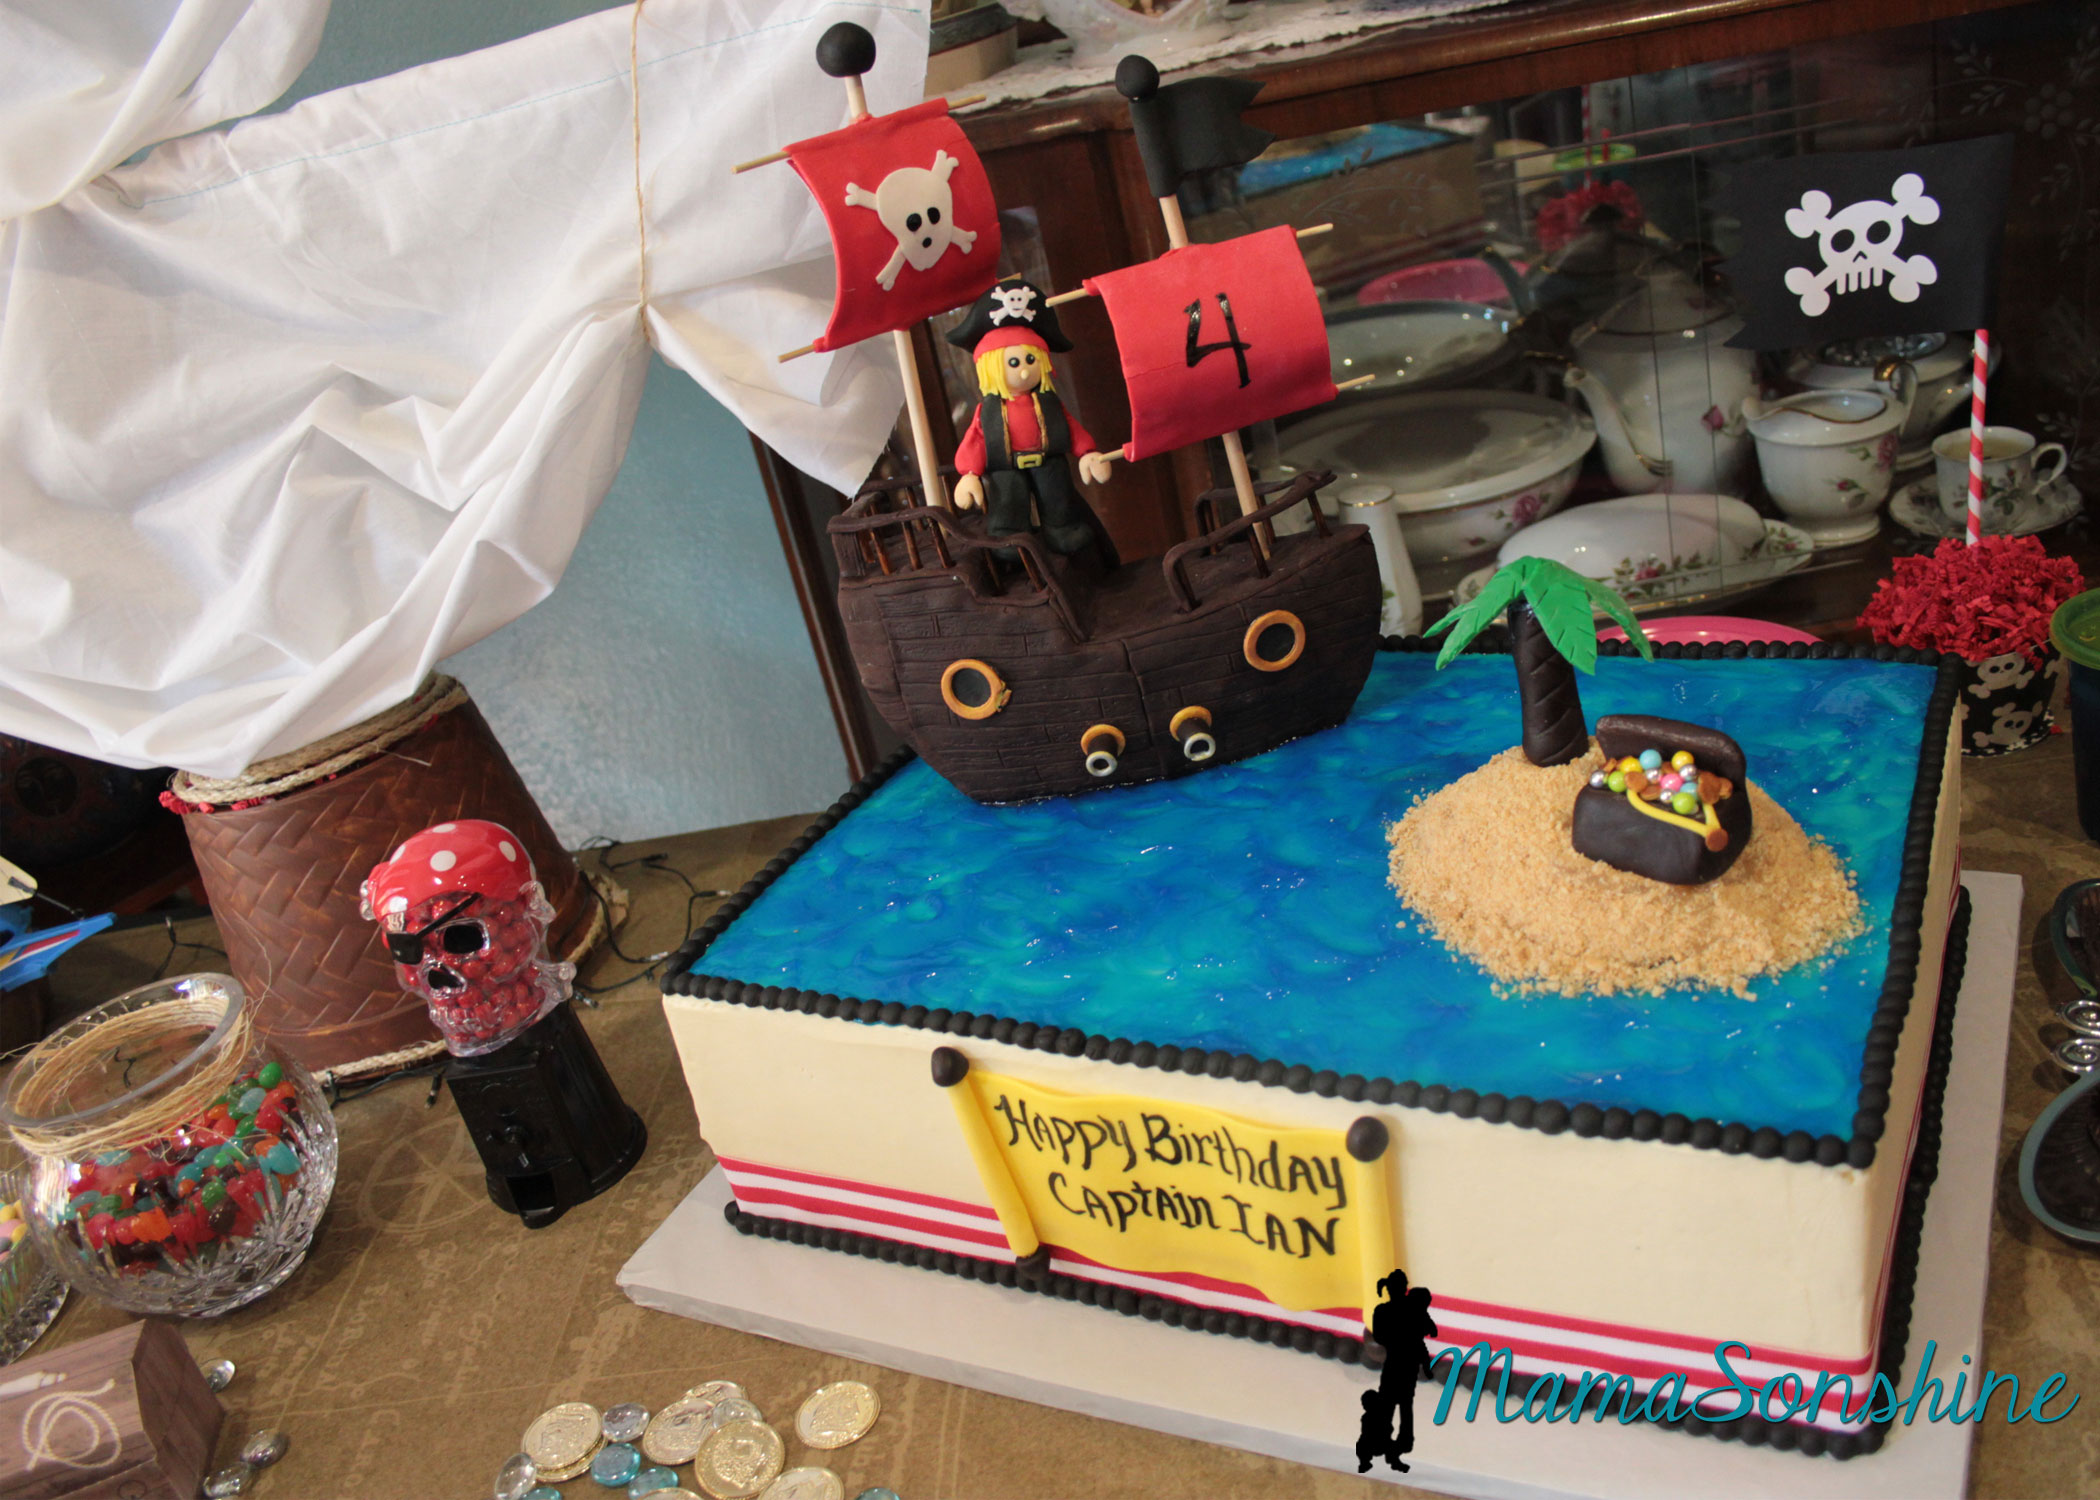
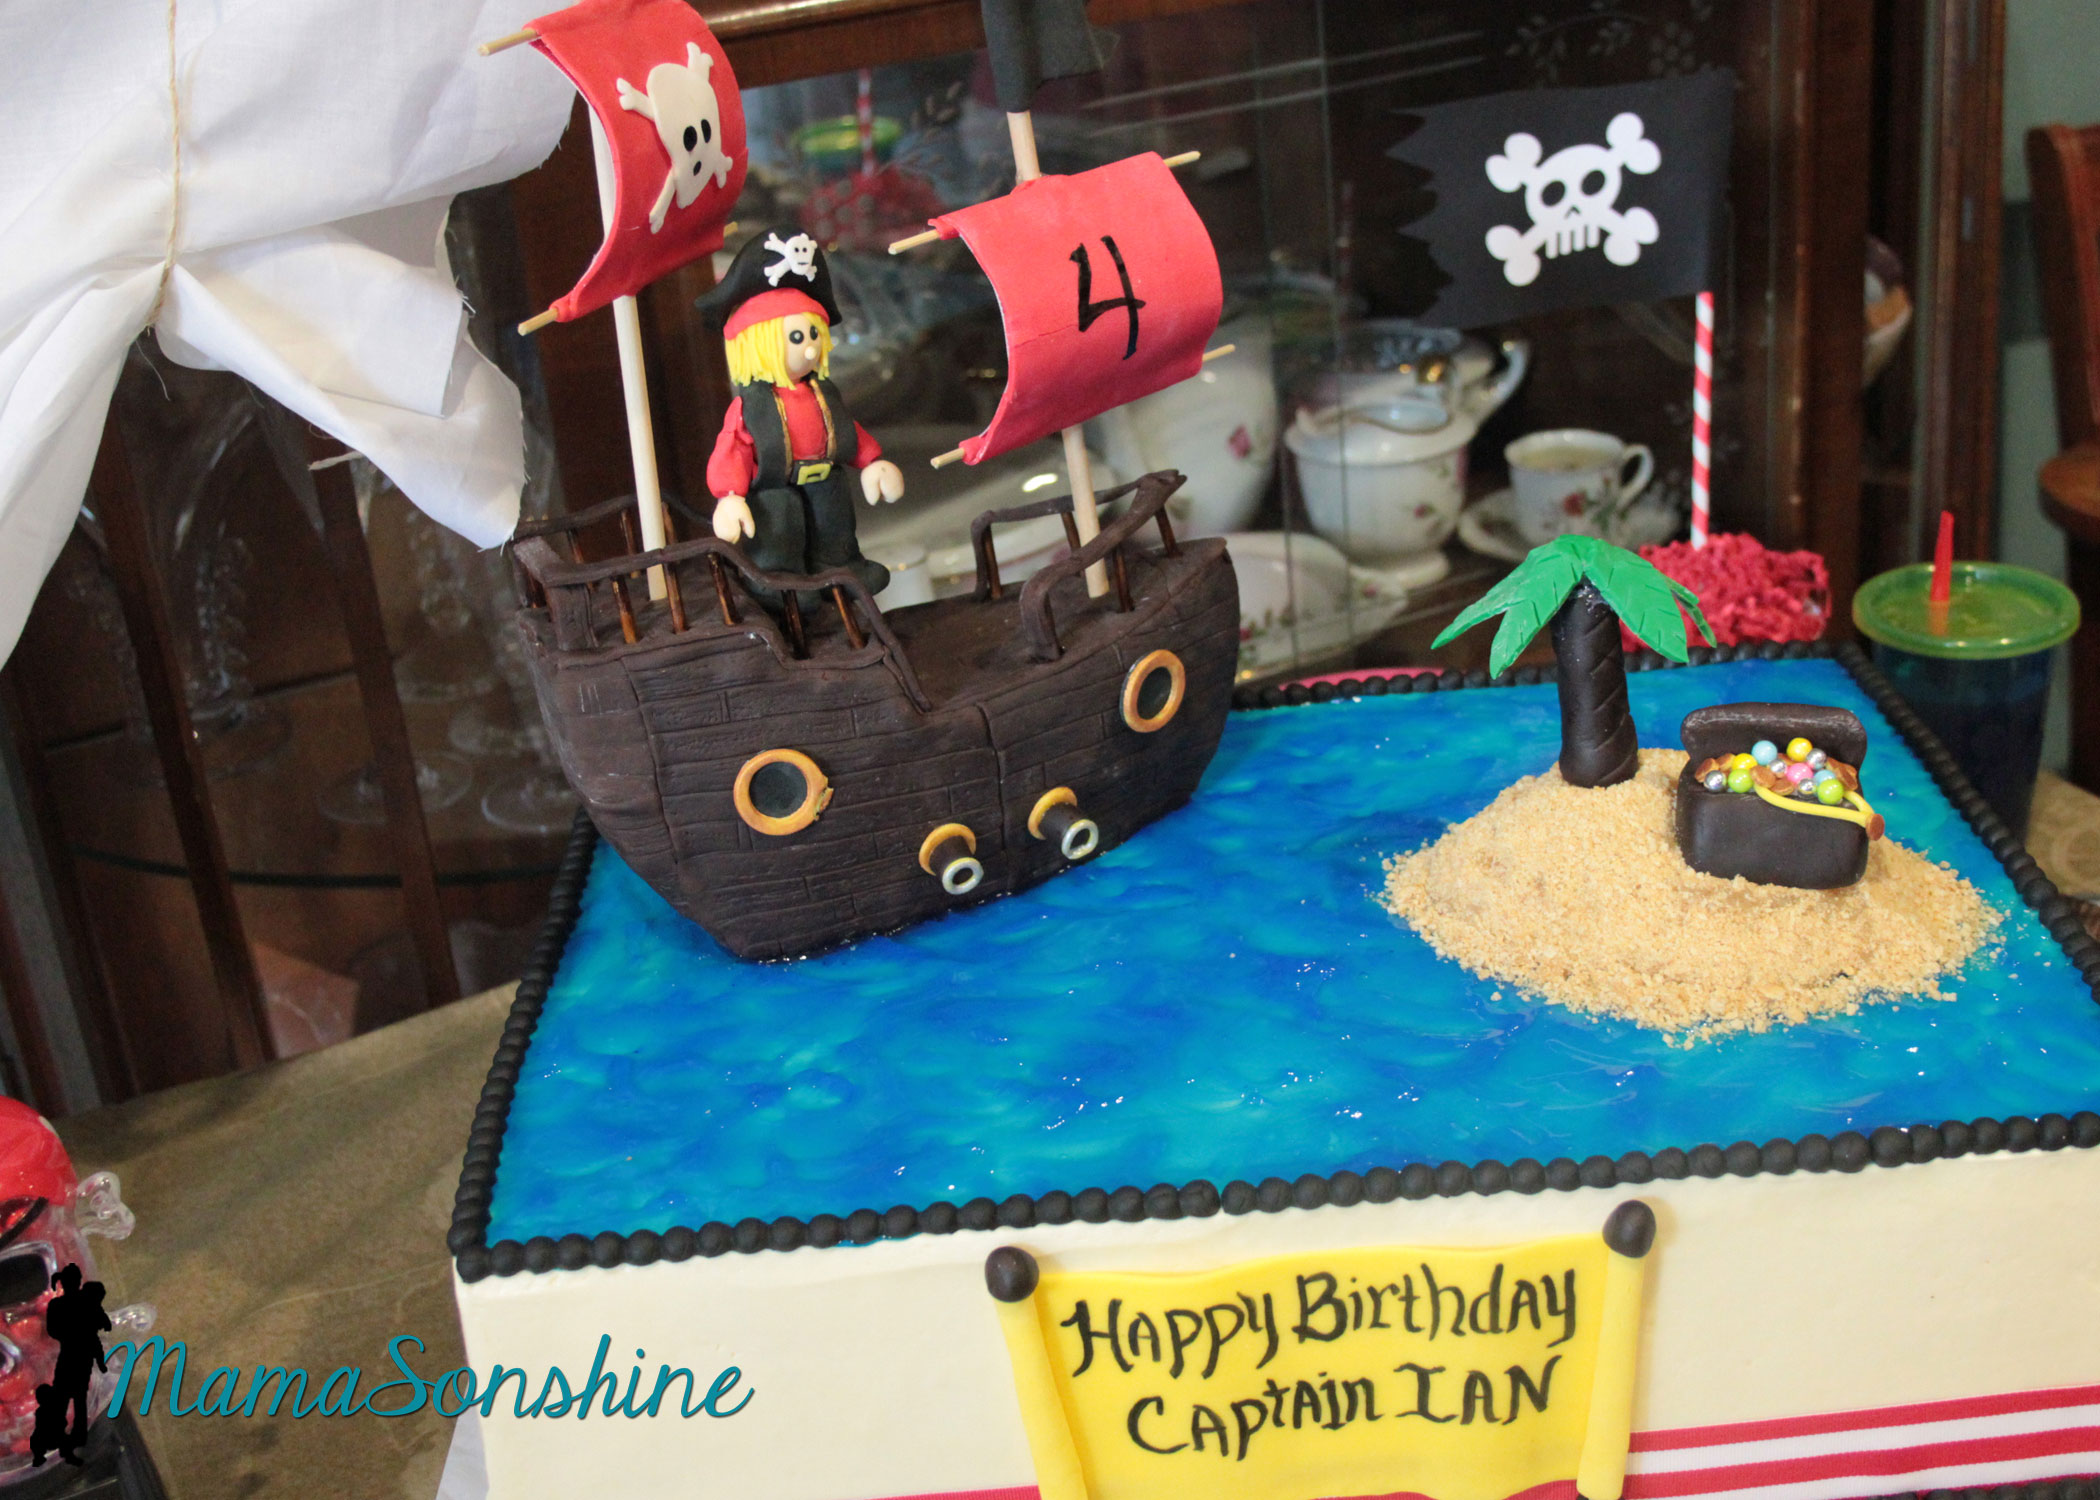
The cake
I did not make the cake, this awesome creation was made by my aunt.
This table-cloth was the most expensive paper table-cloth I have ever purchased, but I absolutely loved it. The skull candy dispenser was the one thing my son said he had to have at his pirate party.
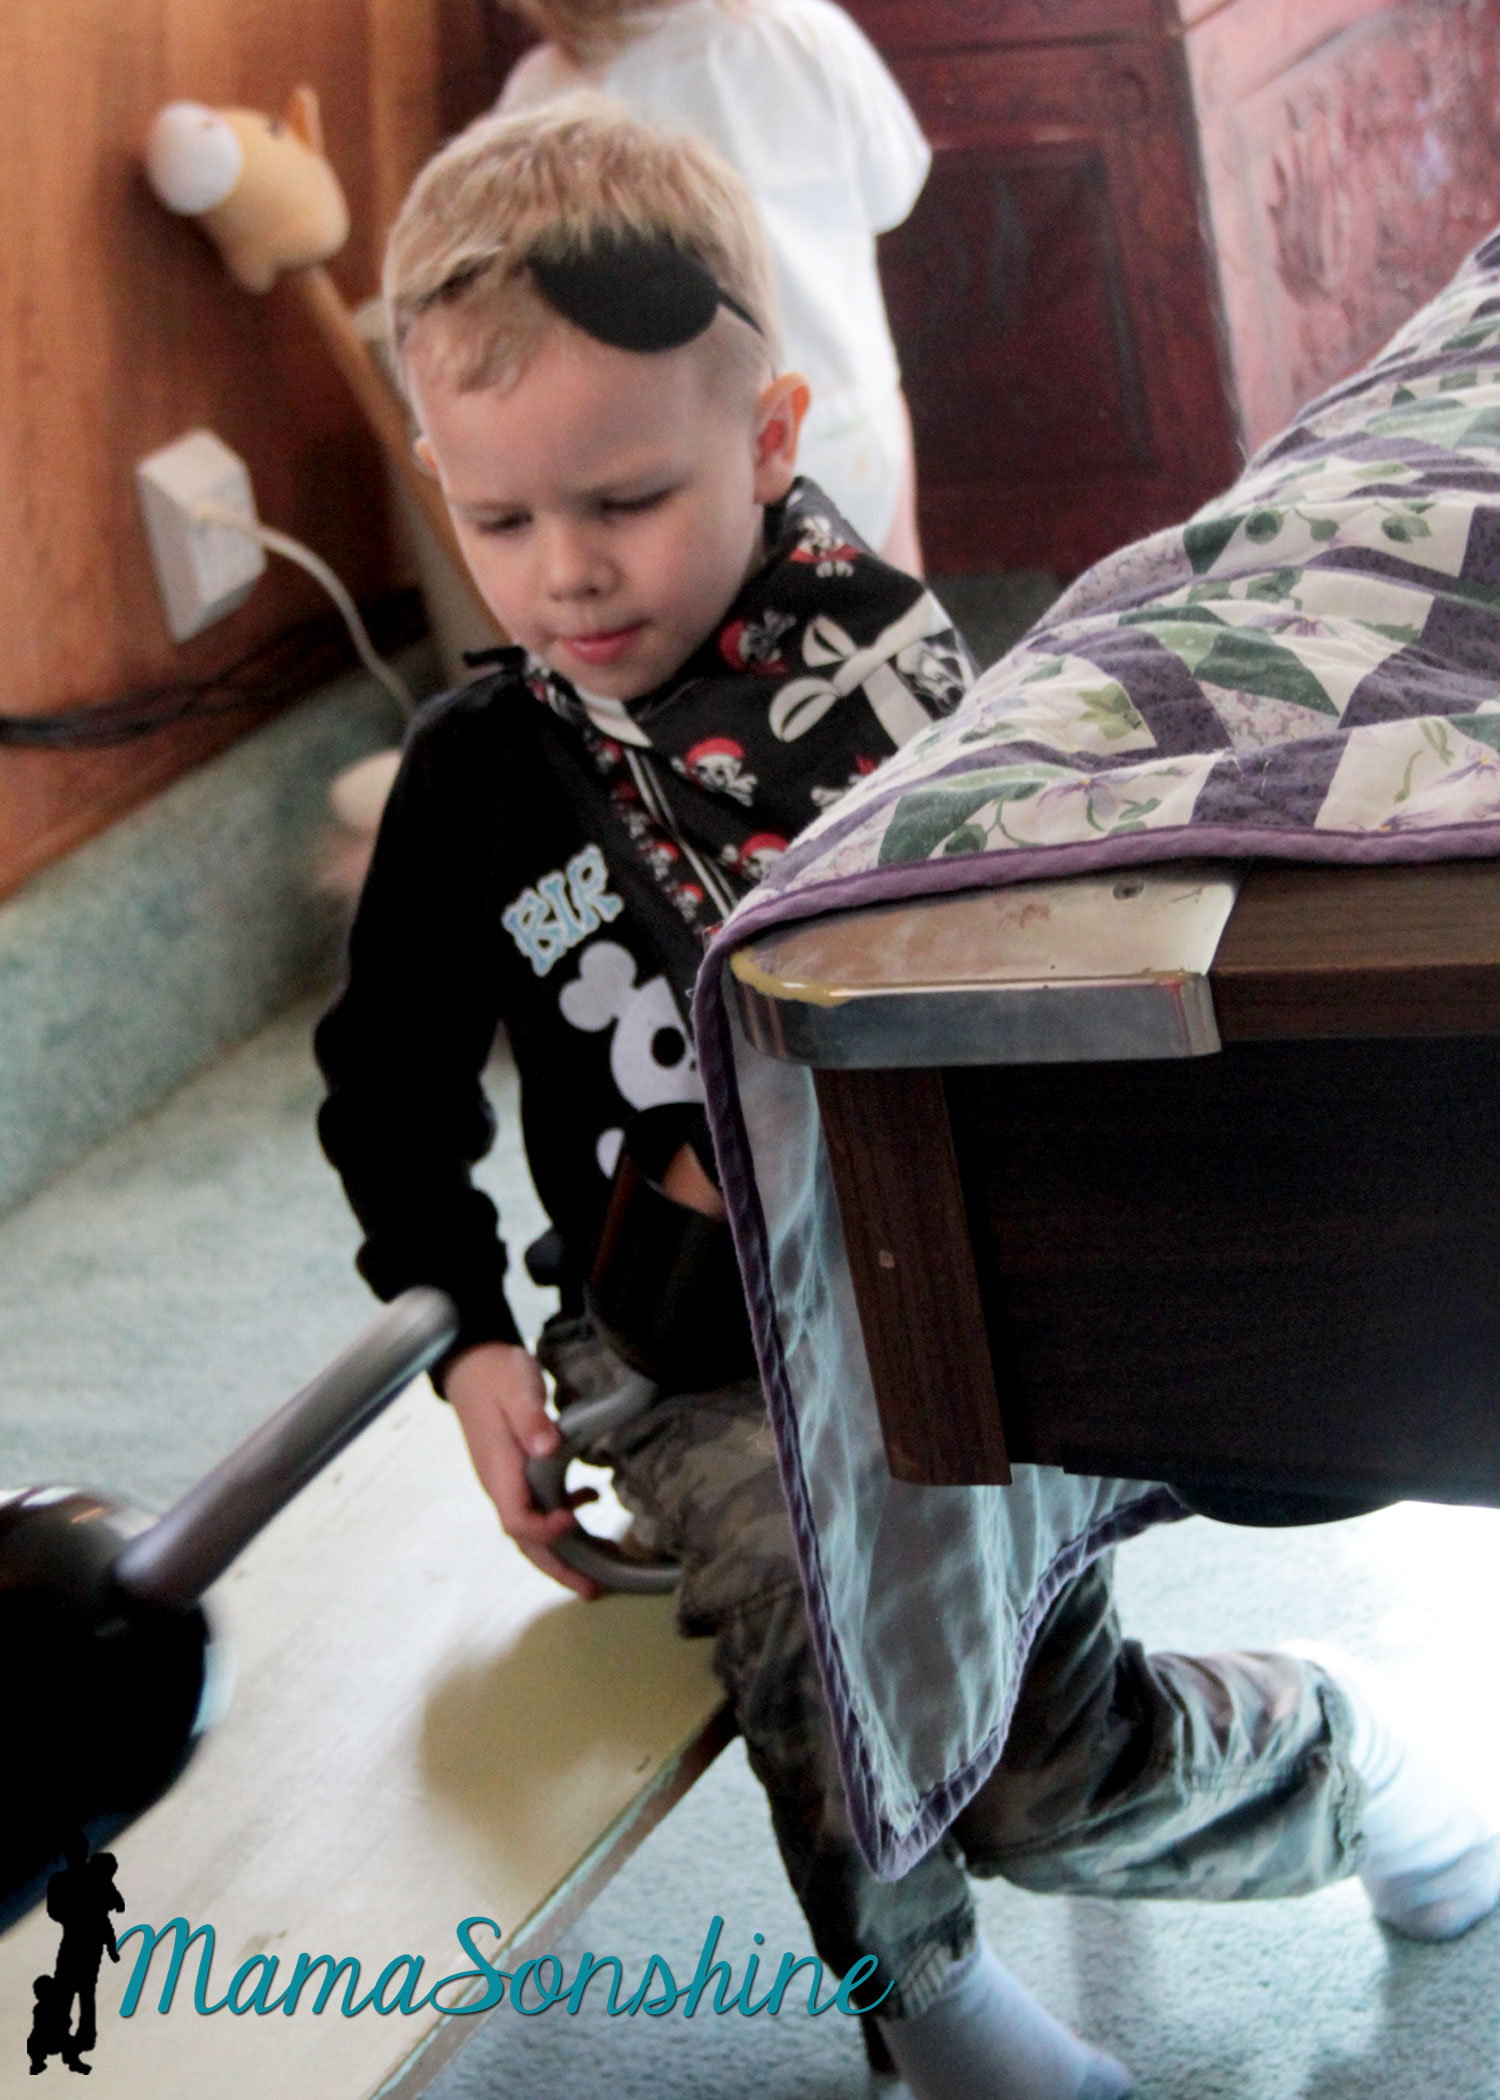
My son likes to wear his bandana as a pirate cape.
The drink labels were also made using the Cameo’s print and cut feature. Have I told you how much I love that feature?
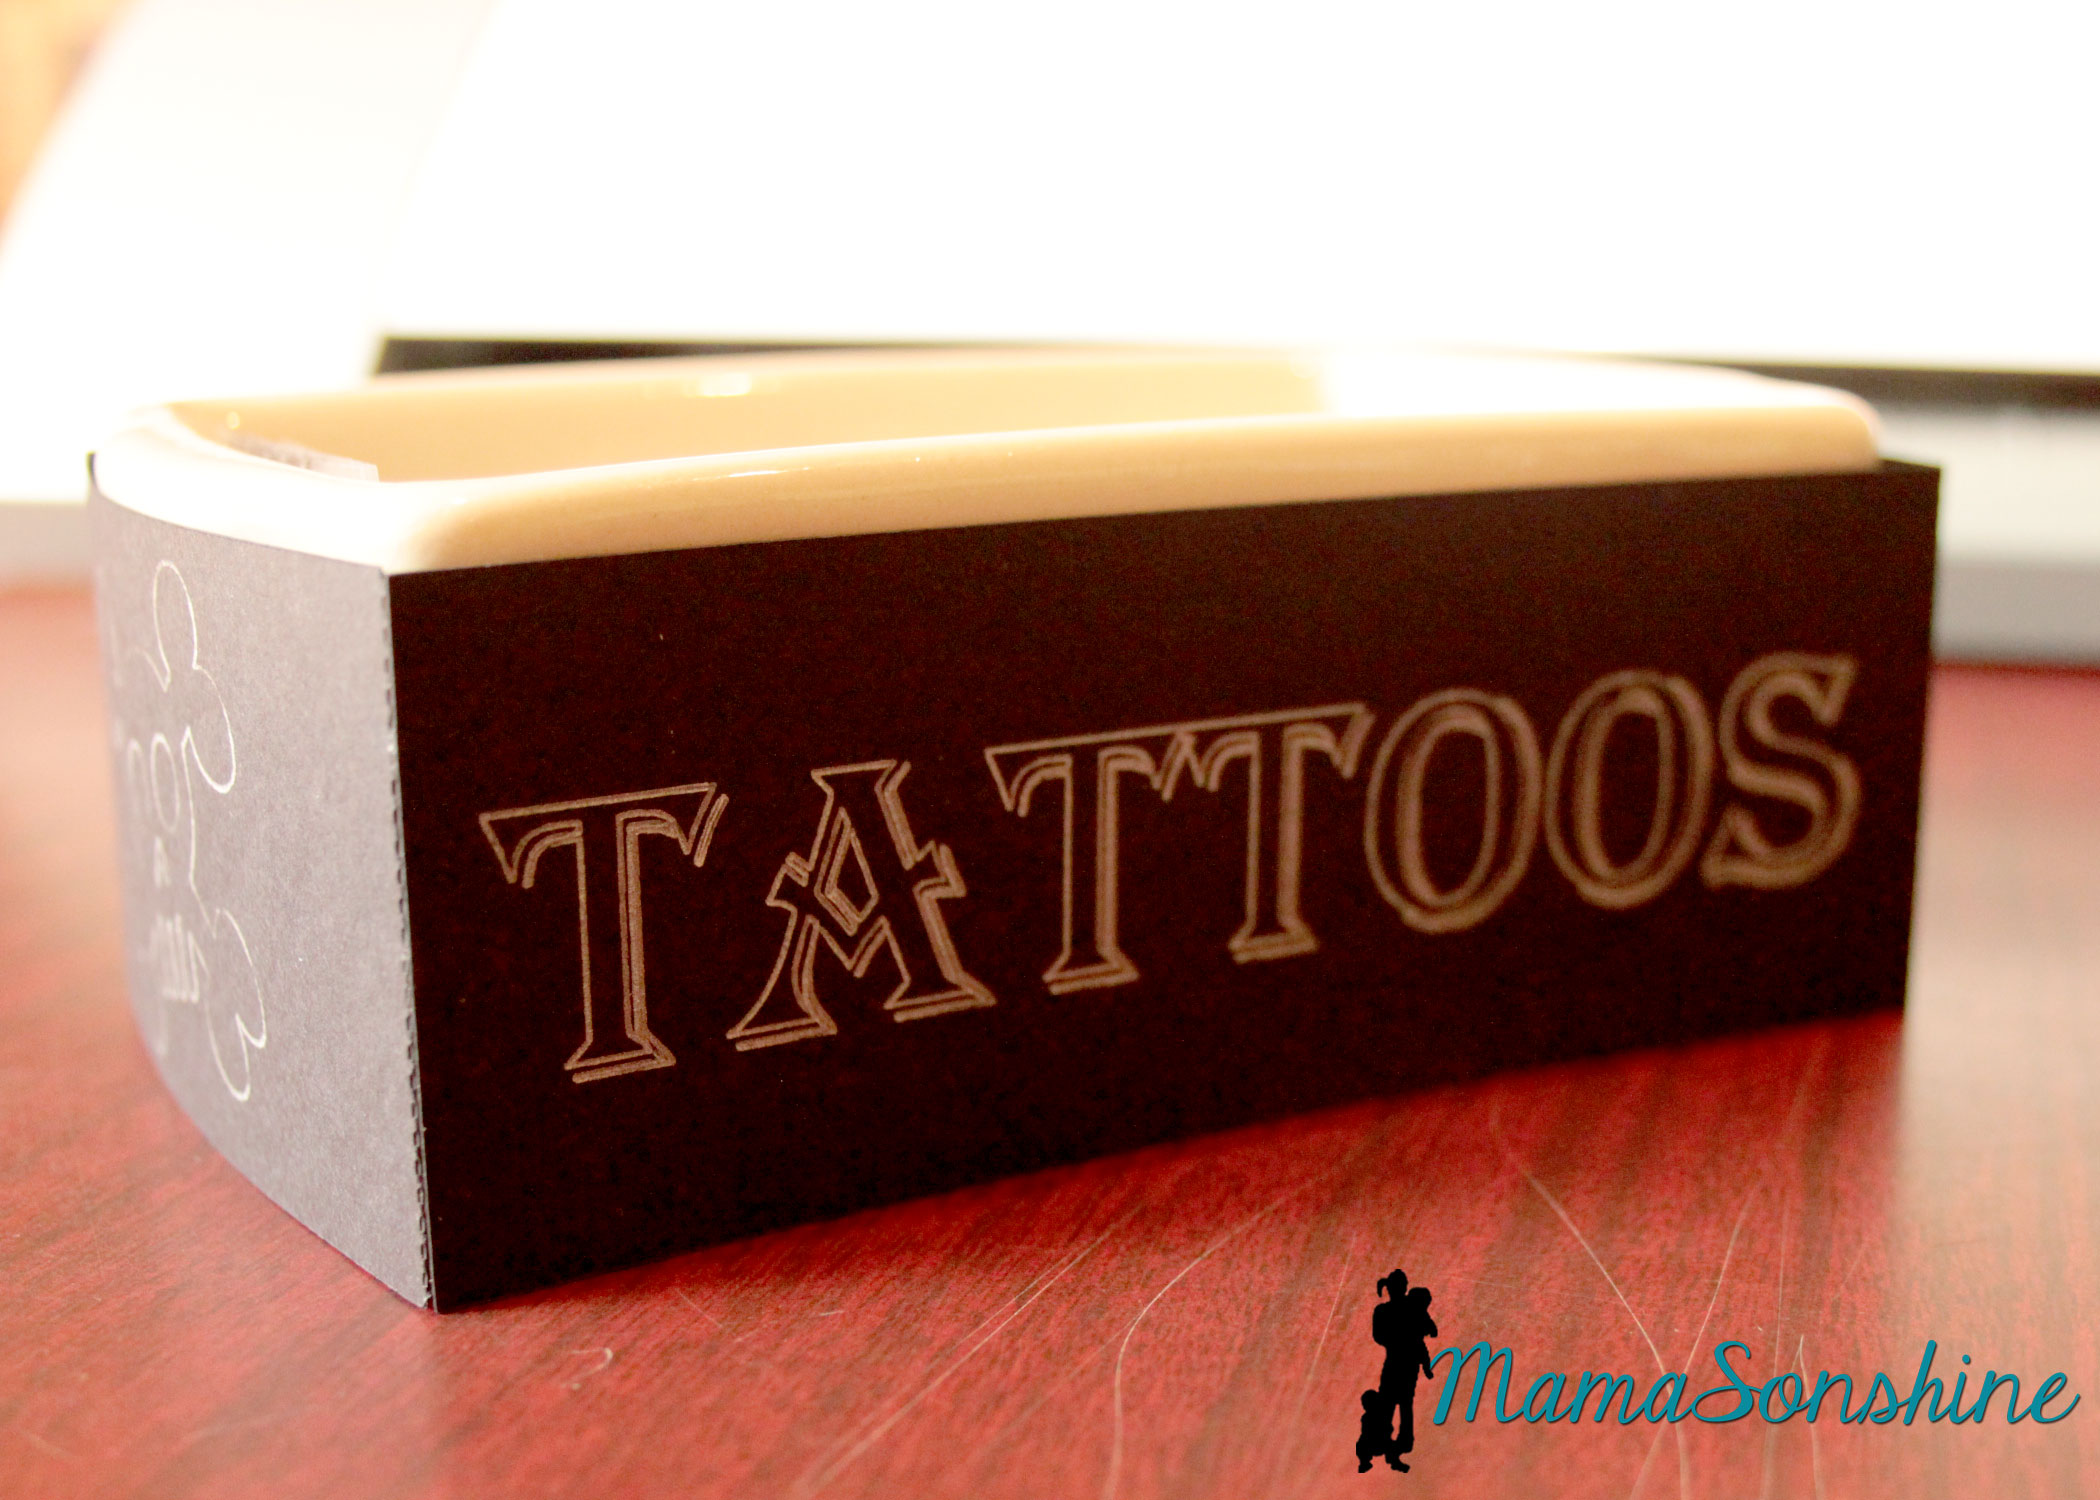
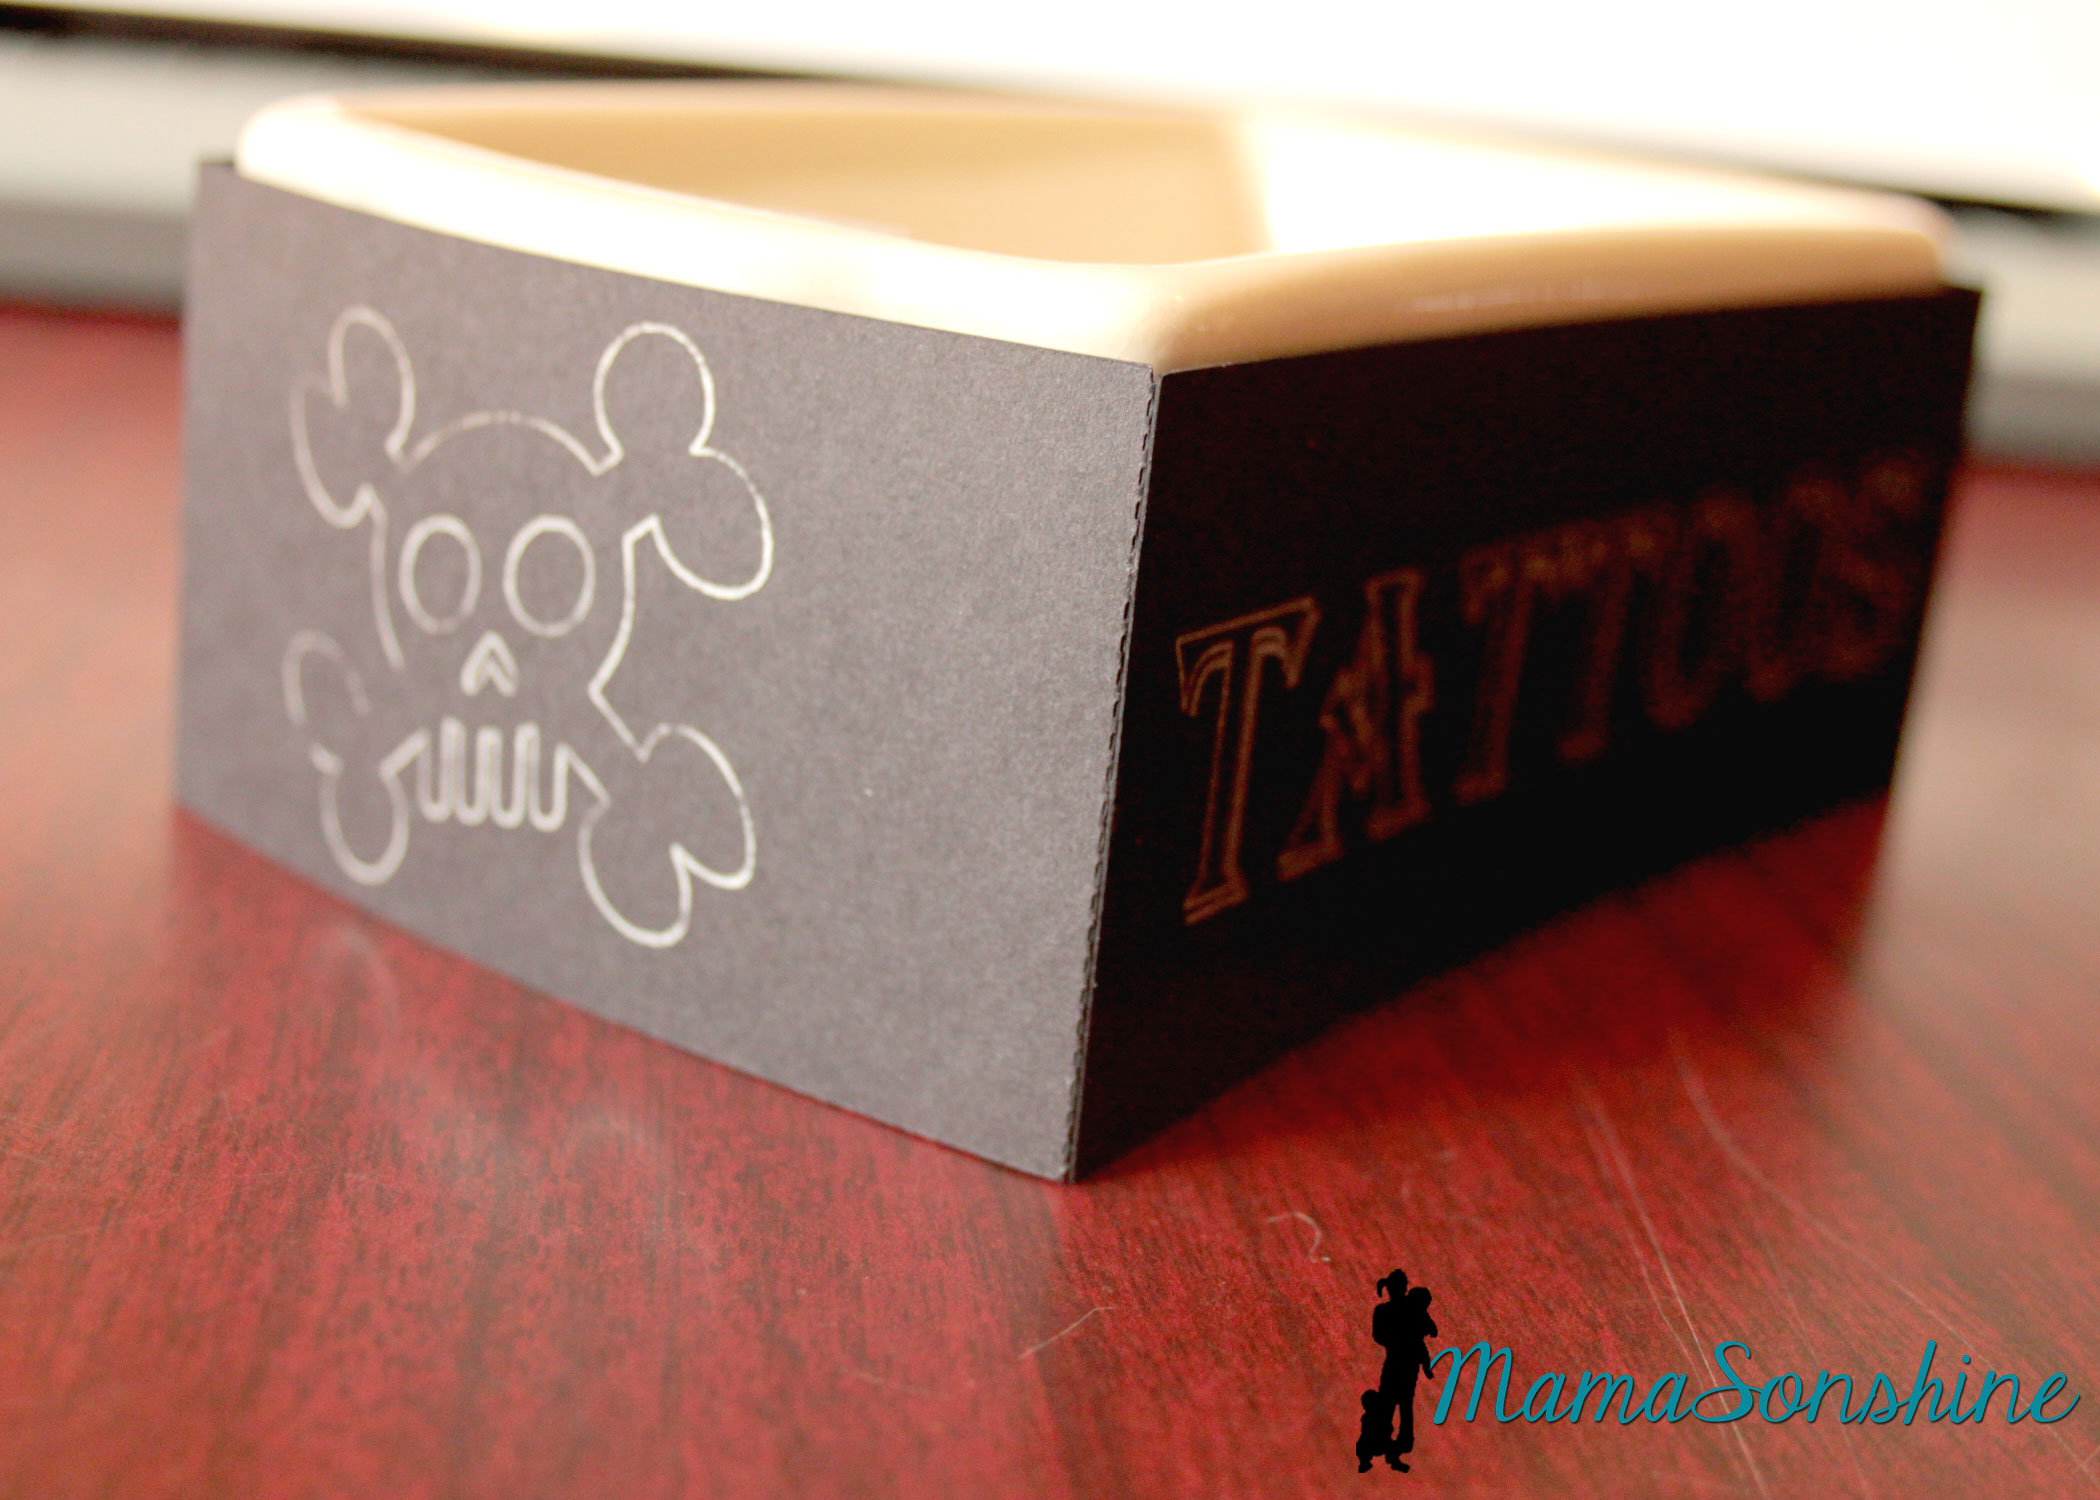
We had some extra tattoos so I transformed a dish my mom had.
I used the sketch pens on the cameo. It was really easy and something I did at the last-minute, but wouldn’t have if I didn’t have my Silhouette.
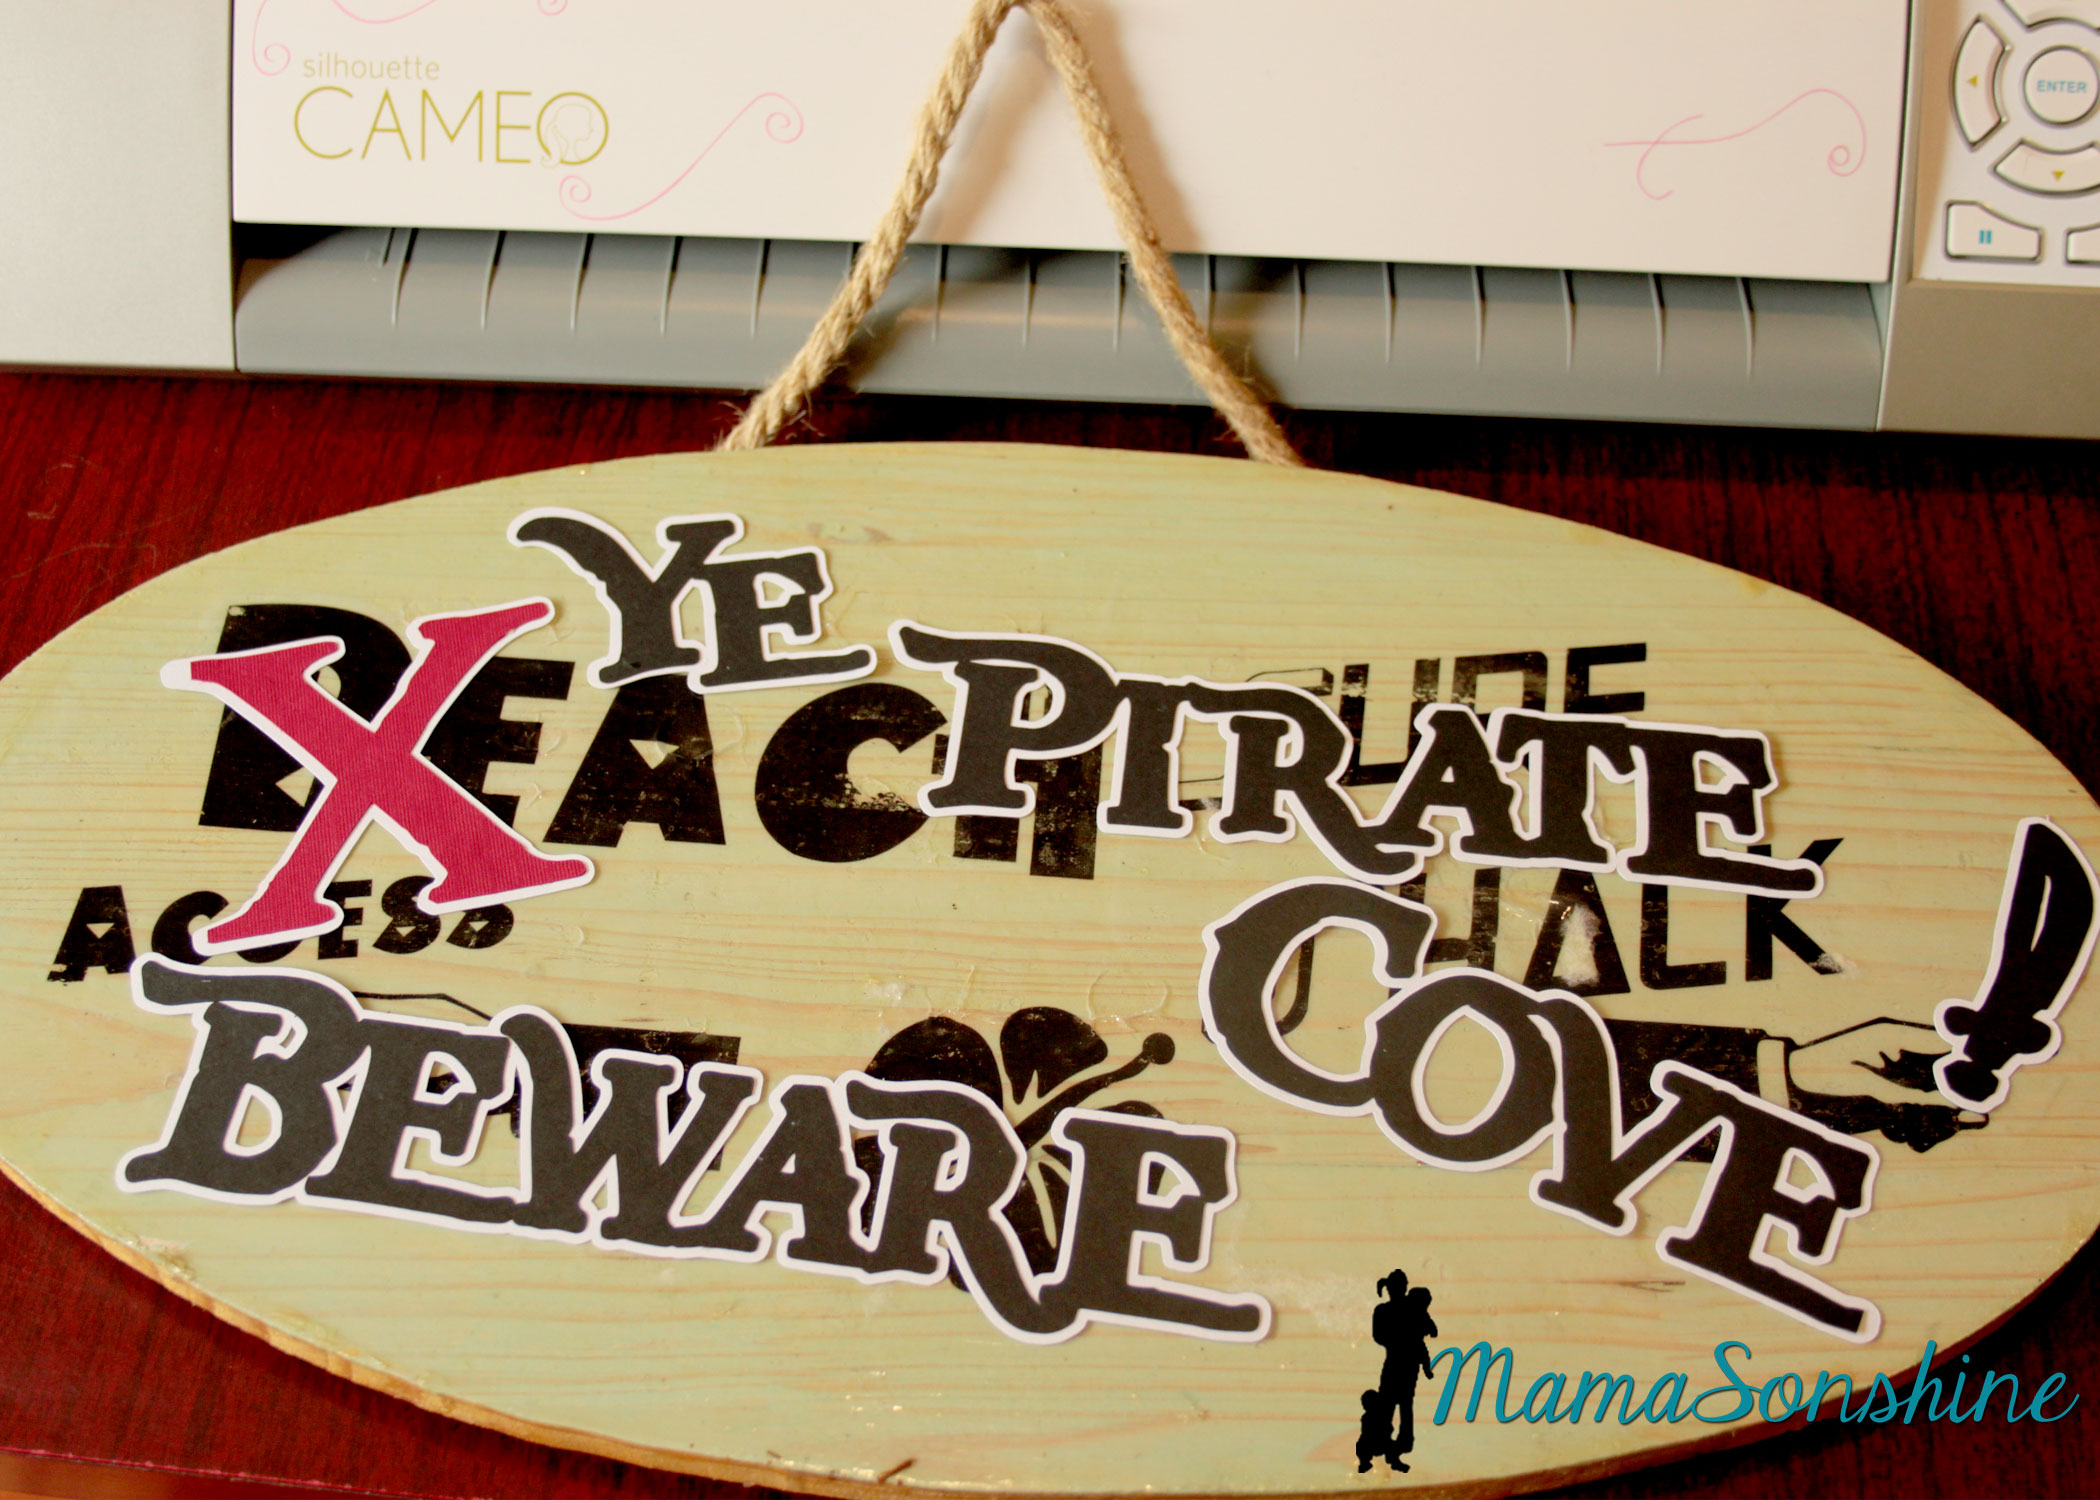
I took the sign I made for Sid’s beach party and cut out letters to make it look like Pirates had taken over the beach. I was going to redo the sign, but my mom wanted to keep the original, so I had to make something temporary. She has kept the sign up on the front of her house since Sid’s party.
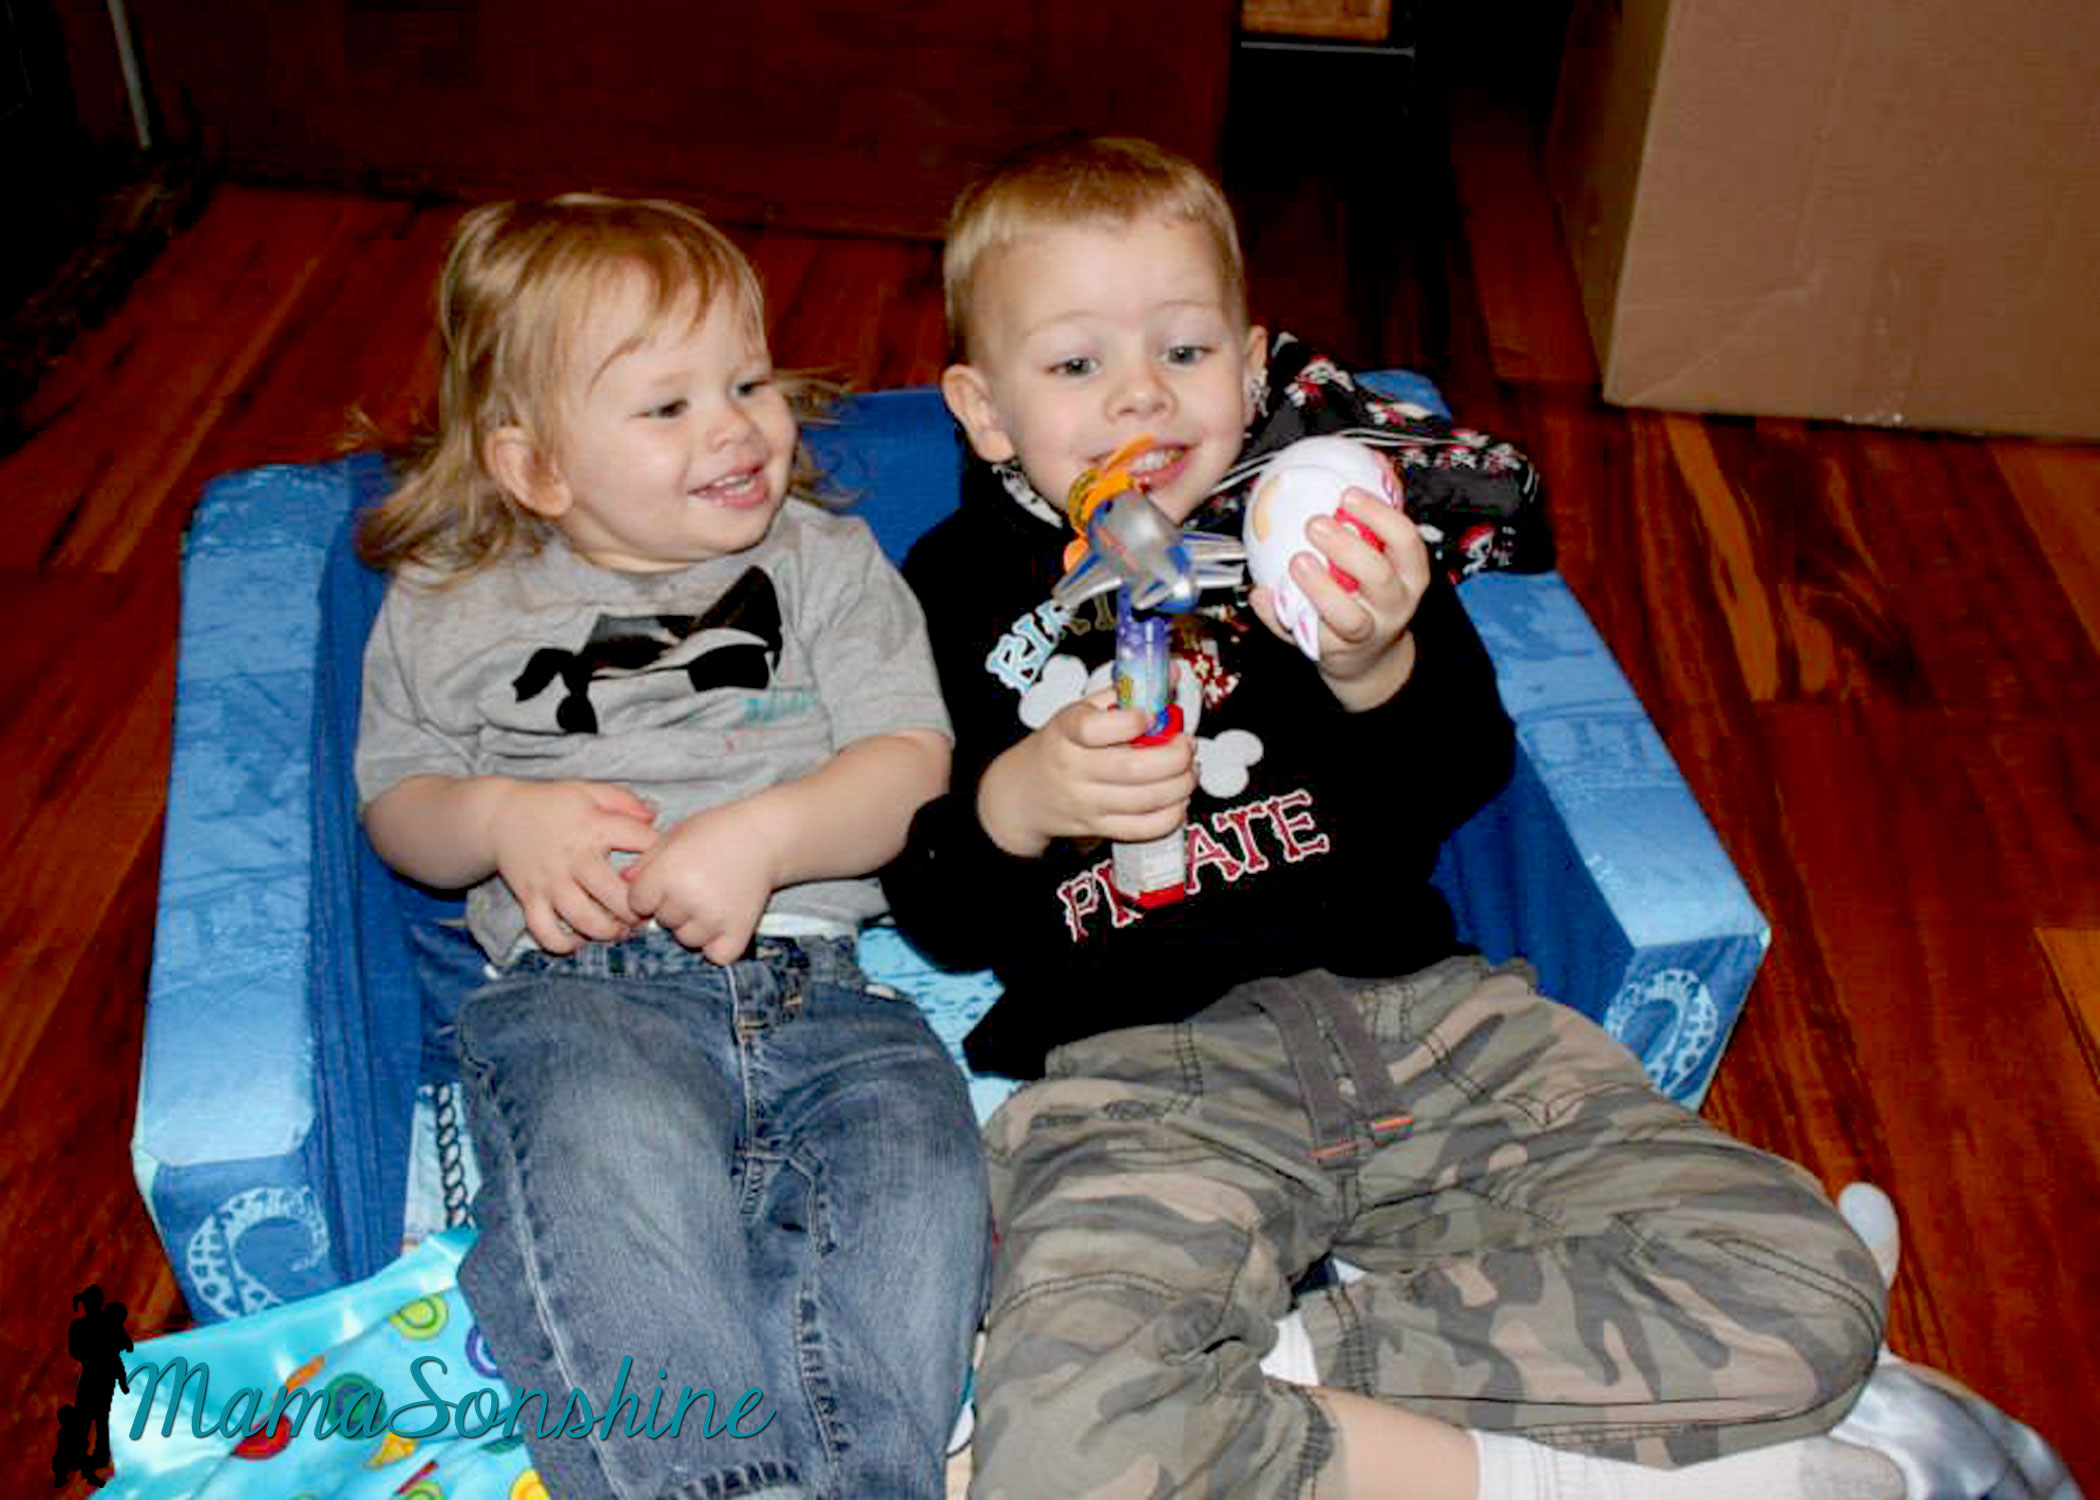
Of course the night before I decided to make Sid a shirt to wear for the party. Then I realized I had to make Ian one in a similar style, even though I had already made him a birthday shirt.
I just cut circles out of a cardboard box and painted the flattened box. I used my cameo to cut the letters out of cardstock and Mod Podge to glue them on.
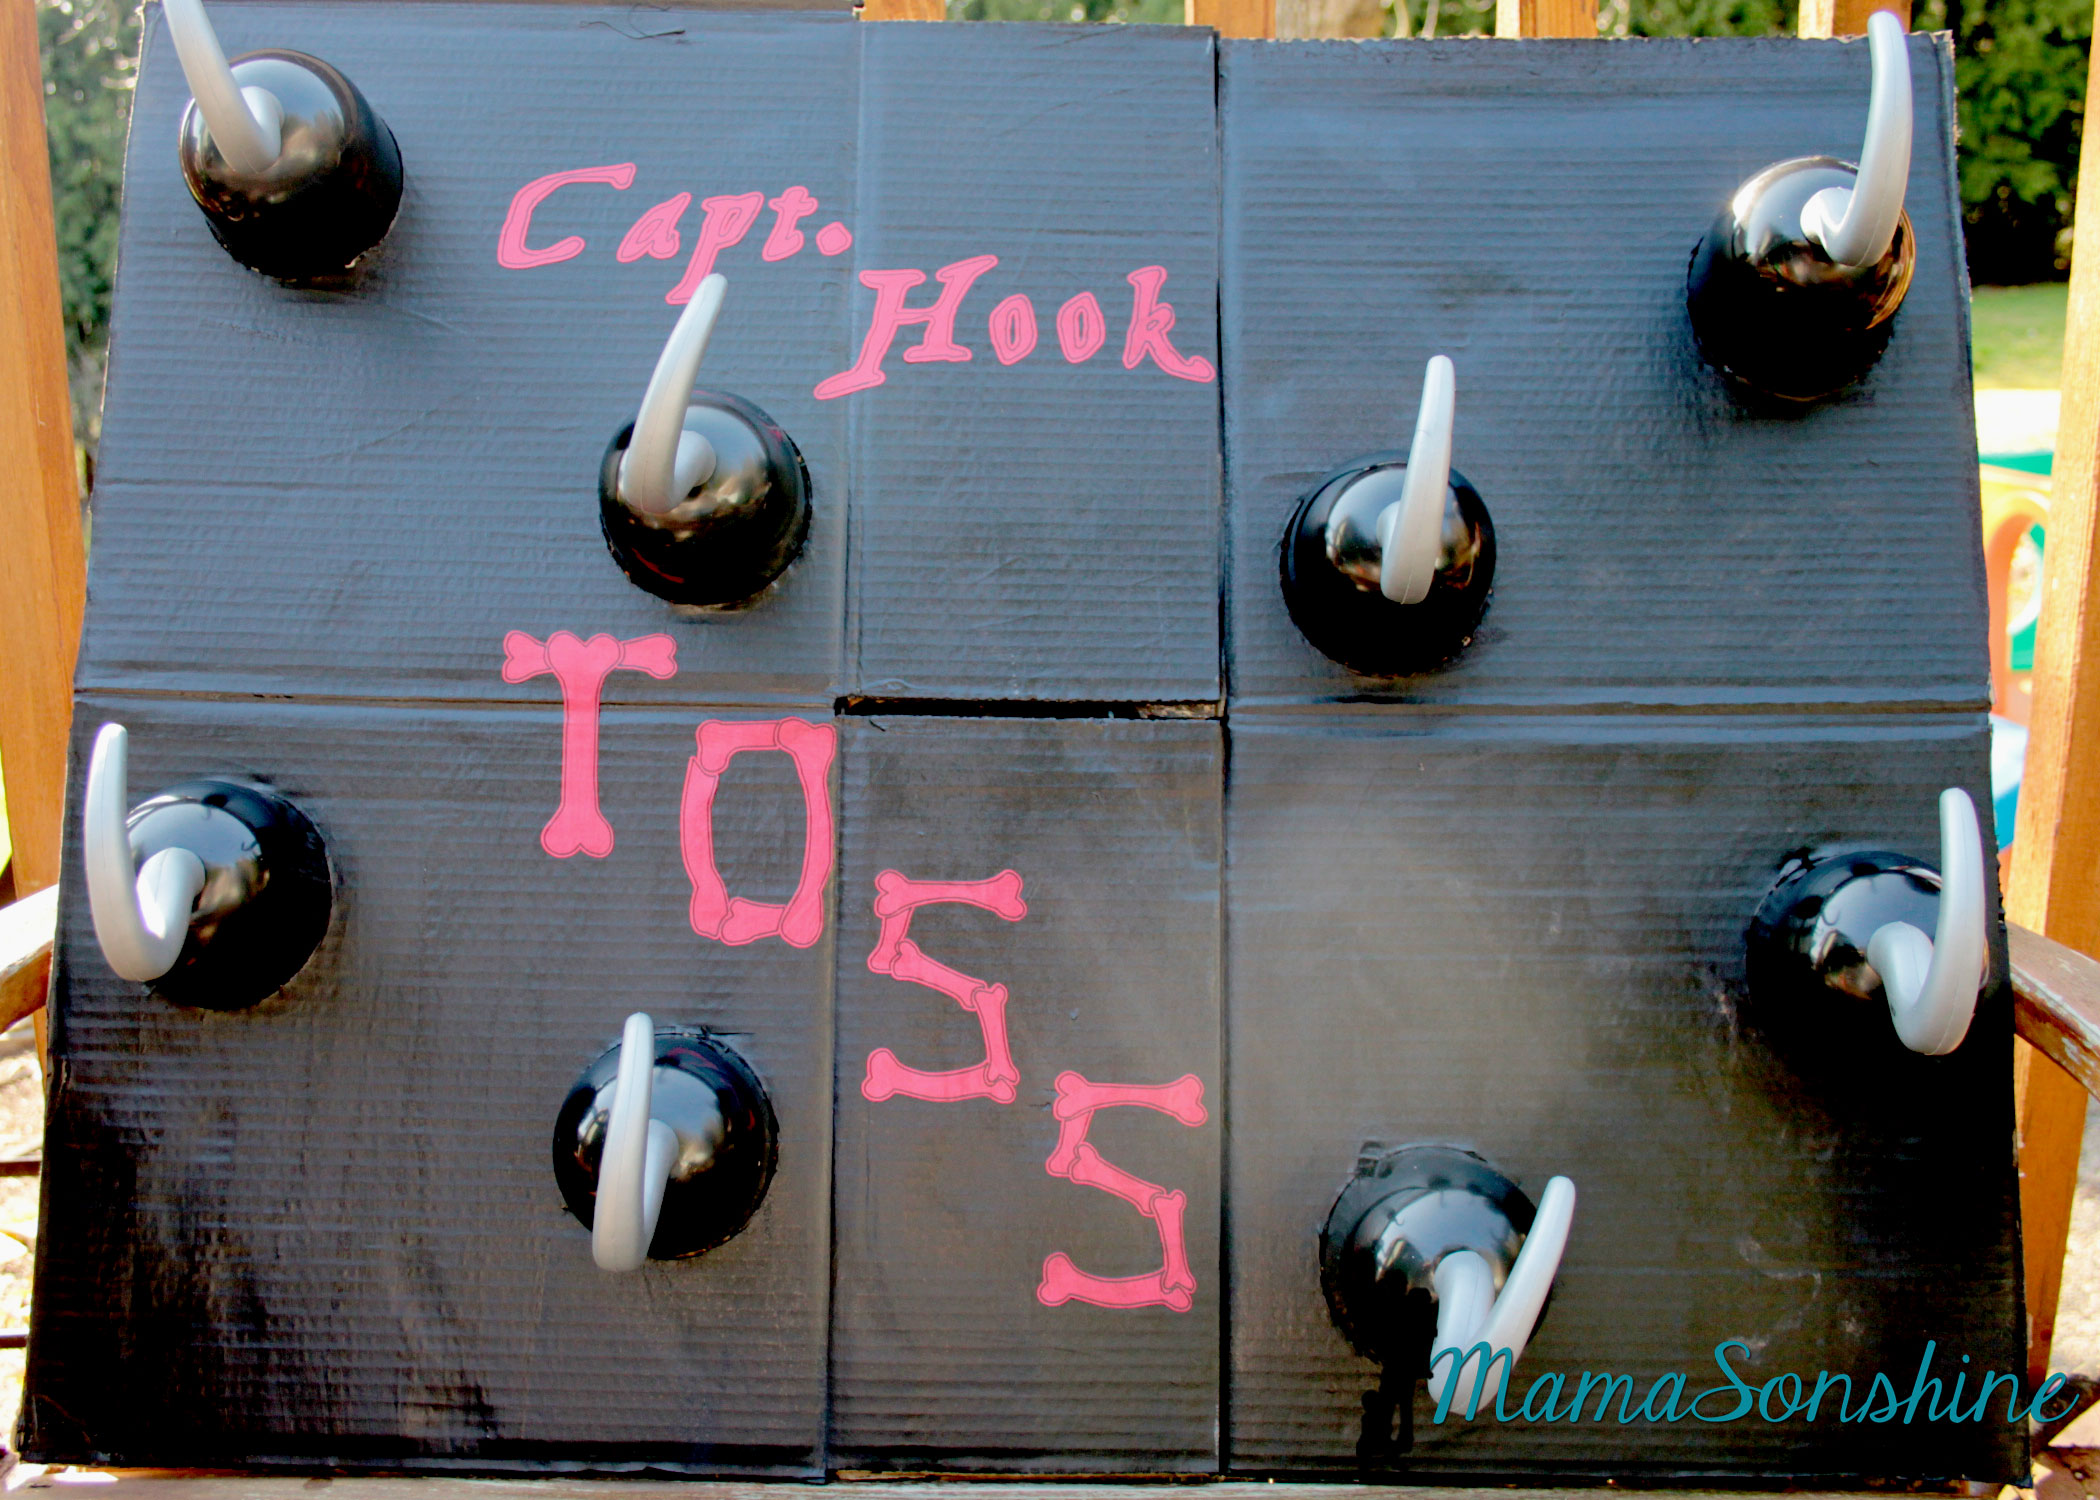
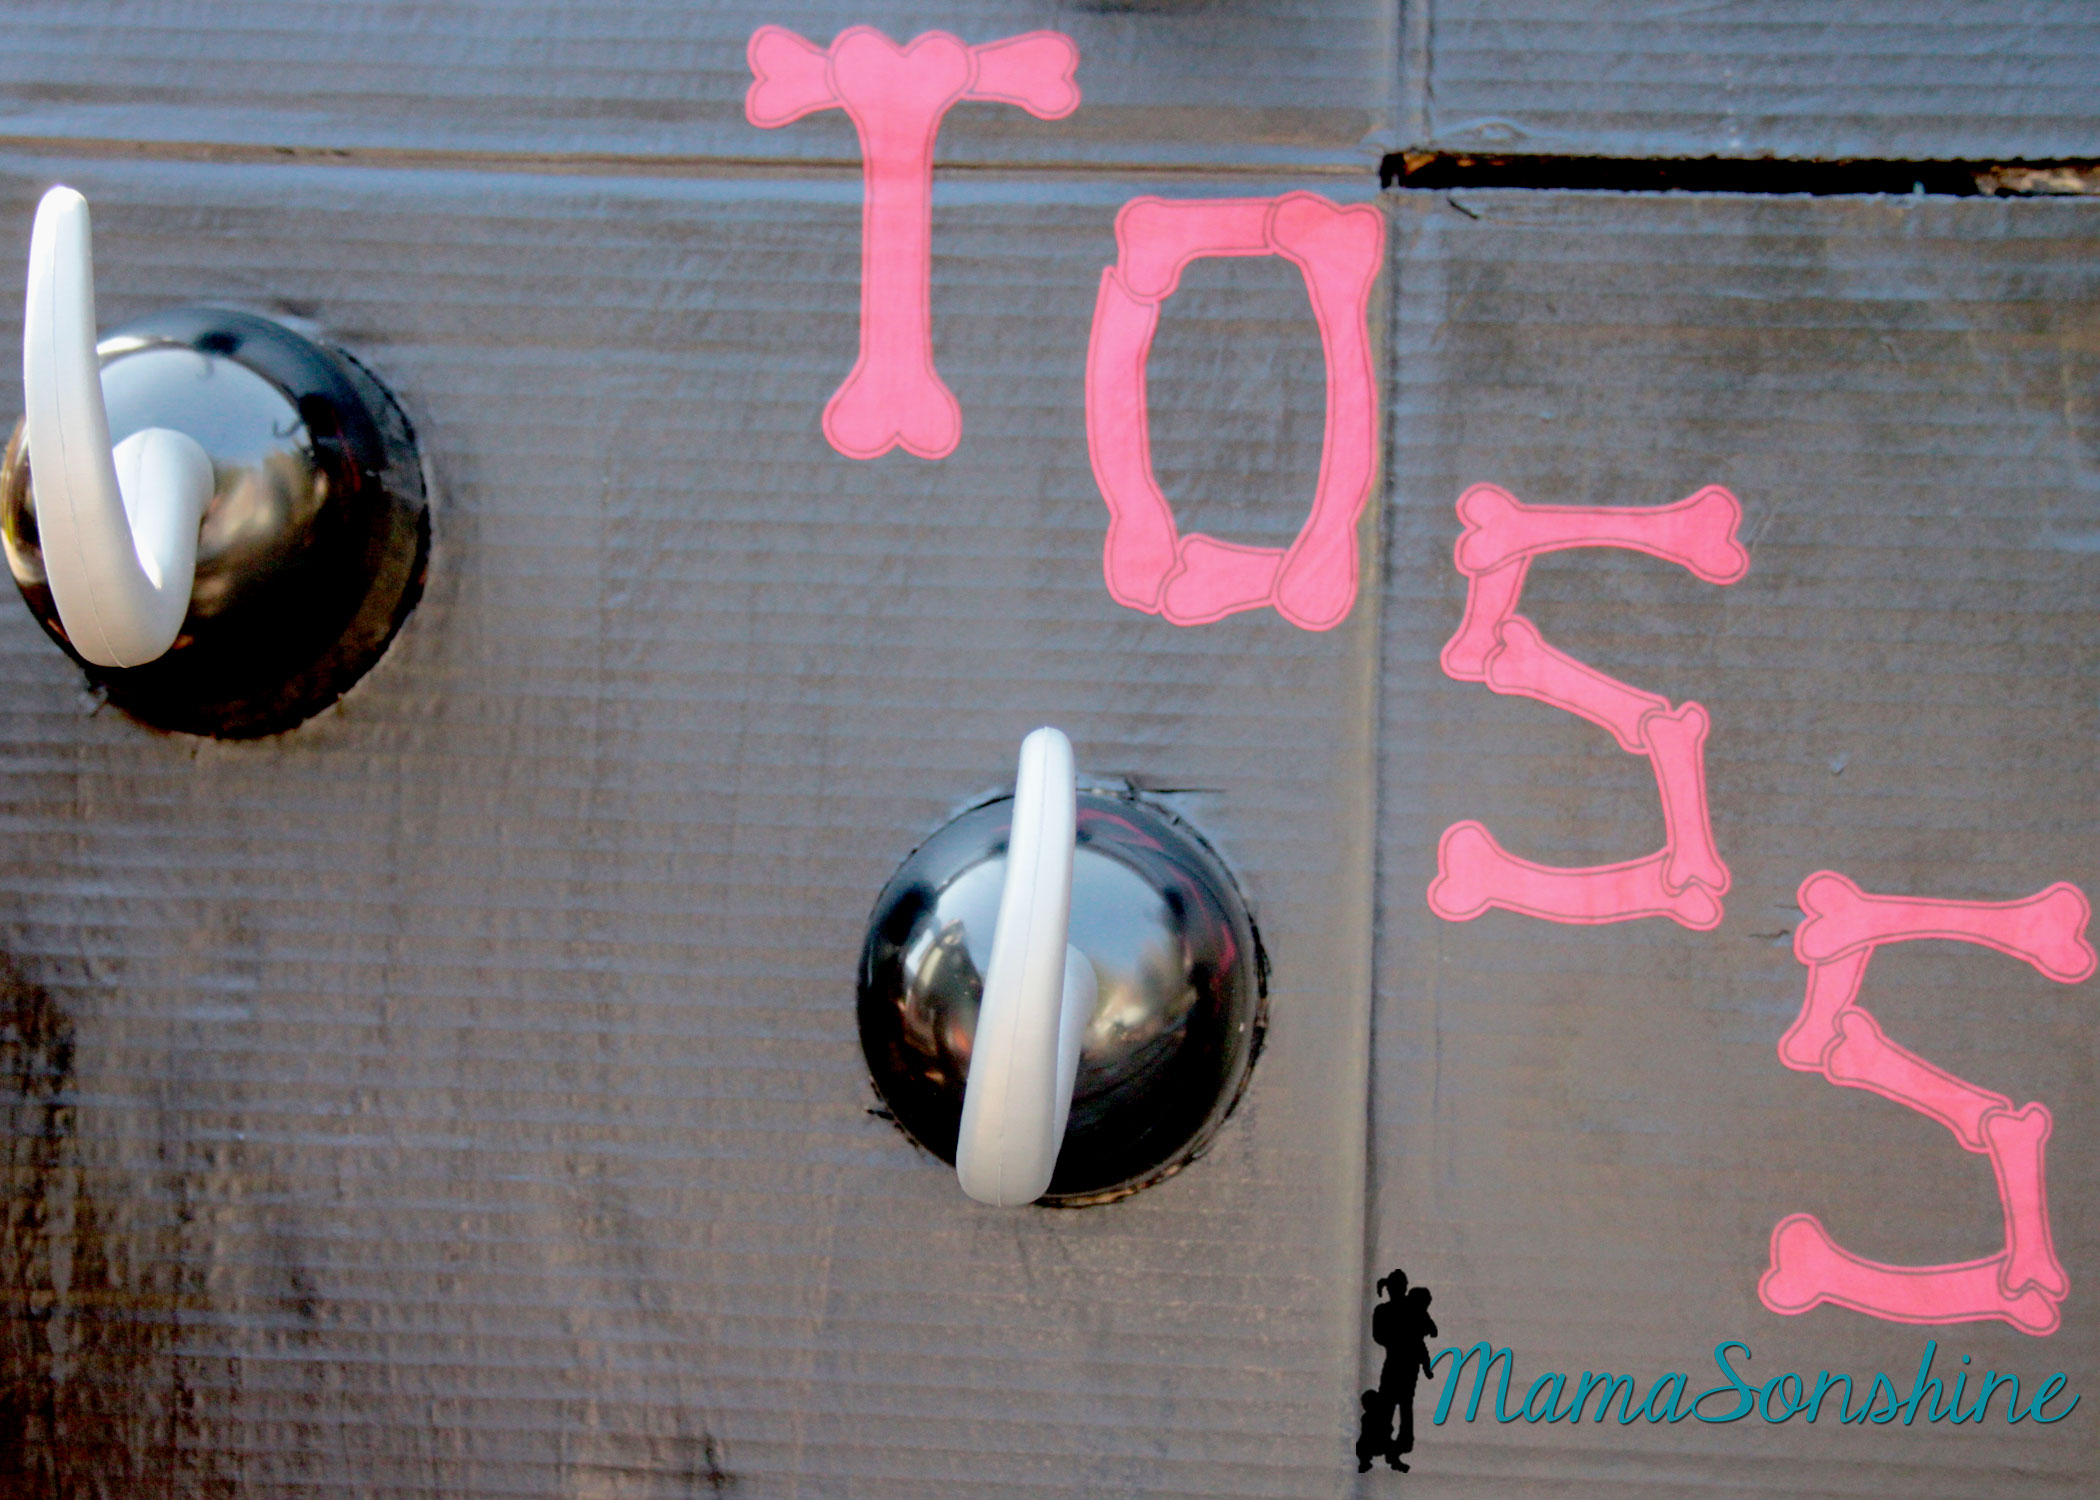
Baby Sid loved playing the hook toss game.
It was super difficult to get a picture of the birthday boy, he was in constant motion that day.
Since it was March in the Pacific Northwest, we couldn’t let the kids play outside. The kids got walk the plank in the basement. I used a wood board my mom had, some step stools and the kid pool. I thought about filling it with those plastic balls you find in a ball pit, but didn’t have time to order them.
The kids didn’t need anything to jump into. They loved the plank just the way it was.
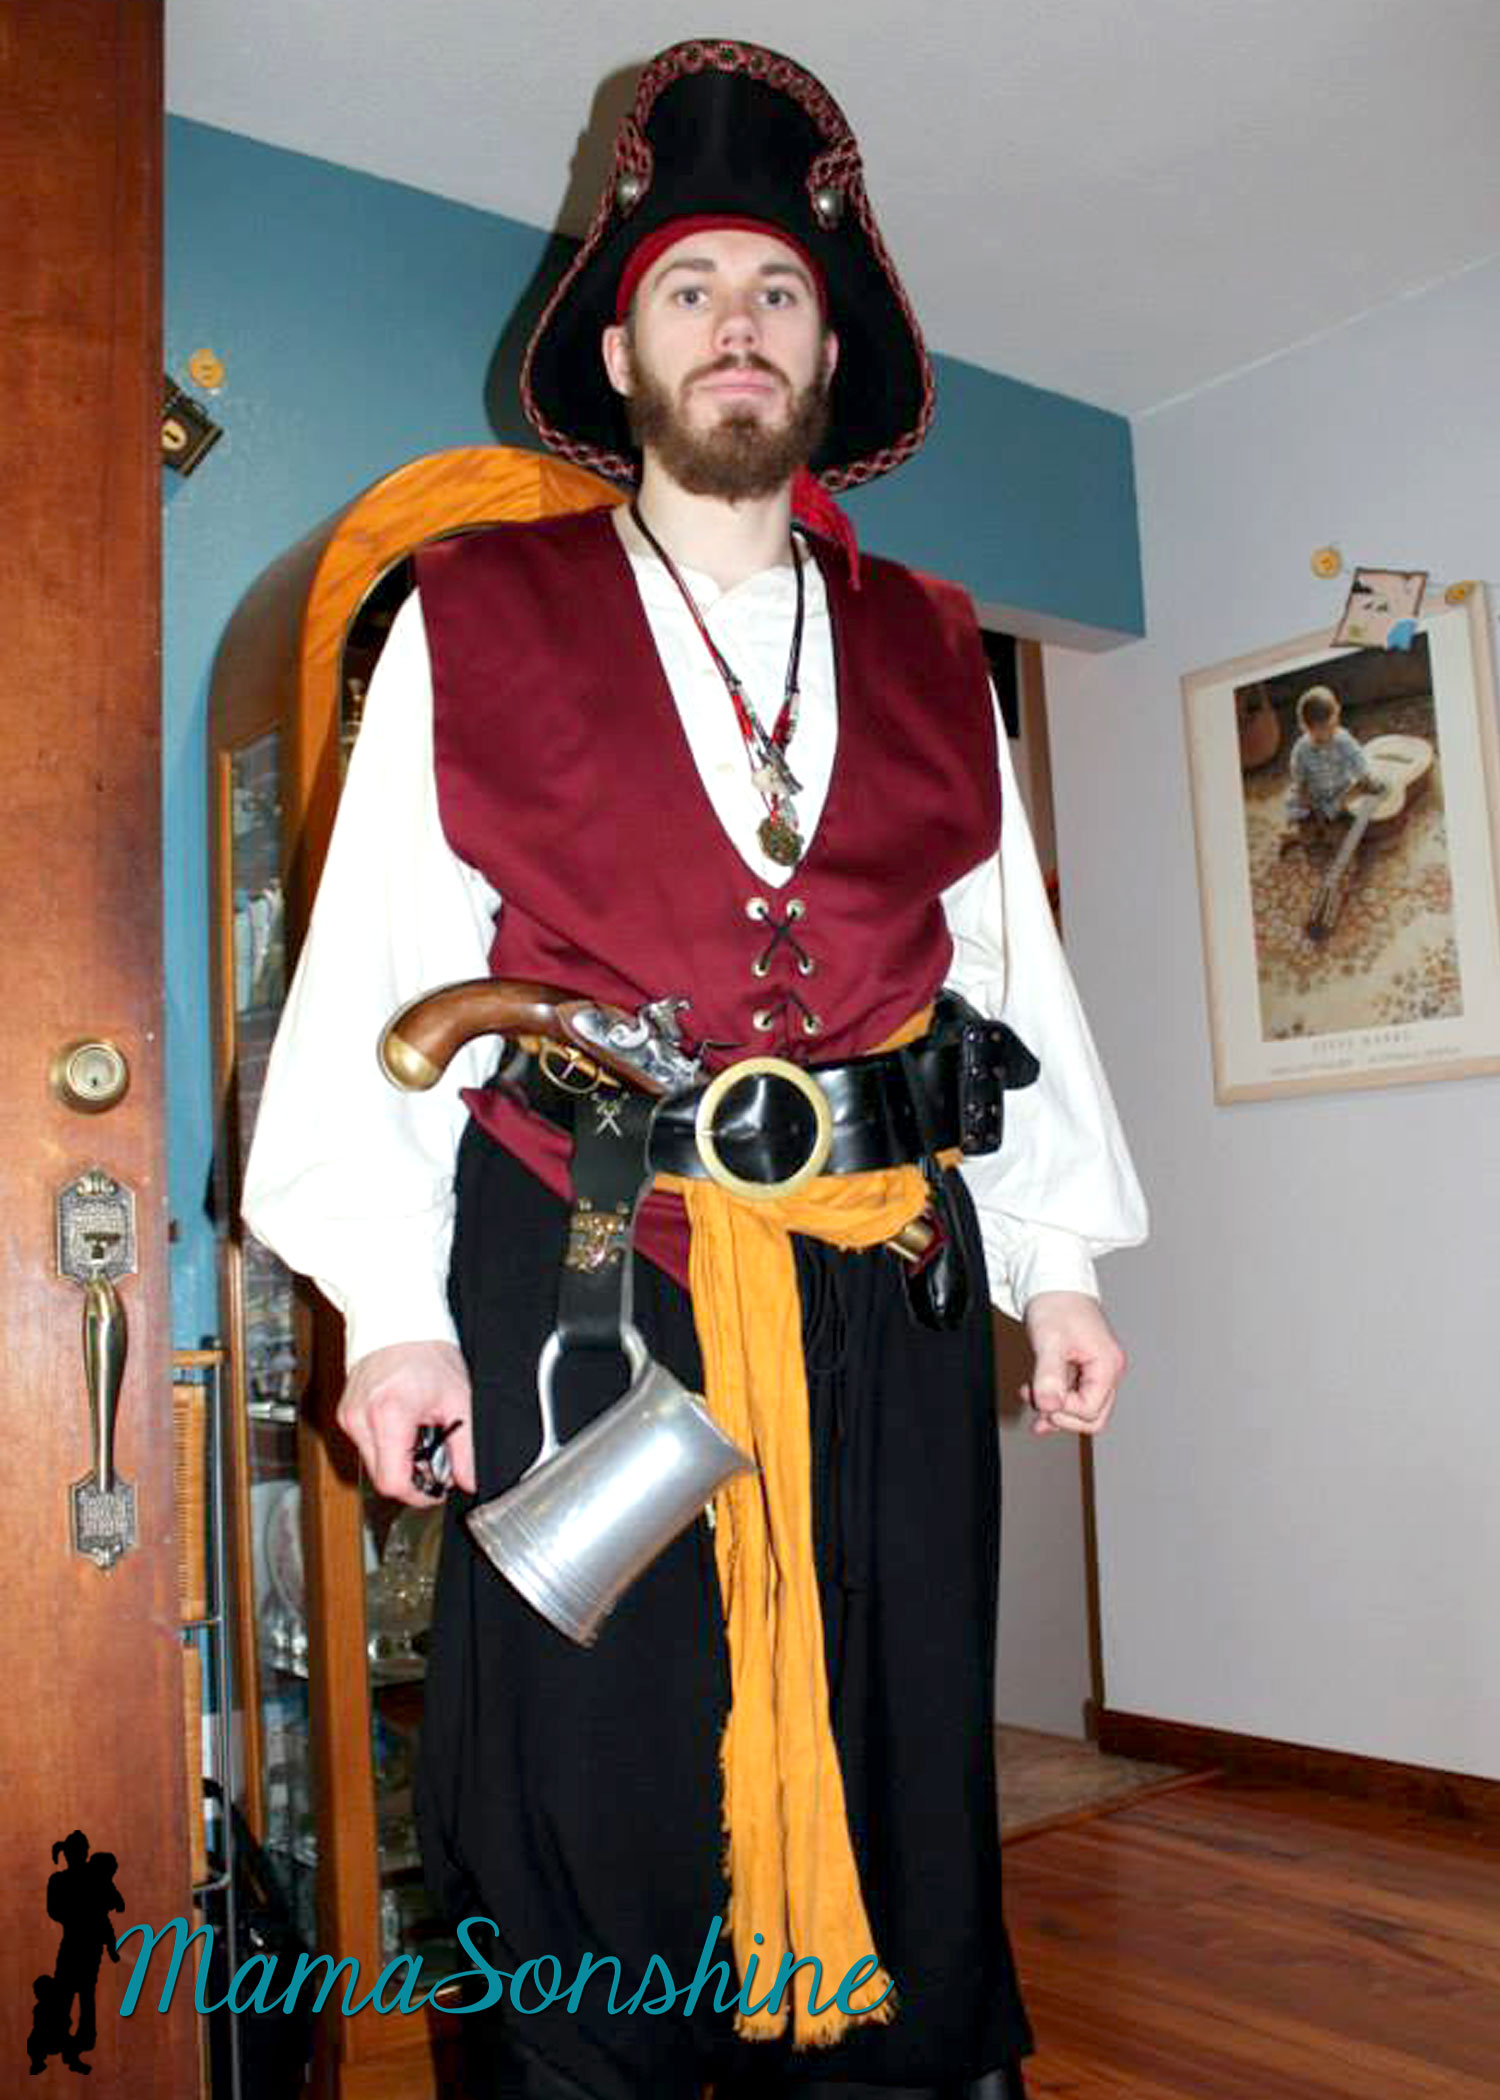
And what kind of pirate party would this be without a real pirate?
My cousin is part of a pirate group in Portland and he was kind enough to show up in full pirate grab. He was the hit of the party!
It was a busy day but Ian loved his party.
Thanks for visiting, remember to Shine On
Want to Check Out More Silhouette Projects?
My Silhouette Challenge buddies and I are all sharing projects on our blogs today, so pursue the projects below for a wealth of Silhouette inspiration!