I Tri and Craft

thoughts from a mother of boys, a marathoner, a triathlete, a crafter, a wife, and a scientist


7 Comments

DIY Christmas Coasters ~ and a GIVEAWAY!!!!

‘Tis the season for giving, and there is nothing better than giving someone a hand-made gift.

Except being able to giveaway a new Silhouette Portrait or Cameo, that is.

decembergiveaway250

That’s right, a wonderful group of bloggers and I have gotten together to giveaway not one, but two Silhouettes.  These ladies have also came up with a variety of holiday projects to make with your brand new Silhouette.  Just follow the links at the end of this post for some inspiration.

DIY Christmas Coasters

I thought I would share some of the gifts I have been making for Christmas this year.

MSS_DIYCoasters


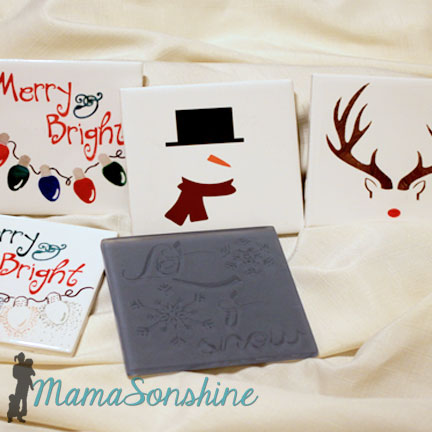
I made some Christmas coasters from tiles using a couple different methods, including etching cream, vinyl and sharpies.

MSS_DIY Christmas Coasters

I love making etched glass items and thought how great it would work on glass tiles.  I found these blue glass tiles, they are clear glass with a backing that is colored, and knew they would be perfect for a snow themed coaster.

MSS_glass tiles with stencil

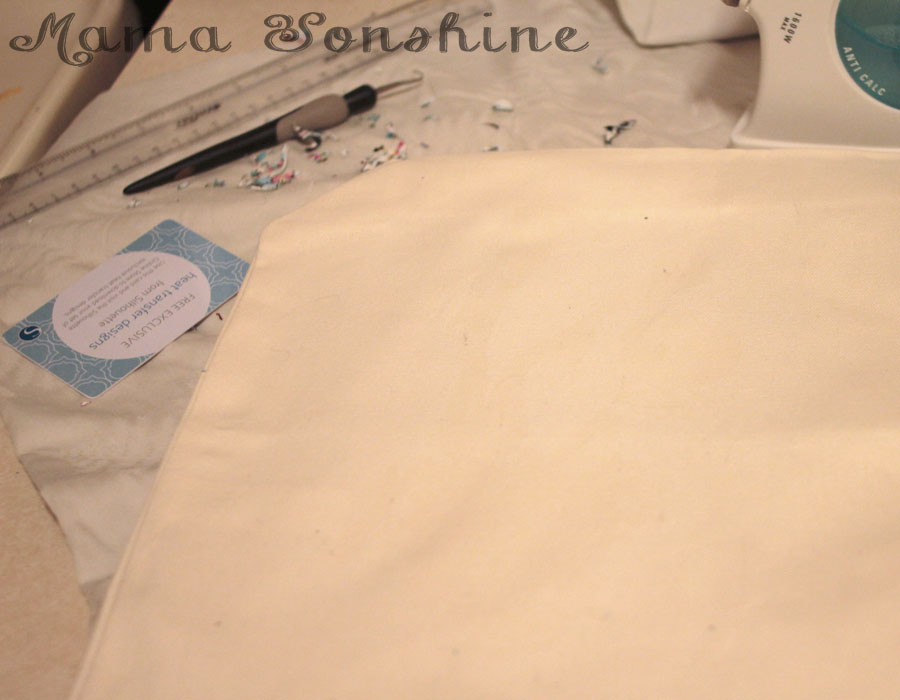
Since the tile would be a coaster I wanted the majority of the surface to be rough with the design smooth.  I cut my design out of scrap vinyl, I have been told contact paper works too, and transferred the design on to the tile.

MSS_glass etching in action

I like to apply my etching cream right next to the sink.  I lay down wax paper for a work surface, and use gloves to protect my skin.  At the end of the etching time I try to scrape the etching cream back into the bottle.  No need to waste!  Rinse the rest of the cream off the tile under cold running water.  Peel off the stencil and wash again with soap and water.

Please follow the directions on your etching cream and be safe.

MSS_Etched Glass Tile Coasters


MSS_Etched Glass Tile Coasters

Because the tile is thick glass the unetched parts refract the light and distort the design when trying to take a picture.

MSS_Etched Glass Tile Coasters

I absolutely love how these turned out, but the elegance of them is lost in translation.  They do look lovely all wrapped up in a bow.

MSS_Etched Glass Tile Coasters Gifts


Did you know that etching cream will also take the glaze off ceramic tiles?

This is even harder to photograph because of how subtle it is.

MSS_Etched Tile Coasters

My first thought was to make a minimalist snowman design with vinyl, but then I decided to take it one step further.  I used a vinyl stencil for the snowman base and a few circles of falling snow.  I then applied the etching cream to the entire coaster as above.  This left a rough background with a shiny snowman and snow.

MSS_Etched Tile Coasters

After etching, washing and allowing to dry for at least a day, I applied the vinyl decorations, using outdoor vinyl if I had it.  I love how these turned out, they are impressive with just the vinyl but when you look close you can see the subtle outline of the snowman and snow.

MSS_Etched Tile Coasters


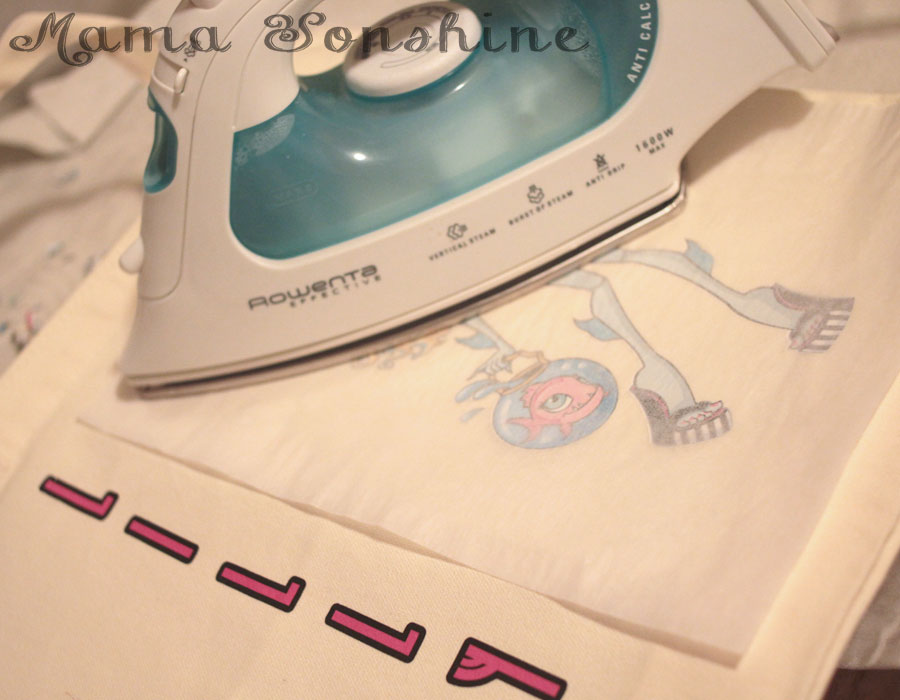
But why stop there?  Sharpies on ceramics are always a fun craft.

Since I am pretty sure my 4-year-old draws better than me, I use my Silhouette to cut out stencils for all my Sharpie work as well.  As I did with these Rudolph coasters and they are fantastic!

MSS_Sharipe Colored Tile Coasters

After coloring I cured the ink by placing the coasters in a cold over, turning on the heat to 350°F, baking for about 30 minutes, turning the oven off and letting the coasters come back to room temperature slowly.

MSS_Sharipe Colored Tile Coasters


Using the same sharpie and stencil method I made some Christmas light coasters as well.

MSS_Sharipe Colored Tile Coasters

On one set of coasters I simply colored the lights in.  On the other set I used the negative of the stencil and used scattered dots to draw the lights.  I should tell you that I did not use oil based markers or ceramic pens.  I cured them just as I did with the Rudolph ones.

MSS_Sharipe Colored Tile Coasters

Some of the colors (uh, all but the red and green) did not hold up as well with the curing process.  *sigh, lesson learned.  So, if you are going to cure them in the oven, use ceramic markers.  Another option would be to seal them after coloring with a clear waterproof sealant.  Sealing them is still probably a good idea anyway.

MSS_Sharipe Colored Tile Coasters

Not to worry though.  They can just be recolored and then sealed.  (which admittedly I have not yet done, but plan on doing)

These coaster would make great gift to with a new mug and box of hot chocolate, coffee or tea.  *spoiler alert

MSS_DIYCoasters

Silhouette Giveaway!

I know, I know, here is the part of the post you are most excited about.  As I said above, my Silhouette Challenge buddies in partnership with Silhouette America are hosting a mega-huge giveaway for not one…but two winners!  The prizes up for grabs?

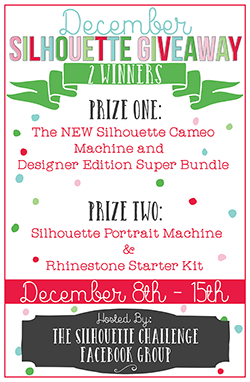
First prize: The NEW Silhouette Cameo Machine and Designer Edition Super Bundle!  $406.93 value.

  • Silhouette CAMEO®
  • Designer Edition Software
  • Dust Cover
  • $25 Download Card
  • Four Essential Silhouette Tools (hook, spatula, scraper, pick-me-up™)

Second prize: Silhouette Portrait Machine and Rhinestone Starter Kit!  $219.98 value.

Pretty sweet, huh?  We want you to have the chance to get that Silhouette machine that might still be on your wish list.

To enter: just click on the image below or on this link, either will take you to the entry form.  Because of my many blog friends who helped make this giveaway possible, you have 42 potential entries, which means a lot of winning power.  So, hurry up and enter!

{This giveaway runs from today through Monday, December 15th at 11:59p eastern and is open to anyone 18 years of age or older with a U.S. or Canada mailing address. You can read the rest of the terms and conditions in the giveaway window. You only need to enter the giveaway on one blog.}

A Rafflecopter Giveaway

decembergiveaway250

click on me to go to entry form


Want to Check Out More Silhouette Projects?

My Silhouette Challenge buddies and I are all sharing projects on our blogs today, so pursue the projects below for a wealth of Silhouette inspiration!

Reinvented Elf on a Shelf Book Cat-Shaped Ornament Stamped Christmas Towels M&M Milk Bottle Teacher Gift 3D Holly Berry Ornament Deer Silhouette Mirror Silhouette Christmas Craft with Double-Sided Adhesive Winter Village Display Wood Grain Nativity DIY Rustic Pallet Christmas Tree 2014 Christmas Card + Giveaway Gift Tags Chalkboard Vinyl Christmas Signs Personalized Christmas Ornament DIY Wood Slice Christmas Ornaments DIY Nativity Candle Jar Sleeve Chalkboard Charger Inspiration + Giveaway Christmas Countodwn Festive Advent Christmas Decor AND A Giveaway! All Hearts Go Home Luminarias Deer Silhouette Vinyl Wood Slice Ornaments Some People are Worth Melting For Olaf (Frozen Inspired) Ornament Personalized Pajamas with HTV 3D Reindeer Shield Decoration Trendy Christmas Cards with Silhouette + Free Cut Files Let It Snow Mitten Banner DIY Christmas Coasters Elf on the Shelf Wardrobe Simple Ornaments Stenciled Santa Sack Put on your Yamika! Reindeer Photo Ornament Christmas Card DIY Nativity Shadowboxes Monogrammed Drop Cloth Christmas Tree Skirt Canvas Wall Art for the Holidays

1. Pineapples and Pinecones // 2. Simply Kelly Designs // 3. Architecture of a Mom // 4. Just a Girl and Her Blog // 5. Two Purple Couches // 6. Chicken Scratch NY // 7. Creative Ramblings // 8. One Dog Woof // 9. Ginger Snap Crafts // 10. The Thinking Closet // 11. Please Excuse My Craftermath… // 12. Designer Trapped in a Lawyer’s Body // 13. weekend craft // 14. Dragonfly & Lily Pads // 15. Practically Functional // 16. Living My Given Life // 17. My Paper Craze // 18. The Kim Six Fix // 19. Home At Eight // 20. Queen of Everything // 21. Tried & True // 22. McCall Manor // 23. unOriginal Mom // 24. Create it. Go! // 25. From Wine to Whine // 26. GetSilvered // 27. It’s Always Ruetten // 28. Nearly Handmade // 29. Mama Sonshine // 30. Silhouette School // 31. It Happens in a Blink // 32. Create & Babble // 33. Sowdering About // 34. Where The Smiles Have Been // 35. My Favorite Finds // 36. Lil’ Mrs. Tori // 37. Designed Decor

Dawn Marie

facebook instagram pinterest parties by mamasonshine etsy bloglovin google+ email twitter Image Map


Leave a comment

Thank You Gift ~ Mini Canvas Picture

This summer I ran a half-marathon located in another city.  The location wasn’t that far, maybe an hour or an hour and a half from home.  But when you need to be there at six in the morning that is very far!

So my cousin and I decided to stay the night before the race.  The race was in the wine country and there are not a lot of hotels around there.  But there are a lot of bed and breakfast places.  The other thing the surrounding city had was rooms for rent located in people’s houses.  You could rent the room, like a bed and breakfast, but there wouldn’t be other guests.

As it turned out my cousin had a friend who grew up down there and that friend’s parents still live there.  And they had a room that they rent out to guests and they were gracious enough to let us stay the night there.  Because of their generosity, I want to make them a thank you card and a little gift.

MSS_Thank You Gift

I first used some crayons from my son’s art kit and made a little rainbowish pattern on a mini canvas.  The min canvases and easels can be found at Michel’s Craft Store and are about 3″x3″.

MSS_Thank You Gift

Using my Silhouette Cameo I cut out the dandelion, floating seeds and words out of different colored vinyl.  Because of the waxy nature of the crayons and the texture of the vinyl I went ahead and sealed it all with some Mod Podge, then added the adhesive rhinestones.

I thought the words ‘relax’ and ‘breathe’ fit well with the room they let us use.  It was a very calming house and atmosphere, which was just the thing we needed prior to our race.

MSS_Thank You Card


I also designed and cut out this thank you card using my Silhouette Cameo.

 UPDATE:

My dutiful sister has informed me that the canvas says ‘breath’ when I intended it to say ‘breathe’

*sigh* such is my life. it is always after I post it that she finds the errors…


Dawn Marie

facebook instagram pinterest parties by mamasonshine etsy bloglovin google+ email twitter Image Map


4 Comments

Tips for Printable Heat Transfer Material

I may have mentioned once or twice how much I love the print and cut feature on my Silhouette Cameo.

Well, I am going to bring it up again.  Only this time I will be using a Heat Transfer Material to make a gift.

There are other brands out there that sell this kind of material, but I use Avery, because I can buy it just about anywhere.

Here is the concept, you print something out on your computer, cut it out and then iron it on to something made of fabric.  And viola! Your very own custom shirt, coat, bag, pillow, blanket, etc.

I wanted to make a six-year-old girl a bag with her favorite Monster High Character.   I could have made one by layering colored heat transfer vinyl (HTV) but the characters from Monster High have sooo many coloring shades, that it would either too much work (& too munch HTV) or it wouldn’t give me the same look I was going for.

Lagoona Blue Tote Bag


I have used this material in the past, so I am very familiar with it, but as with all projects, I ran into some trouble.  I figured it would be beneficial to others if I shared my snafu, so you will not make the same mistake.

Here are a few tips for using the printable heat transfer material:

  • Know your printer.  Printer inks are different and behave differently.  If you have an ink jet printer, get the material designed for ink jet printers.  If it is a laser printer, there is a different material for that, as well as the other inks, like UV.  If you choose the wrong type your ink will not set and will either run or fade.
    • Print a test page on regular paper to see how your image will fit, and line up.  You don’t want to waste any of the transfer material.Print a test page first
  • There are two different kinds of transfer material.  One for light-colored fabrics and one for dark.
    • The one for light-colored fabrics is an actual ink transfer material.  It will transfer the ink on to your shirt, so the places in your design that are white, will be transparent, meaning the shirt will show through.  The material that it is printed on will adhere to the fabric, so there is a protective layer between the ink and the outside world.  You must also remember to flip your design on the horizontal plane when using this material.
    • The one for dark-colored fabrics is like a sticker.  It is a white material and so the white areas in your design will remain white.  Plus, there is no need to flip the design.  It is the one I like to use the best.Dark Fabric Material
    • Weed carefully, this material can tear easily.  But it is not sticky, so you can do it in sections.
    • Don’t use the shade of fabric alone to make the decision on which one to use.  Think about what you want your project to look like in the end.  I use the material for dark fabrics all the time, even on light-colored fabric like this tote bag.Light colored bag, but using dark fabric transfer material
  • Your iron must be hot and dry.  If you use this to iron out the wrinkles in your clothes, dump out the water.  Set your iron to the hottest setting.  It is also not recommended you not use an ironing board.  This could be because you don’t want an uneven surface, but it is also because of the reflective heat material under the cover.  Heat on the bottom of the material may interfere with it bonding to the fabric.  I place a folded, ironed sheet on my kitchen counter.MSS_HTM_MHbag09
  • Cool removal or not?  Some heat transfer material requires you to wait until the design has cooled before removing the transfer plastic.  If it does and you rush it, you can peel off your design with the transfer plastic, so be patient.Sometimes you have to wait for it to cool before removing protective/transfer layer
  • Don’t be discouraged when it takes longer to adhere than the instructions say.  I have held the iron in place for minutes, when the instructions say 45-60 seconds.
  • Apply constant high pressure.  You are not ironing out the wrinkles, so don’t move your iron around.  You can mess up your design, as I did.What can happen when you move your iron around
    • But not all is lost if you do.  Here is something you might not know: the heat that put it on, can take it off.
      • Apply heat back to the design and quickly use something to scrap away the design before it cools.  I first used my weeding tool to pull the design, but that was taking too long.  I then thought of my scrapping tool (a used Sil gift card), when the design was still hot I just scrapped it off.  You have to keep applying heat to small areas and scrapping, and repeating.  The scrapping doesn’t take too long, and within 10 minutes, it was gone.  There is a slight bit of ‘glue’ left, it’s not really glue, but there is a residue, it’s kind of like a shiny outline of your design.  MSS_HTM_MHbag07
    • That’s OK, because you are going to reprint your design and reapply.  This time, not moving the iron around.MSS_HTM_MHbag08


It turned out just the way I wanted it to, and the birthday girl was happy.

MSS_HTM_MHbag01


The bag went perfectly with the personalize Monster High water bottle & Lagoona Blue card I made.

MSS_HTM_MHbag11


Happy Crafting

signature-black
facebook instagram pinterest parties by mamasonshine etsy bloglovin google+ email twitter Image Map


Enhanced by Zemanta