Valentine’s day is coming up. Not really my favorite holiday, because I am not really all that fond of hearts. Never really have been. I even had an anti-pink period in my life. Don’t worry, I got over it.
I have boys who need to give out Valentines at school, to both boys and girls. They are two and four so I have a hard time wanting to hand out cards that say ‘be mine’ or ‘my valentine’ or anything like that. There are lots of great alternatives now, and really punny ones too. I typically like to make something for the kids to hand out, but this year I am so far behind and if I did make something I would have to double it cause now both kids are in preschool.
Yesterday I decided to just buy valentines for the kids to hand out.
EEKK!!! I KNOW! who is this lady?
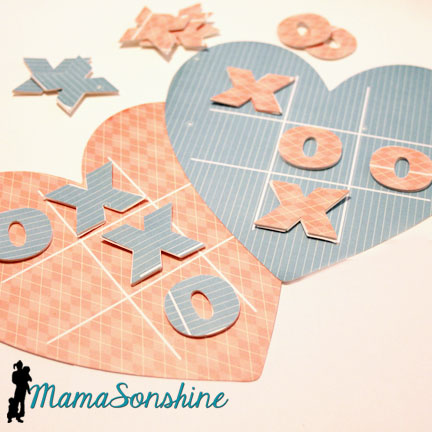
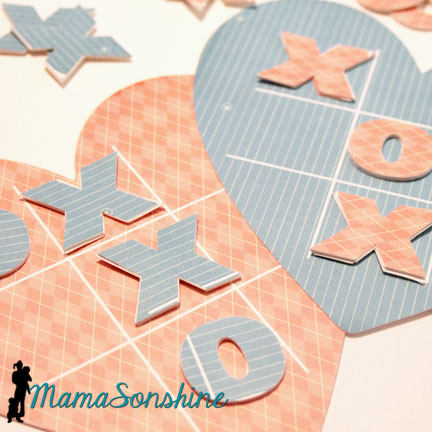
But I couldn’t go with out making anything for the kids. I love the Tic-Tac-Toe Valentine’s I have been seeing lately and decided to design my own for the kids at school.
In Silhouette Studio I designed the game board and some x’s and o’s. Only I wanted them a little thicker so I cut out 5 layers of each x & o and glued them together.
The boys will give one to each kid, from both of them, but not as their valentines cards. Just a fun gift and they can play it at school during the party.
I wanted to make a free printable for you guys, but didn’t want you to have to cut out all those little x’s & o’s. So I made your game pieces in circles to cut out.
You can click on the picture to download it or go here.
Please note this design is for PERSONAL USE only please. Please do not forward, share, sell or distribute the files for any commercial purposes or claim as your own design. Thanks a bunch!
I feel a little behind this year. Ian’s birthday is next month and I have only been working on his invitations for about a week.
Ian decided in December that he wanted a Ninja Turtle birthday party. I knew it was on the list of parties but didn’t know he wanted it this year. (He has the next six birthday’s planned, yep, he takes after me.)
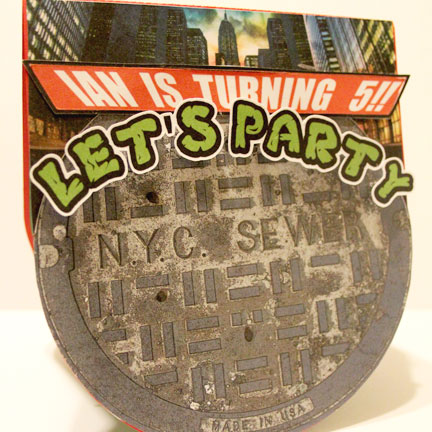
I decided I wanted his invitations to be a pop-up card with the front as a sewer cover. I designed them knowing I would need to use my favorite thing about the Silhouette. It’s Print ‘N Cut feature!
It is the main reason I got it and it just so happens that this month’s Silhouette Challenge was to make a project using this very thing I love so much.
I started with a picture of a NYC manhole cover. I used Photoshop to make the sewer cover look a little more comic-booky. I couldn’t find a TMNT one with out words on it, and while I could have altered it in Photoshop to remove the words, I just didn’t want to go the trouble, this was easier.
I had thought about having just a circle card, but the pop-up part would have been to small, or the circle card would have been too big. So I used a card template from SVG CutsHaunted Forest kit.
I needed something above the manhole cover, and I didn’t want to use a solid color so I used a picture of NYC that I found on one of the TMNT sites. Since the angle of the city is from the street it worked perfectly. For that part and the sewer cover I used the fill with pattern feature, or more accurately, I dragged and dropped the pictures into the shapes.
I used foam dimensional tabs to raise the ‘Let’s Party’ text.
I didn’t want to apply the letters individually to each invitation. I connected them with the offset tool, I made the offset as small as possible while still maintaining connections between each letter.
It was still in two parts, but that was better than 9 parts.
I made the “Ian is turning 5” part in Photoshop and traced it in Studio.
But a TMNT party invitation would not be complete with out some Ninja Turtles!
p.s. I decided to use the Old-School version from my childhood because I like them the best.
I traced a PNG copy of a picture of the four of them coming out of a sewer. This was the part that I wanted to use as a pop-up.
It is pretty amazing how close and accurately the Silhouette cuts with the print ‘n cut feature. I could even cut out the little spaces on the bottom that would have been white after printing. There is no way I would have been able to cut that out by hand.
The party information will be printed out on vellum and attached to the bottom of the inside. I decided on vellum because I didn’t want the inside to be white. I could have printed it on colored paper, but with the size of the card I couldn’t get two on one page, and I hate wasting paper.
Stay tuned for how the party turned out and all the other things I will make, although you will have to wait till a couple of months.
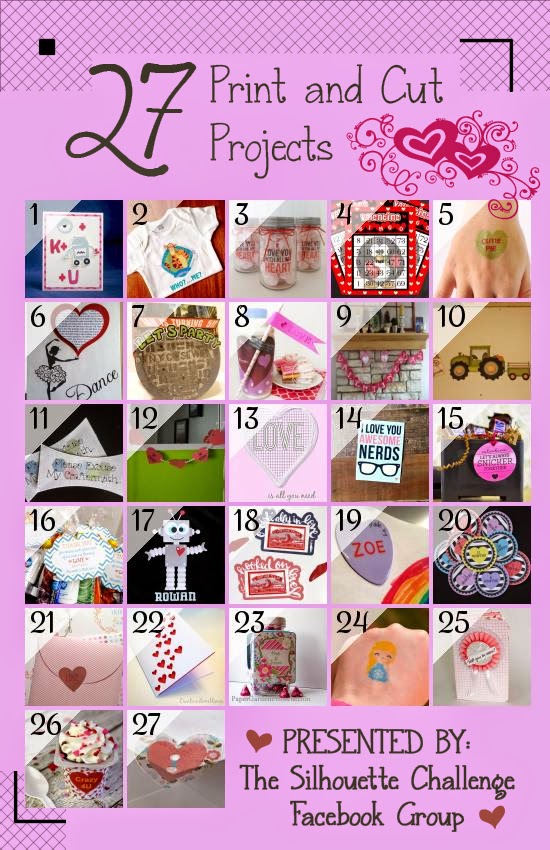
Want to Check Out More Silhouette Projects?
My Silhouette Challenge buddies and I are all sharing projects on our blogs today, so pursue the projects below for a wealth of Silhouette inspiration! With a heavy emphasis on hearts!
I actually got our fist batch of Christmas cards out this week. When I order cards, I just order extra, but when I make them I always make less at first. I don’t want extra hand-made Christmas cars lying around, because they have the kids pictures on them, I can’t use them for next year.
My sister had always sent out Christmas cards with a picture of her kids. For Ian’s first Christmas we decided that we would have one picture done with all three kids. That way we can send one card to all our joint family and friends. Almost every years since (except last year, because I didn’t do cards last year) we have sent out a joint card. Typically I just order them, but not this year.
This year I decided to go back to making my own cards, because I can just use my Silhouette Cameo. It will be easy peasy. Unless you are like me and decide you need to make a Christmas card with like a hundred pieces. Needless to say they took a little longer than I thought they would.
We went to a local mall where a few times a day they release bubble snow in the atrium. I took a picture of the kids in the falling snow and thought it would be a great idea to make a shaker card like a snow globe. I used this snow globe file from Bird’s Cards, which is a great resource for free card files.
Back to the pictures, I didn’t like the mall and all the strangers in my background so I went a head and used Photoshop to ‘fix’ it.
Doesn’t that snowy tree scene look so much better? (Which was a free desktop background file)
While the three older kids did a great job taking a group picture, Sid didn’t cooperate all that much. I had many wonderful pictures with the other three, but no Sid.
For the picture of the boys I used this picture in front of the silver tree they had up. There wasn’t a good picture of those two with the snow.
So, you wanna see how the card turned out?
I hope everyone has a Merry Christmas and a Happy New Year!
p.s. family and friends, there is another batch going out, so don’t worry if you haven’t gotten yours yet.
My sister has one of those Christmas villages, with all the houses and the snow and stuff. This year my nieces wanted to make her a little village in a giant Mason Jar. Luckily my mom has hundreds of Mason Jars in various sizes. Remember how we made all those Cookie-in-a-Jar guest gifts for my cousins baby shower? Yep, she still has tons.
She took the kids to the craft store, got all the little things to go in the jars and turned the kids loose.
Ian made one for me and my mom put together a stand for it. I am pretty sure this was a gallon mayonnaise jar, it’s huge.
My mom made some cream-colored playdoh so the items would stay upright in the jar. She also bought some of that Kinetic Sand in cream.
Ian placed all the items himself. I absolutely love it.
His gift gave me an idea for a Christmas gift for Ian’s teacher. Luckily my mom had all sorts of stuff left over so Ian could make another jar.
Before we started decorating I used the hot glue gun and glued six blobs on the bottom of the jar for stability.
I tried to use the playdoh, but didn’t like how the stuff wouldn’t really stay up right, unless you used a hold bunch of playdoh. I didn’t really like how the playdoh looked from the outside.
So after he placed all the stuff in the jar, I took it all out along with the playdoh. Then I put it all back in how he had it, and with his instructions, but I used hot glue to secure his decorations.
He was sad that we didn’t have any more reindeer, but at least we had Santa.
This jar wasn’t as large so he couldn’t fill it quite so full. After all was secure I dumped in the plastic snow that mom got at the craft store.
I really wish I had sprayed the inside bottom of the jar with that window snow paint. I think it would have looked great, but I thought of it after, and I don’t have any….but you can use that idea, it’s all good.
Since this is a teacher gift and made in a Mason Jar I thought these tags would be perfect!
I designed the tag in Silhouette Studio software. For the jar I used the print ‘n cut method, and cut the lid out in two layers.
Love the tag? I know, it’s super cute. And you are in luck, cause you can download here. For free.
This PDF file is the above printable tag for Christmas.
This SVG file is for those of you who would like to use it in your cutting machine. I did have to change the font for the SVG file because it was a little too thin for cutting.
Please note this design is for PERSONAL USE only please. Please do not forward, share, sell or distribute the files for any commercial purposes or claim as your own design. Thanks a bunch!