I know it’s hard to talk about Christmas before Thanksgiving but us crafters need to be prepared. In order to be ready with our DIY Christmas Gifts and new decor we need to start early. In all honesty we probably start thinking about Christmas in the summer.
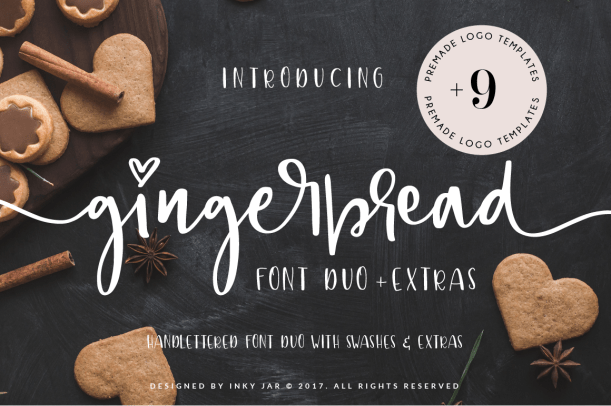
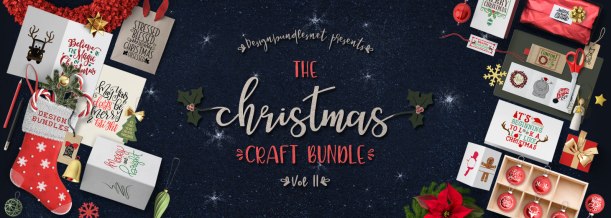
If you are still in the process of making gifts, or items to sell at craft fairs or online you will love this design bundle! It is full of Christmas fonts, monogram frames, holiday cut files and so much more! As with all the design bundles from DesignBundles.net your purchase comes with personal and commercial licenses. So you are able to use all the wonderful elements in all your projects.
One of the fonts I am super excited about is the Gingerbread font
Handlettered fonts are so lovely and they are great for gift tags and cards. I love this one with all the swooshes.
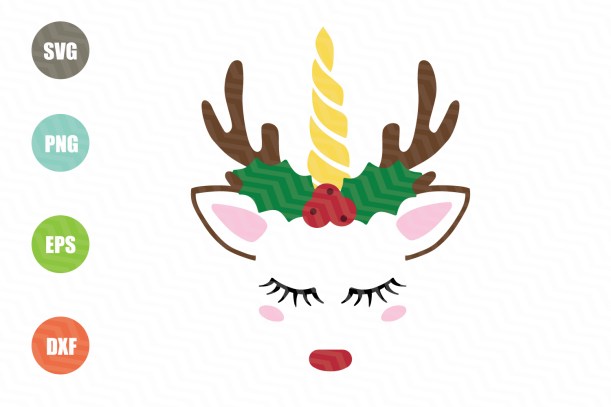
If you are making loads of Christmas ornaments you will find loads of cut files to use on them.
They have also been kind enough to add a floating ornament template. Easy to cut out using your Silhouette (or Cricut).
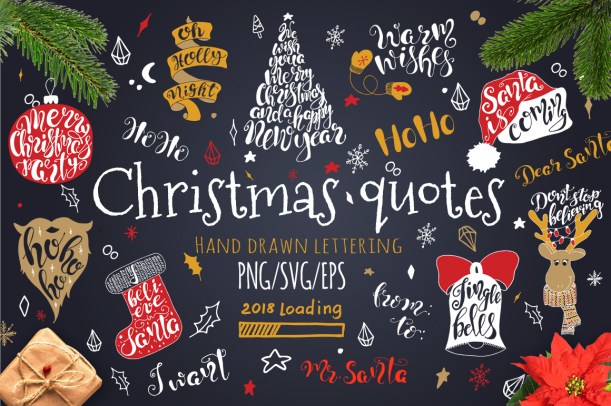
Hand lettering quotes to use as stencils on chalkboard, or even just printed will make quick DIY decorations. Any number of these would also be great on shirts for the family.
And we all love a good monogram for the holidays! These would work well on those glass ornaments too.
The most amazing thing about this it the price! Product from over 40 designers are in this bundle. There are so many items I can’t even list them all. Individual items range in price from $3-$18, so in total this bundle is worth over $300! But Desingbundles.net is offering it to you for the discounted price of $24!
A 93% discount. But this discount won’t last forever. Get it before the time runs out, and so you still have time to get your gifts made.
Valentine’s day is coming up. Not really my favorite holiday, because I am not really all that fond of hearts. Never really have been. I even had an anti-pink period in my life. Don’t worry, I got over it.
I have boys who need to give out Valentines at school, to both boys and girls. They are two and four so I have a hard time wanting to hand out cards that say ‘be mine’ or ‘my valentine’ or anything like that. There are lots of great alternatives now, and really punny ones too. I typically like to make something for the kids to hand out, but this year I am so far behind and if I did make something I would have to double it cause now both kids are in preschool.
Yesterday I decided to just buy valentines for the kids to hand out.
EEKK!!! I KNOW! who is this lady?
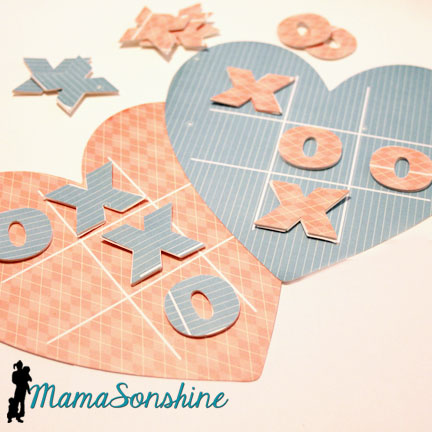
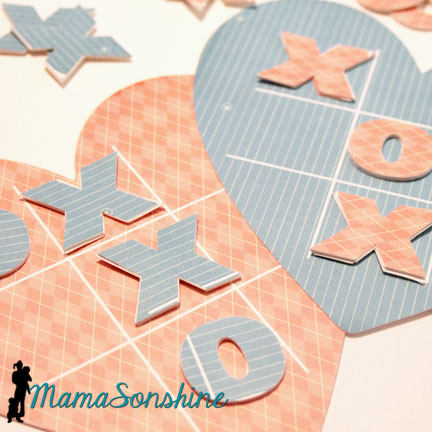
But I couldn’t go with out making anything for the kids. I love the Tic-Tac-Toe Valentine’s I have been seeing lately and decided to design my own for the kids at school.
In Silhouette Studio I designed the game board and some x’s and o’s. Only I wanted them a little thicker so I cut out 5 layers of each x & o and glued them together.
The boys will give one to each kid, from both of them, but not as their valentines cards. Just a fun gift and they can play it at school during the party.
I wanted to make a free printable for you guys, but didn’t want you to have to cut out all those little x’s & o’s. So I made your game pieces in circles to cut out.
You can click on the picture to download it or go here.
Please note this design is for PERSONAL USE only please. Please do not forward, share, sell or distribute the files for any commercial purposes or claim as your own design. Thanks a bunch!
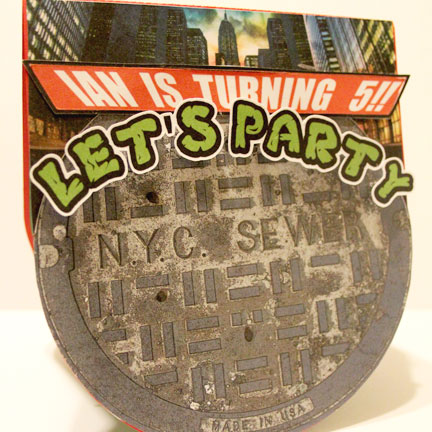
I feel a little behind this year. Ian’s birthday is next month and I have only been working on his invitations for about a week.
Ian decided in December that he wanted a Ninja Turtle birthday party. I knew it was on the list of parties but didn’t know he wanted it this year. (He has the next six birthday’s planned, yep, he takes after me.)
I decided I wanted his invitations to be a pop-up card with the front as a sewer cover. I designed them knowing I would need to use my favorite thing about the Silhouette. It’s Print ‘N Cut feature!
It is the main reason I got it and it just so happens that this month’s Silhouette Challenge was to make a project using this very thing I love so much.
I started with a picture of a NYC manhole cover. I used Photoshop to make the sewer cover look a little more comic-booky. I couldn’t find a TMNT one with out words on it, and while I could have altered it in Photoshop to remove the words, I just didn’t want to go the trouble, this was easier.
I had thought about having just a circle card, but the pop-up part would have been to small, or the circle card would have been too big. So I used a card template from SVG CutsHaunted Forest kit.
I needed something above the manhole cover, and I didn’t want to use a solid color so I used a picture of NYC that I found on one of the TMNT sites. Since the angle of the city is from the street it worked perfectly. For that part and the sewer cover I used the fill with pattern feature, or more accurately, I dragged and dropped the pictures into the shapes.
I used foam dimensional tabs to raise the ‘Let’s Party’ text.
I didn’t want to apply the letters individually to each invitation. I connected them with the offset tool, I made the offset as small as possible while still maintaining connections between each letter.
It was still in two parts, but that was better than 9 parts.
I made the “Ian is turning 5” part in Photoshop and traced it in Studio.
But a TMNT party invitation would not be complete with out some Ninja Turtles!
p.s. I decided to use the Old-School version from my childhood because I like them the best.
I traced a PNG copy of a picture of the four of them coming out of a sewer. This was the part that I wanted to use as a pop-up.
It is pretty amazing how close and accurately the Silhouette cuts with the print ‘n cut feature. I could even cut out the little spaces on the bottom that would have been white after printing. There is no way I would have been able to cut that out by hand.
The party information will be printed out on vellum and attached to the bottom of the inside. I decided on vellum because I didn’t want the inside to be white. I could have printed it on colored paper, but with the size of the card I couldn’t get two on one page, and I hate wasting paper.
Stay tuned for how the party turned out and all the other things I will make, although you will have to wait till a couple of months.
Want to Check Out More Silhouette Projects?
My Silhouette Challenge buddies and I are all sharing projects on our blogs today, so pursue the projects below for a wealth of Silhouette inspiration! With a heavy emphasis on hearts!
I think it is important to have a positive outlook on life.
I am a firm believer of the idea that the day is what we make of it. It is not always easy, but we gotta try.
I try to wake up and tell myself “today will be a good day and I will be happy” OK, so maybe not when I wake up, cause I can barely find the floor to stand up out of bed. But at least after my first cup of coffee and then tell myself that multiple times a day when things are going so good.
So I decided to make myself a reminder.
I purchased this phone cover and after a few months thought it needed something more.
I couldn’t think of a design that I wanted. OK, that’s not true, I couldn’t narrow done a design for the back. So I thought I would come up with something a little more motivational.
“Some days you just have to create your own sunshine”
I thought it very fitting for me and lest be honest it is not always sunny here in the PNW.
I loved the quote so much that I decided to make a print for it. And just in case you need a little sunshine I have this printable available for you to download too!
Just click here or on the picture below to download your copy in order to bring a little sunshine to your day.
Please note this design is for PERSONAL USE only please. Please do not forward, share, sell or distribute the files for any commercial purposes or claim as your own design. Thanks a bunch!


 https://designbundles.net/the-christmas-craft-bundle-ii