I have been looking for a used inexpensive jogging stroller for a while now. I didn’t want to spend a lot of money on it as I don’t know how long I would really use it. The boys are older and they won’t be a stroller forever. I understand that there are wonderful strollers out there that are worth the hundreds of dollars spent on them. But I am cheap, and just didn’t want to spend $100+ on a used stroller. Hell, I didn’t want to spend more than fifty bucks.
And when I say I was looking, I mean I was waiting for a cheap stroller to find me.
It finally did.
I was driving home from work one day and I saw it on the sidewalk with a for sale sign. I called and talked the guy down in price.
Friday night Ian spent the night at my mom’s so Saturday morning I thought was the perfect time to break the stroller in.
I got some snacks for Sid, his blanket, his toy and water for me and we hit the road.
It was my slowest pace since I started running again.
I didn’t think there would be a difference in running and running while pushing a stroller. But there is. It is harder.
One thing that helps with your pace is the movement of your arms. When you push a stroller you either don’t move your arms or you only move one arm. Plus it’s heavy and Sid is no light weight, so I have that extra weight.
But we made it, we did four miles that morning. Plus I had a place for all my water. I drink a lot of water while running and while I have a hand bottle, it isn’t enough.
The next morning I had a running date with my cousin. She and I have not done any long runs in well over a month and we have a half marathon coming up. Every week from now until then we will be doing at least one long run, and Sunday we started with 7 miles.
I hadn’t planned on bringing Sid, but he woke up just as I was getting ready to leave. Not to worry, I can just bring him.
Which in all honesty, I was happy about, because I was concerned about my water intake on a 7 mile run. I had finished about 40 ounces the day before on a 4 mile run, so how would I make it through 7 with only 16….But since I had my stroller it wasn’t an issue. Plus we could bring our snacks and my cousin didn’t need to wear her running belt.
Again it was hard, but we did it. We were slower than snails in peanut butter, but we did all 7 miles. After, we were all “I could have done another mile or two.”
And that slow pace allowed us to talk. Because for long distances you should run at a pace where you can maintain a conversation. Right? So it was good for us.
I don’t plan on taking a kid with me on all my runs, but having a jogging stroller gives me a little more flexibility. It will allow me to go running during the times that I have only one kid, instead of always having to wait till they go to bed. Plus the more I train with a stroller, the easier it will be when I don’t have one.
Sid doesn’t seem to mind riding in the stroller, even if it did put him to sleep.
This past month I have been busy making Ian’s birthday party decorations. I wanted to share a few of the items I am making.
I don’t want to spoil the surprise, so this is just a sneak peek at what I can do now that I have my Silhouette Cameo to help me.
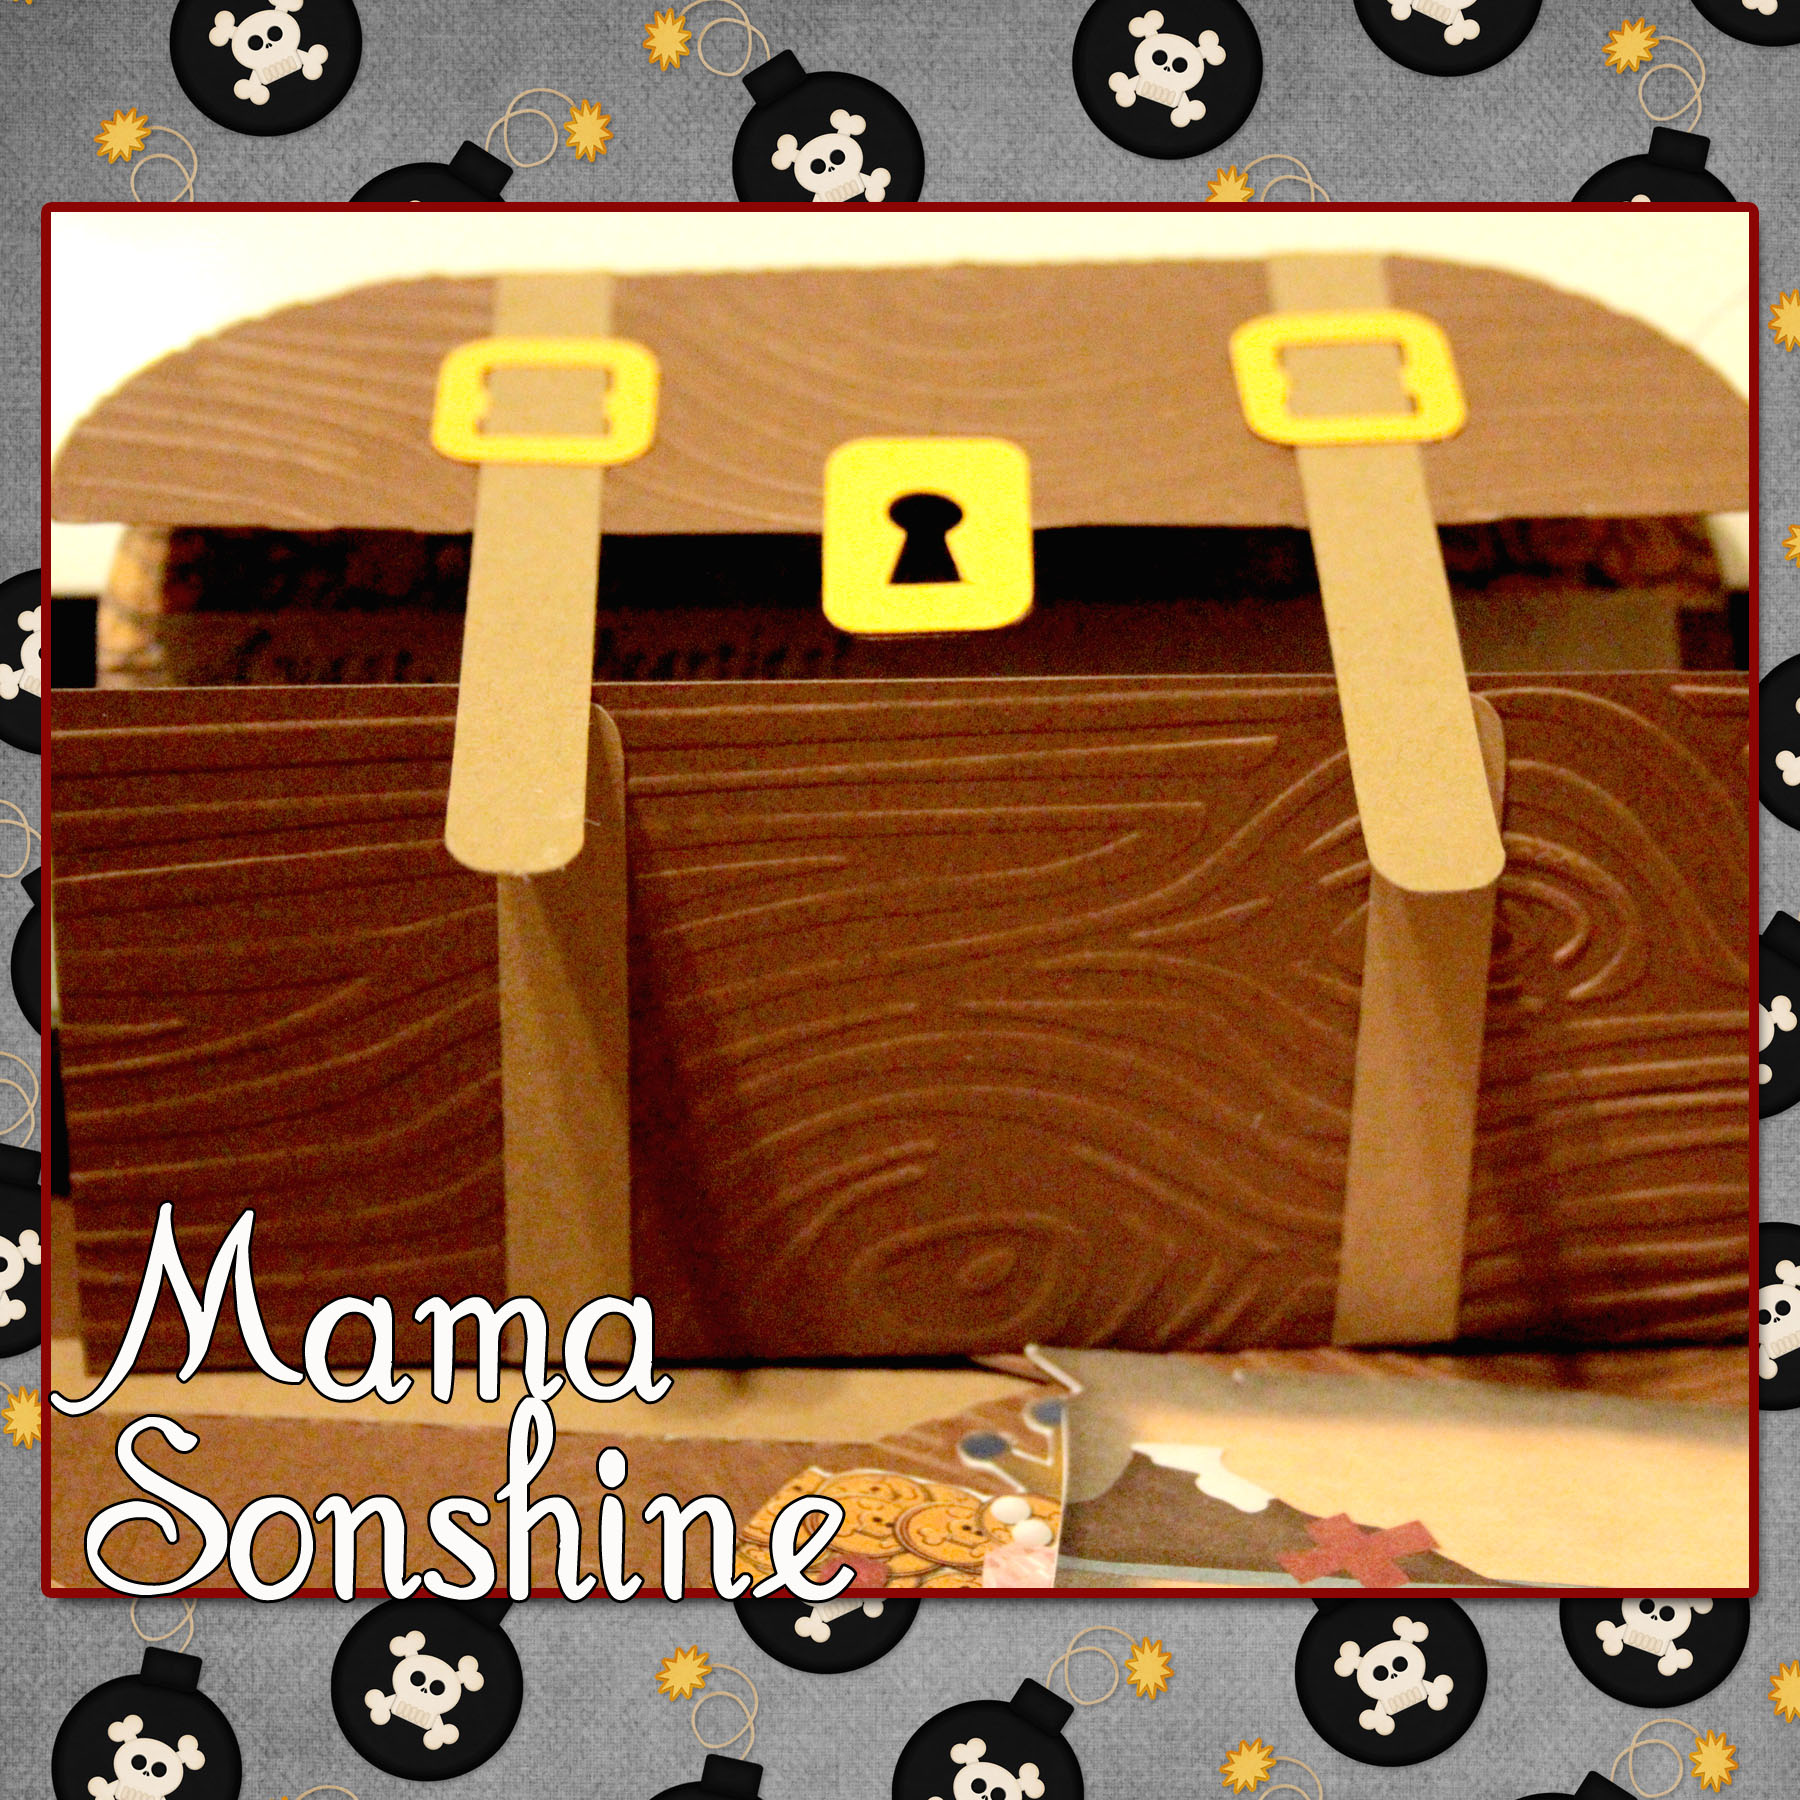
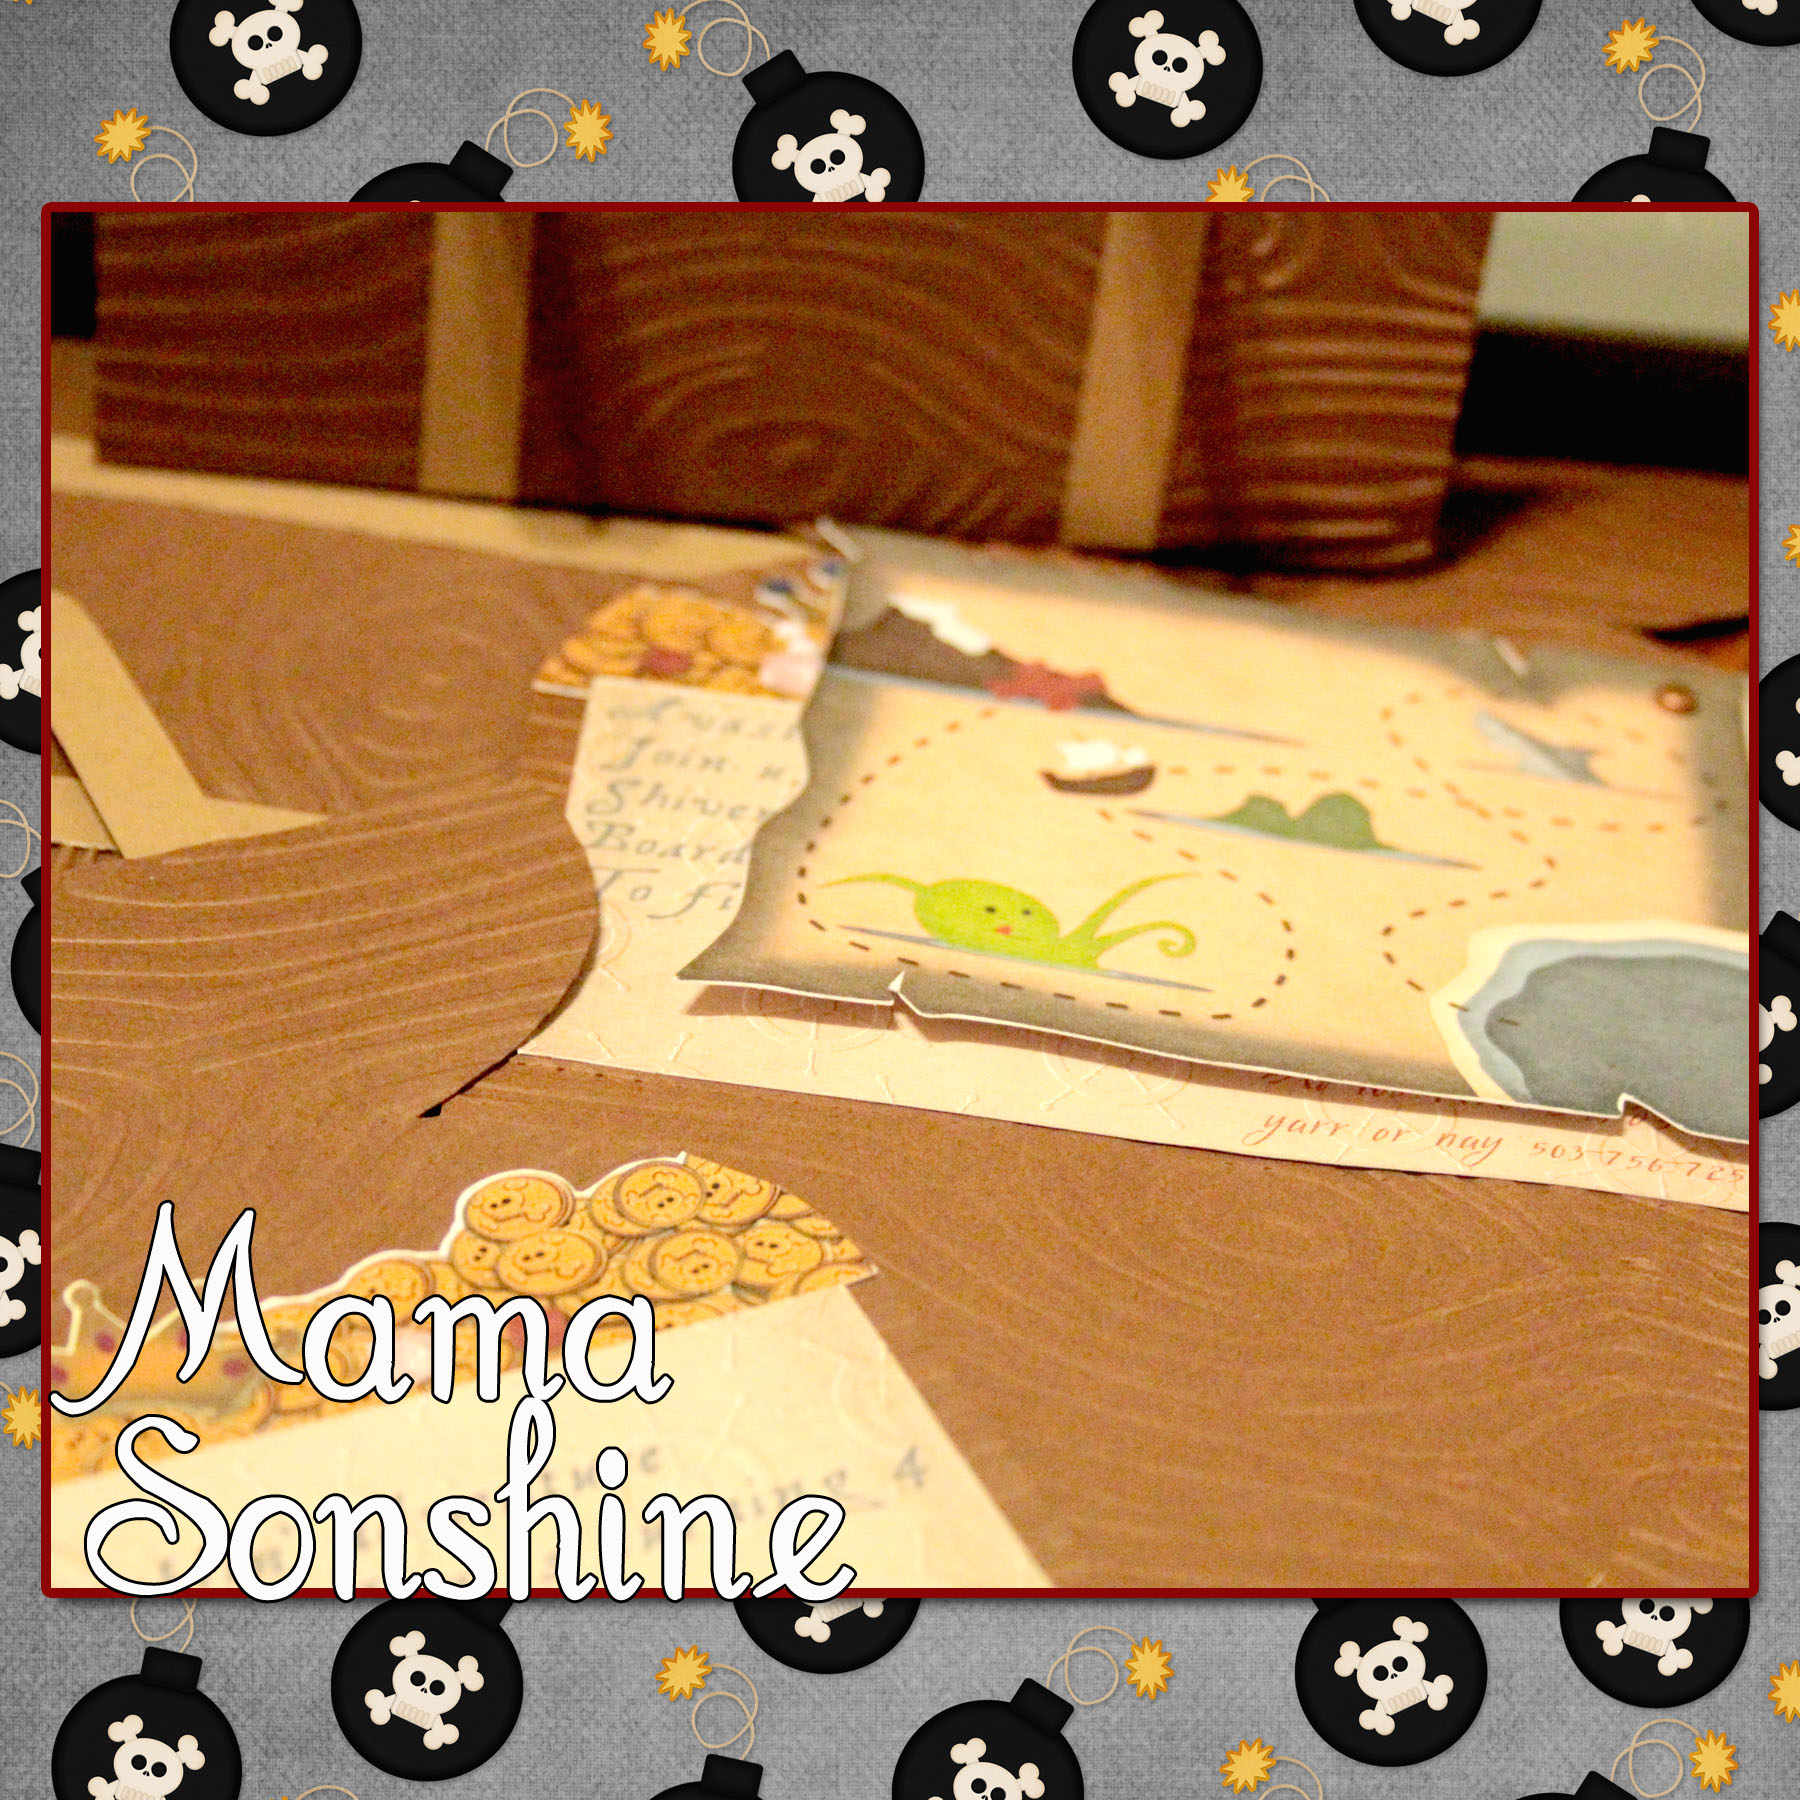
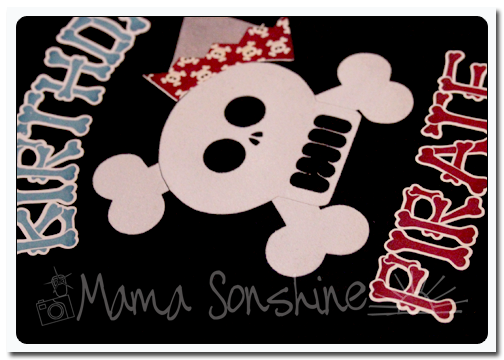
Ian had decided he wanted a pirate birthday party this year. I wanted his invitations to be pirate chests that open up to revel treasure, and a treasure map.
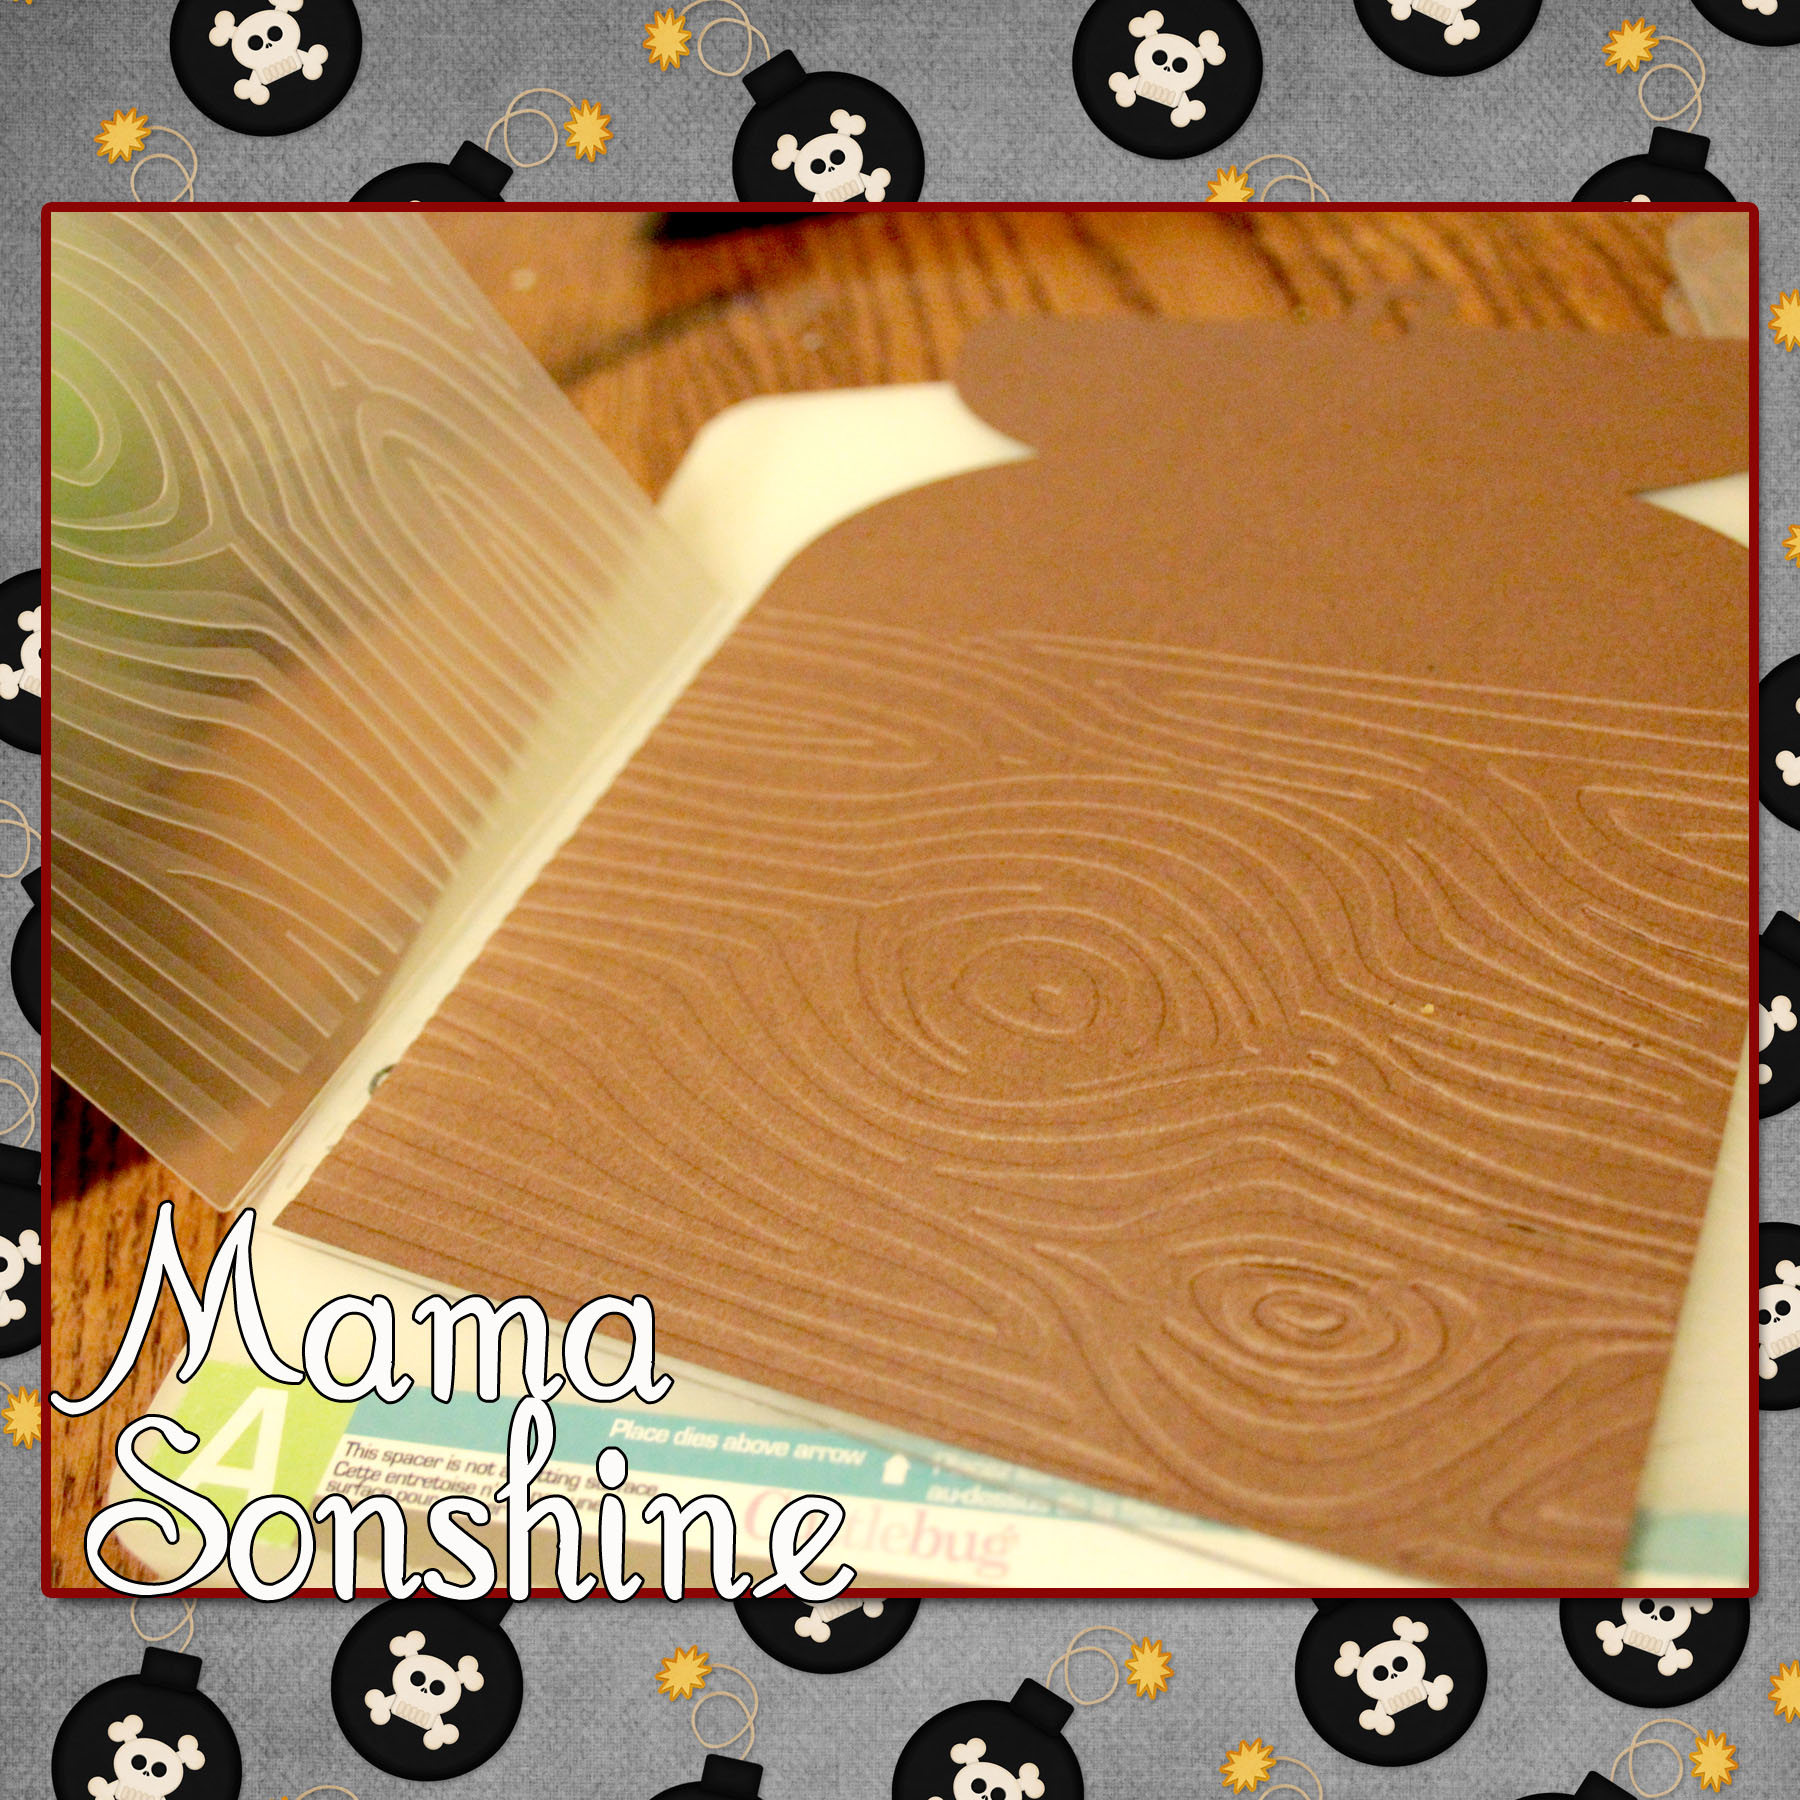
I quickly gave up trying to draw a treasure chest and just purchased a cut file from the Silhouette Studio Store. After which I ran it through my Cuttlebug to emboss the paper with a wood grain.
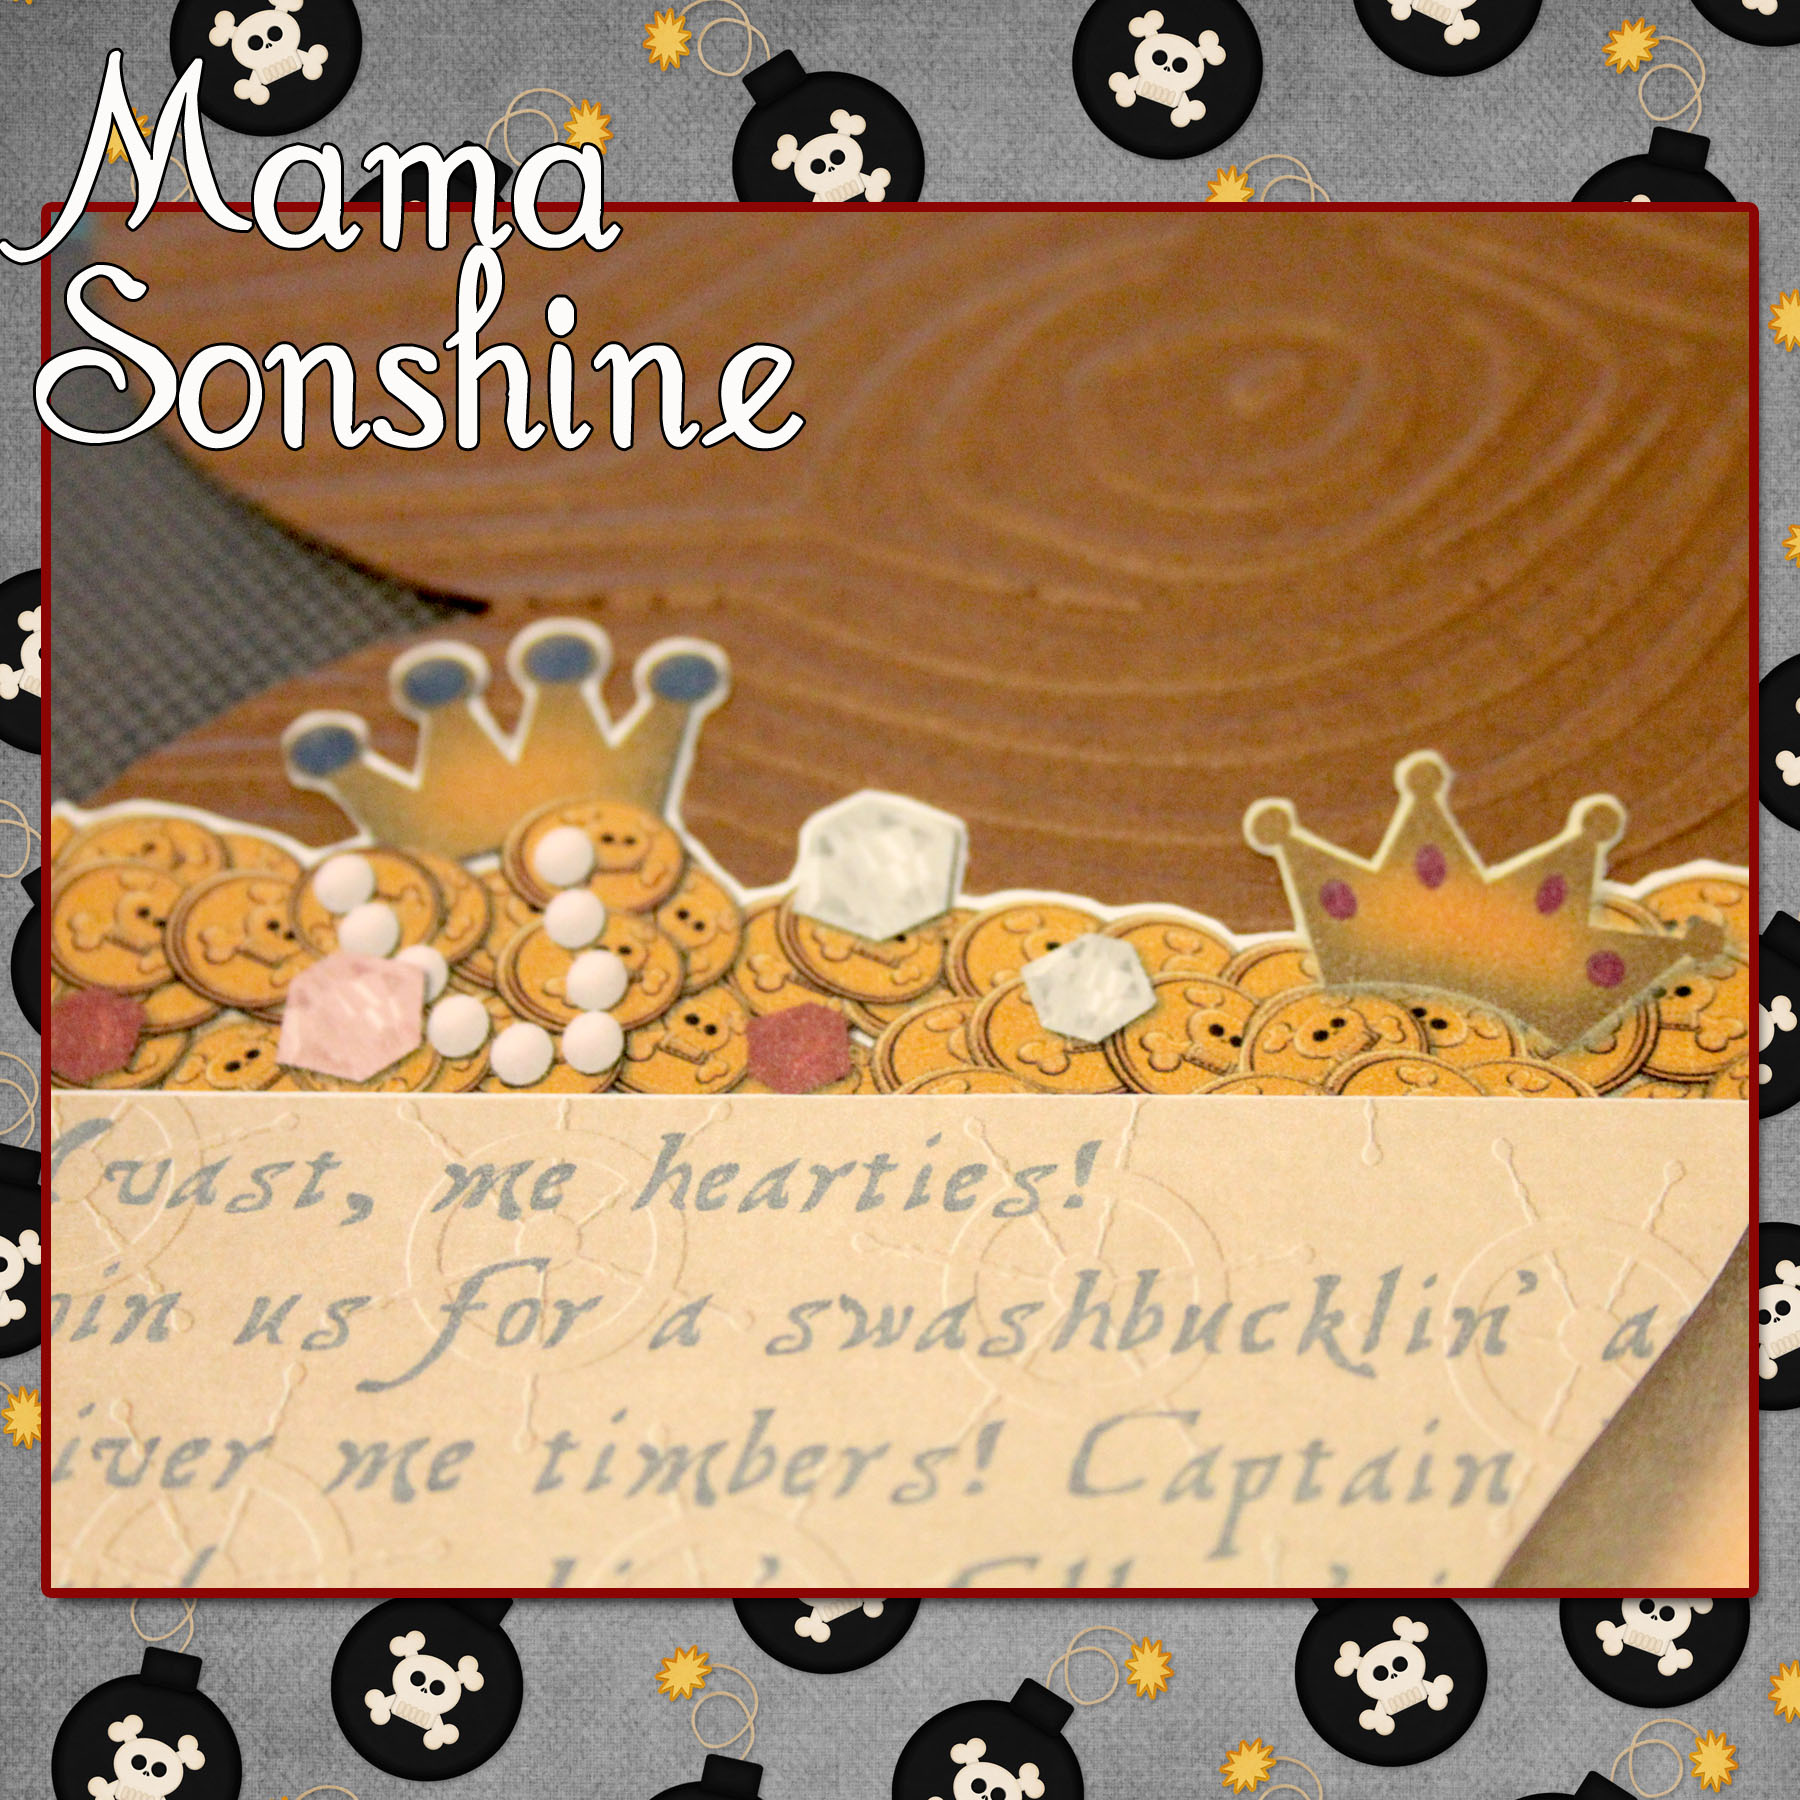
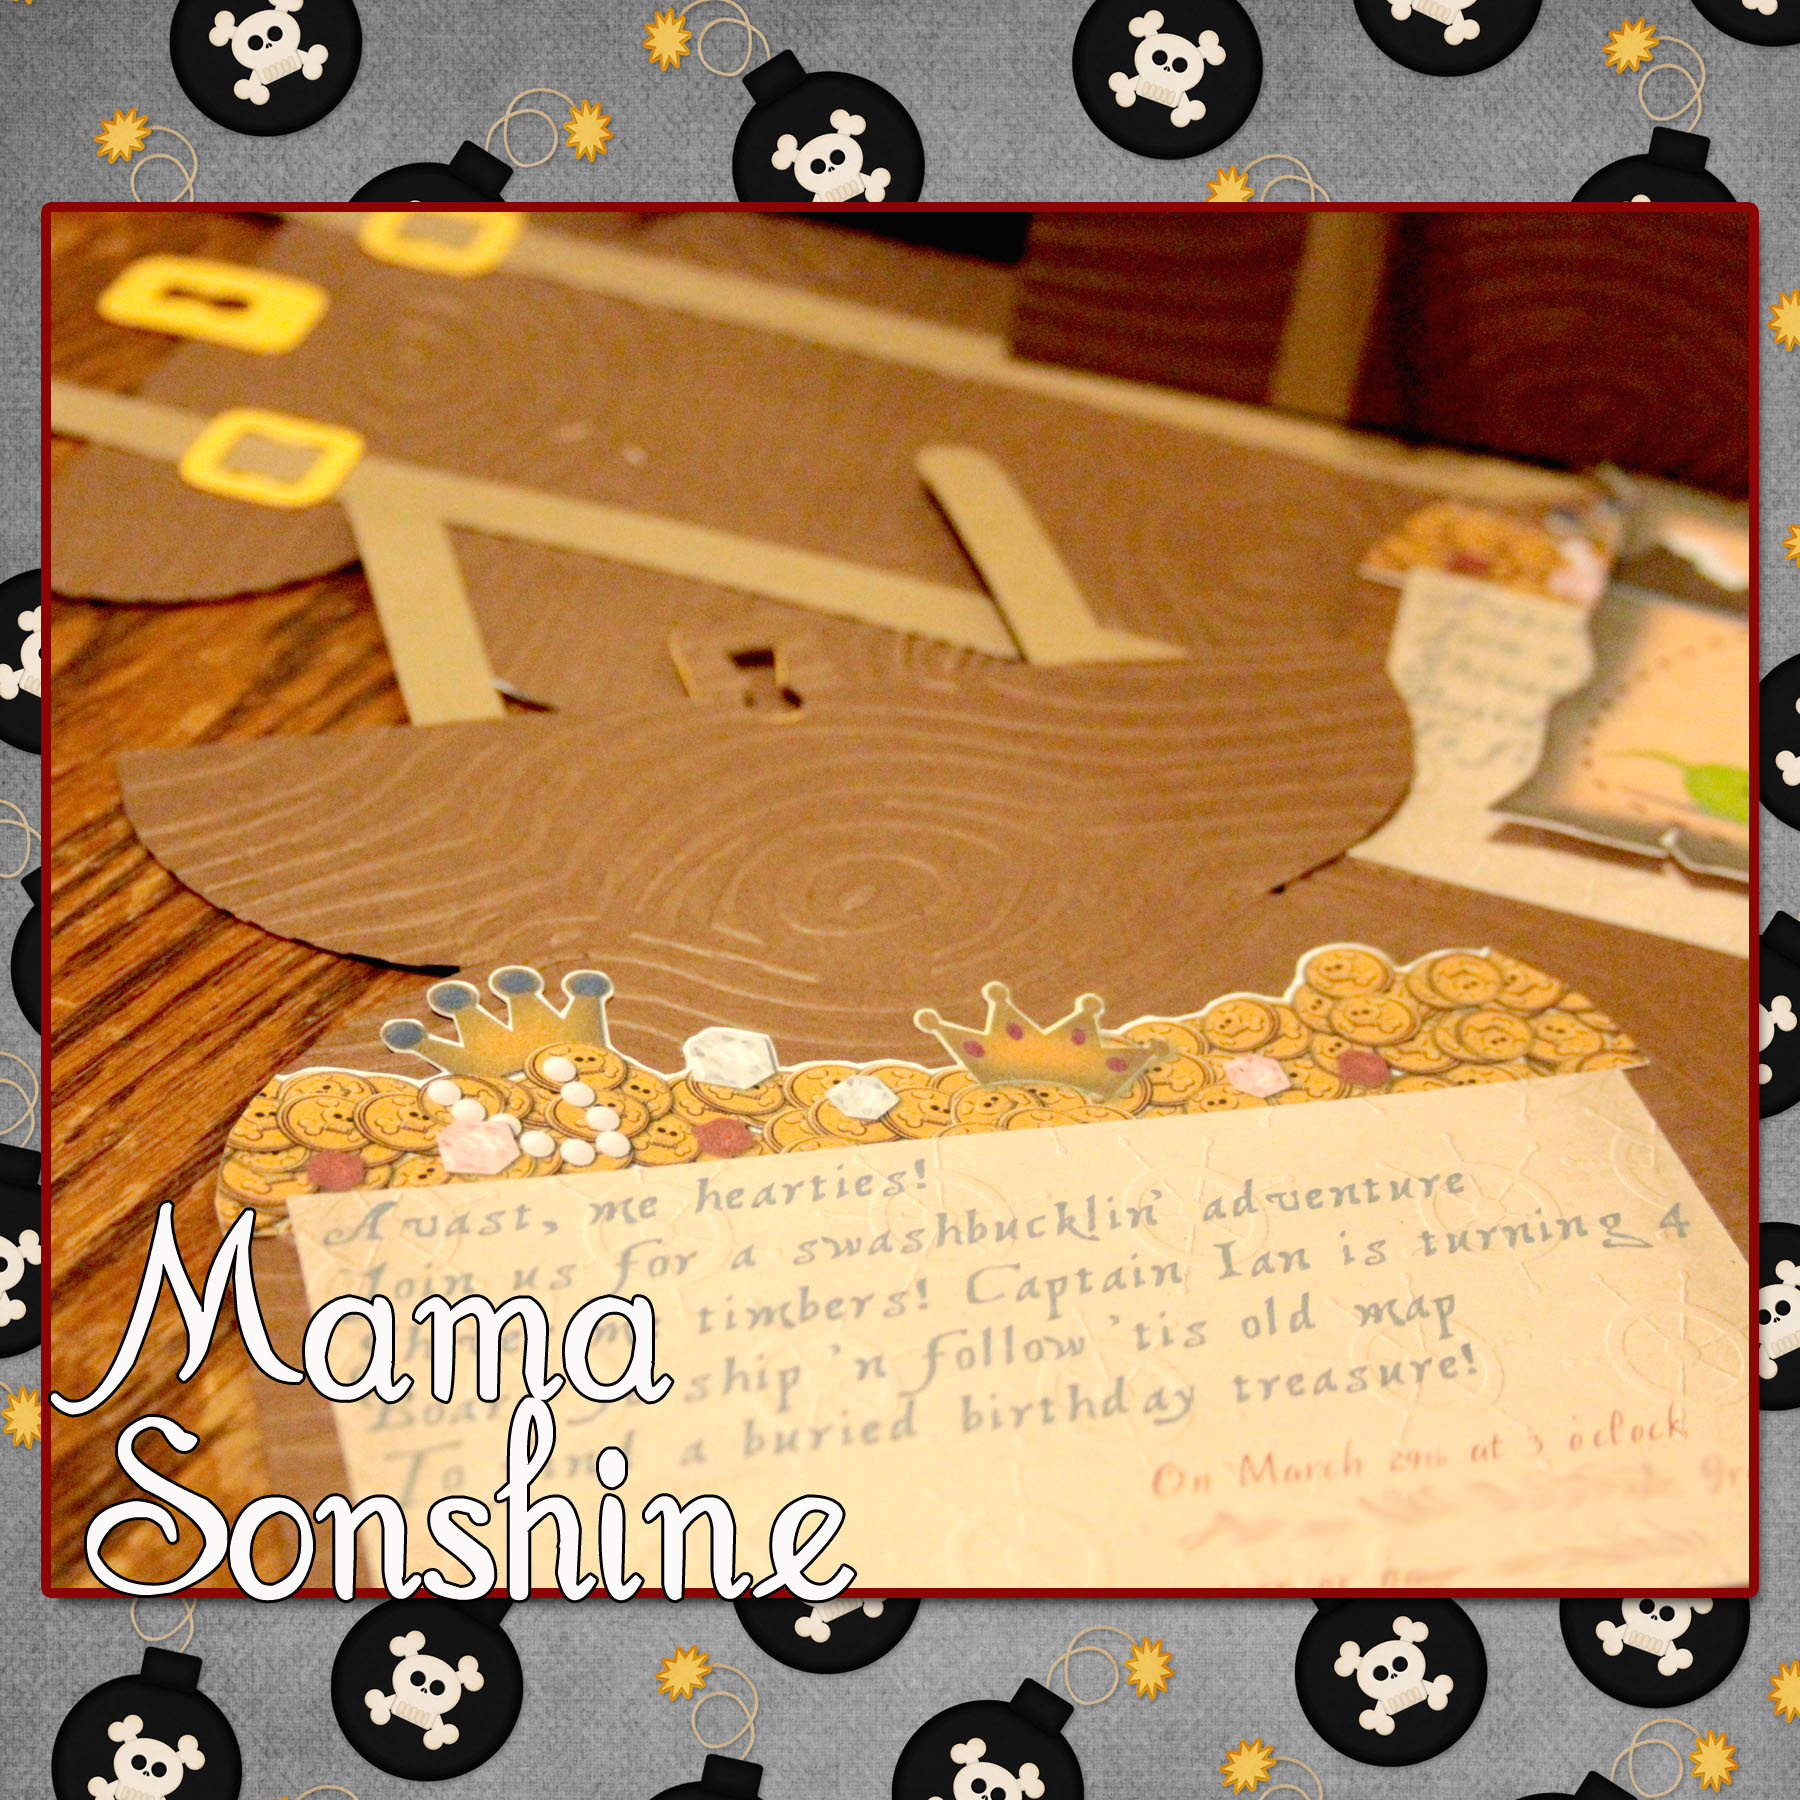
I went to Photoshop and created a picture of coins and jewels that matched the shape of the card. I imported that image into the Silhouette Studio software so that my machine would cut around all the little shapes for me.
I also created a cut out that would contain all the information on the card.
It says
“Avast, me hearties! Join us for a swashbucklin’ adventure Shiver me timbers! Captain Ian is turning 4 Board ye ship ‘n follow ’tis old map to find a buried birthday treasure!”
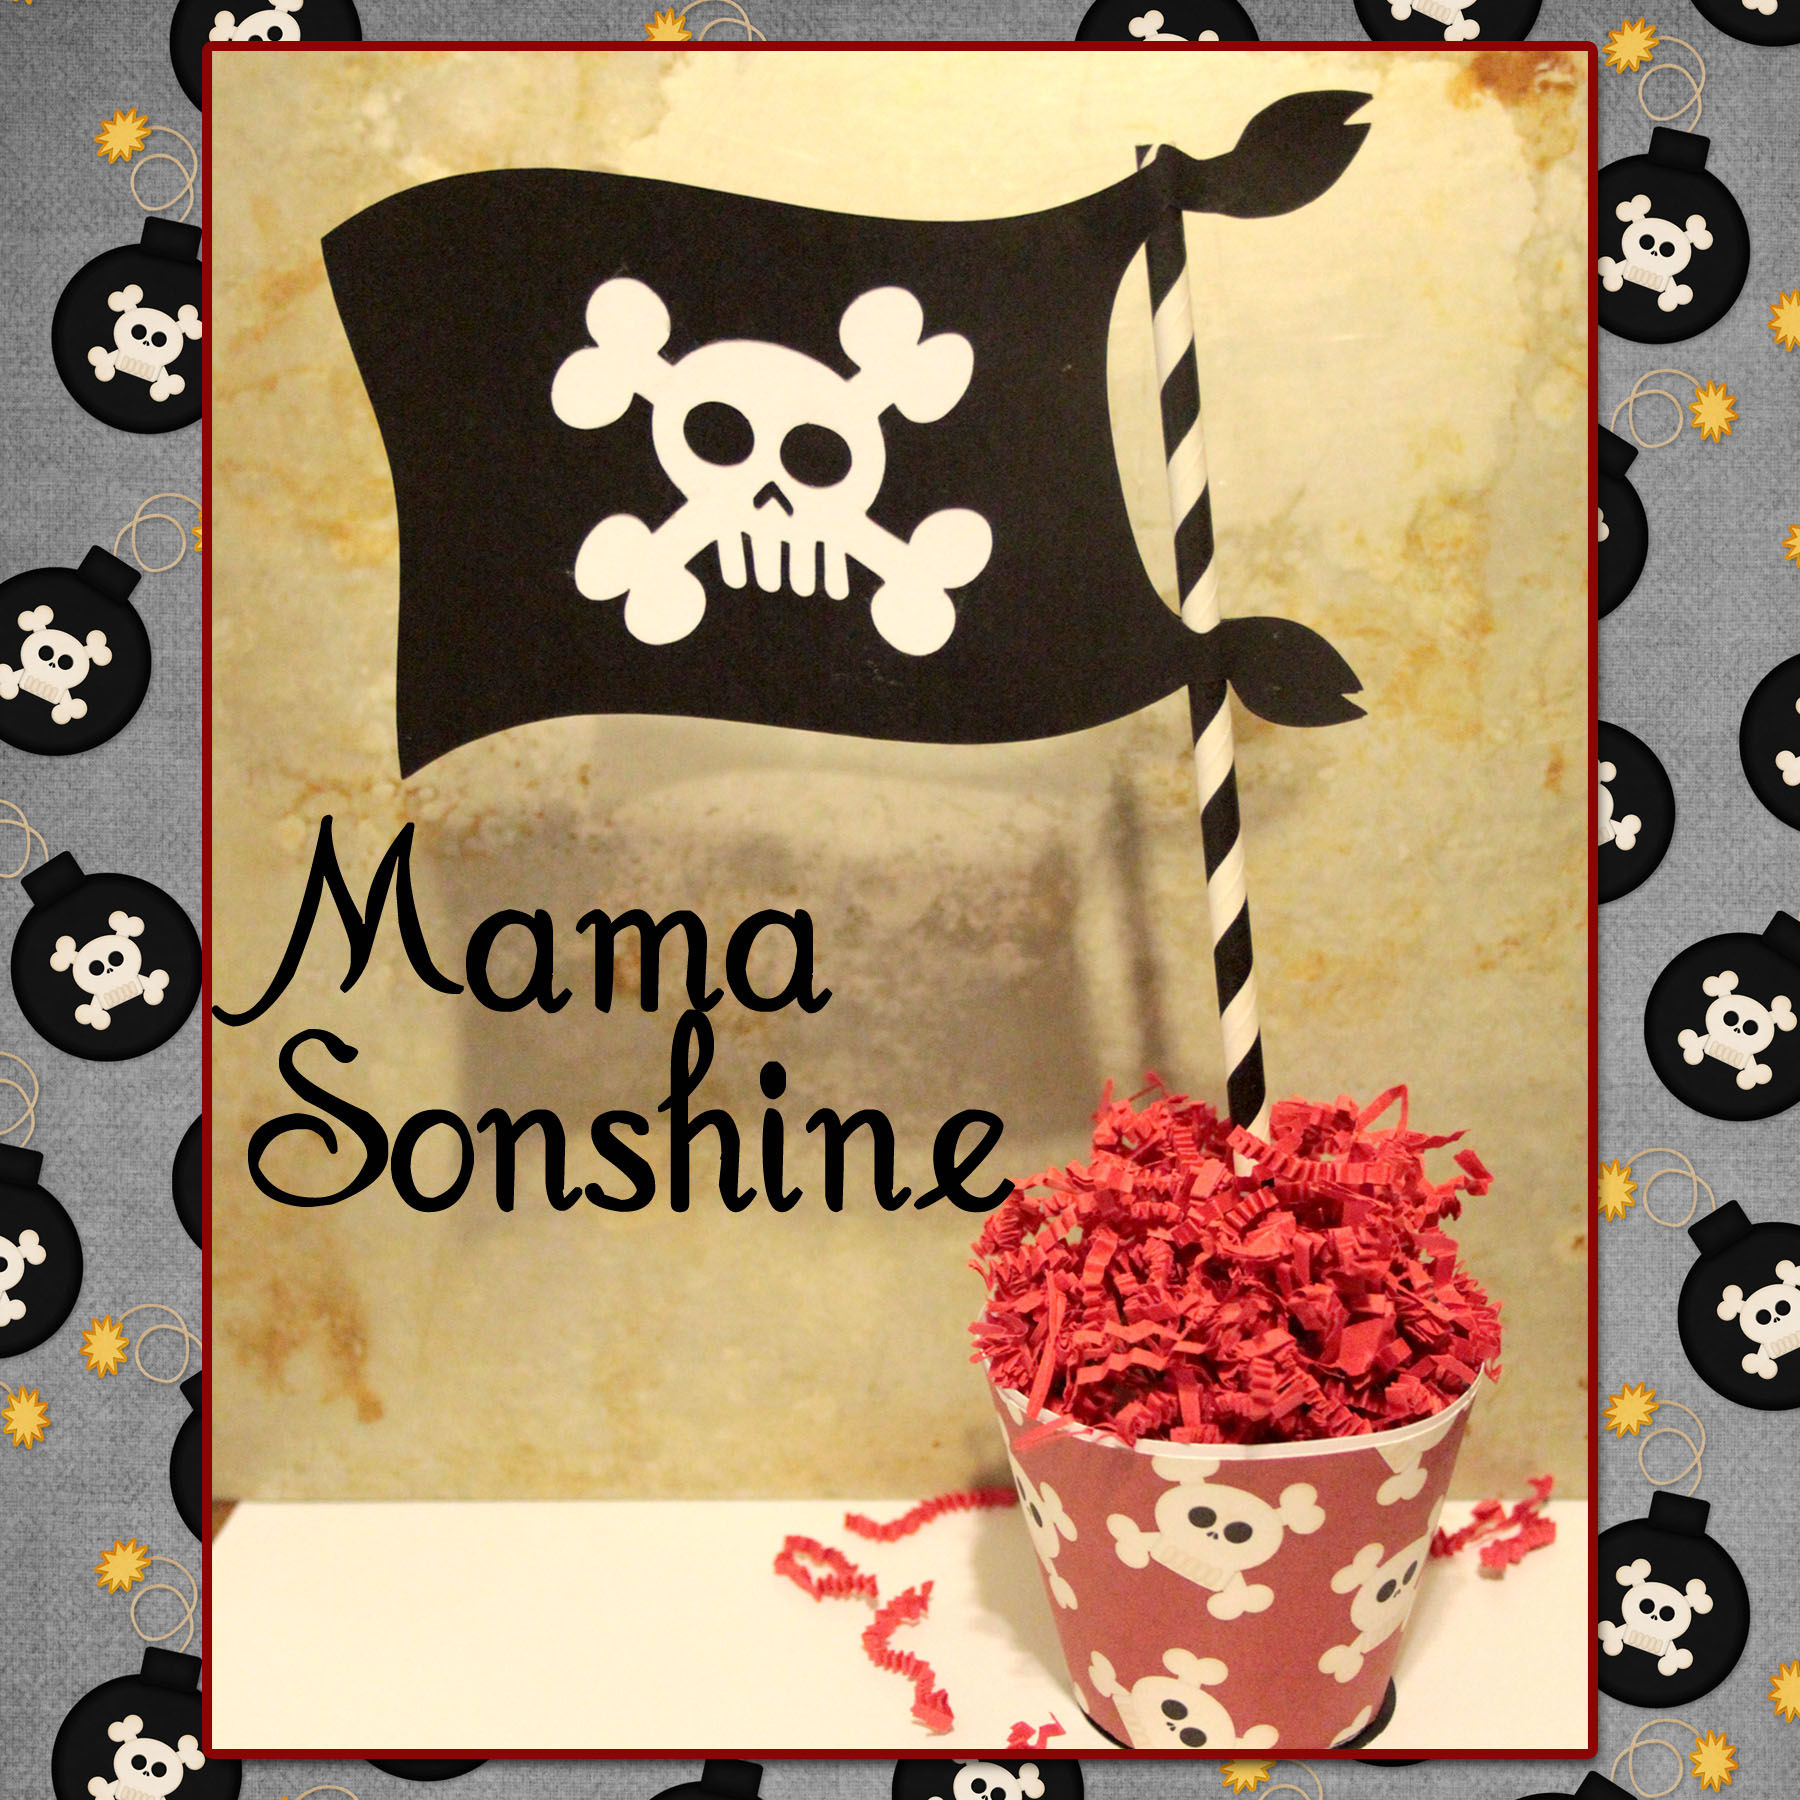
I used the digital graphics from Just So Scrappy‘sYoHo Pirate kit (as I will do for various other items I made for this party) to make cut out a treasure map.
The three elements inside the card were made with the Silhouette’s Print ‘n Cut feature, which I think is da bomb!
I cut the treasure chests out in a light brown and dark brown cardstock. I also cut the straps in the same two colors, I then used the light straps on the dark chest and vice versa. The buckles and locks were cut out using a gold-colored cardstock. I glued all the elements together, except the map, which I attached with a brad so it can be moved.
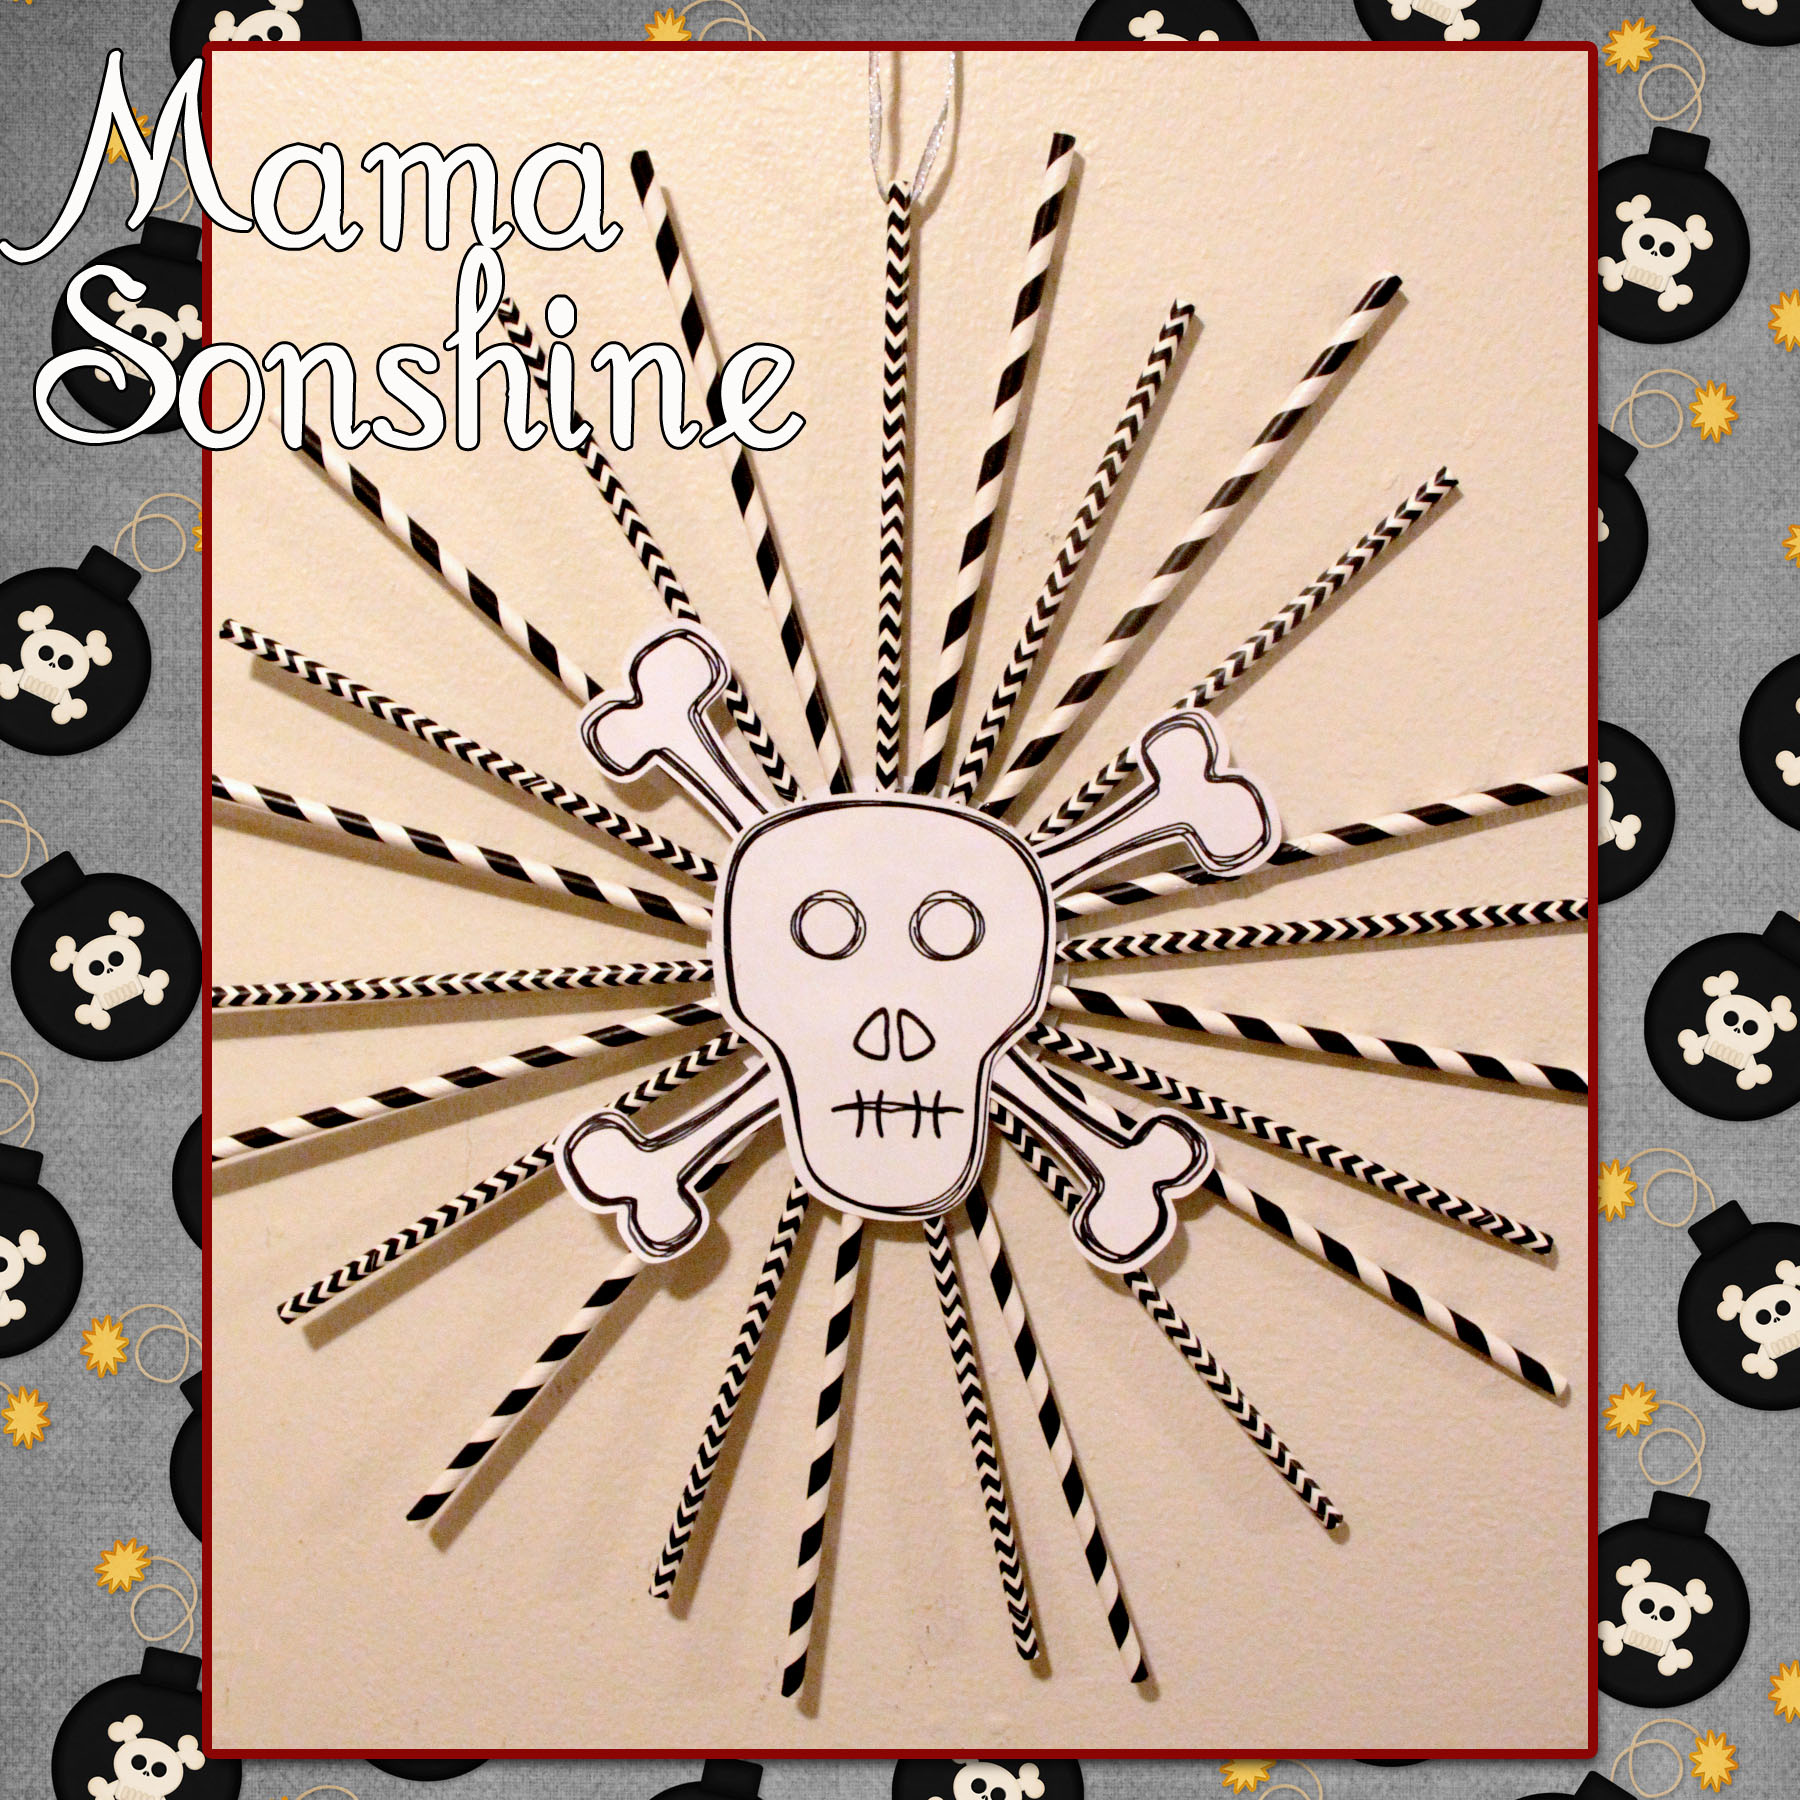
Using the same digital graphics I created a pirate flag topiary table decoration. I had to create my own cut file for the flag portion, cutting out the skull and crossbones.
I sandwiched a white piece of cardstock in between the two flag pieces, which I glued to a paper straw. The base is made using the print and cut feature, it is an adapted cupcake wrapper shape.
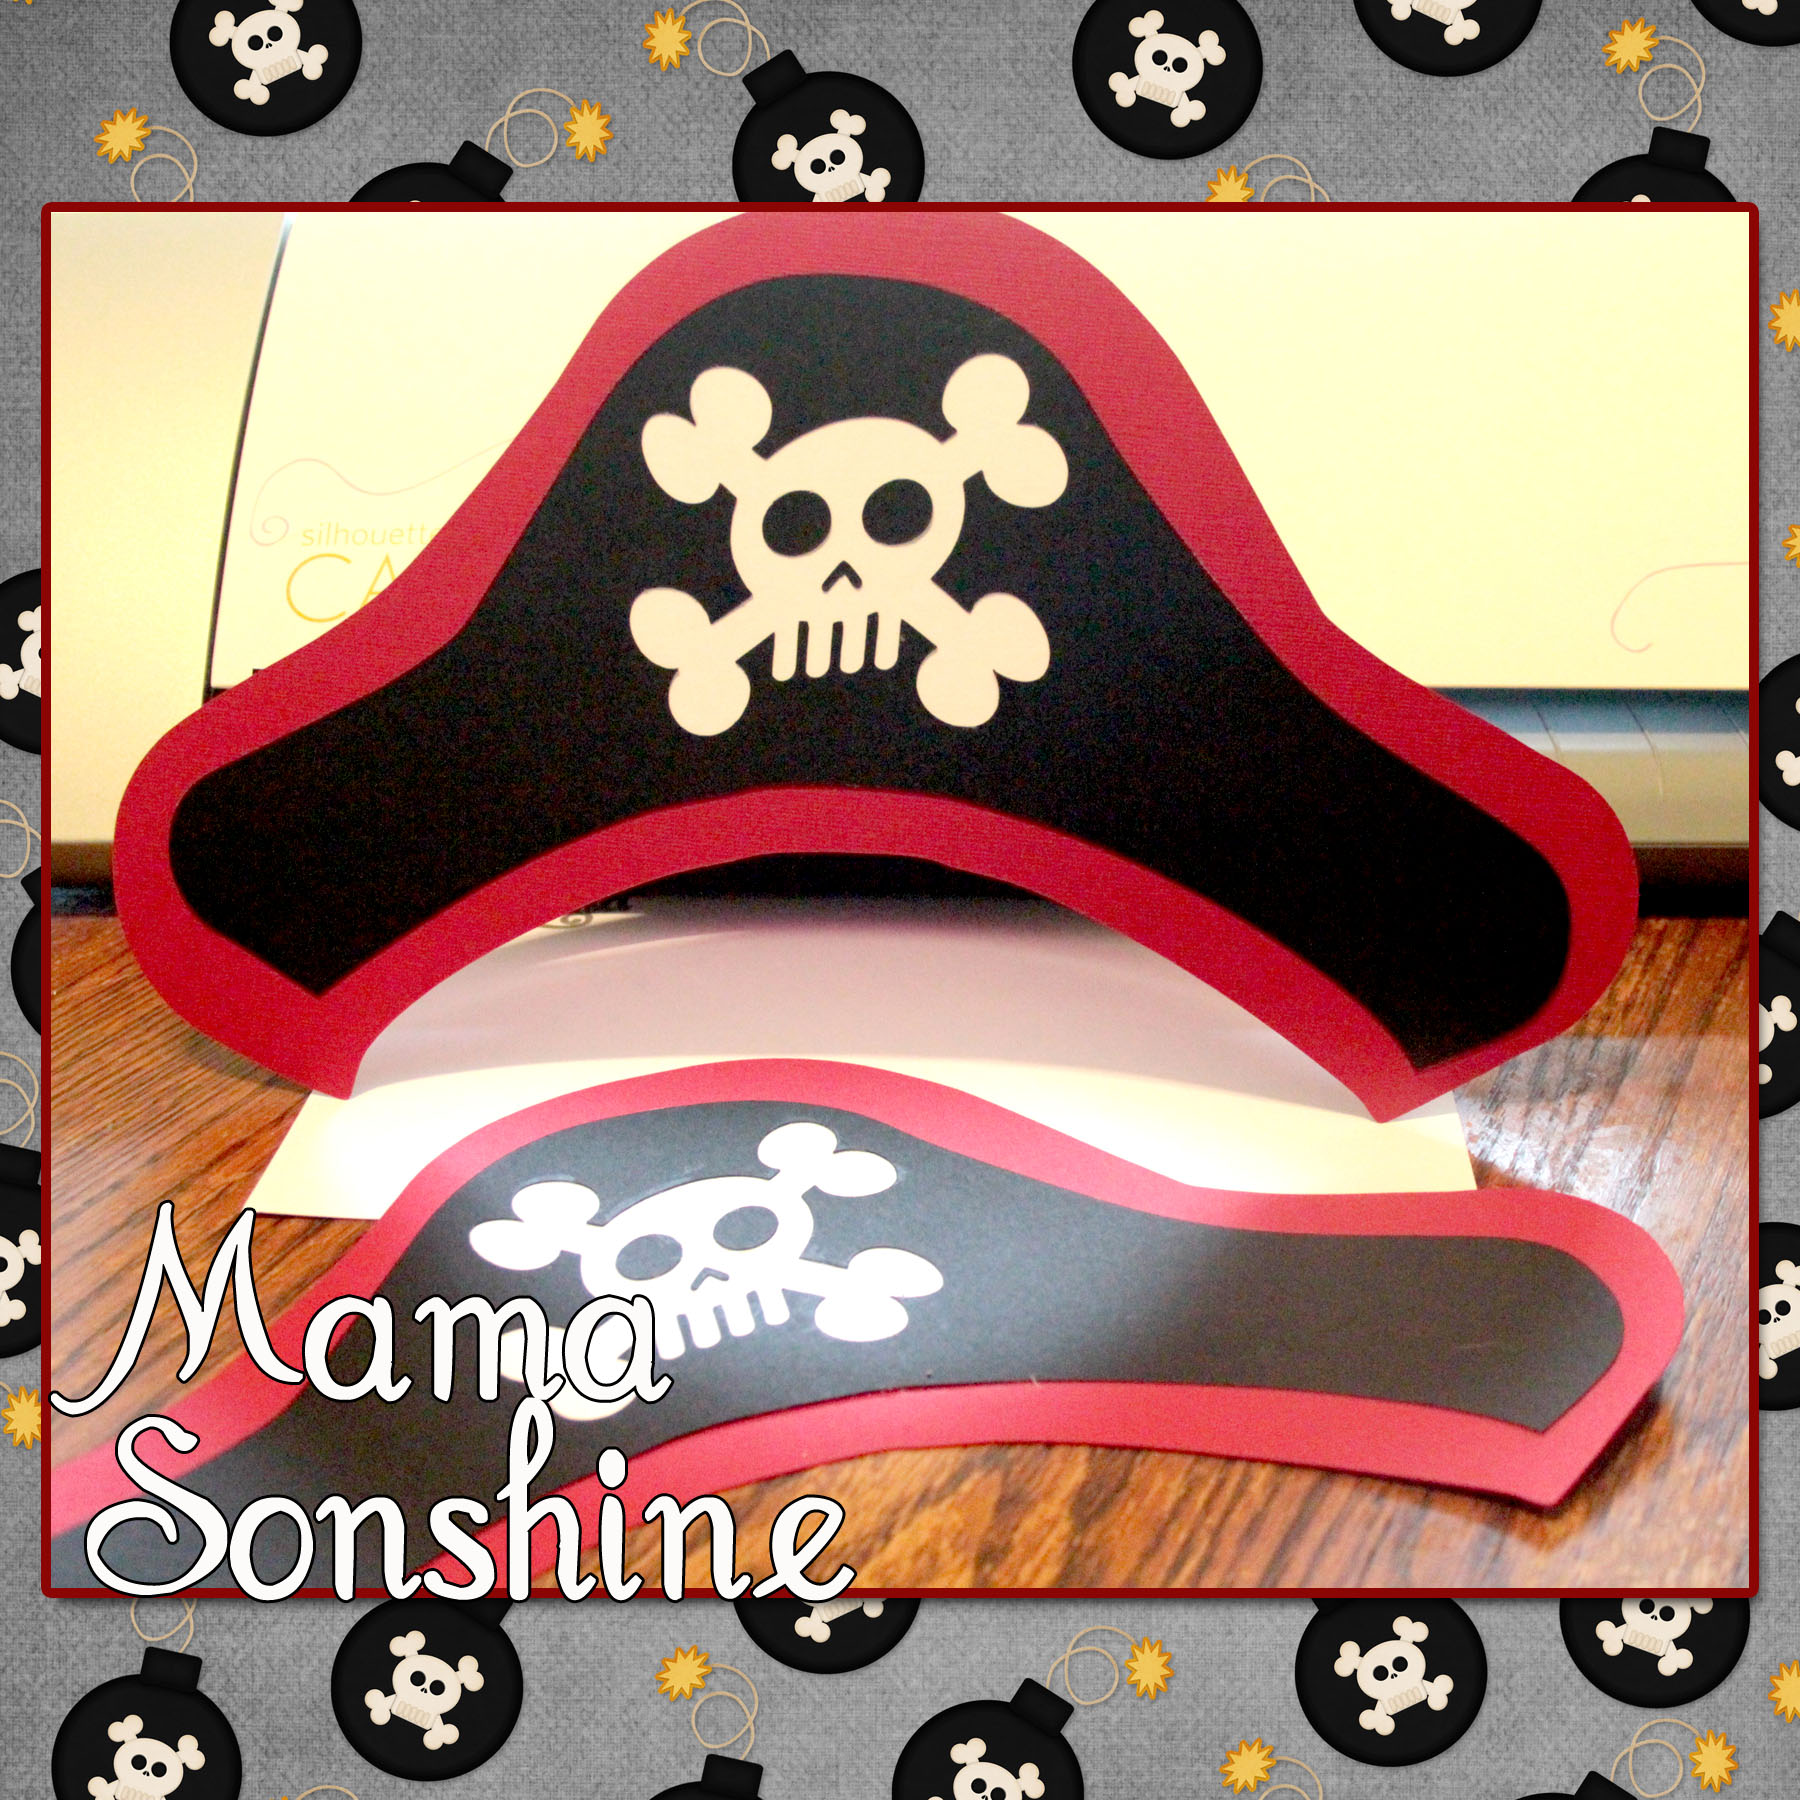
And what it just wouldn’t be a party with out party hats!
For the pin wheel I used the sketch feature that can only be found in the Silhouette Studio Designer Edition.
I ‘hand’ drew the skull and bones, and by hand I mean I used the draw polygon tool. I used the sketch tool to make the skull look more hand-drawn. I used a black Sharpie Marker to draw the lines with the Cameo and then made the cut around it.
This is only the tip of the iceberg when it comes to decorations that can be made using a personal cutting machine. I would never have been able to cut out all the pieces to make forty invitations, if I had to do it by hand.
I have much more planned and will revel more after the party.
Happy Crafting
Want to Check Out More Silhouette Projects?
My Silhouette Challenge buddies and I are all sharing projects on our blogs today, so peruse the projects below for a wealth of Silhouette inspiration!
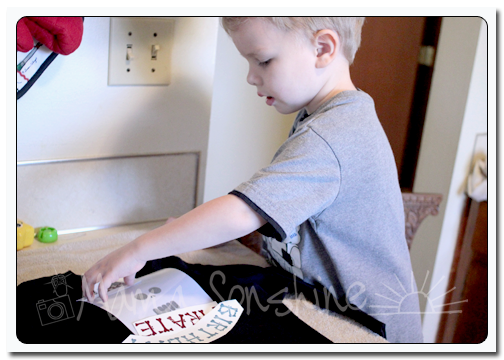
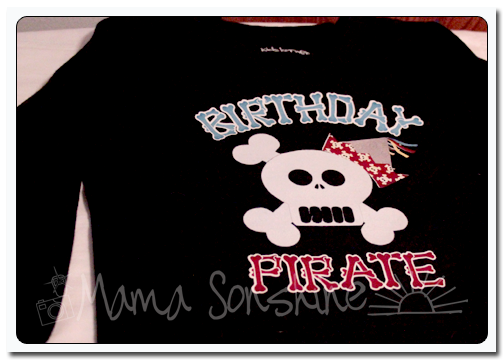
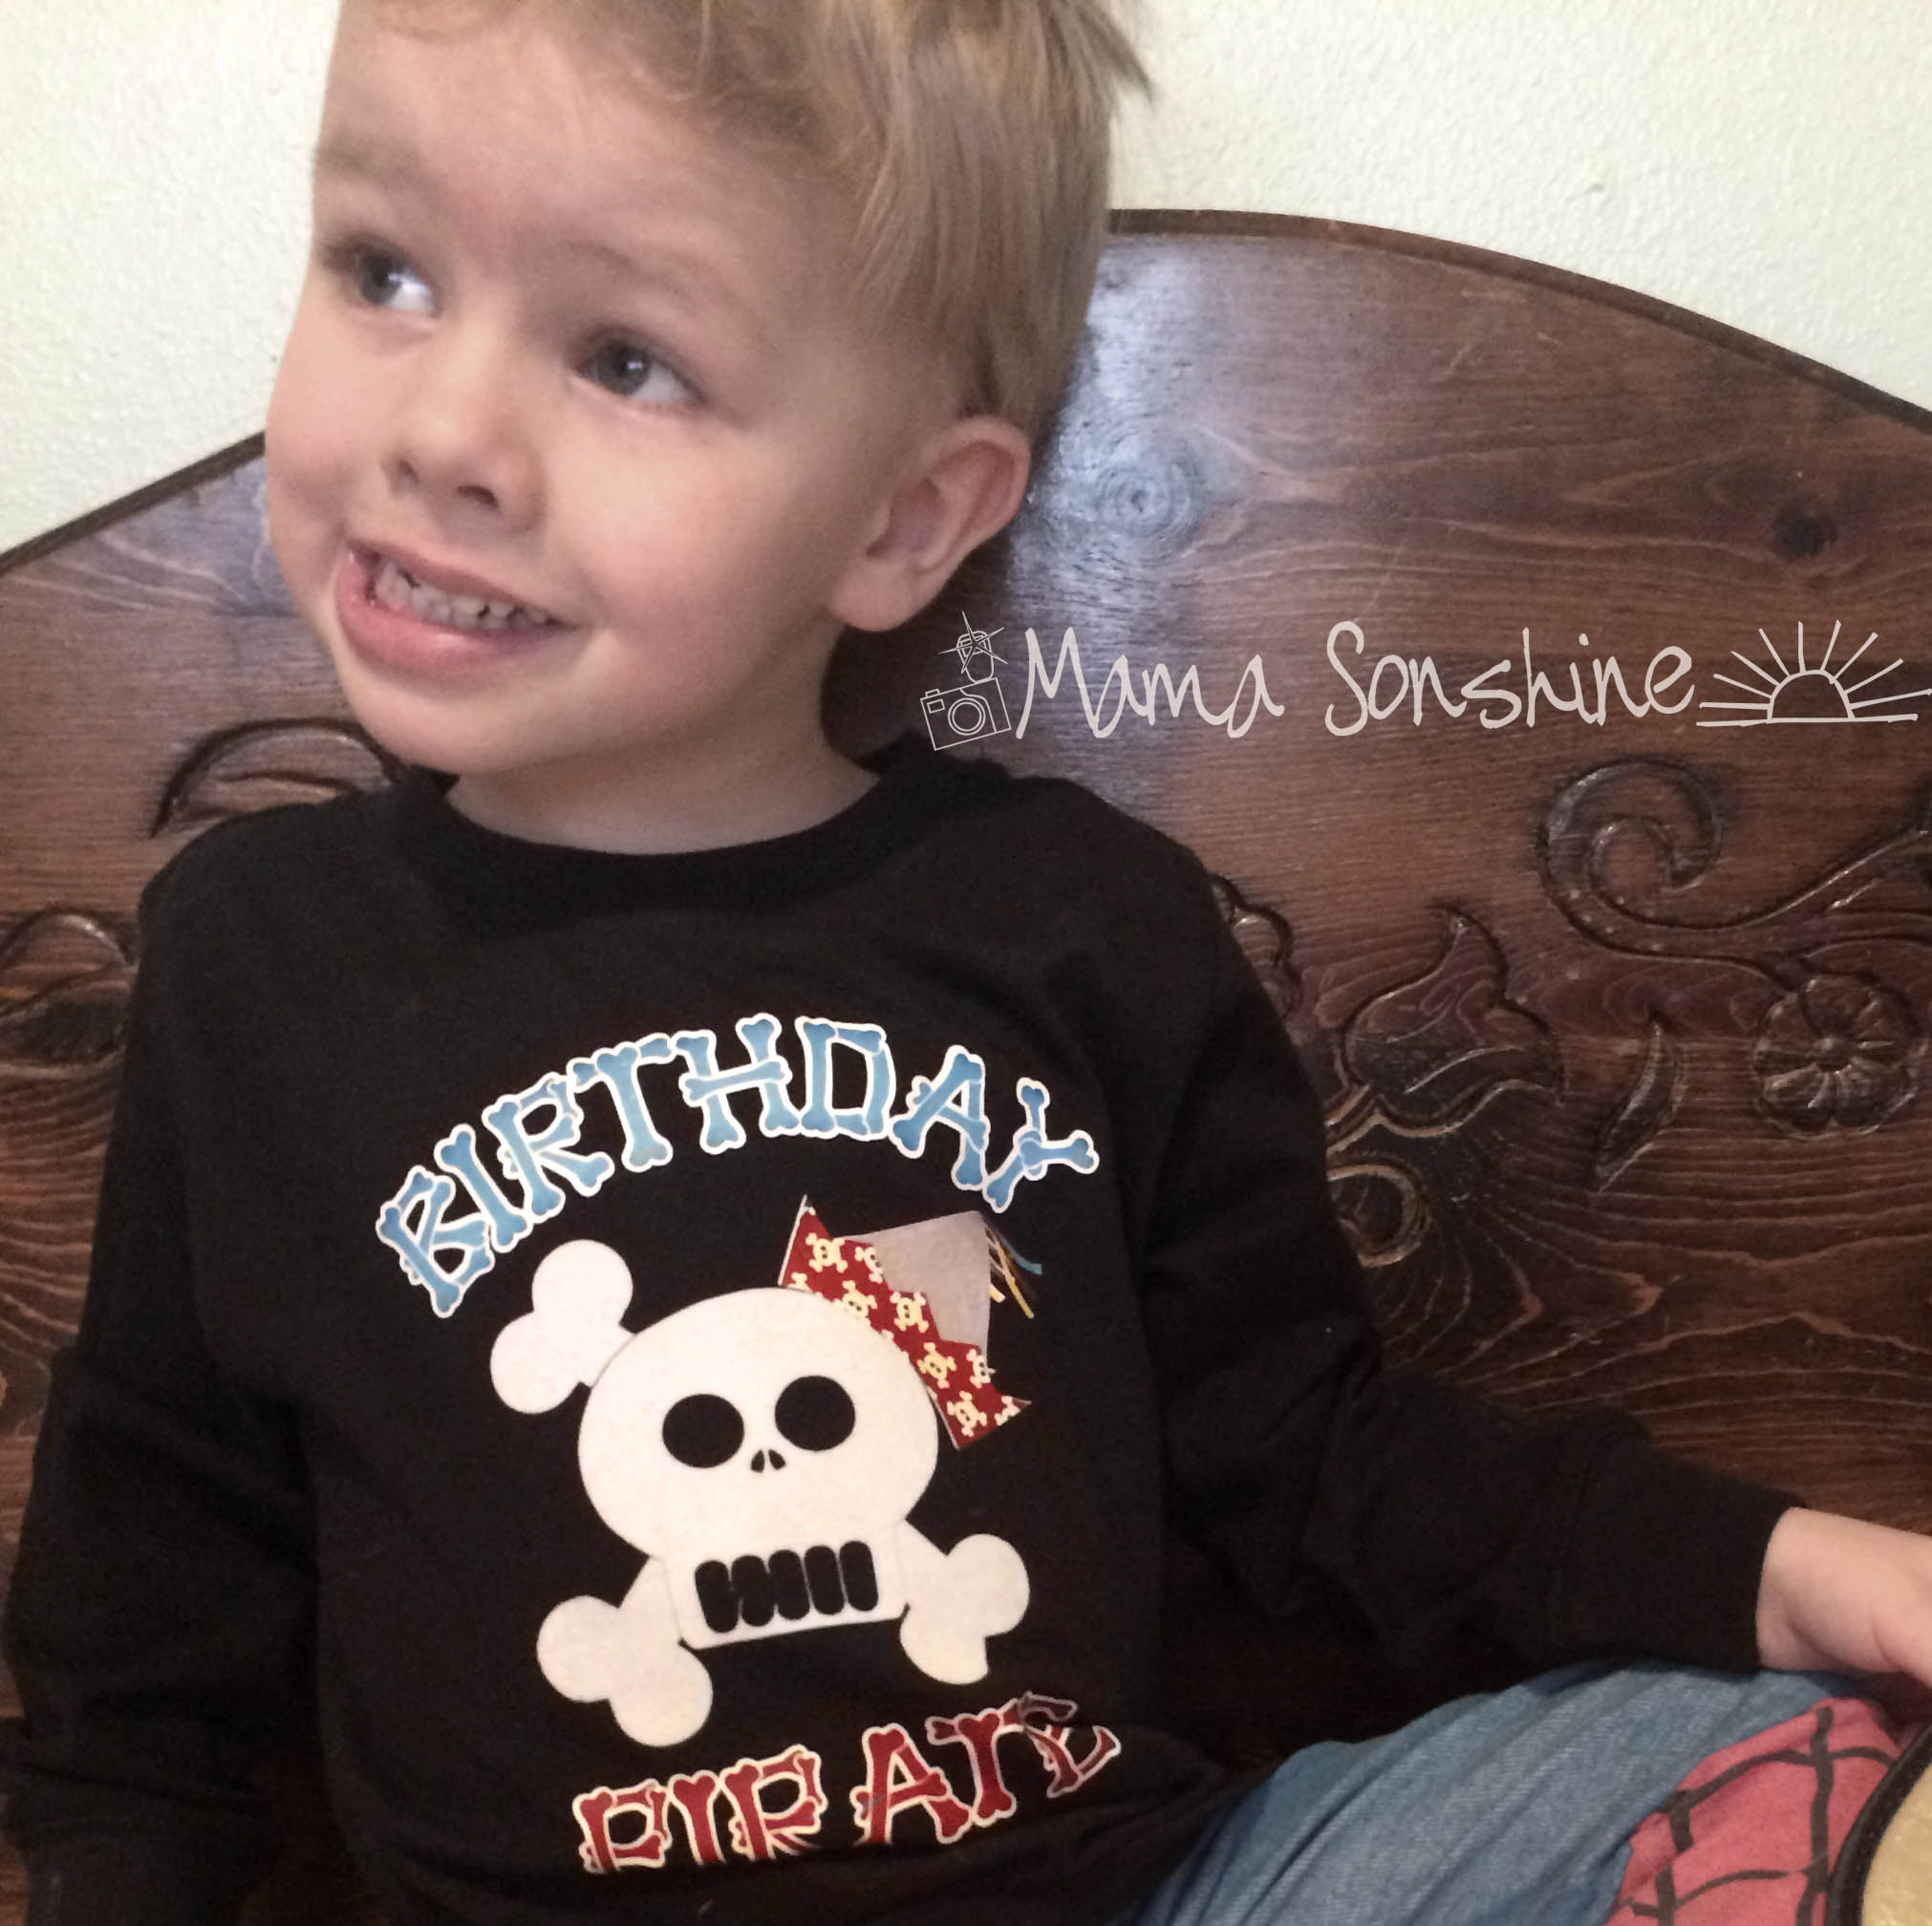
I wanted to share with you the steps I took to make my son’s birthday shirt. There was a few problems I had that I was able to work through. Hopefully this will help so others won’t get stuck like I did.
Part Three will be how to iron everything on and some tips.
My first tip; if you want your words to be in the correct direction I would advise you not to let your three-year old place them on the shirt.
The flocked transfer material has a clear plastic film over the top. This is the side you face down when cutting, you want the Silhouette to cut through the transfer material but not this film. After weeding out the areas that you want the shirt to show through, lay your transfer material with the film facing up. I would advise ironing on one piece at a time, just to ensure proper placement.
Use a dry iron, on the highest setting (please read the directions that come with your material) and a piece of thin cotton fabric between the iron and your material. I used a pillowcase after determining a dish towel was too thick. You want to apply a lot of pressure for up to a minute, or more. Again, this is where you want to double-check the instructions that come with your material. The time can very depending on manufactures, but the main thing is if isn’t sticking, you need more time and pressure. Try not to move the iron around like you are ironing your clothes. Just hold for a minute, then move to another area and hold, with lots of pressure. Have I made it clear that pressure is important?
Some material is cool peel, meaning you need to wait until the ironed on design has cooled before removing the top film. If this is the case, wait! You will only ruin your design if you get impatient.
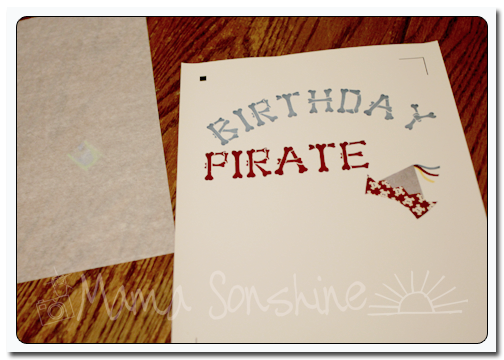
The intricate cut around the words was done as stated in the previous tutorial, but I wanted to separate the words from the page and lay them on the shirt without yet removing the backing, so I just cut them out with scissors. The Silhouette settings I used made a ‘kiss cut’ meaning it cut through the transfer material but not through the backing. When you are ready to iron on the material you peel it off like a sticker.
After placing the elements where you want them use the same iron settings but use the piece of parchment-like paper that comes with the printable transfers between the material and your iron. Again using lots of pressure. Also, make sure something is covering the areas that have already been ironed on. If you apply direct heat to this material you could melt it.
As I have stated above I used the printable material for dark fabric and ink jet printers. The dark fabric is like a sticker. What is face up is what will show, this is different from the material for light fabric. The dark fabric material also leaves a white area on the printed material where there is a white area on your screen. With the light fabric material, where there is white on your screen the shirt fabric will show through. This is something to consider before purchasing your transfer material. Also it is very important for you to know what kind of printer you will be using. The way an ink jet and laser printer adhere the ink to the paper is different and for this type of material it does make a difference.
The first time I printed this out I used a laser printer without thinking of the consequences.
It looks fine, there wasn’t any difference between it and the one I ended up printing on my ink jet printer. At least not until I ironed it on.
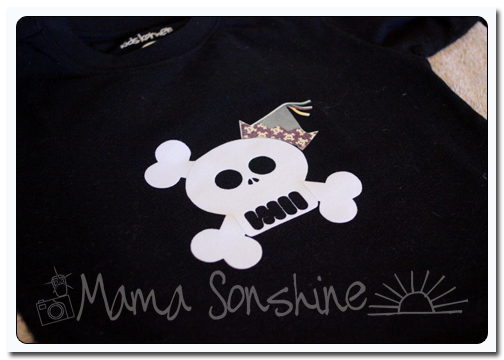
See how the hat has faded? This is because of the toner in a laser printer. It can come off the printable heat transfer material when heat is applied. I had to go back and reprint everything on an ink jet printer. At this point I also had to make the hat a little bigger to cover up the faded one.
But the end result was still one happy birthday-boy-to-be.
If you want to see how I designed the skull check out Part one.
If you want to see how I designed the print and cut words and hat see Part Two.
I wanted to share with you the steps I took to make my son’s birthday shirt. There was a few problems I had that I was able to work through. Hopefully this will help so others won’t get stuck like I did.
This part of the shirt was made using printable heat transfer material for the Dark Shirt Transfer Material and an Ink Jet printer. The HTM for light material is different and the steps you take to print and cut are different. Also be sure you know what kind of printer you are going to be using, either ink jet or laser, and get the appropriate transfers. The way the ink sets on the paper is different, if you use a laser printer on the ink jet papers your color will come off when ironed.
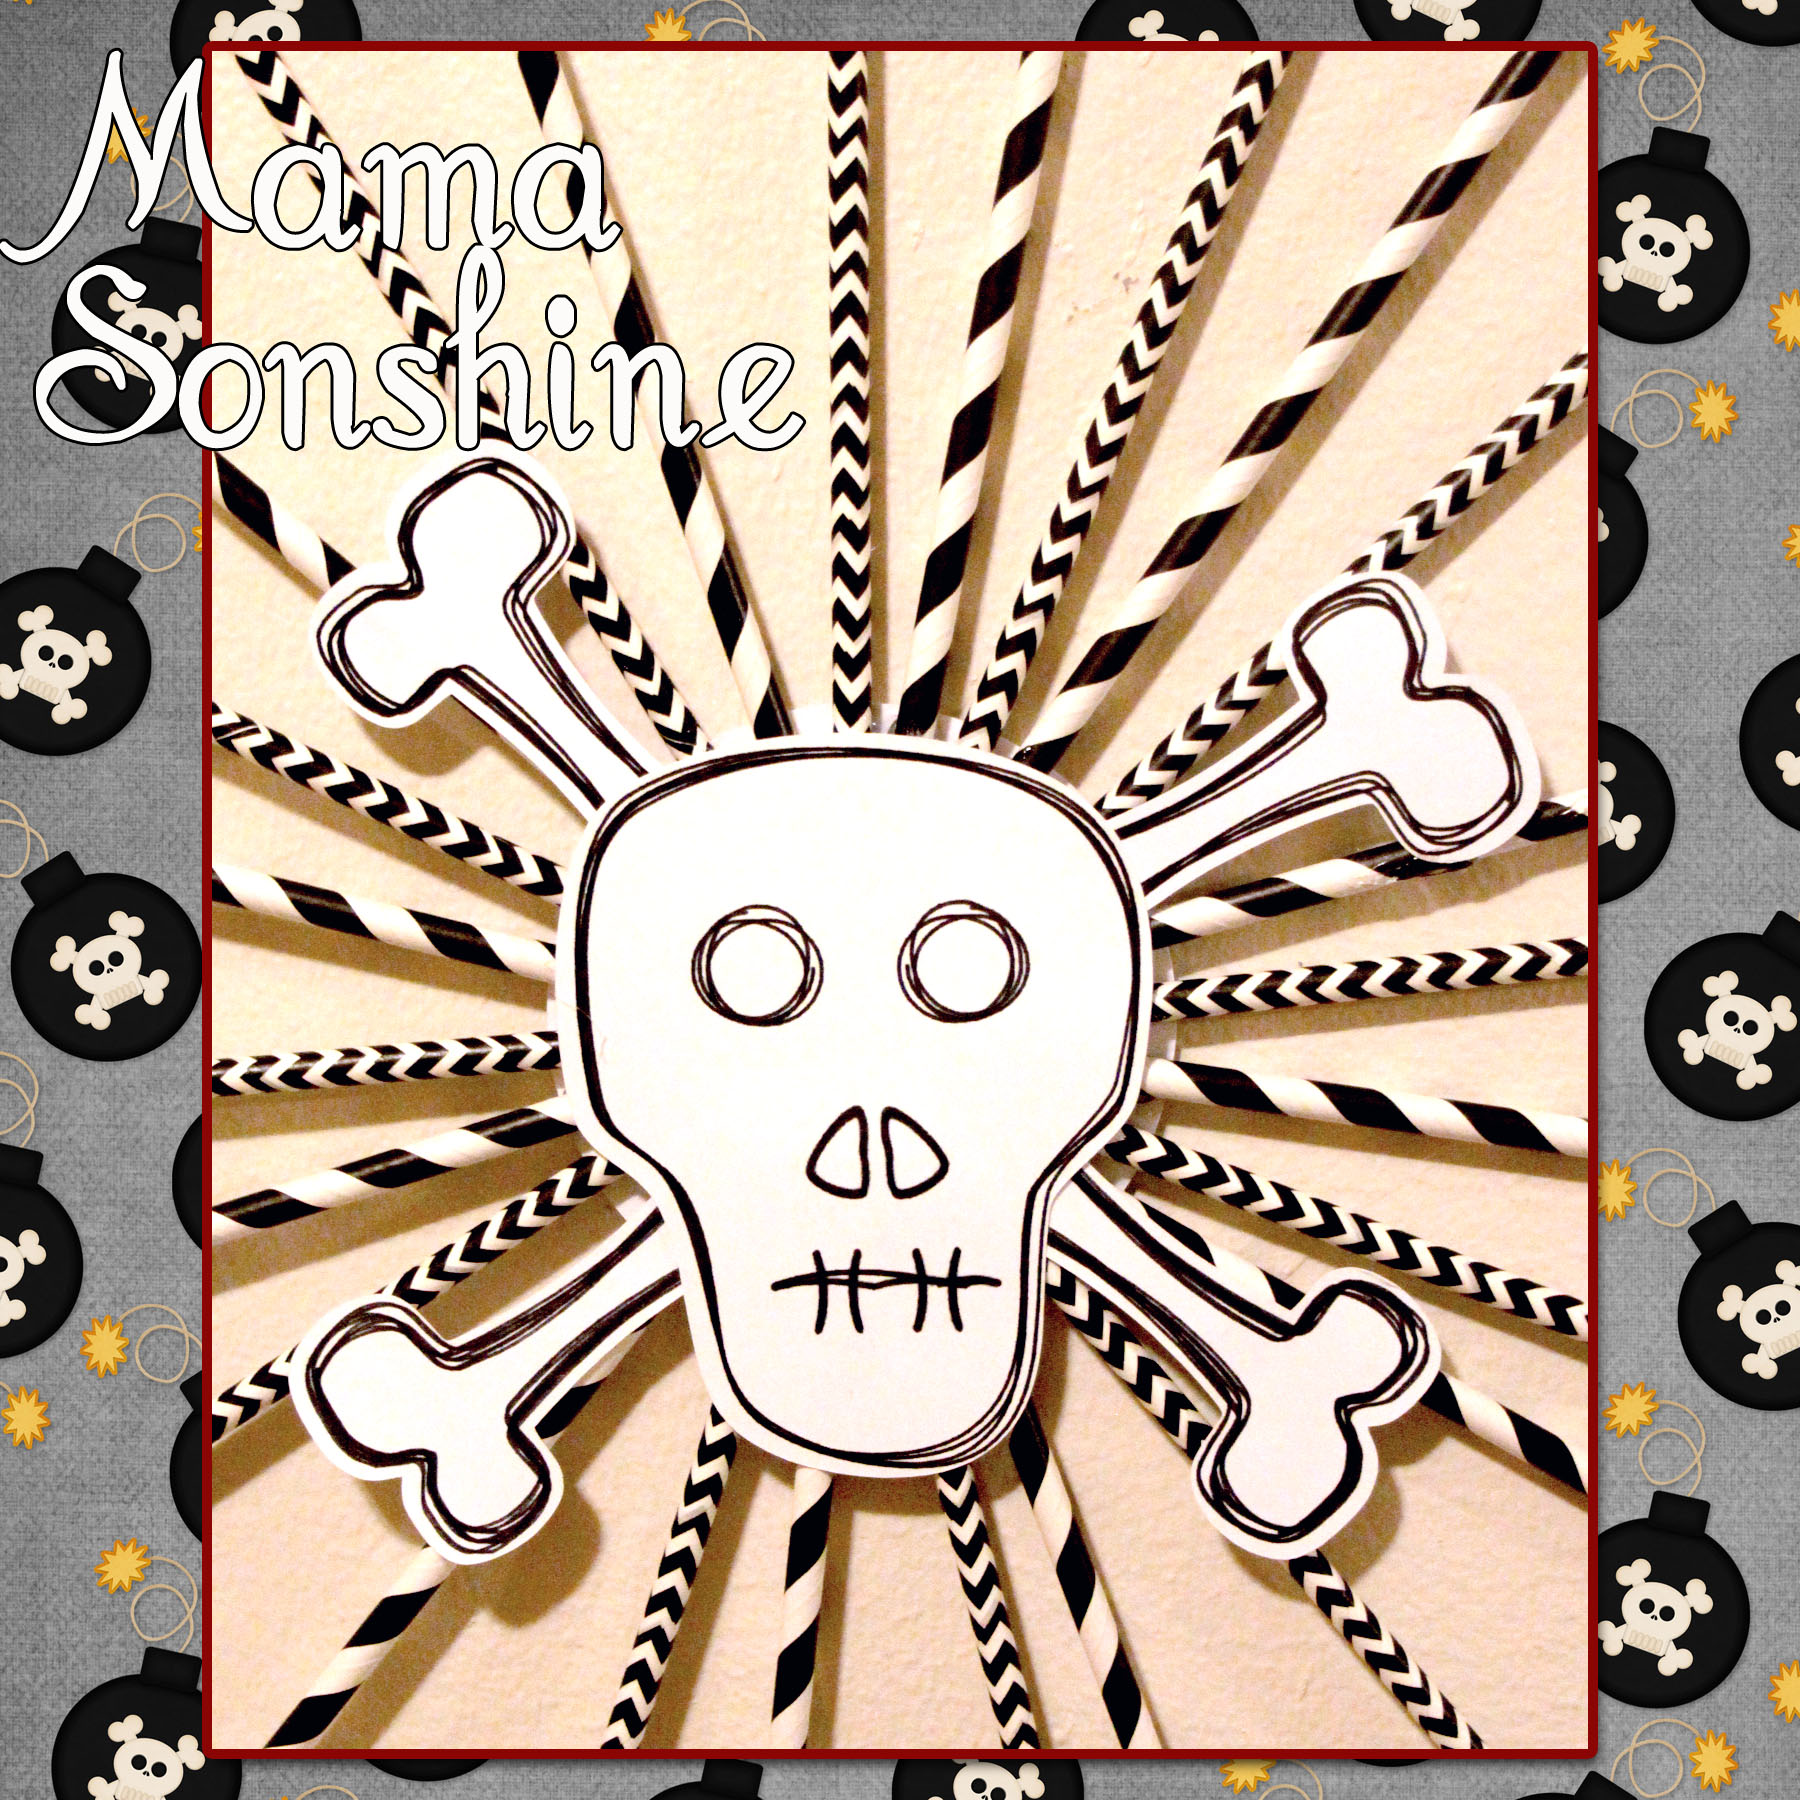
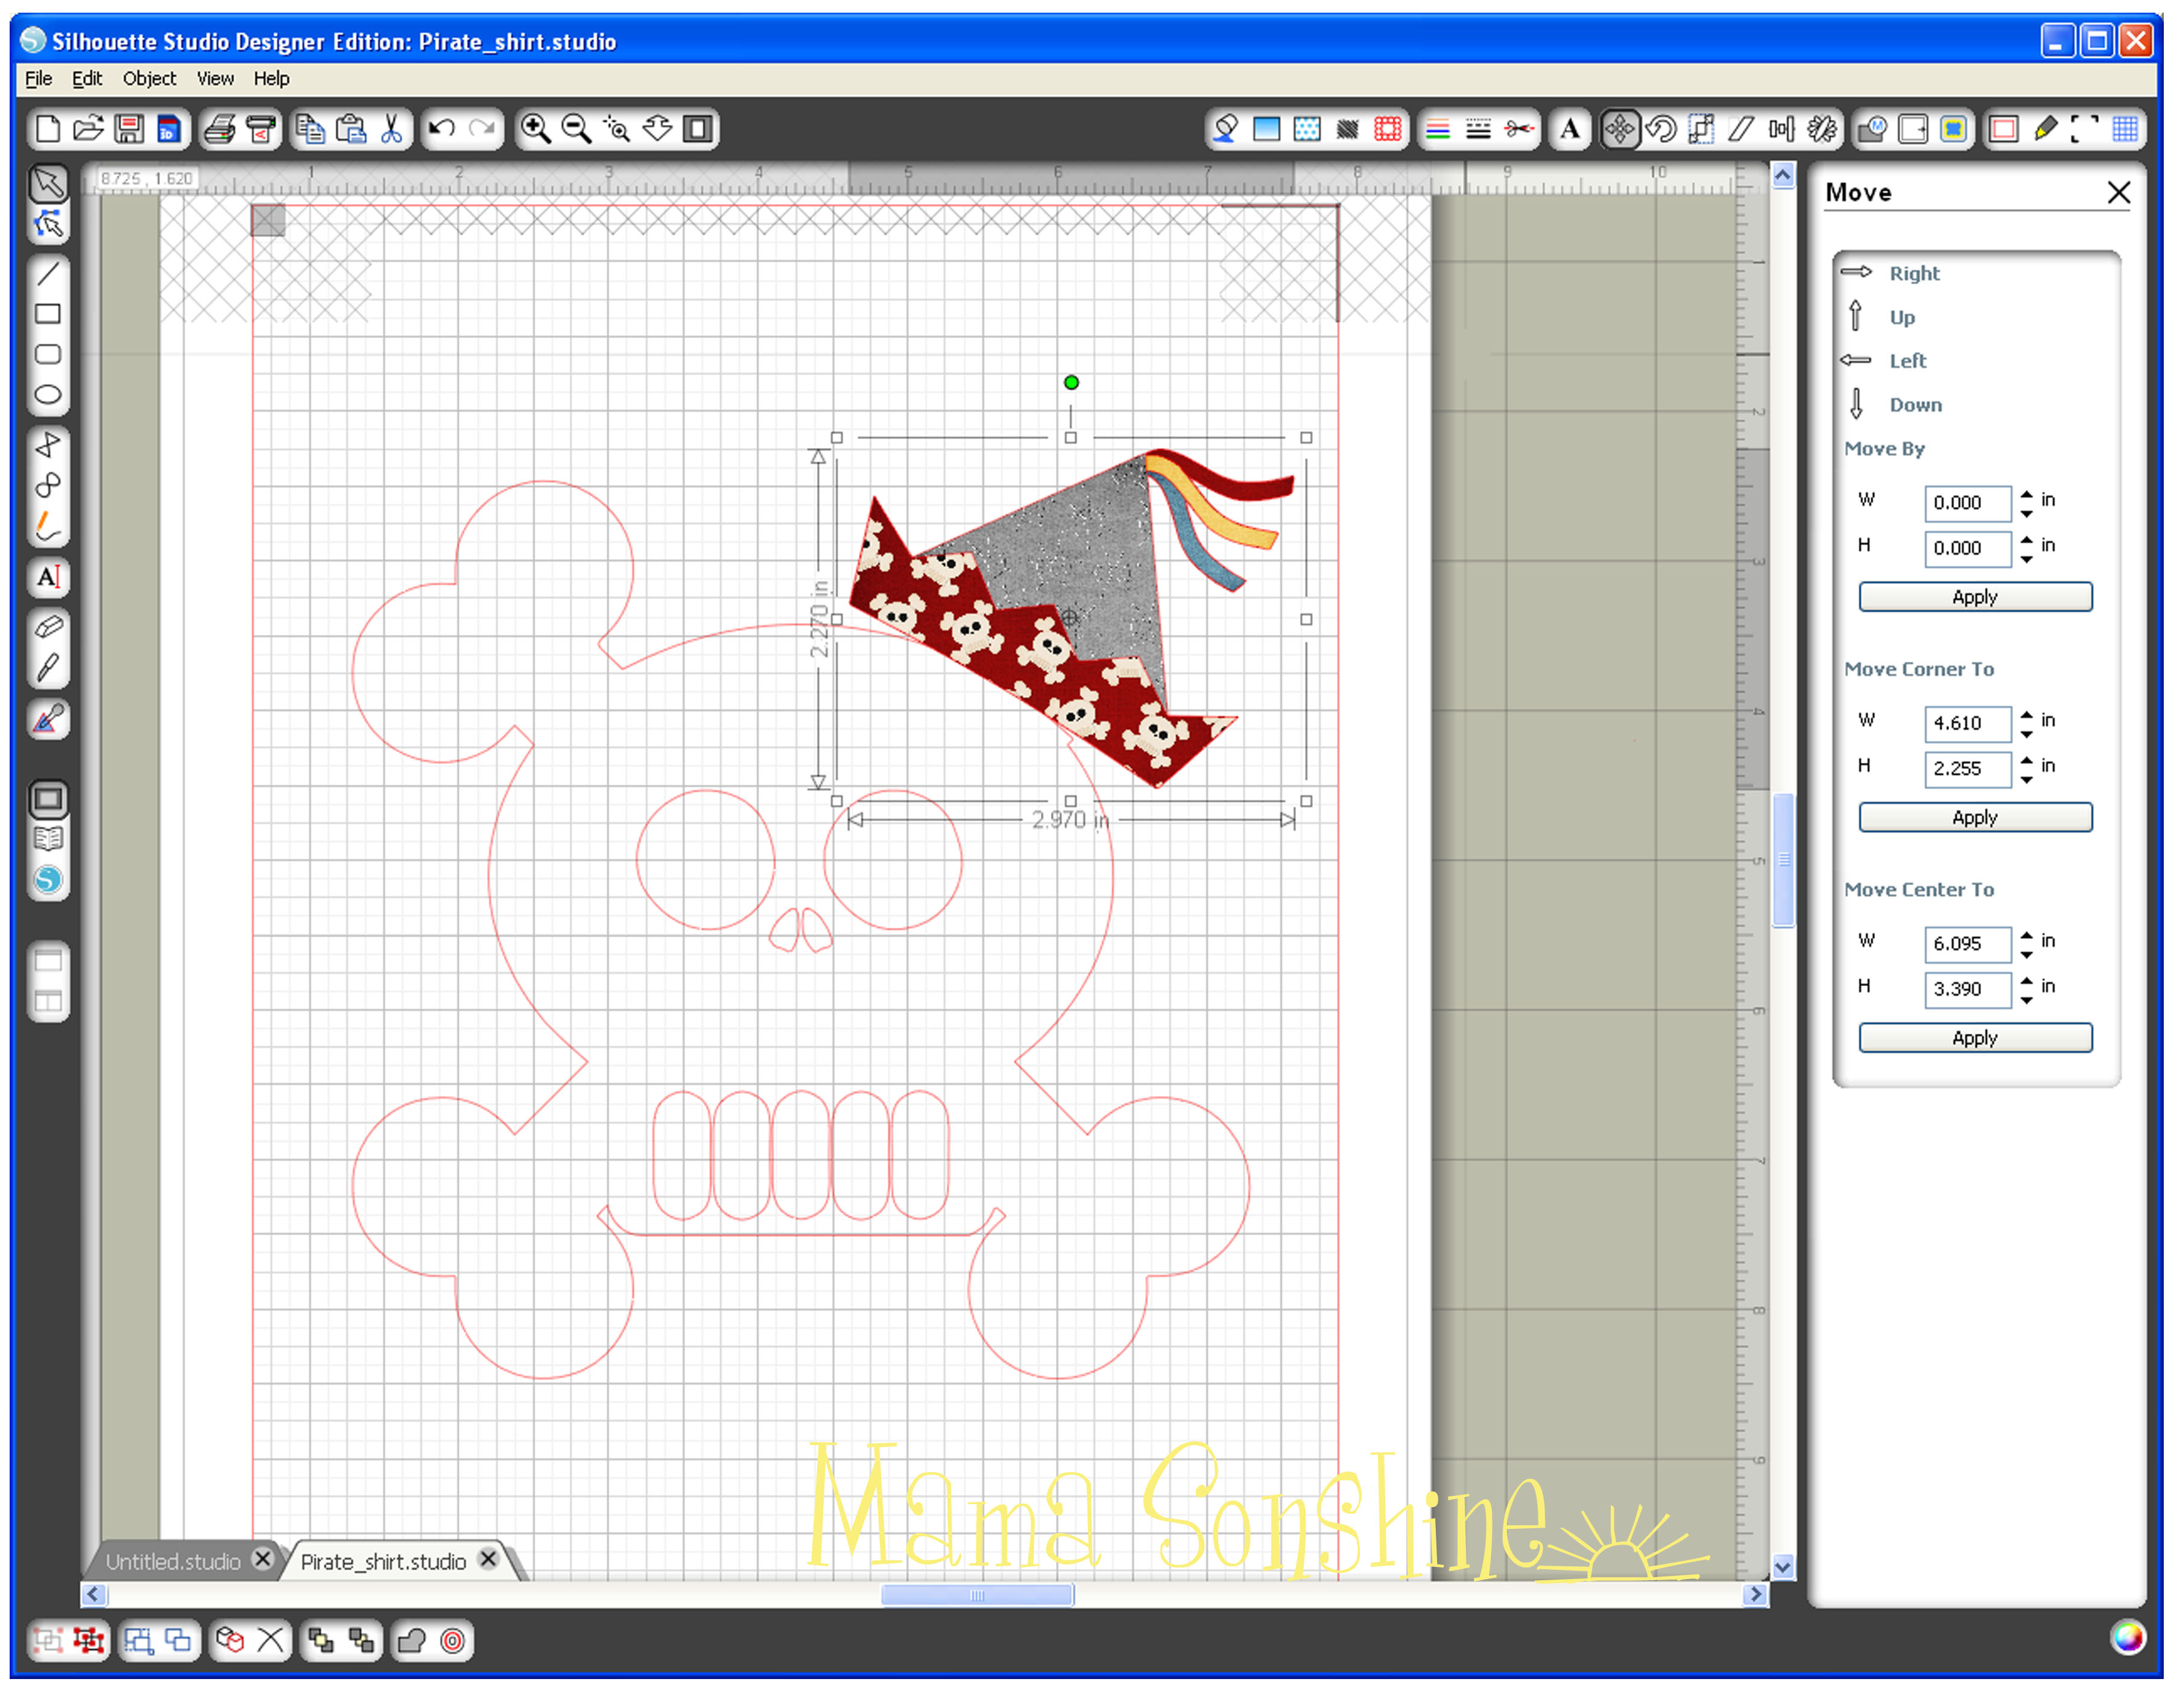
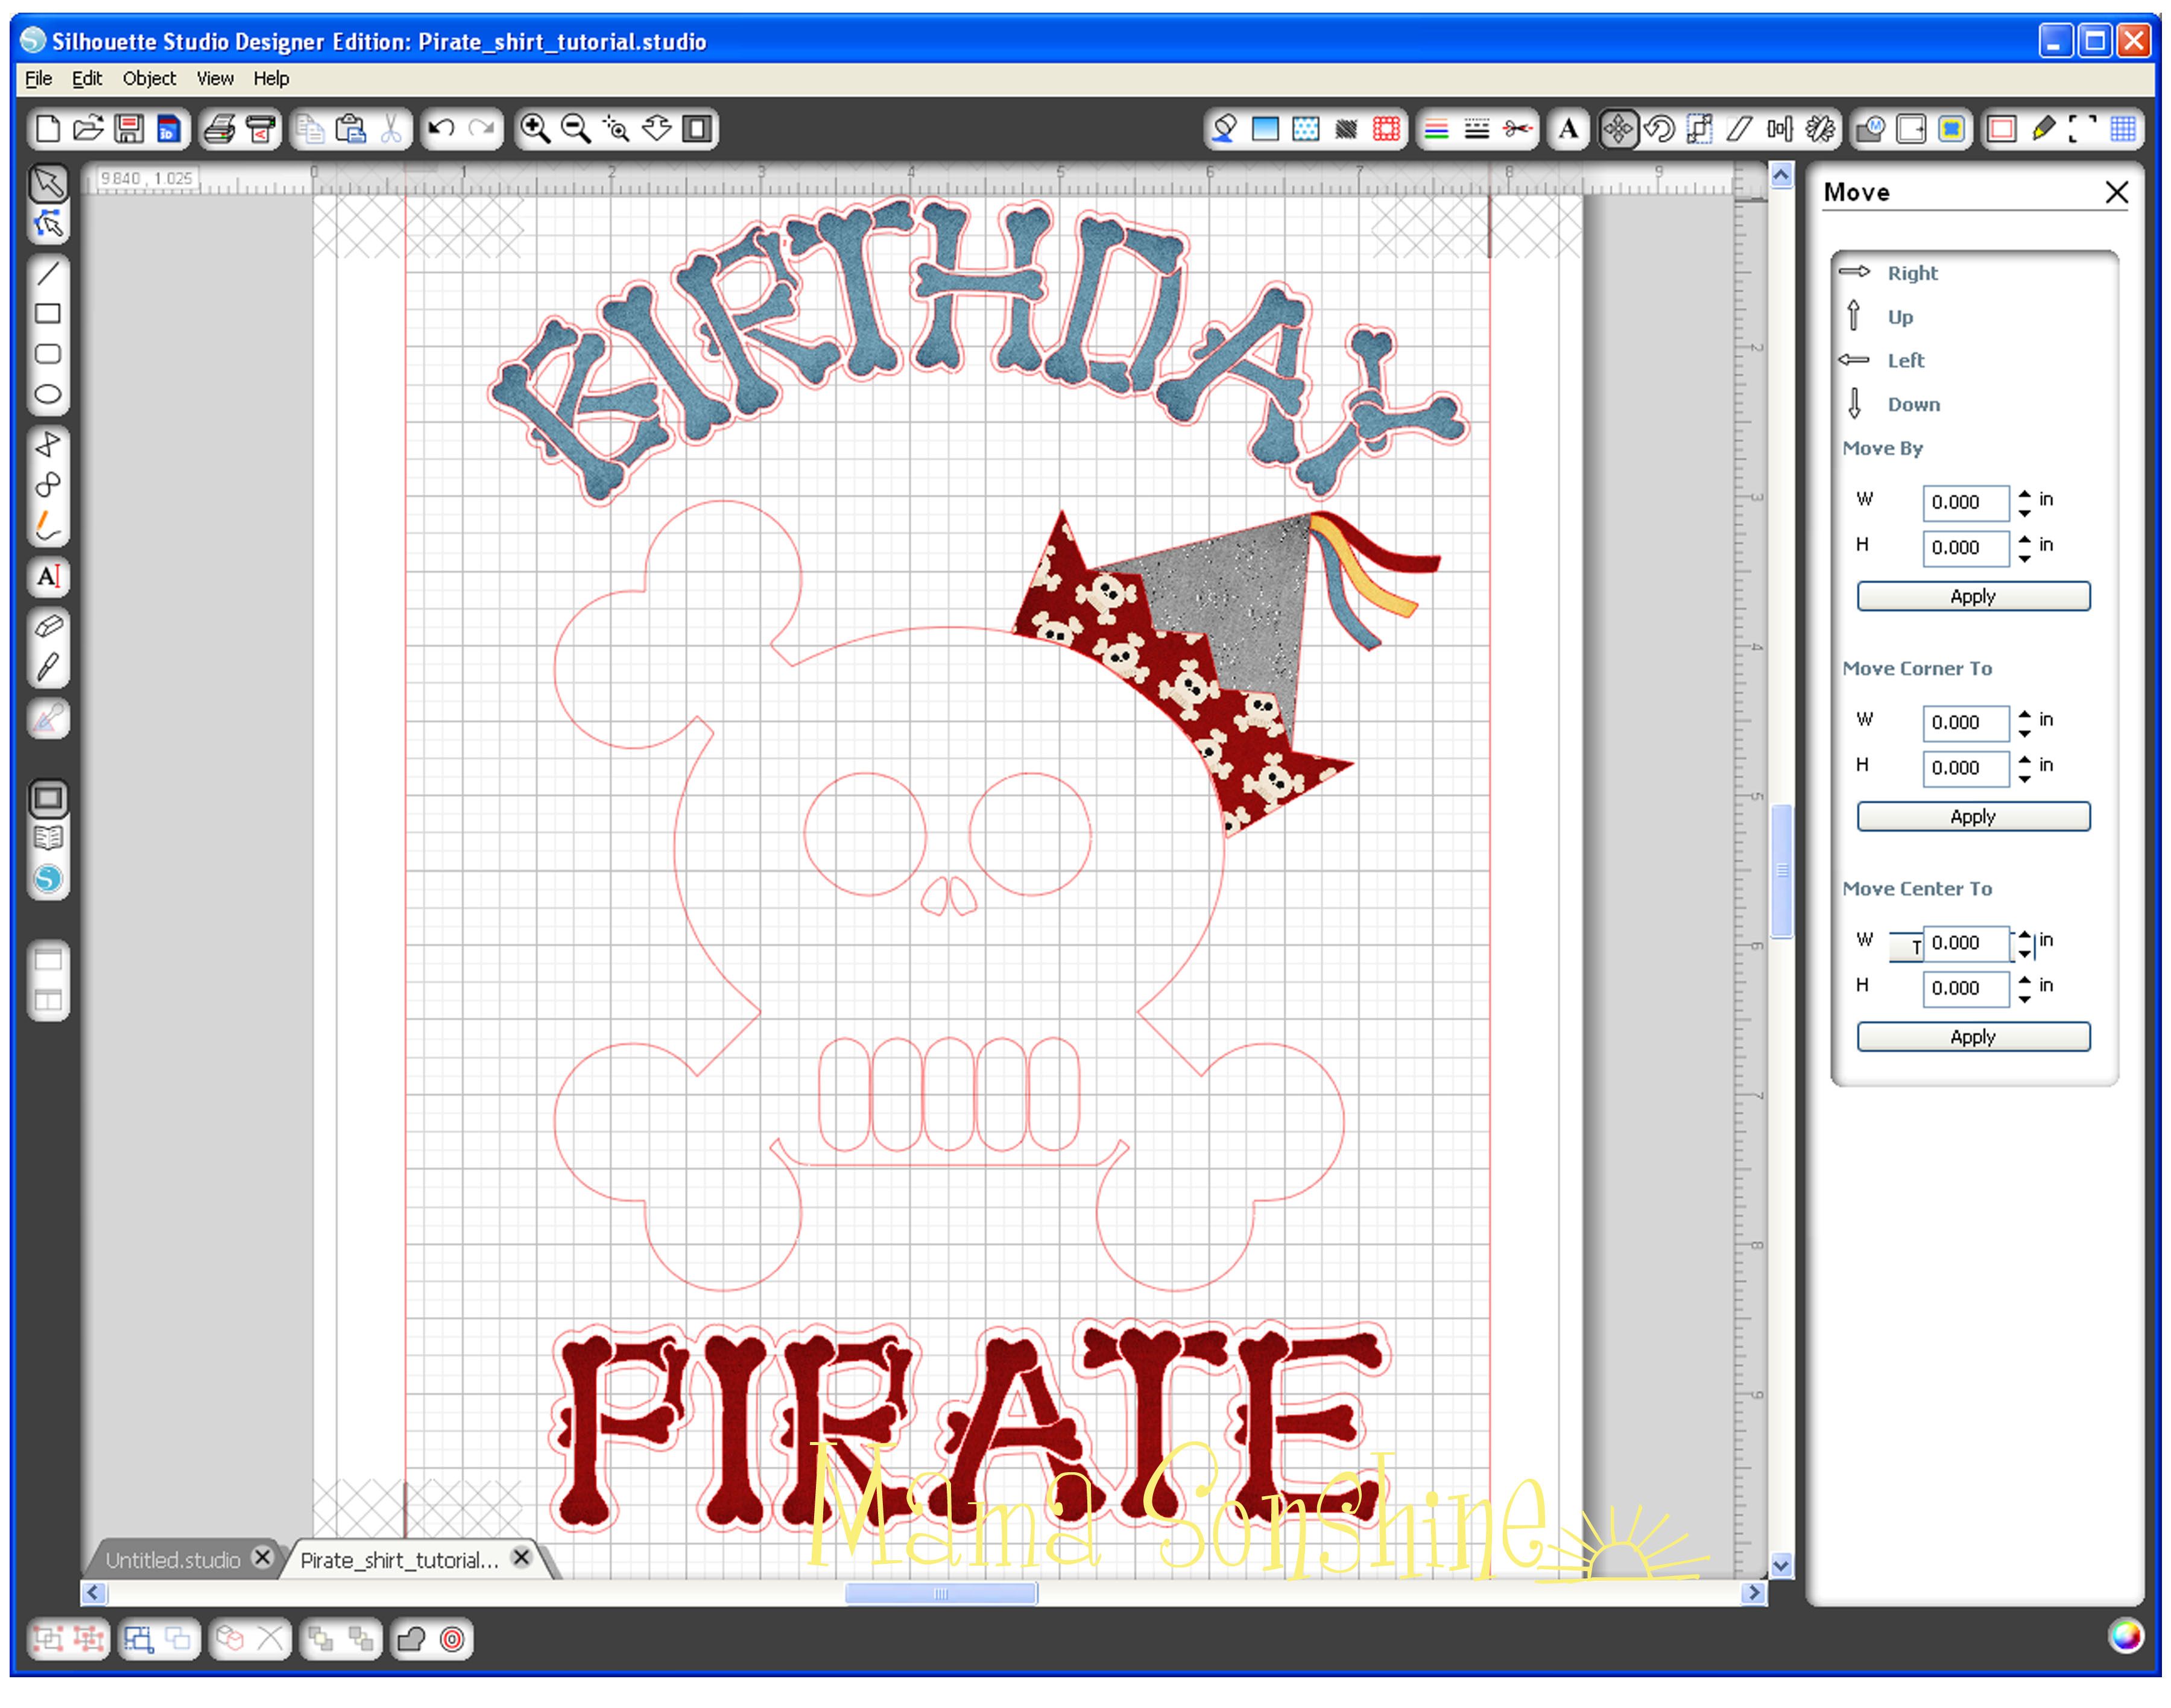
In the studio software I used the same file I had open for the skull & cross-bones because I needed the skull for a size and placement reference. When I didn’t want it on the screen I simply moved it off the mat.
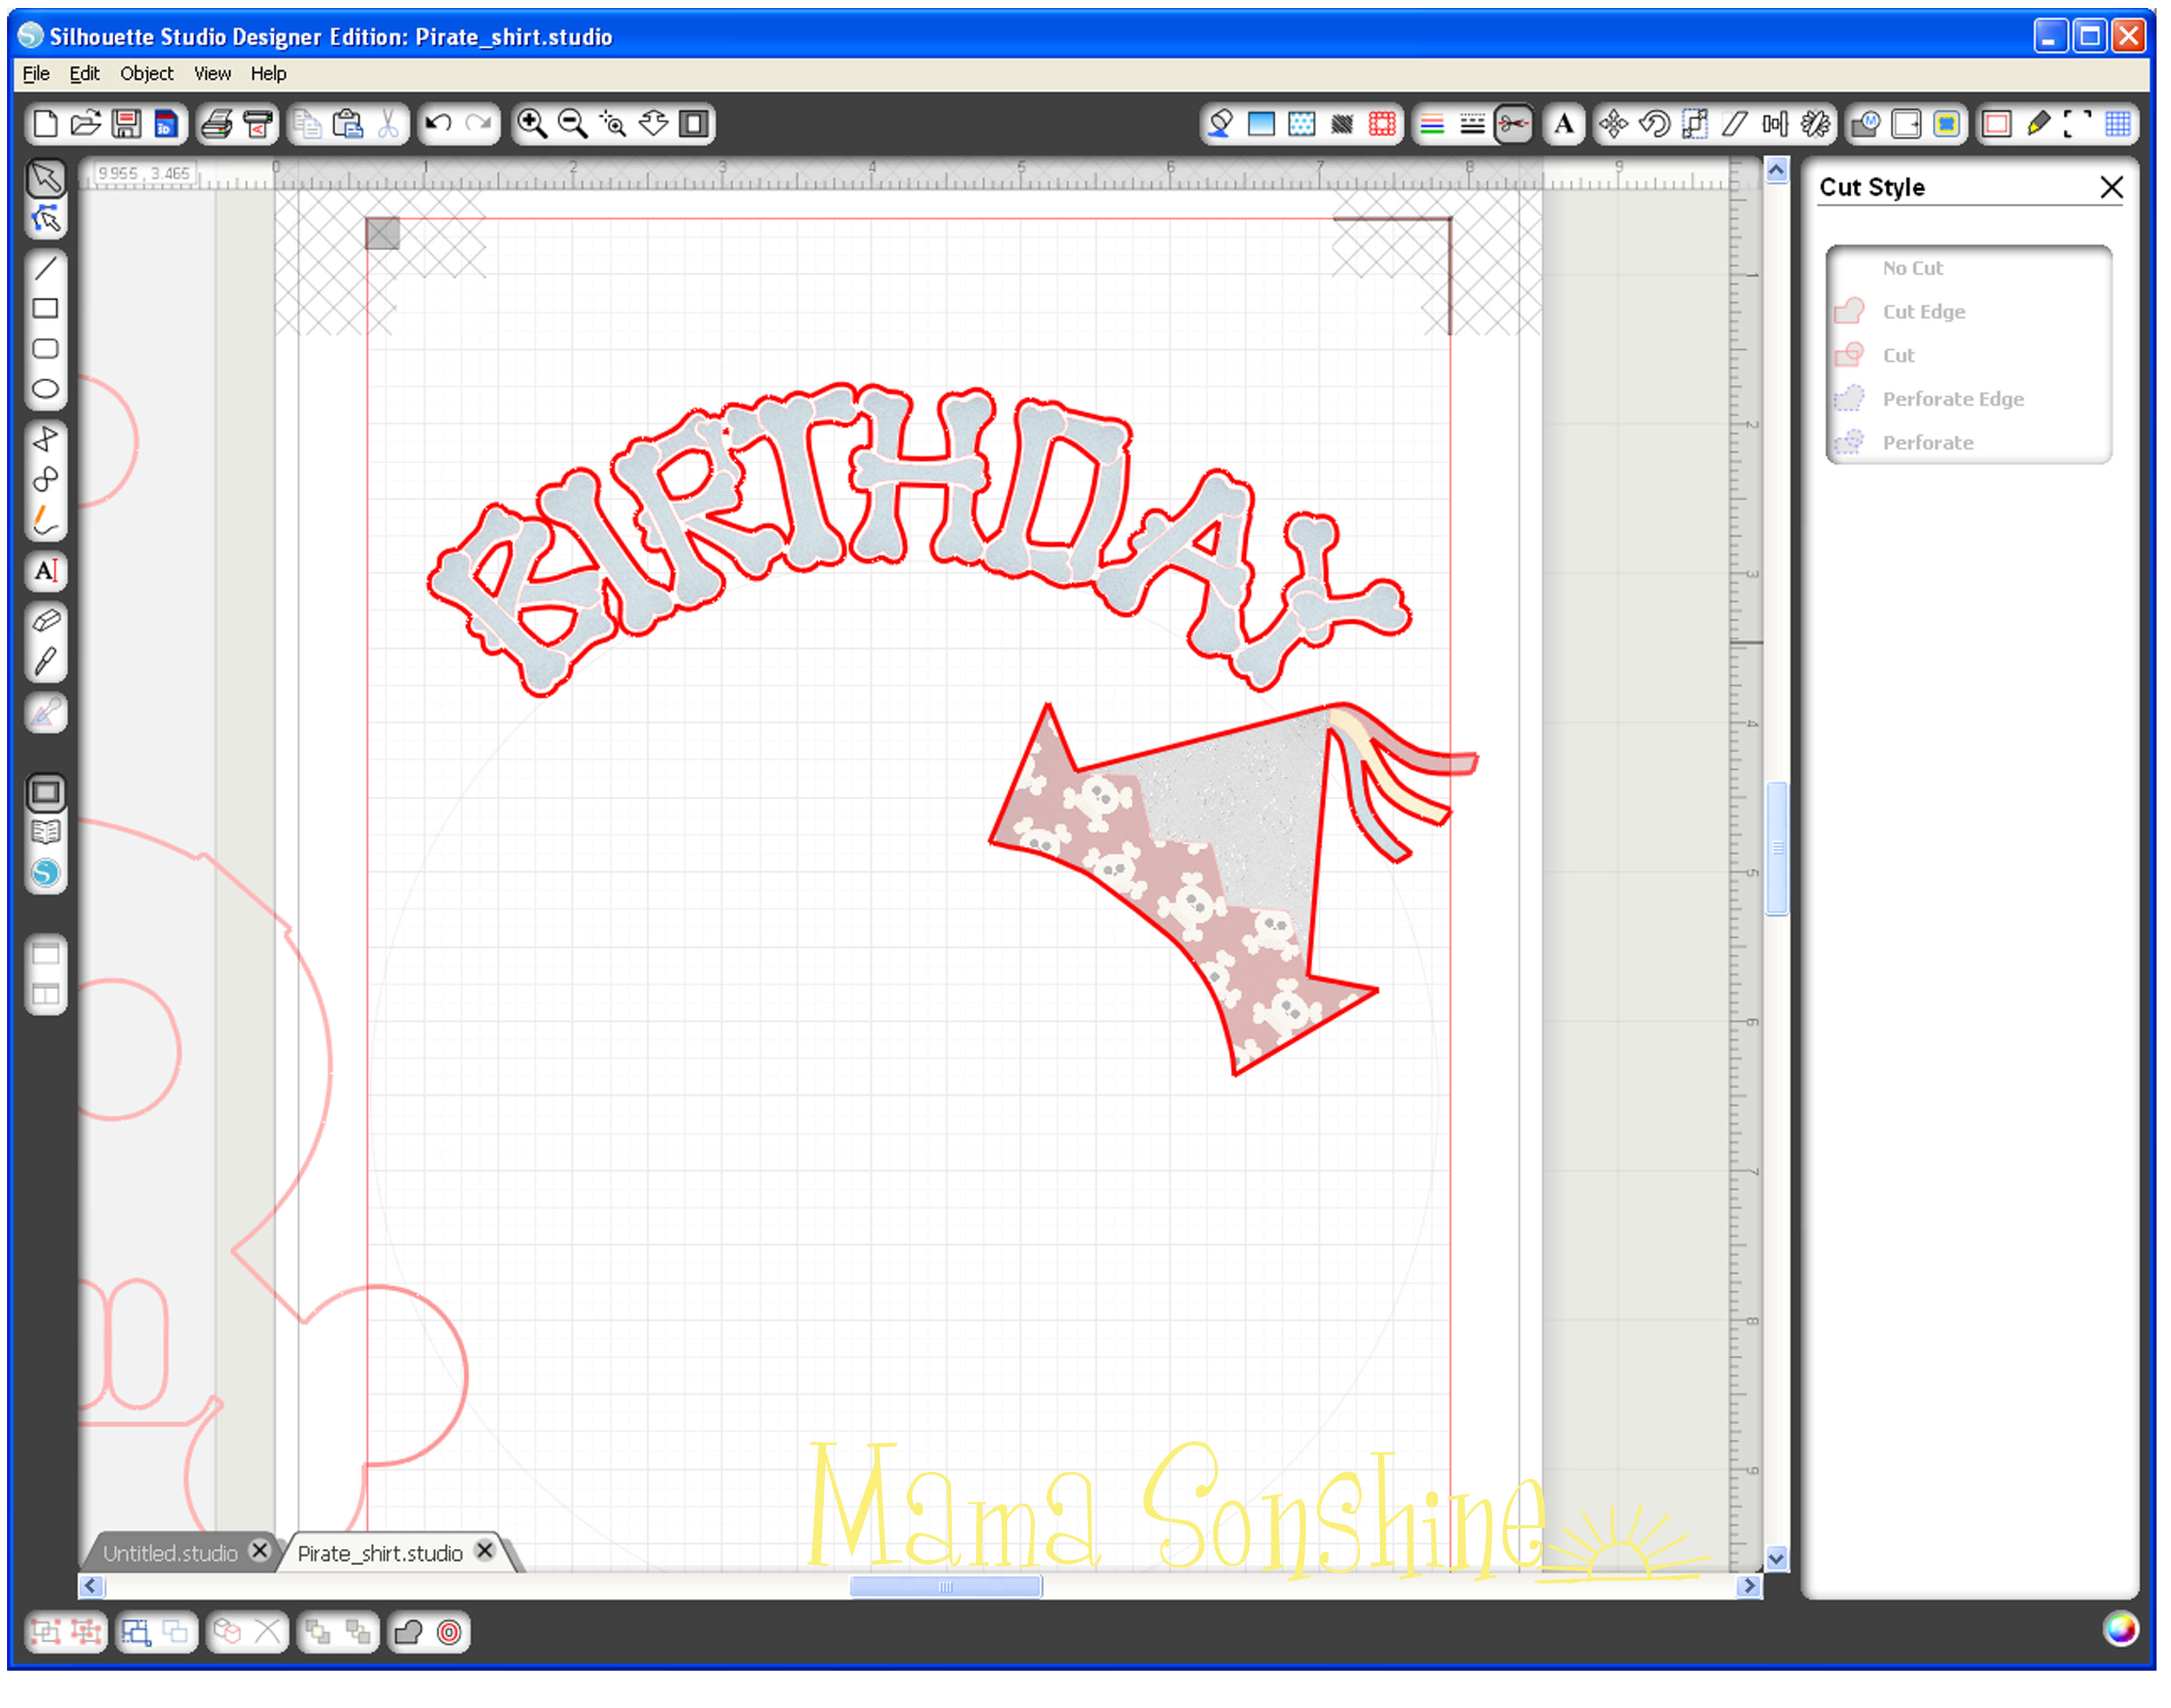
First the party hat:
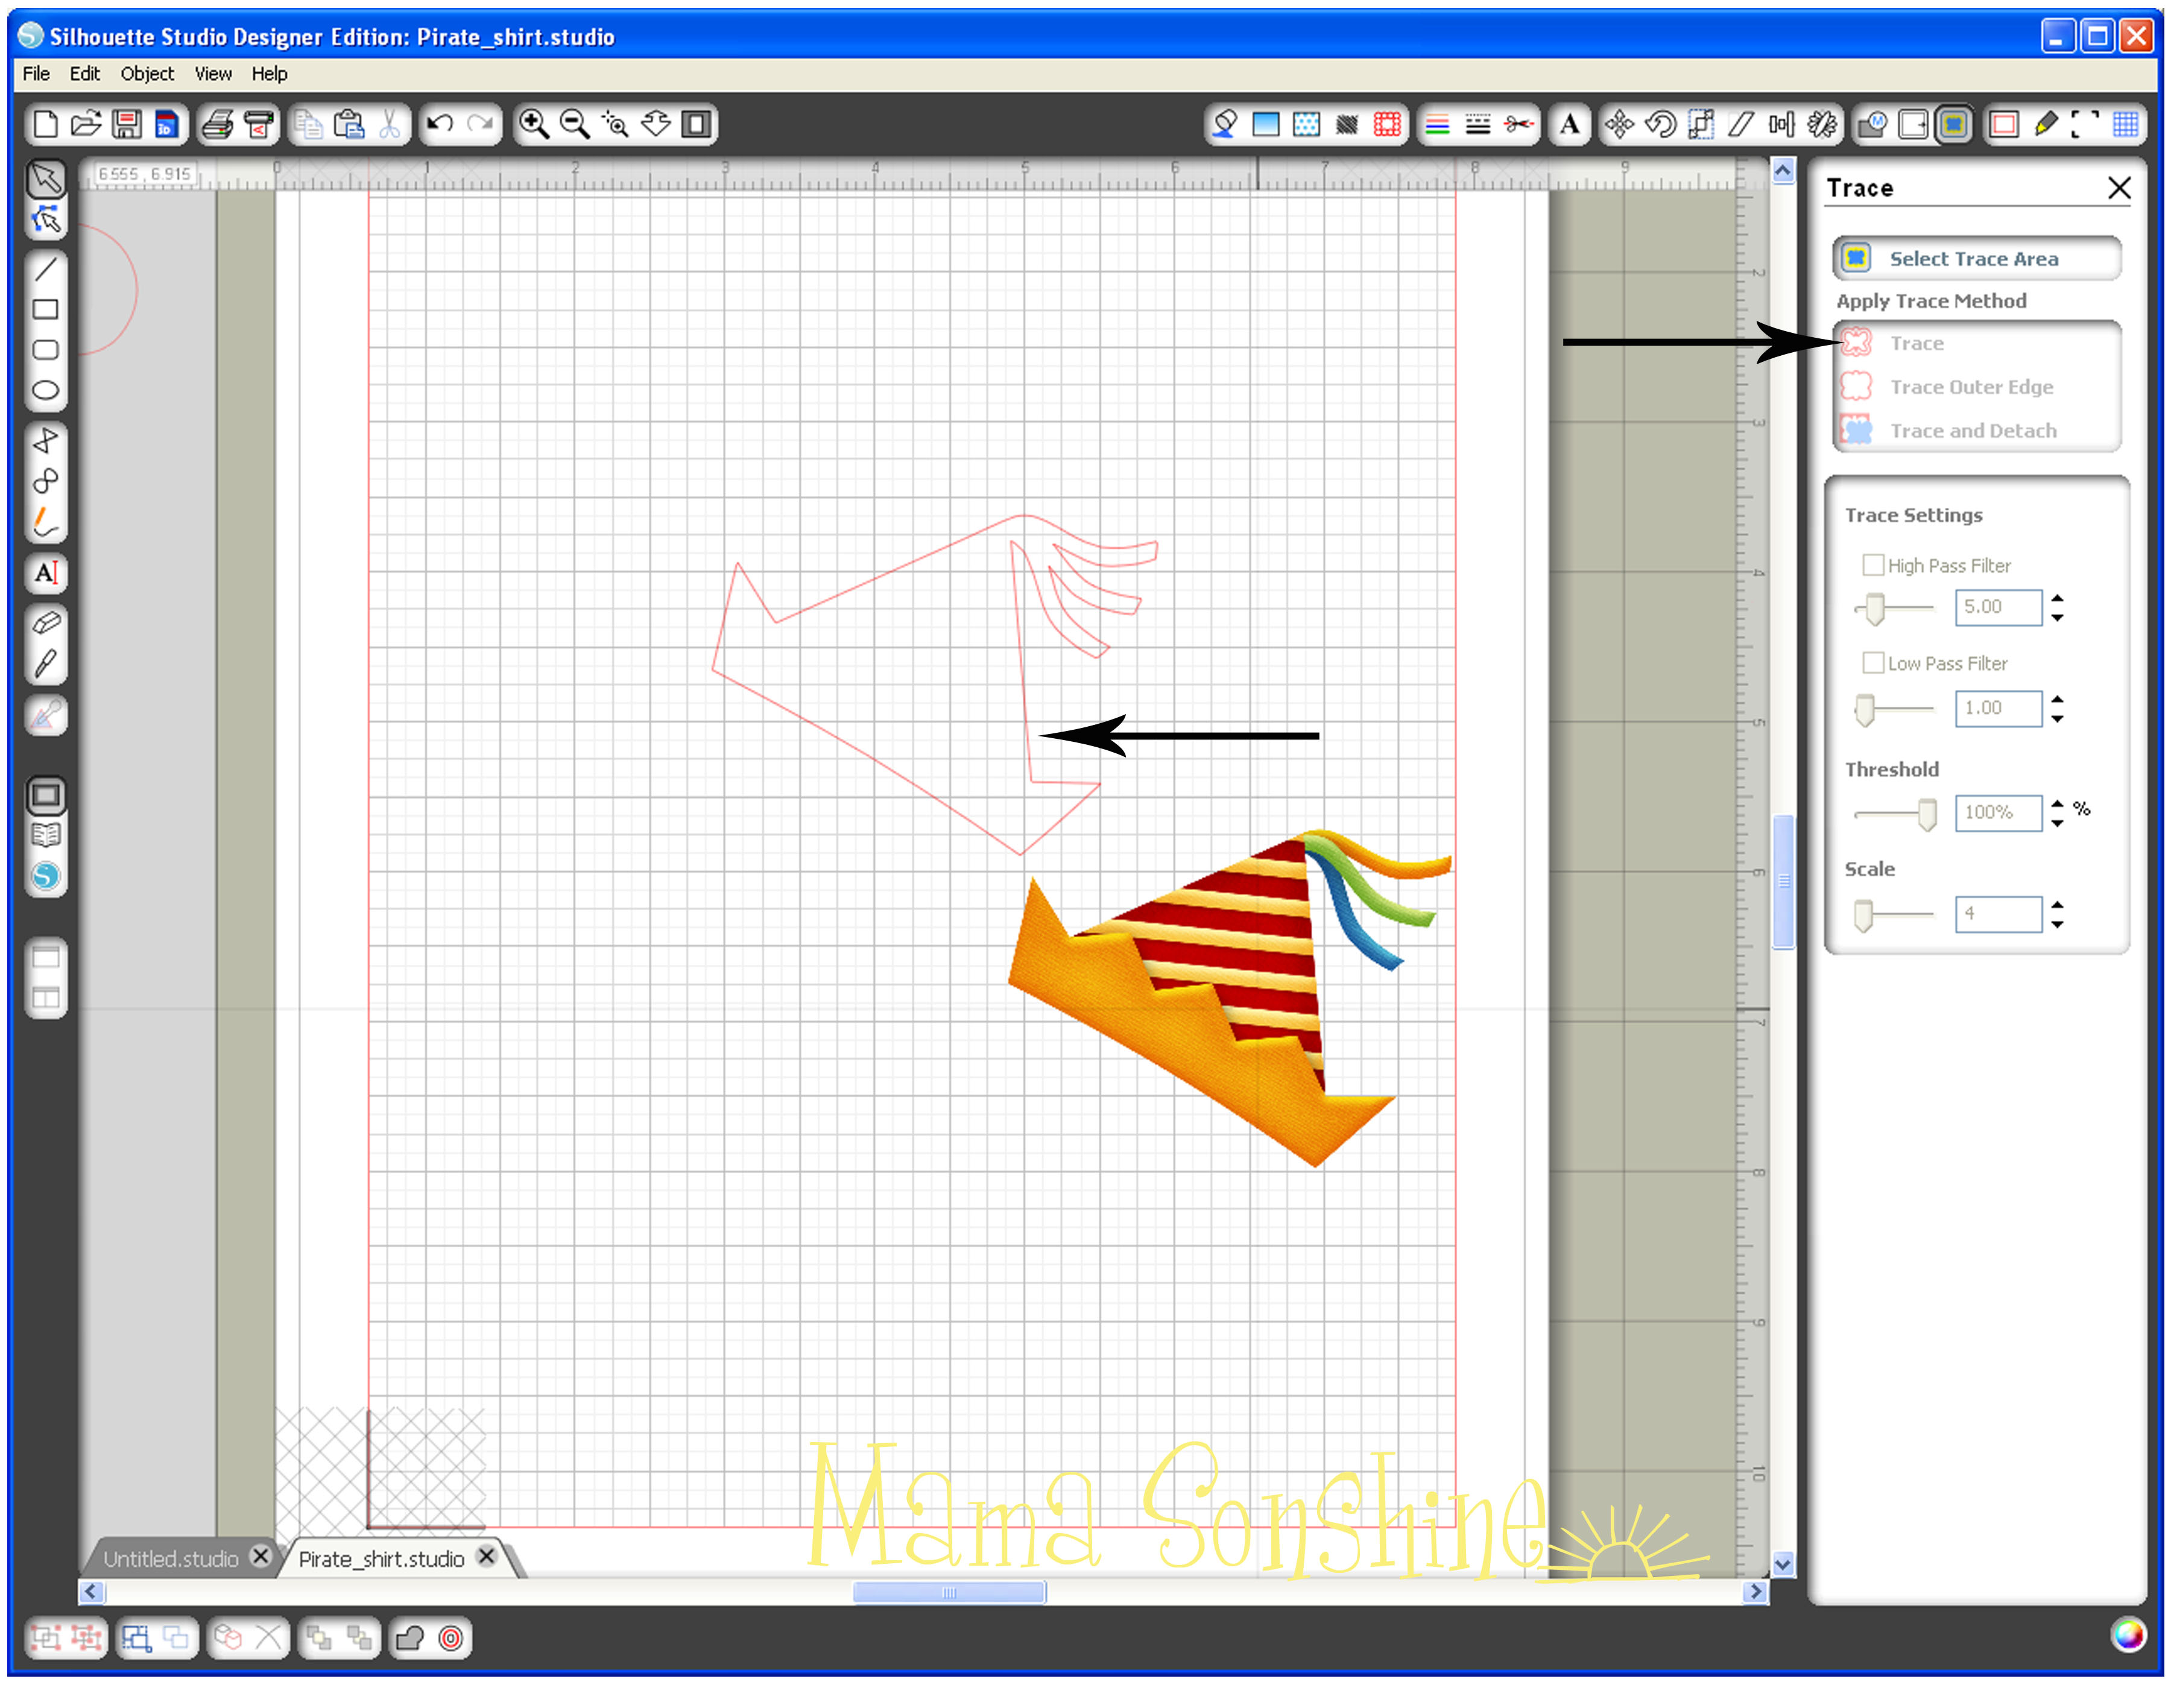
I wanted a birthday hat shape that I could fill with a pattern, using the digital papers from the YoHo Pirate kit mentioned above. I chose a party hat .png file I had because I liked the shape. Since I don’t want the pattern or colors that are currently I made a new cut file using the .png as a template.
I wanted to make the stripe portion one pattern, the yellow portion a different pattern, and I wanted to change the color of the ribbons. The trace tool could not cleanly make these five individual elements. Even when I selected trace instead of trace outside edge, I still only got the outside edge traced.
This slideshow requires JavaScript.
I found it more difficult to try to trace each portion than to simply make a new shape. I selected the draw polygon tool and made a new shape for the yellow portion of the hat. It is important not to move the picture after tracing it and drawing the shape. You also don’t want to use the line tool, because you want an element that can be filled with a pattern.
I used the draw curve tool to make the three different ribbons on the top of the hat. Again, the ribbons are three different shapes that sit on top of the traced hat. After this you no longer need the picture of the hat, so you can delete it or just move it off the page.
Use the fill pattern window to select the patterns for each element. Bring back the skull & cross-bones to fit the hat on the skull. Select all five elements of the hat, re-position and re-size the hat until you get the look you want. Unselect all elements, then select only the bottom border of the hat, here the red portion. Use the point edit tool to fit the hat to the shape of the skulls head. At some point you may also need to edit the points of main hat shape.
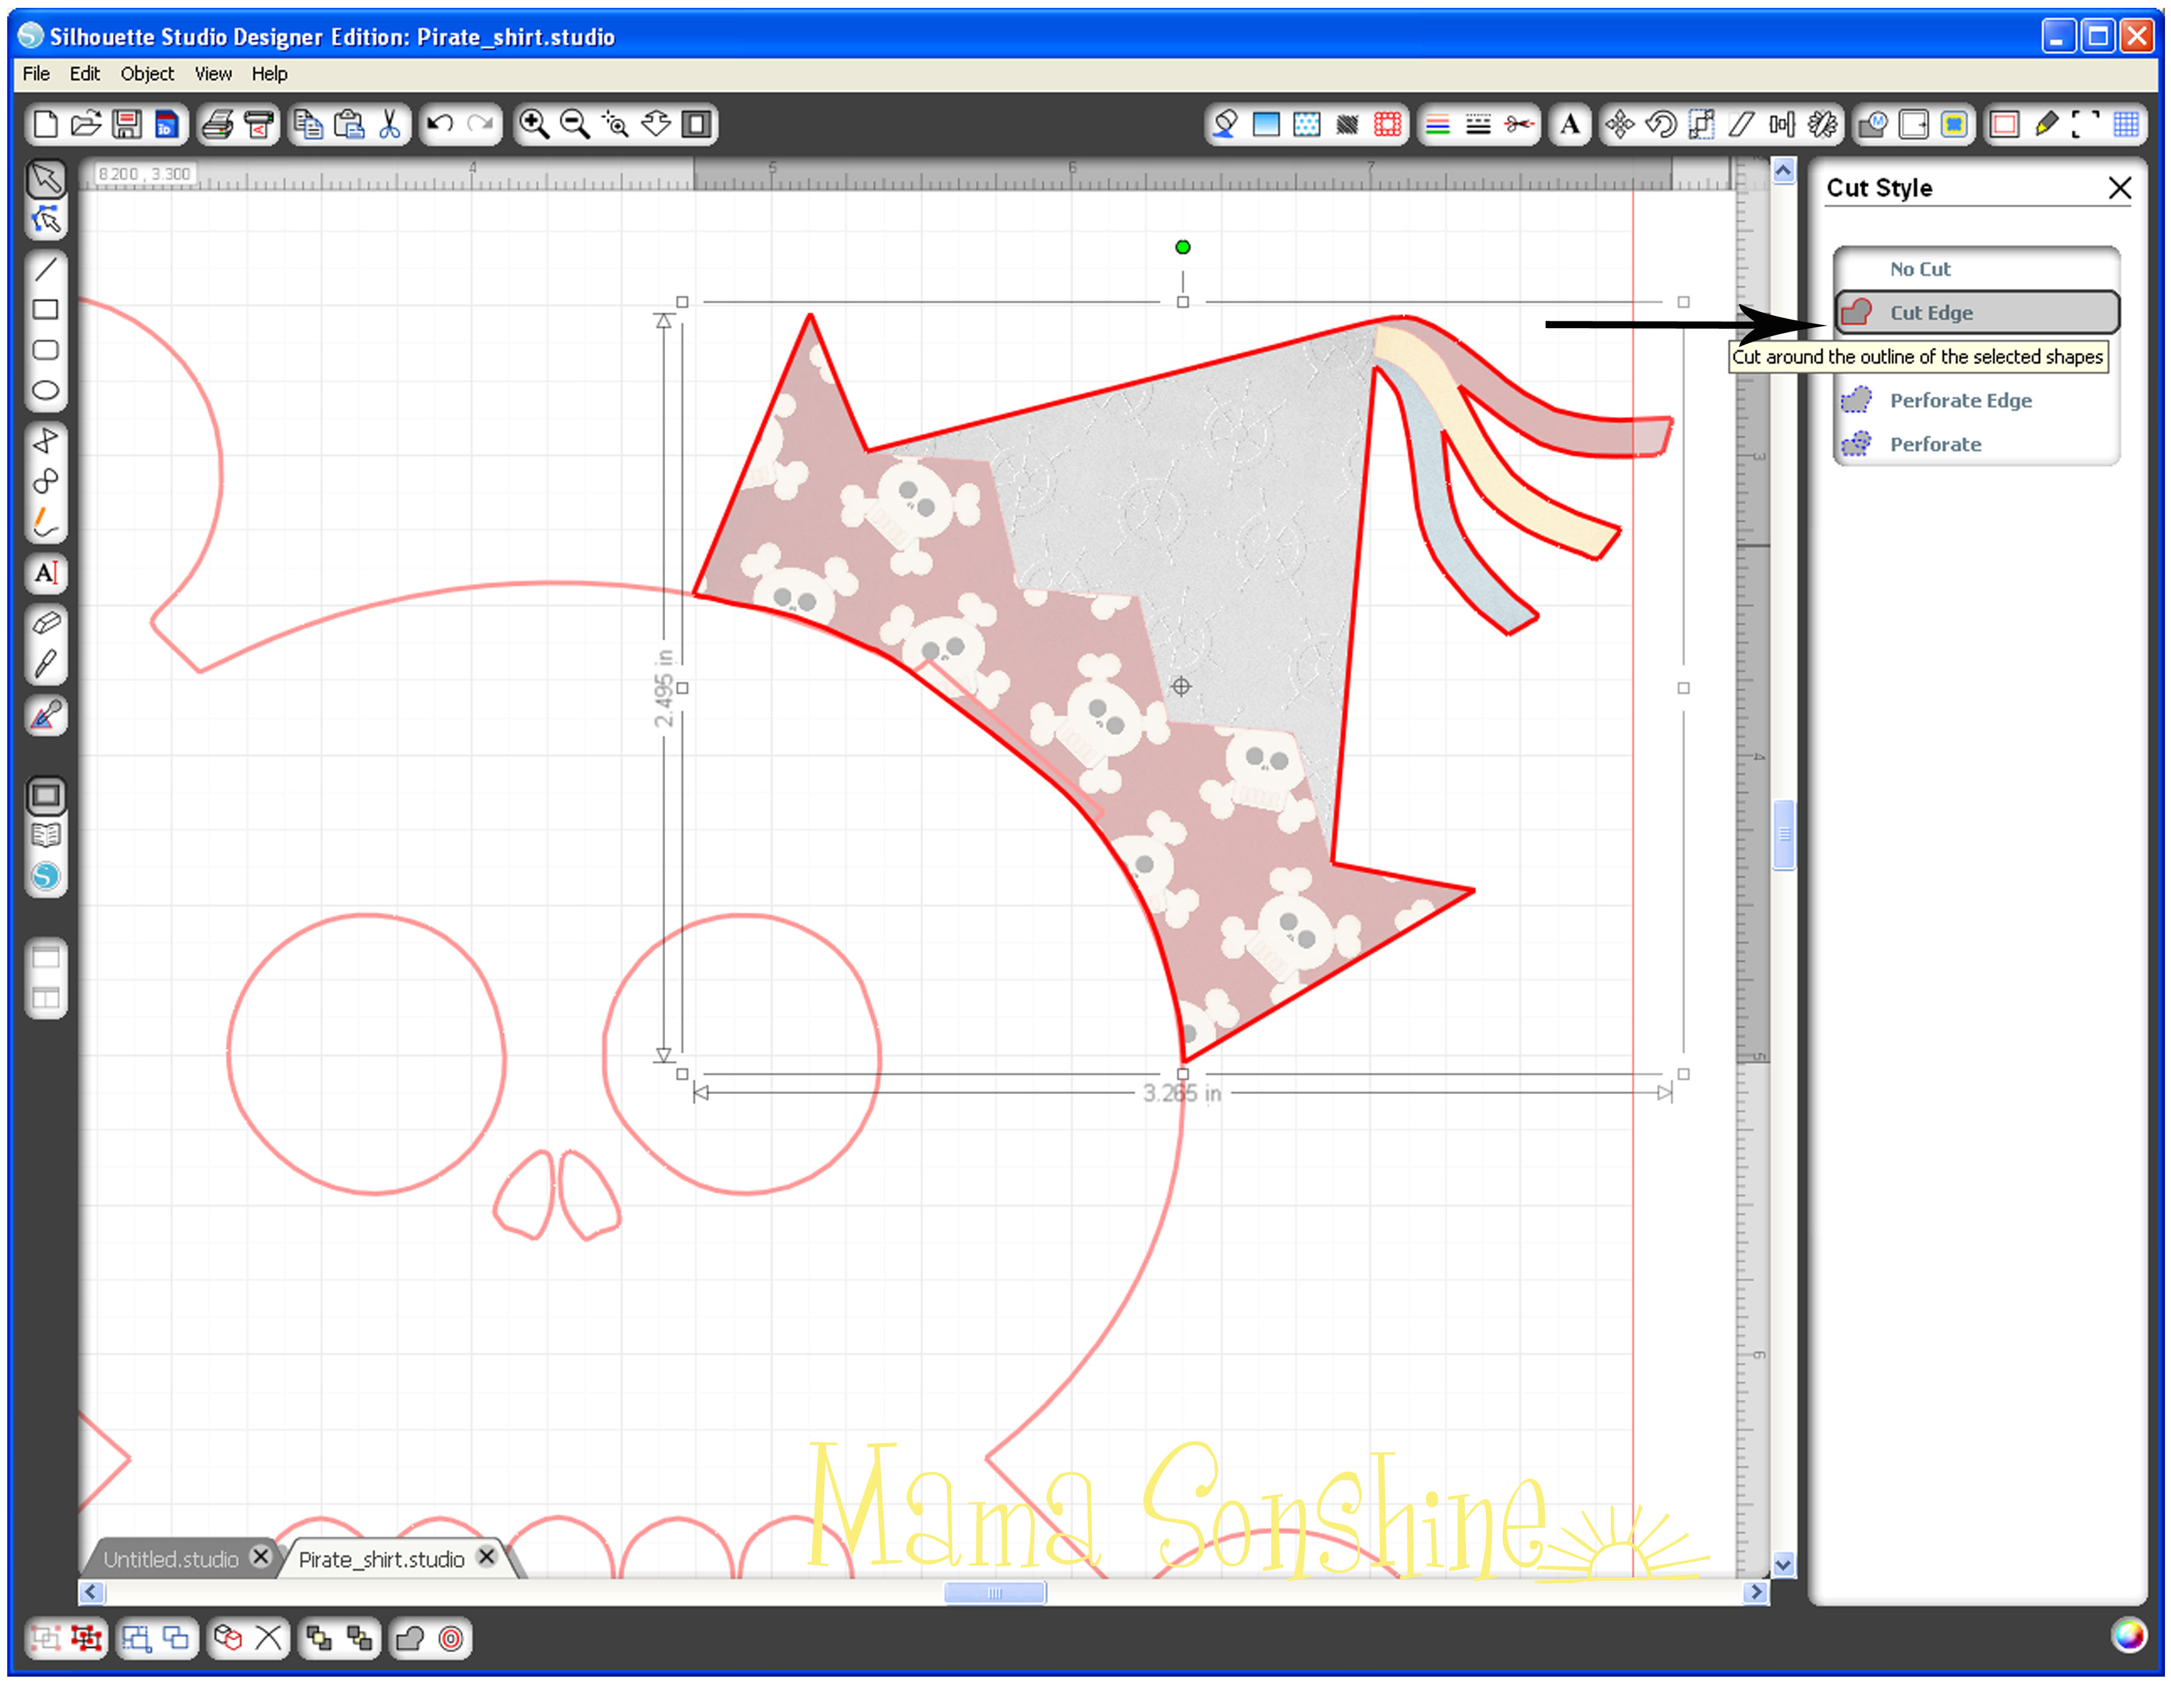
Once you have the hat fitting the shape of the head go to your cut style tool box because you don’t want the elements of the hat cut in separate pieces. Select all the elements, and select no cut, then select only the main hat shape and select cut edge. This ensures that you are only going to cut around the hat’s edge after printing. Select the five elements of the hat and group them together, you don’t want any of them moved away from each other now.
Now for the text:
First I wanted the word birthday to be arched, I drew a circle, typed the text then dragged the text to the circle using the little circle with a cross inside. Resize and move the text until you get it the desired results. If the green outline and move tool go away because you had to select off the text, just double-click the text till they come back. I had to move the skull off the page, because the text kept trying to link with it instead of the circle and move it back to fit the text to the skull size.
This slideshow requires JavaScript.
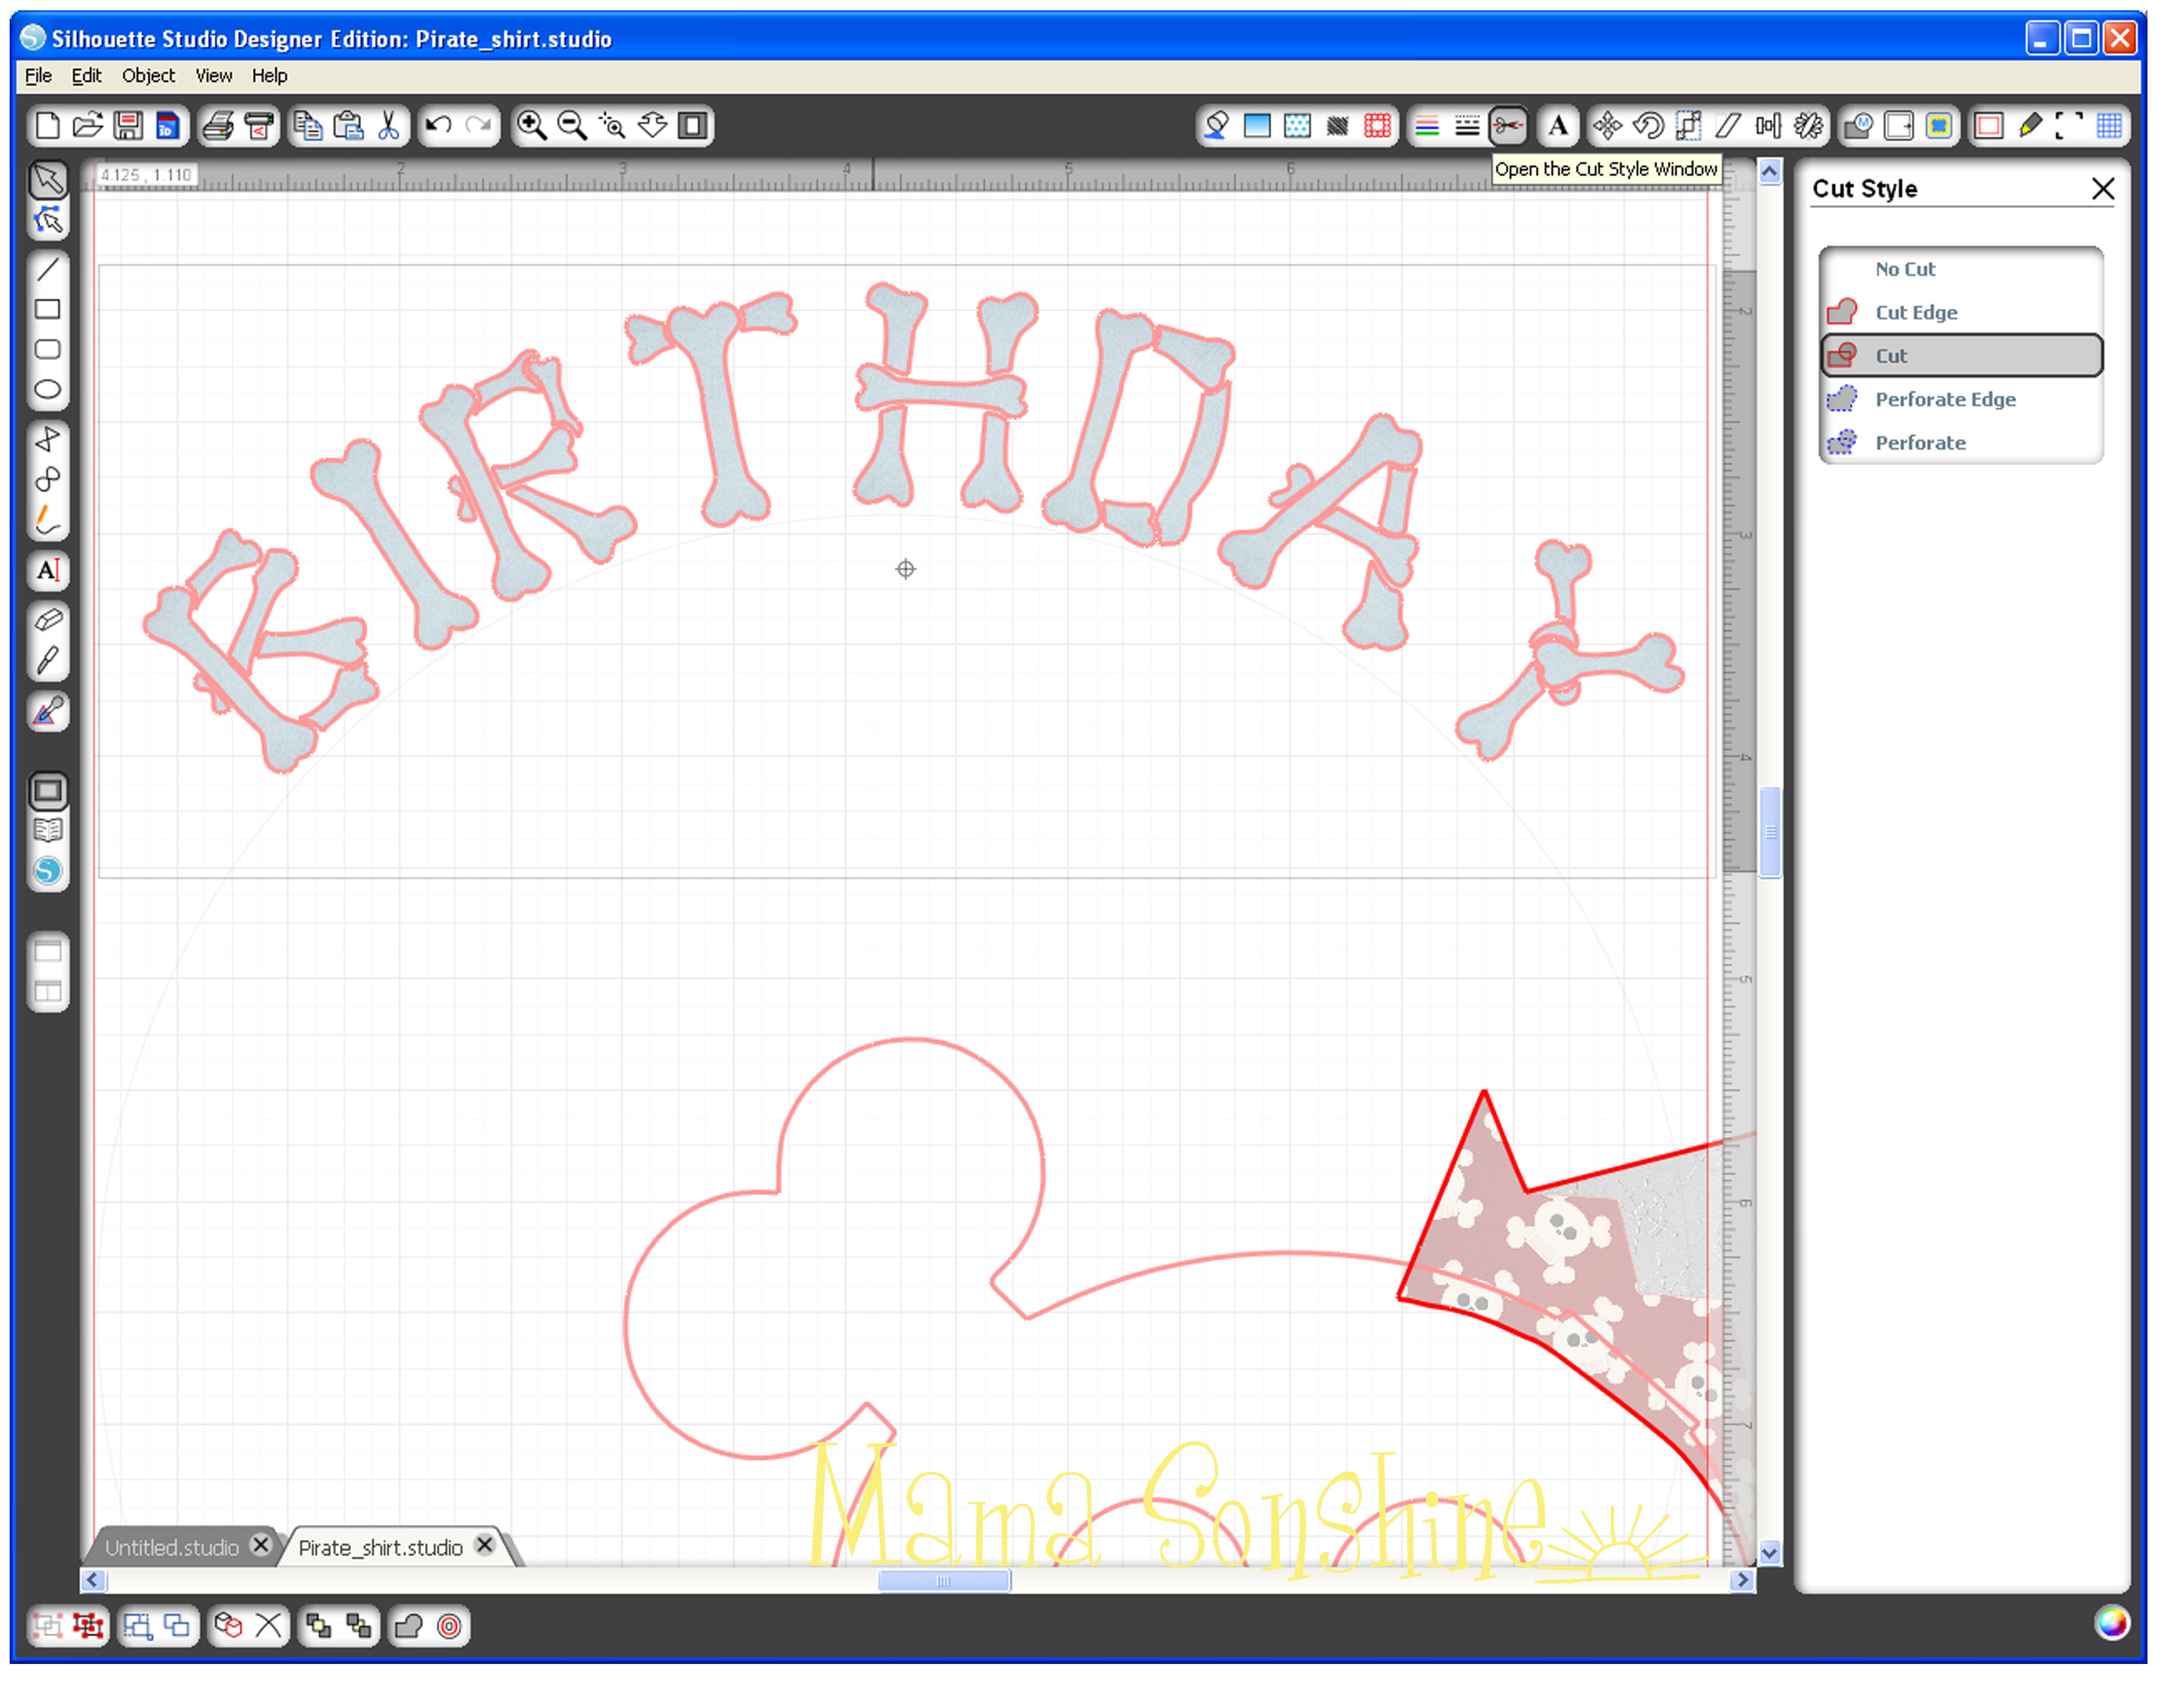
This next part is where I had the most difficulty. I really liked this Bones font I found, the problem is that each letter has little bones that would be cut separately. This would happen even if cut edge was selected, because the software sees each bone as a different element. After hours of trial and error I finally figured out the simplest way to cut around the word, and not each individual letter or bone.
The first time I did this I took a very long route to get where I wanted. I released compound paths, duplicated, filled patterns, made new compound paths, welded, grouped, un-grouped, made offsets, moved, re-sized, moved again, etc. After I got the result I wanted I realized I was adding a bunch of extra steps.
This slideshow requires JavaScript.
First select your text and go to the offset tool box, create an offset and adjust size so it is just slightly bigger than your text. If you are using the dark T-shirt transfer material your offset will show as white, so it is up to you how much white you want to show. At this point each letter will cut out separately, which I didn’t want because I didn’t want to align them on my shirt, I wanted the whole word as one element. So I move my text up slightly to work with my offset. I moved each offset letter closer to each other with a very slight overlap so I could weld them together. The offset and the text no longer match up, so you may have to ungroup your text to move each letter back to the offset, but do not release compound path.
Choose a pattern to fill the text for printing.
Go to the cut style window and select all the letters of your text, then select no cut. Select the offset and cut edge. You will see that your machine will now cut around the letters as one piece.
Repeat the steps for your second word and align everything, including the skull, to make sure size and proportions look good.
Since the skull is not part of the print ‘n cut, you would move it off the page. Show registration marks and move your elements on your page for printing. Just make sure your hat elements are grouped together and the text and offsets are grouped together. After printing, do not move anything, it will need to be in the same location for cutting.
I found the cut settings for Silhouette Studio has for printable heat transfer-dark material worked great.