I Tri and Craft

thoughts from a mother of boys, a marathoner, a triathlete, a crafter, a wife, and a scientist


5 Comments

Custom Daredevil Shirt ~ Silhouette Blog Hop & a Giveaway!!

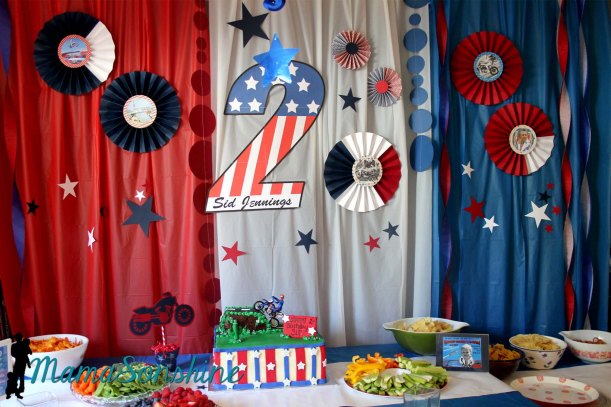
When Sid turned two we had an Evel Knievel themed birthday party for him.  This seemed perfect for our little daredevil.  Admittedly when discussing this theme with Ian he was a little concerned. It took me a while to figure out why, and then I explained to him that Evel is a person’s name and that he was not evil, and when I say ‘daredevil’ I also don’t mean someone who is bad. I just love how kid brains process things.

Evel Knievel Party Decorations


Originally I wanted to make Sid an Evel Knievel suit. And when I say ‘I wanted to make’, I really mean I wanted my mom to make him one (see picture).

But it was so hot and we had lots of water activities at his party that he wouldn’t really be wearing it…..so I scratched that idea.

I also thought of just making him a shirt that looks like the top of Evel’s suite. Think tuxedo shirt….

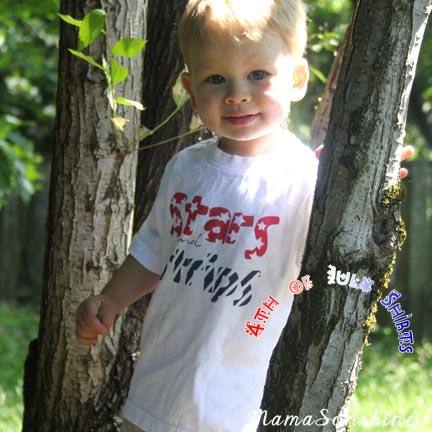
But I still wasn’t sold on that idea.  Then I found an image somewhere on Google that I thought would be great for his shirt and a whole new idea was formed.

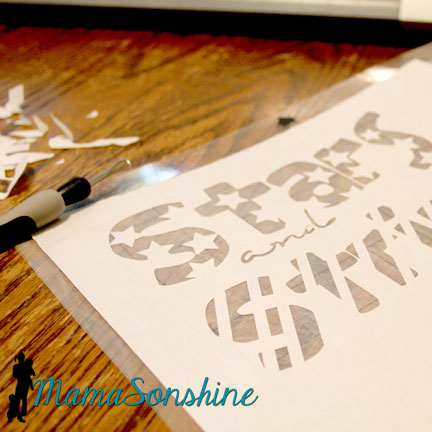
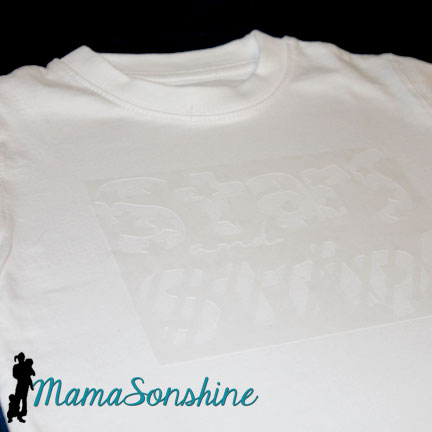
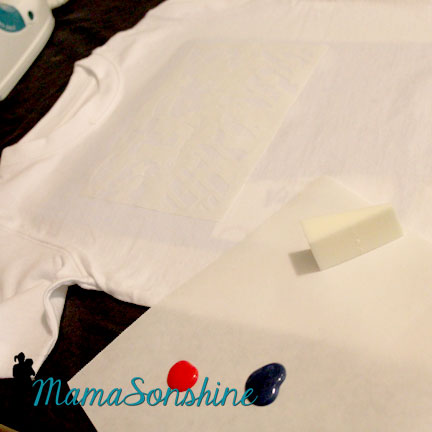
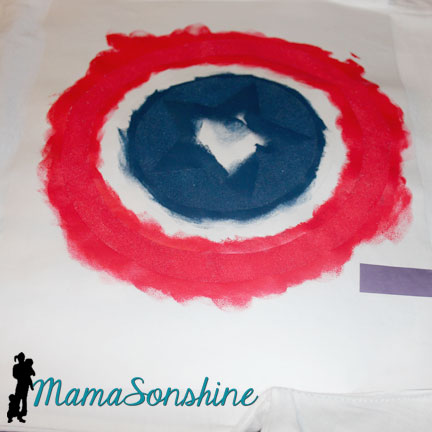
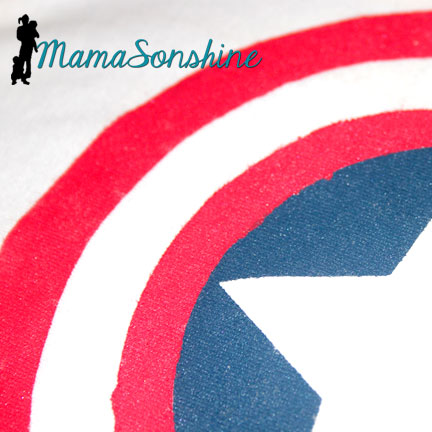
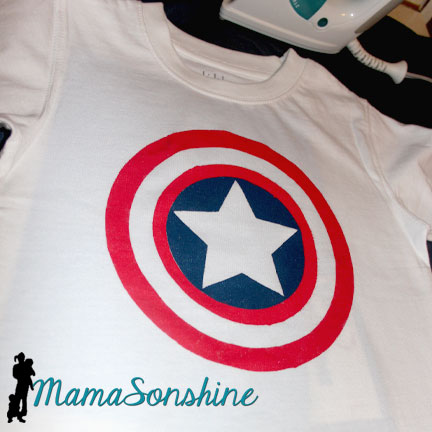
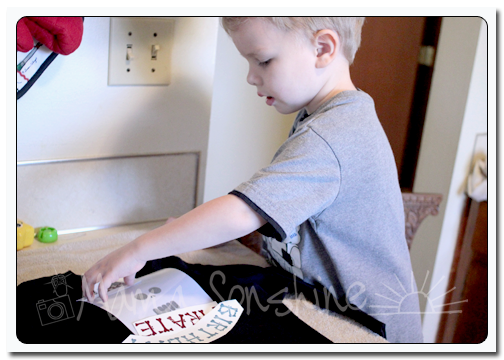
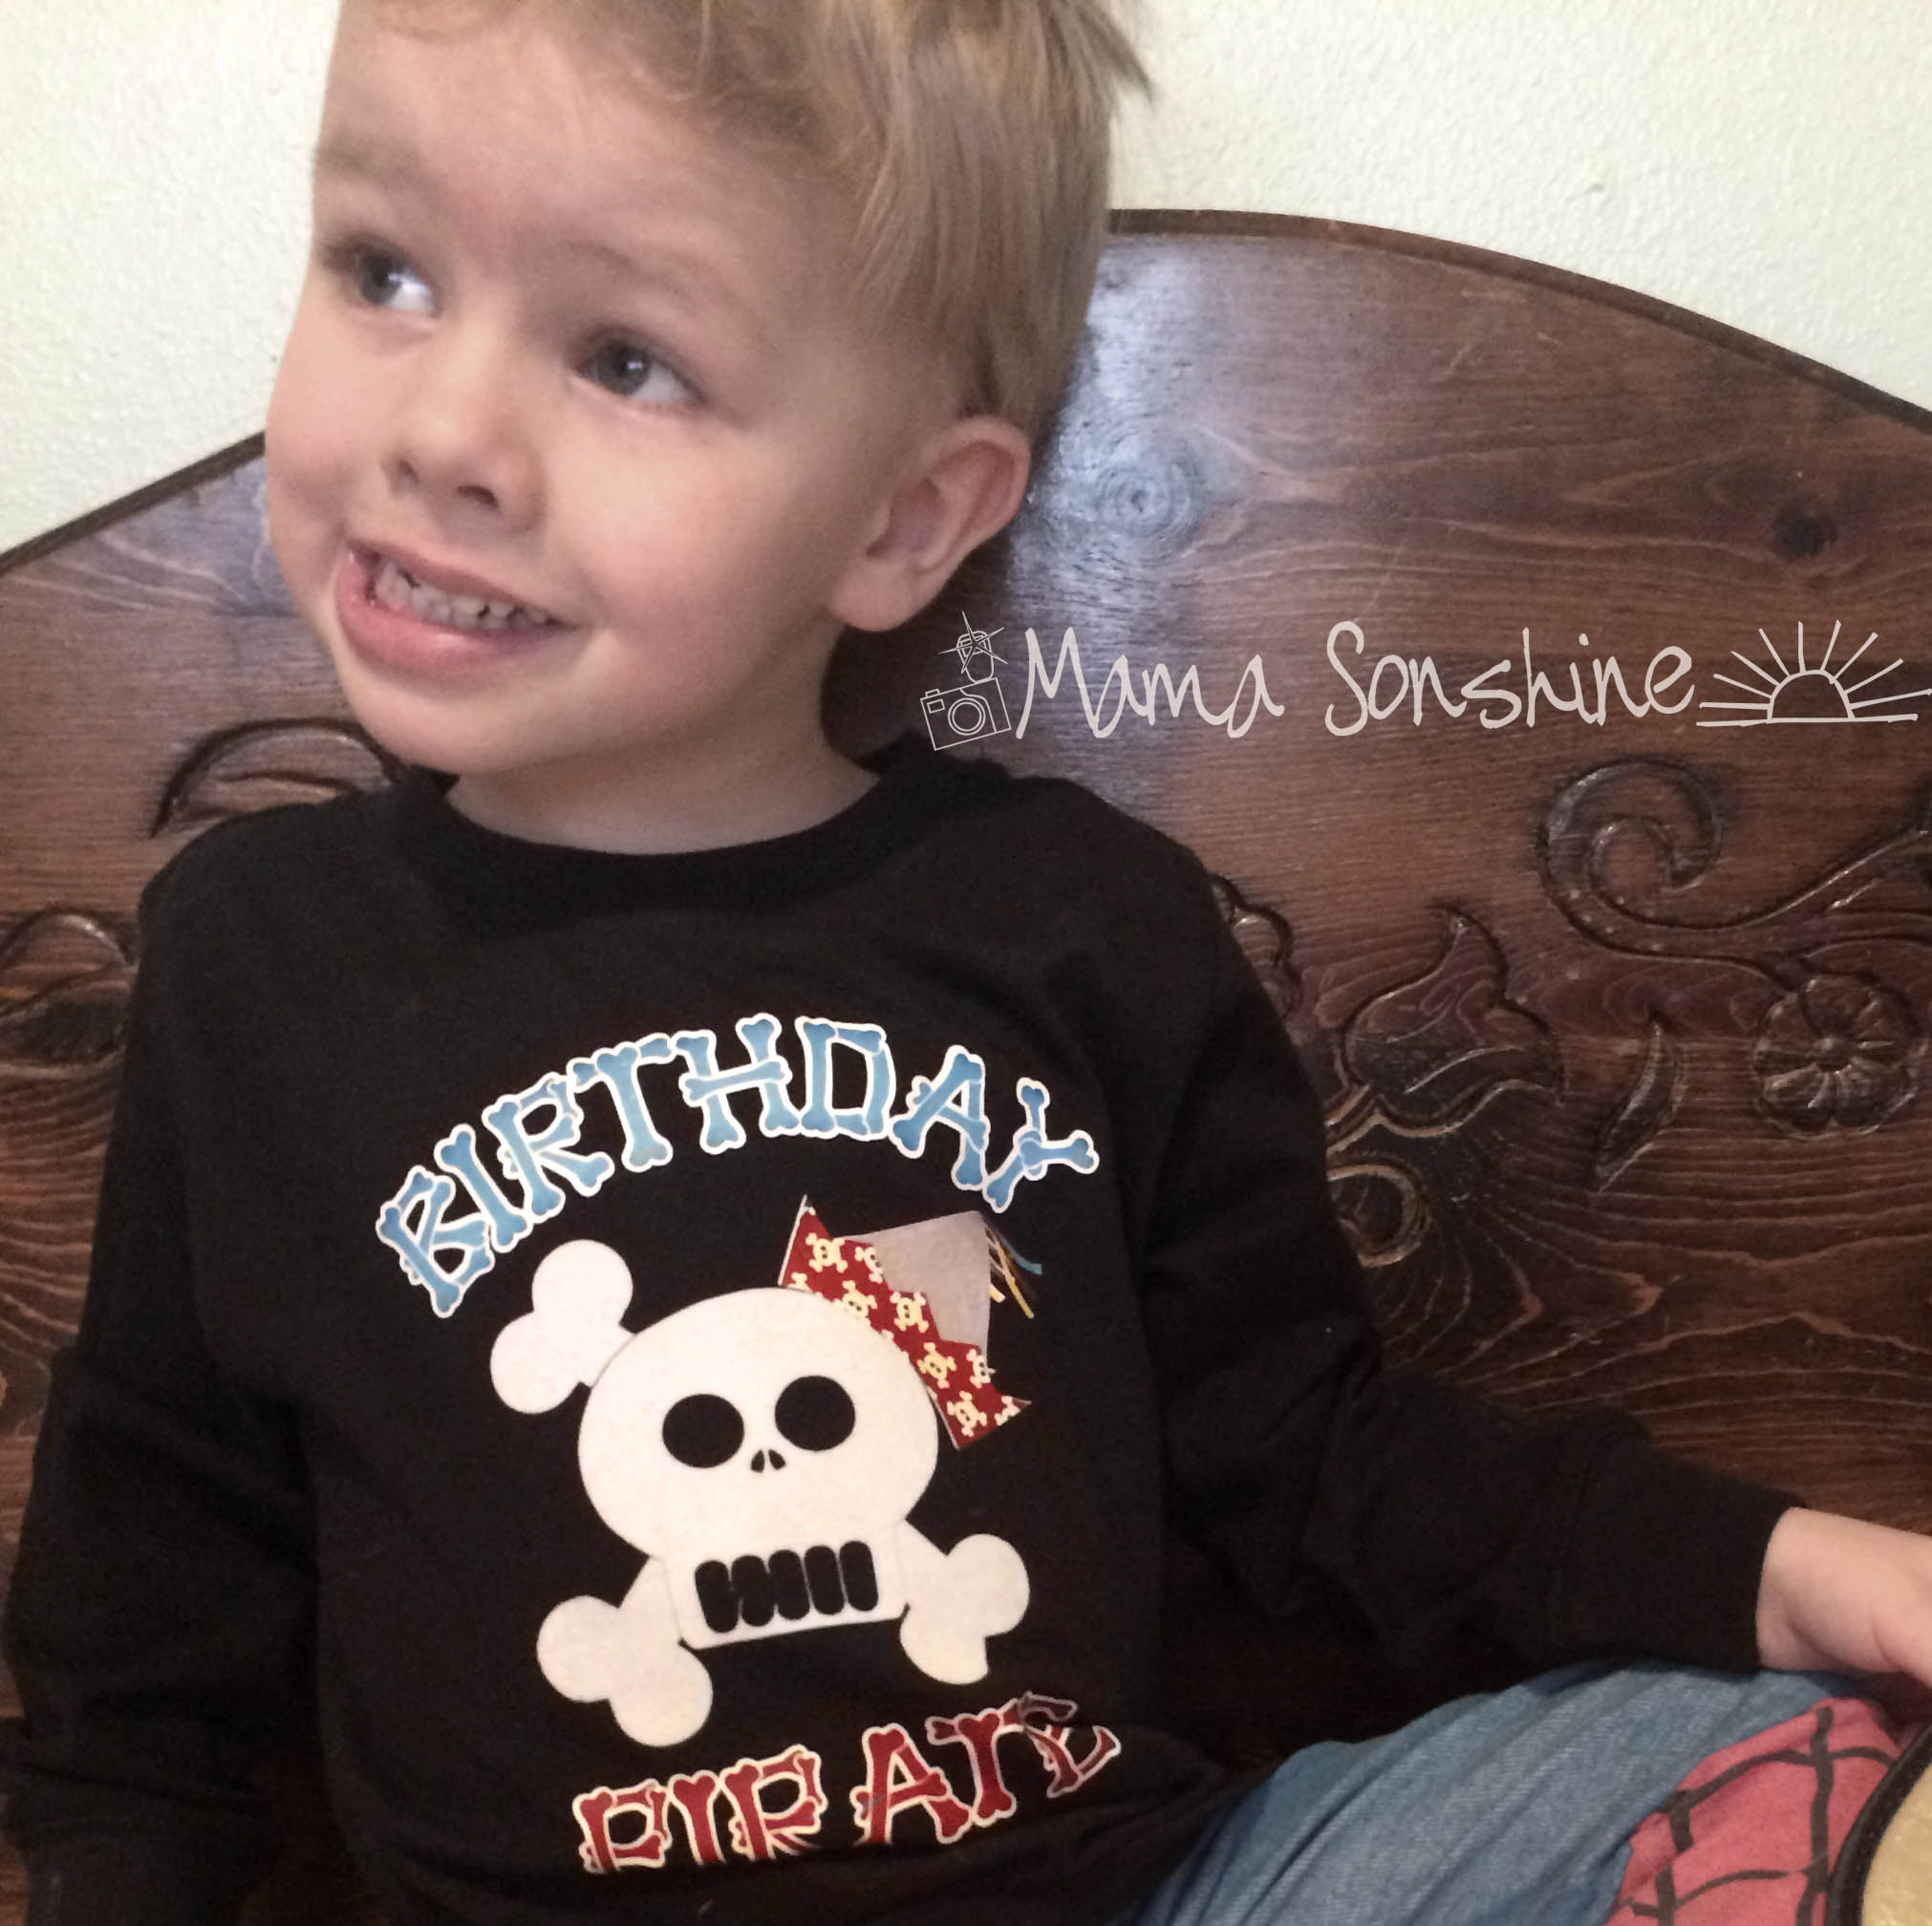
I wanted to customize Sid’s shirt so I took the image traced and altered it. (As I do with everything I make.)

Sid Evel Knievel birthday shirt

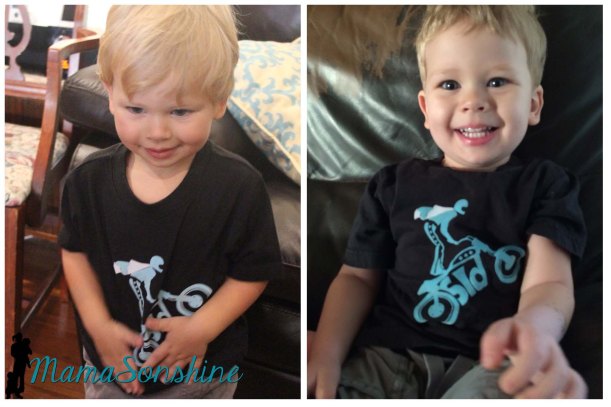
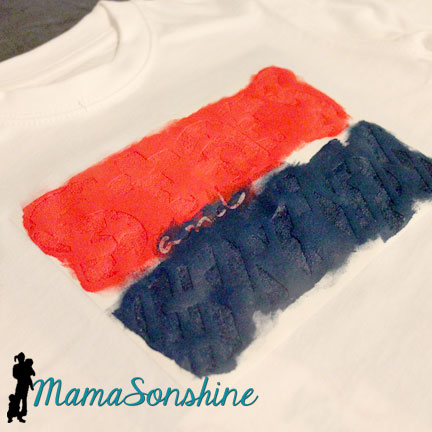
It is convenient that Sid’s name only has three letters and fit under the motorcycle in place of the engine.  I used two colors of flocked HTV (HTV=Heat Transfer Vinyl), it’s the kinda fuzzy stuff. I personally think it holds up better than regular HTV by the way.

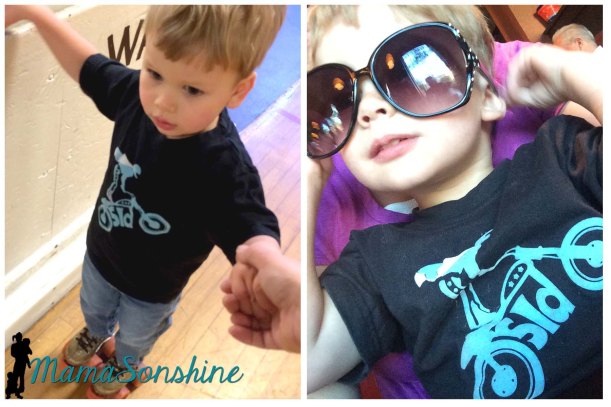
It was a little difficult to get a picture of him in his shirt on his birthday (left) but he still wears this shirt all the time (he’s three and a half now).

Custom Evel Knievel Shirt

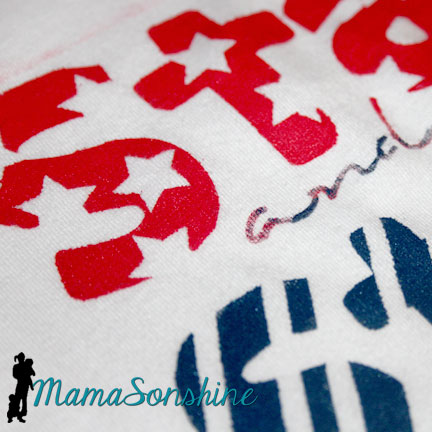
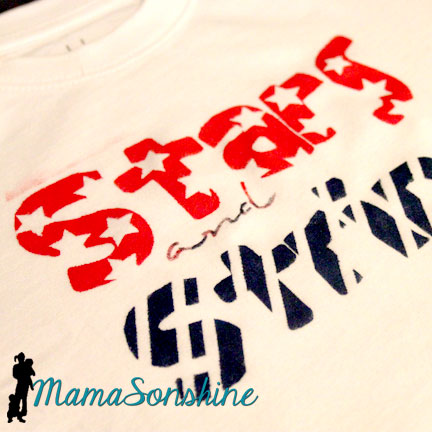
I went ahead and used the same image for his party favors.  I simply replaced Sid with Ride, as I felt people wouldn’t want to take home bags that say “Sid” on them.  For the bags I used the printable HTV for light colors (there is a difference between the one for light fabric and the one for dark fabric, I explain it in this post) and had my Cameo cut around the outside of the image, and the larger pieces inside.

Evel Knievel Party Favors

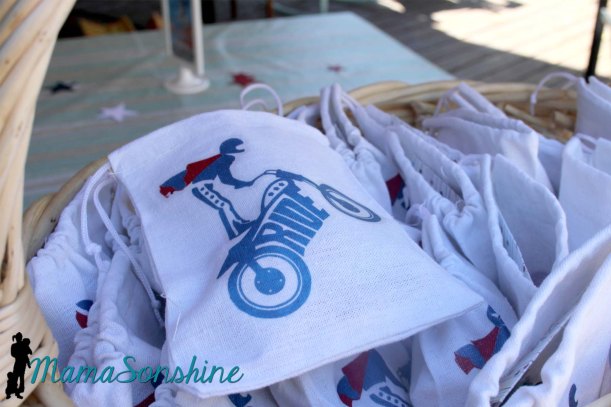
Inside the bag is a matching tattoo and sticker also made with my Silhouette Cameo.

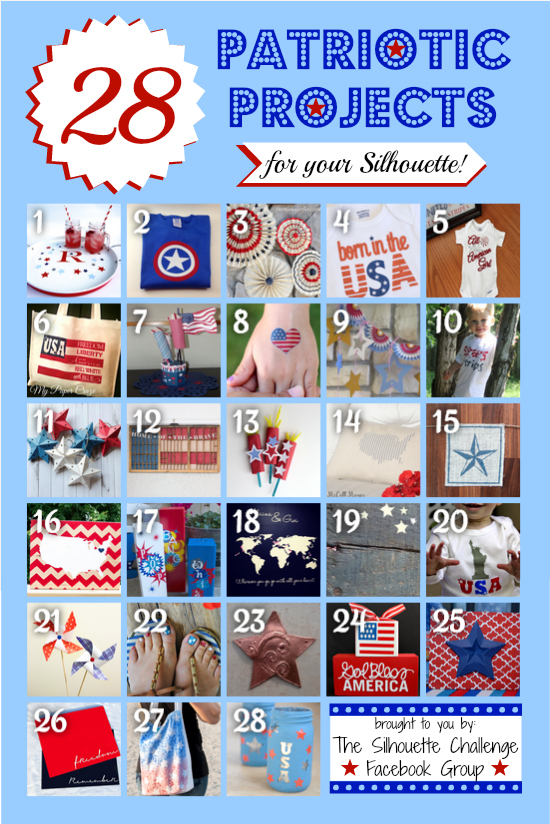
Turns out that this Silhouette Challenge theme was all about Fabrics! So I just knew this project would fit in perfectly. Now since using HTV is only one option with working with your Silhouette and fabrics these wonderful ladies have come up with some other amazing ideas for you.  My Silhouette Challenge buddies and I are all sharing projects on our blogs today, so peruse the projects below for a wealth of Silhouette inspiration!

Art Party Smocks Custom Daredevil Shirt ~ Silhouette Blog Hop DIY Lightning Bug Wall Art with Lights DIY Chevron Mickey Mouse Shirt with Glitter HTV DIY Nautical Pillow Cover + A GIVEAWAY! Recycling Tee Shirts - St. Patty's Day Style! Appliqued Initial Heart Pillow Wrap-Around Shark Shirt Sew A Shopping Tote Into A Zipper Pouch 3 Creative Onesies for Baby Girl & Free Cut Files Pom Pom Tail Bunny Onesie Freezer Paper Stenciled Cushion with a Giveaway! Rawr! Dinosaur Birthday Shirt customize your Picnic Blanket It is Well With My Soul T-Shirt Design Monogrammed Envelope Pillows + Giveaway {The Silhouette Challenge} Toddler Trouble Shirt with free cut file DIY Ombré Tote Upcycled t-shirt cat... Meow! Little Helper Stenciled Kids Apron DIY Easter Egg Shirt - Silhouette Heat Transfer & Rhinestones DIY: Crazy Cat Lady Shirt + Free Cut File

1. Cutesy Crafts // 2. Mama Sonshine // 3. Morena’s Corner // 4. Simply Kelly Designs // 5. Coral + Mint Design Co. // 6. A Time For Seasons // 7. Architecture of a Mom // 8. Where The Smiles Have Been // 9. Haberdashery Fun // 10. The Thinking Closet // 11. The Crafting Nook // 12. Get Silvered // 13. Tori Grant Designs // 14. From Wine to Whine // 15. Create & Babble // 16. Curly Crafty Mom // 17. unOriginal Mom // 18. The Small Stuff Counts // 19. The Experimental Home // 20. Creative Ramblings // 21. Adventures in All Things Food // 22. Minted Strawberry

But wait there’s more…

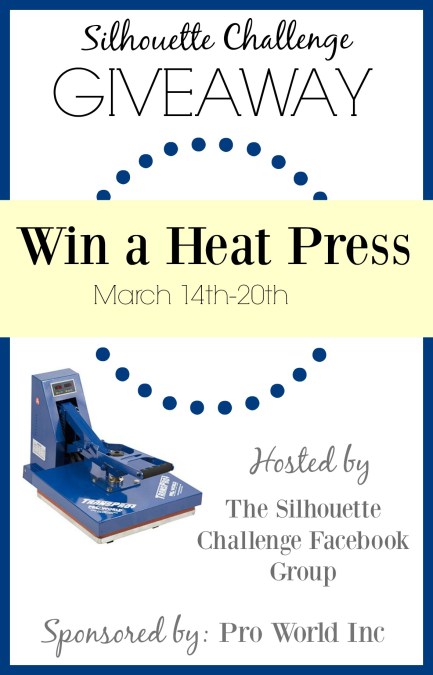
Because really if you are going to be working with HTV you really want a heat press and right now you have a chance to win one!

Heat Press Giveaway

Win A Heat Press SC

click on picture to enter contest

Pro World Inc is giving one lucky reader a Heat Press Valued at $300! 

Pretty sweet, huh? To enter: just complete the entries in the Rafflecopter link below. You have 26 potential entries, which means a lot of winning power. So, hurry up and enter!

{This giveaway runs from today through Monday, March 21st at 11:59p eastern and is open to anyone 18 years of age or older with a lower 48 U.S. mailing address. You can read the rest of the terms and conditions in the widget below, click through the link below.}

↓↓↓↓↓

→→  a Rafflecopter giveaway ←← 

↑↑↑↑↑

Dawn Marie

facebook instagram pinterest parties by mamasonshine etsy bloglovin google+ email twitter Image Map

This year my running club and I will be participating in the Hood to Coast Relay Race as a fundraising team. We will be raising money for Providence Cancer Center to help #FINISHCANCER. Click on the picture below (or here) to donate today.

banner copy


5 Comments

Star and Shark USA Flag Shirt

I had thought I was very cleaver making my four-year old a Capt. America shirt for him to wear on July 4th.

Till I showed him and he said “I don’t yike Capt. America now”

hmmm….

OK back to the drawing board.

This time around I decided to take a sailors approach to the flag.  Because I saw Lauren’s post (The Thinking Closet) about her Nautical Star Banner.  I just loved the nautical star and thought it would look great on a shirt.  But I didn’t want plain old boring stripes….

hmm….what to do….

shark_mask_grn


Then my son picks these out at the store.  “I’m a SHARK! dana dana dana”


So my brain clicked and this shirt was born.  Just in the nick of time.


MamaSonshine Shark Flag Shirt


My original plan was to do the stencil with freezer paper, because it makes a tighter seal and crisper lines..  But the cuts are too intricate for my dull blade.  So I used vinyl, and as you can see some of the detail, like the gills was lost, and the edges are a little blurred.

The tricky part to this shirt is all the small pieces, I didn’t want to lay every little piece of freezer paper down one at a time.  I thought I would share how I connected all the parts to make one complete stencil.  Lauren also talks about how to do this in her afore-mentioned post.

First find the FREE images you want to use and trace them.  (Please be mindful of copyright laws, and other people’s art work)

Draw lots of little rectangles using the rectangle tool.  Place them on top, over the two parts you want connected.  Select everything, go to the modify window and click on subtract.  Then select everything again and click on make, under compound path.

MamaSonshine Shark Flag Shirt


If you go to the color fill tool box and fill your shape with a color, you can easily see you now have a star that has missing parts.  The parts that are colored is what will be painted on the shirt.

MamaSonshine Shark Flag Shirt


After tracing the shark, we do the same thing.  Make rectangles, go to modify and click subtract.

MamaSonshine Shark Flag Shirt

Then, under compound path, click make (after selecting all parts of the shark).  You will see that when I traced the shark, I made sure that the gills and eye were part of the white portion.  This eliminates a bunch of little eyes having to be added after the stencil is laid down.

MamaSonshine Shark Flag Shirt

Draw a large rectangle, the size that you want your flag.  Use the replicate and alignment tool boxes to fill the rectangle with your stars and stripes.

MamaSonshine Shark Flag Shirt

The row of … and column of…were especially useful in this design.   As was the space vertically and space horizontally tools in the alignment tool box.

MamaSonshine Shark Flag Shirt

Now select everything, the outer rectangle, all the sharks and all the stars, go to the modify window and click on make compound path.

MamaSonshine Shark Flag Shirt

Of course this removes all the fill colors you have used, but that’s ok.

MamaSonshine Shark Flag Shirt


If you click on a fill color now, you will see that all the parts that will be your stencil are now colored.  These are the parts that the shirt will show through.

MamaSonshine Shark Flag Shirt


You can look closely and see all the parts are connected and will come off in one piece.

Cut, apply to shirt, paint, etc.  You know the drill.

MamaSonshine Shark Flag Shirt


Got all that?

Well don’t worry, I decided to just let you download this cut file.  For free. Yep. Go ahead and make your own.  Tonight.  Cause the fourth is coming soon.

Star and Shark USA Flag Stencil file


I used vinyl as my stencil, but you can also use freezer paper (just make sure your blade is sharp) or stencil material would work great.

My older son wouldn't wear it...

My older son wouldn’t wear it…

so I made the baby try it on

so I made the baby try it on


Thanks for visiting
Shine On

horiz_sig copy

facebook instagram pinterest parties by mamasonshine etsy bloglovin google+ email twitter Image Map


I linked up here:Creative

Featured Button for The Thinking Closet Reader Showcase


10 Comments

Freezer Paper July 4th Shirts

Freezer paper is every crafters’ best friend and I can now see why.

I have made shirts for the boys before using Heat Transfer Vinyl and Printable Heat Transfer Material, but never using fabric paint.

For this month’s Silhouette Challenge the theme was patriotic.  Seriously you could go anywhere with that theme, but I decided the boys needed custom shirts to wear on the 4th of July.

I wanted to make a stencil out of freezer paper that I cut with my Silhouette Cameo.  I didn’t want the basic plain old flag, but I wanted something kinda flag related.

4th of July Shirts


So I cam up with this shirt for Sid.  It says “Stars and Stripes” and has coordinating graphics with the words.  And it was done in Red, White, & Blue.  Tots Adorbs huh?

Since I didn’t actually want them to match I decided to make Ian a Capt. America shirt.  Because who is more patriotic than Capt. America?

The process

Create and cut your design, you don’t have to use a cutting machine to make a shirt out of freezer paper but it sure is helpful.


Freezer Paper Stencil

In the cutting machine the freezer paper can be cut with shiny side up or shiny side down.  However, the shiny side is the side you will iron to your fabric, so if you cut shiny side up, you will need to mirror (flip horizontally) your design.  I used a blade of 2, speed of 3 and thickness of 10.  But there has been a variety of recommended settings on-line, so make sure to do a test cut first.

Freezer Paper Stencil Ironed on

Iron on your stencil.  Put the shiny side down on your fabric and use a dry iron on the setting for your fabric.  Use lots of pressure, and pay extra special attention to the edges.  You don’t want paint to bleed under the stencil.  Freezer paper and transfer tape don’t mix, so you will have to put all those little letter innards back by hand.  I made font decisions with this in consideration.

Use a sponge to paint

Here is a little confession.  I don’t paint much, so I didn’t have any paint sponges or foam brushes or anything at home.  You know what I did have though?  Make-up foam applicator, which worked just fine.

Make sure you place a piece of cardboard or a few pieces of cardstock between the layers of your shirt.  The paint can bleed through, and you don’t want it showing up on the back of your shirt.

Freezer Paper Shirt

Make sure you dab and lift, do not brush.  Brushing can lead to paint bleeding under your stencil.  The idea is have many thin layers of paint instead of  one thick one.  I decided I wanted the ‘and’ to be a mix of red and blue, because I didn’t want too much of one color.

Freezer Paper Shirt

Let your paint dry and peel up your stencil.  You may have to hold down the shirt to avoid stretching the newly painted fabric.

MSS_July4th_shirt09

Most fabric paint requires you to heat set it, running the iron over the design so the paint doesn’t wash off.  The fabric paint I bought did not have that on the instructions, but I did it anyway.  I ran the iron over the front of the shirt, with a pillowcase in between, after is had dried for a couple of days.  I turned it inside out and washed it after that.

If you notice above the word “stars” you can see a little smear of red pain because the frame of my stencil was too small.  I didn’t run the iron over that part, and it was mostly gone after washing it.  So I am glad I did heat set the rest of the shirt.

Stars & Strips Shirt

The Captain America shirt seemed like it was going to be easy, but I forgot about the fact that there is a red circle next to a blue circle with no white between.

So I had to paint it on two different days.

Freezer Paper Capt America

The stencils were different circles, so the inner white circle is actually two.  After all the above was dry, I removed the circle next to the blue, but left the one where it should be white.  I then added another circle to cover the blue center.  This one didn’t stick as well because I was afraid to mess up the paint, so I didn’t press to hard or long.

MSS_July4th_shirt05

This lead to some bleeding of the red paint in to the blue circle.

But it only looks bad close up.

MSS_July4th_shirt06

My older son then informed me he no longer likes Capt. America, so he wouldn’t wear the shirt for me.

MSS_July4th_shirt01

He did tell me he was a Mystic Forest Ranger Zombie Hunter though.

MSS_July4th_shirt14

At least Sid was cooperative.

MSS_July4th_shirt04


Happy Crafting

signature-black
facebook instagram pinterest parties by mamasonshine etsy bloglovin google+ email twitter Image Map


Want to Check Out More Silhouette Projects?

My Silhouette Challenge buddies and I are all sharing projects on our blogs today, so pursue the projects below for a wealth of Silhouette inspiration!

Monogrammed Patriotic Serving Tray Captain American Romper Patriotic Burlap Stars (Pottery Barn Knockoff) Patriotic Onesie {Plus Free Cut File} Patriotic Shirts with Layered Heat Transfer Vinyl DIY Patriotic Tote Bag Red, White & Blue - Patriotic Decorations How To Create DIY Temporary Tattoos Made in America Freezer Paper July 4th Shirts Red, White, and Blue Paper Star Lanterns Fourth of July Rustic Flag Paper Sparklers Pretty Patriotic Pillow Nautical Star Burlap Banner: Stencil Material Tutorial Patriotic Map Art Wooden Fire Crackers; July Silhouette Challenge DIY Chalkboard and Vinyl World Map Let's Talk about Red White and Blue! DIY 4th of July Baby Outfit How To Make A Pinwheel {+ Free Template} Patriotic Nail Art Star Jewelry Vinyl on Wood Blocks Land That I Love Red, White, and Blue Patriotic Placemats DIY Paint Splattered Patriotic Tote Bag Patriotic Mason Jar Candle Holders

1. Our Rosey Life // 2. My Mom Made That // 3. The Kim Six Fix // 4. Create & Babble // 5. The Frill of Life // 6. My Paper Craze // 7. Kate’s Paper Creations // 8. Simply Kelly Designs // 9. Dragonfly & Lily Pads // 10. Mama Sonshine // 11. Lil Mrs. Tori // 12. Tried & True // 13. It Happens in a Blink // 14. McCall Manor // 15. The Thinking Closet // 16. unOriginal Mom // 17. Sowdering About // 18. Weekend Craft // 19. The Outlandish Momma // 20. Adventures in All Things Food // 21. Practically Functional // 22. Silhouette School // 23. Please Excuse My Craftermath… // 24. Ginger Snap Craft // 25. Pineapples And Pinecones // 26. Black and White Obsession // 27. TitiCrafty // 28. Architecture of a Mom //

Enhanced by Zemanta


Leave a comment

Birthday Pirate Shirt ~ A Silhouette Cameo how to (Part 3)

I wanted to share with you the steps I took to make my son’s birthday shirt. There was a few problems I had that I was able to work through.   Hopefully this will help so others won’t get stuck like I did.

In this tutorial I use my Silhouette Cameo and the Silhouette Studio DE software to make a custom shirt for my son’s birthday party.  I used graphics from Just So Scrappy‘s YoHo YoHo Pirate kit.  I used the Silhouette brand Flocked Heat Transfer Material for the skull, and Avery Dark T-Shirt Transfers for Ink Jet Printers.

Part One will be how to make the Skull & Crossbones

Part Two will be how to do the words & party hat

Part Three will be how to iron everything on and some tips.

MSS_BirthdayShirt01

My first tip; if you want your words to be in the correct direction I would advise you not to let your three-year old place them on the shirt.

MSS_BirthdayShirt04

The flocked transfer material has a clear plastic film over the top.  This is the side you face down when cutting, you want the Silhouette to cut through the transfer material but not this film.  After weeding out the areas that you want the shirt to show through, lay your transfer material with the film facing up.  I would advise ironing on one piece at a time, just to ensure proper placement.

Use a dry iron, on the highest setting (please read the directions that come with your material) and a piece of thin cotton fabric between the iron and your material.  I used a pillowcase after determining a dish towel was too thick.  You want to apply a lot of pressure for up to a minute, or more.  Again, this is where you want to double-check the instructions that come with your material.  The time can very depending on manufactures, but the main thing is if isn’t sticking, you need more time and pressure.  Try not to move the iron around like you are ironing your clothes.  Just hold for a minute, then move to another area and hold, with lots of pressure.  Have I made it clear that pressure is important?

Some material is cool peel, meaning you need to wait until the ironed on design has cooled before removing the top film.  If this is the case, wait!  You will only ruin your design if you get impatient.

MSS_BirthdayShirt02


The intricate cut around the words was done as stated in the previous tutorial, but I wanted to separate the words from the page and lay them on the shirt without yet removing the backing, so I just cut them out with scissors.  The Silhouette settings I used made a ‘kiss cut’ meaning it cut through the transfer material but not through the backing.  When you are ready to iron on the material you peel it off like a sticker.

After placing the elements where you want them use the same iron settings but use the piece of parchment-like paper that comes with  the printable transfers between the material and your iron.  Again using lots of pressure.  Also, make sure something is covering the areas that have already been ironed on.  If you apply direct heat to this material you could melt it.

MSS_BirthdayShirt03


As I have stated above I used the printable material for dark fabric and ink jet printers.  The dark fabric is like a sticker.  What is face up is what will show, this is different from the material for light fabric.  The dark fabric material also leaves a white area on the printed material where there is a white area on your screen.  With the light fabric material, where there is white on your screen the shirt fabric will show through.  This is something to consider before purchasing your transfer material.  Also it is very important for you to  know what kind of printer you will be using.  The way an ink jet and laser printer adhere the ink to the paper is different and for this type of material it does make a difference.

The first time I printed this out I used a laser printer without thinking of the consequences.

MSS_BirthdayShirt05

It looks fine, there wasn’t any difference between it and the one I ended up printing on my ink jet printer.  At least not until I ironed it on.

MSS_BirthdayShirt06

See how the hat has faded?  This is because of the toner in a laser printer.  It can come off the printable heat transfer material when heat is applied.  I had to go back and reprint everything on an ink jet printer.  At this point I also had to make the hat a little bigger to cover up  the faded one.

But the end result was still one happy birthday-boy-to-be.


MSS_BirthdayPirateShirt

If you want to see how I designed the skull check out Part one.

If you want to see how I designed the print and cut words and hat see Part Two.


Happy Crafting

signature-black

facebook instagram pinterest parties by mamasonshine etsy bloglovin google+ email twitter Image Map


Enhanced by Zemanta