Seriously all over the air, making us all sneeze like crazy!
But it also brings about more and more baby showers! My new favorite thing to do is to make onesies for the new babies.
A cousin of mine lives all the way across the country and had a baby last December. A few weeks ago she brought the baby back west to meet all the family and friends living here. They had a little party and specifically asked for no gifts.
pfft. yeah right! Like I could go see a brand new baby boy and not out fit him in some adorable clothes.
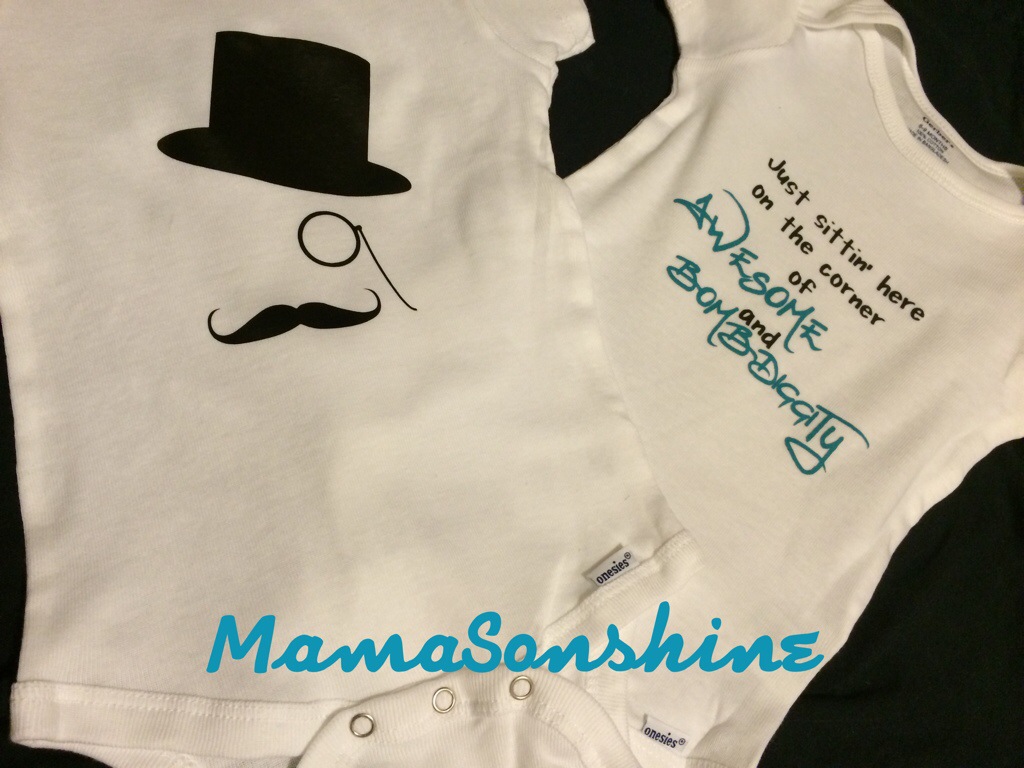
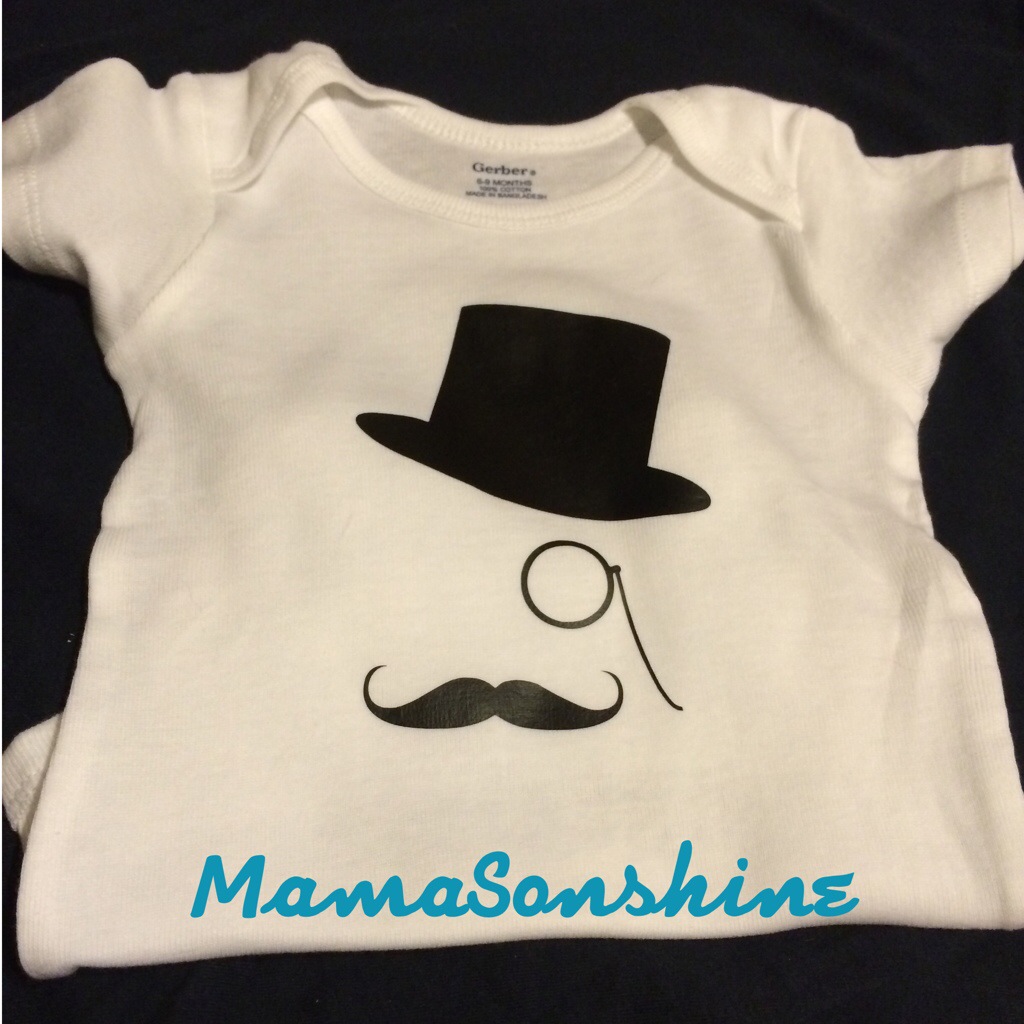
So I made these onesies using some heat transfer vinyl that I cut out with my Silhouette Cameo.
The black heat transfer vinyl was a free sample from Happy Crafters. I was very pleased with the results. The designs for the gentleman shirt went on smoothly and quickly. When the vinyl adhered to the shirt it immediately released from the transfer plastic. So there was no slowly lifting the corner to see to make sure it is sticking.
The top hat and monocle seemed fitting for a southern gentleman.
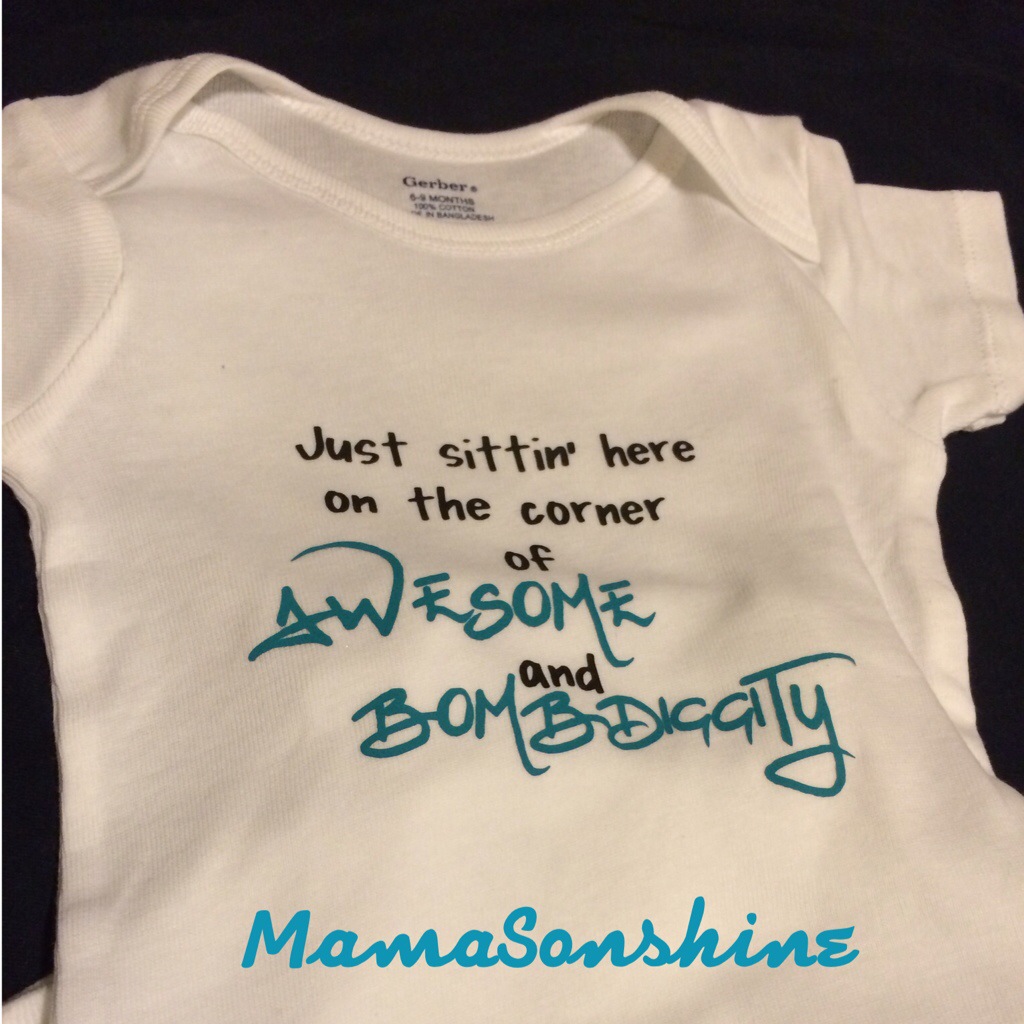
This is the back of the gentleman one. My cousin is super funny and one day was complaining about the use of hashtags on Facebook. So…..I couldn’t resist.
I wasn’t sure if I was going to be able to attend the Meet & Greet, so I thought I might have to mail them to her. But at the last-minute I was able to go, so of course I had to make a gift bag, because, well….I can.
I have another cousin who is expecting and we will be giving her baby shower soon. So stay tuned for some more adorable onesies.
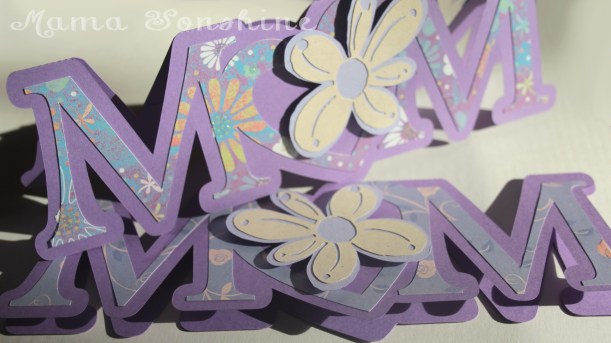
This month’s Silhouette challenge had to involve flowers. With it also being the month of Mother’s day I decided to combine the two topics.
This year I made three mother’s day cards and one Grandmother card (but the Grandma one doesn’t have flowers on it).
All of these cards were made with the help of my Silhouette Cameo.
The first card I made was a shape in the word MOM, but I replaced the O with a heart. I added a layer of floral scrapbook paper and to give it more depth I cut out a two layered flower which was attached with dimensional foam tabs. Because of the font I used for the letters, there wasn’t a whole lot of room to write inside the card, so the sentiment is a simple “Happy Mother’s Day.”
This was my first shape card and while I am pleased with the results, I won’t make the Ms so thin next time.
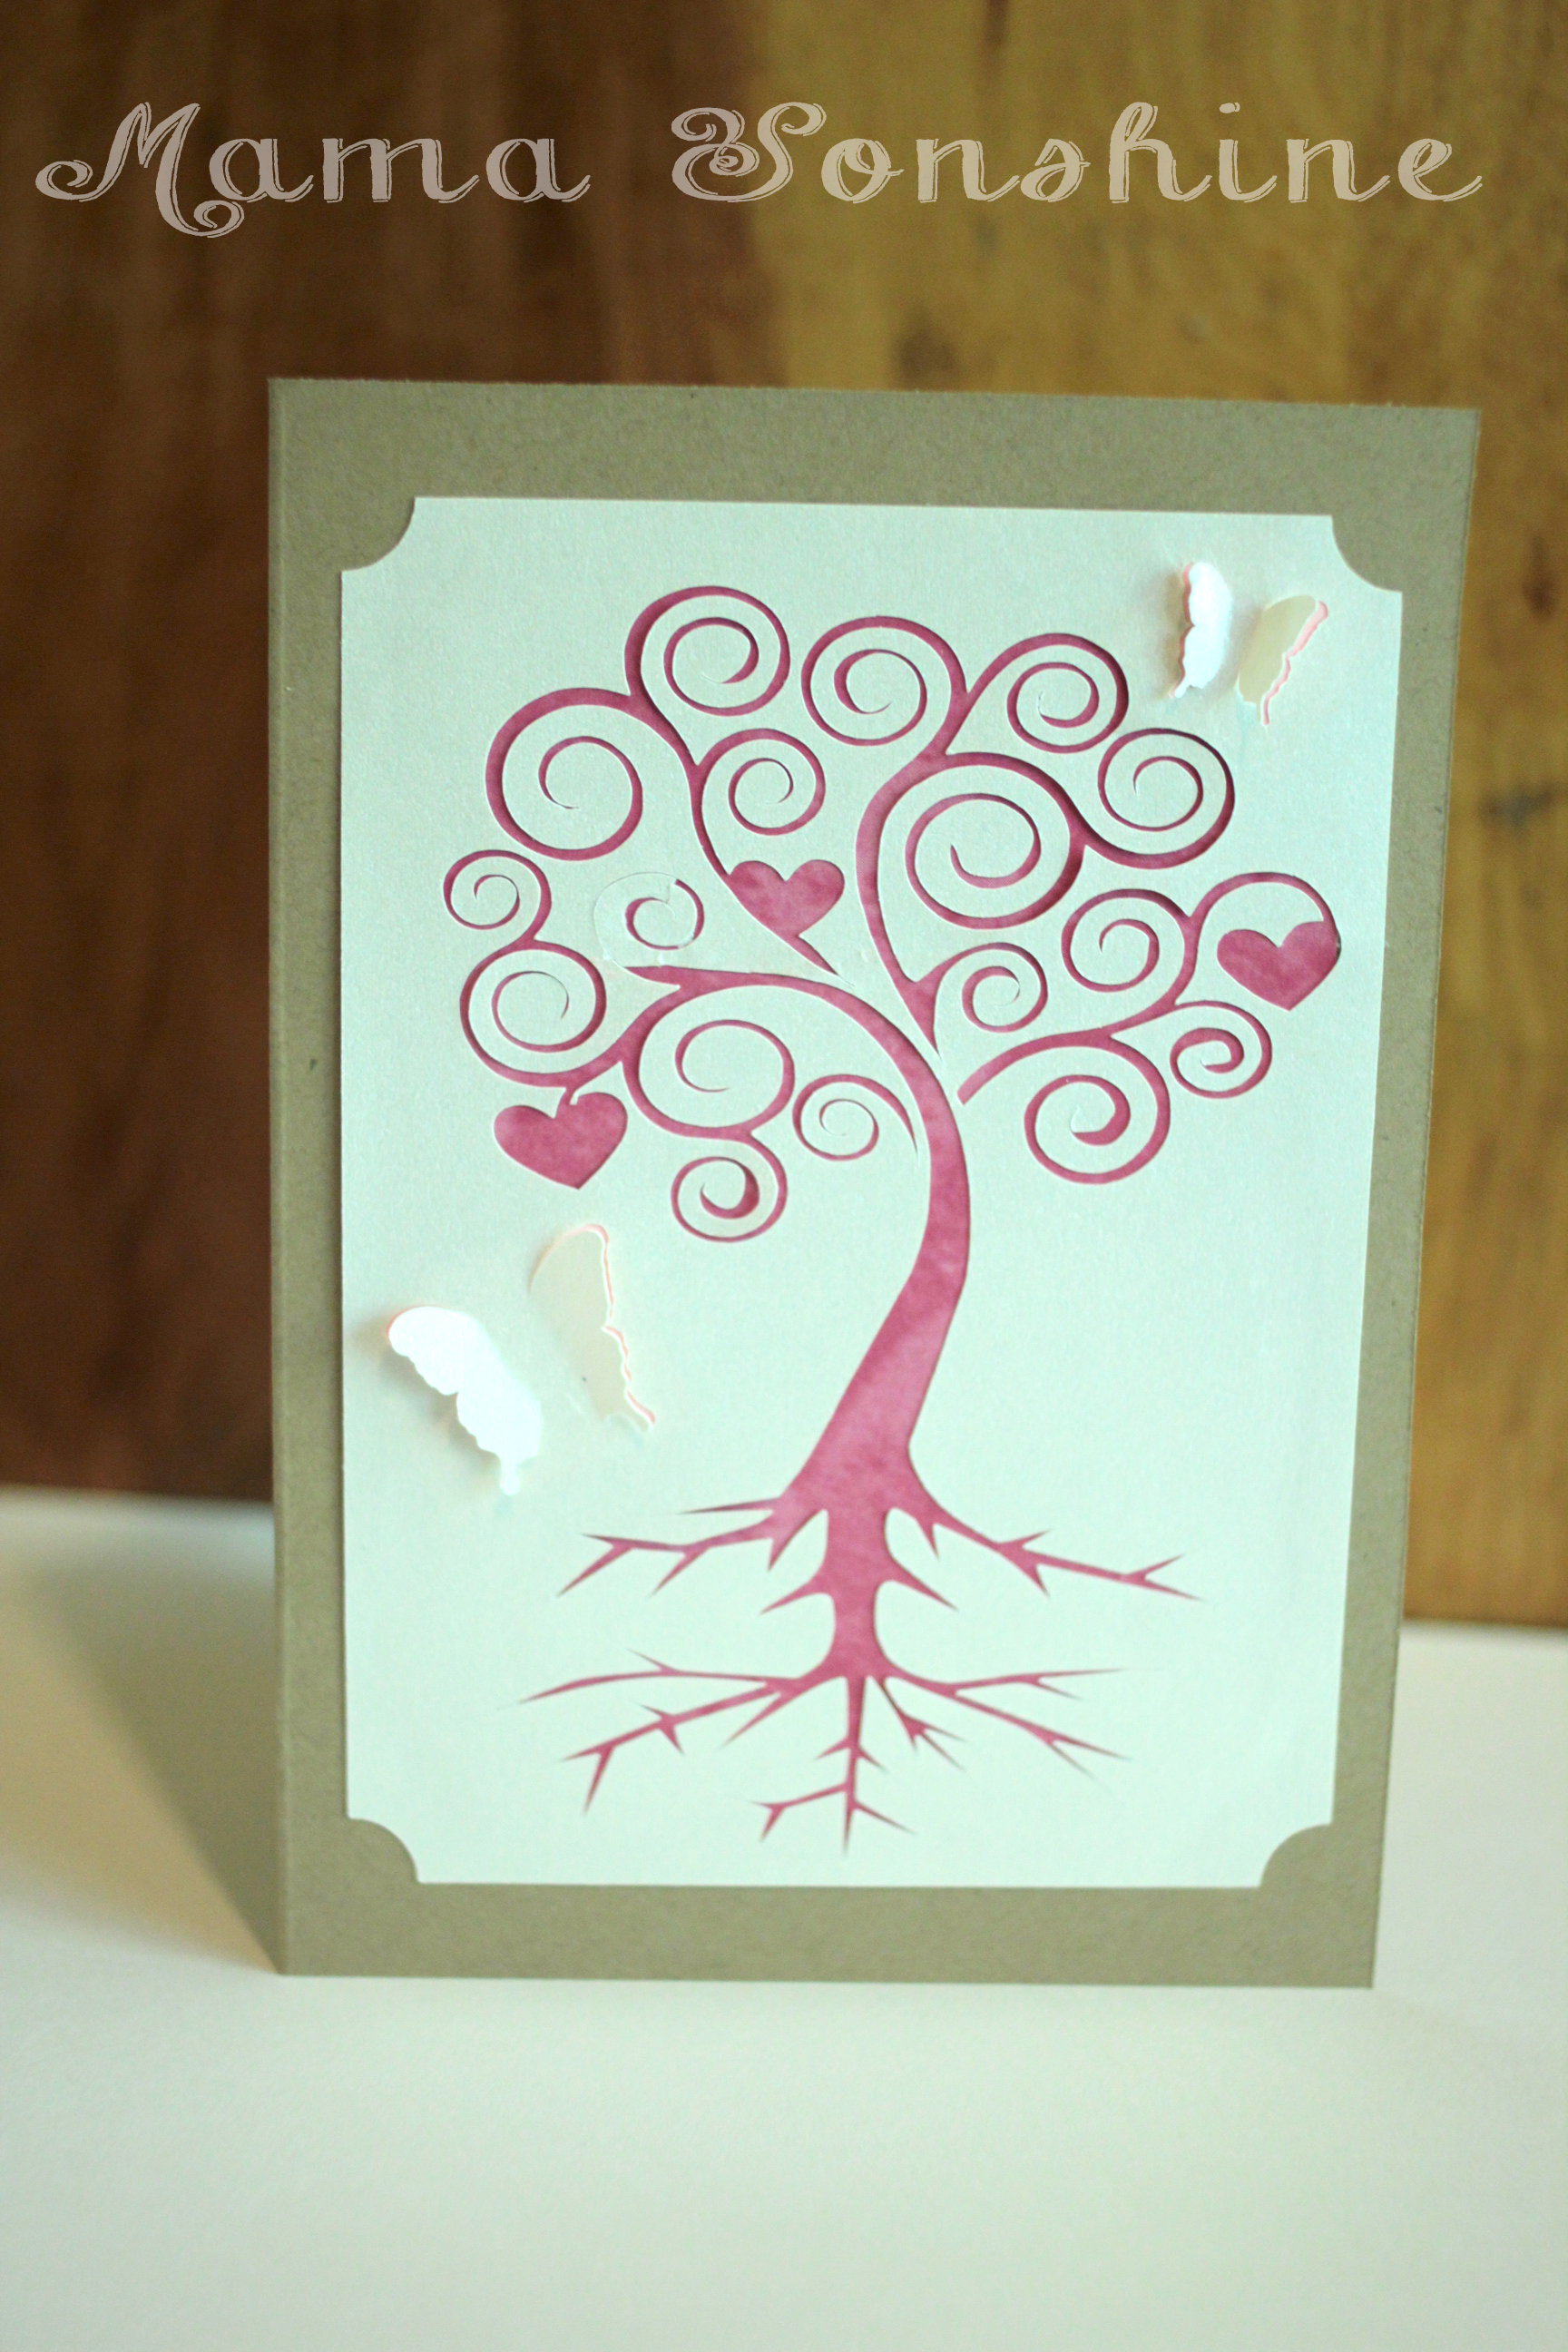
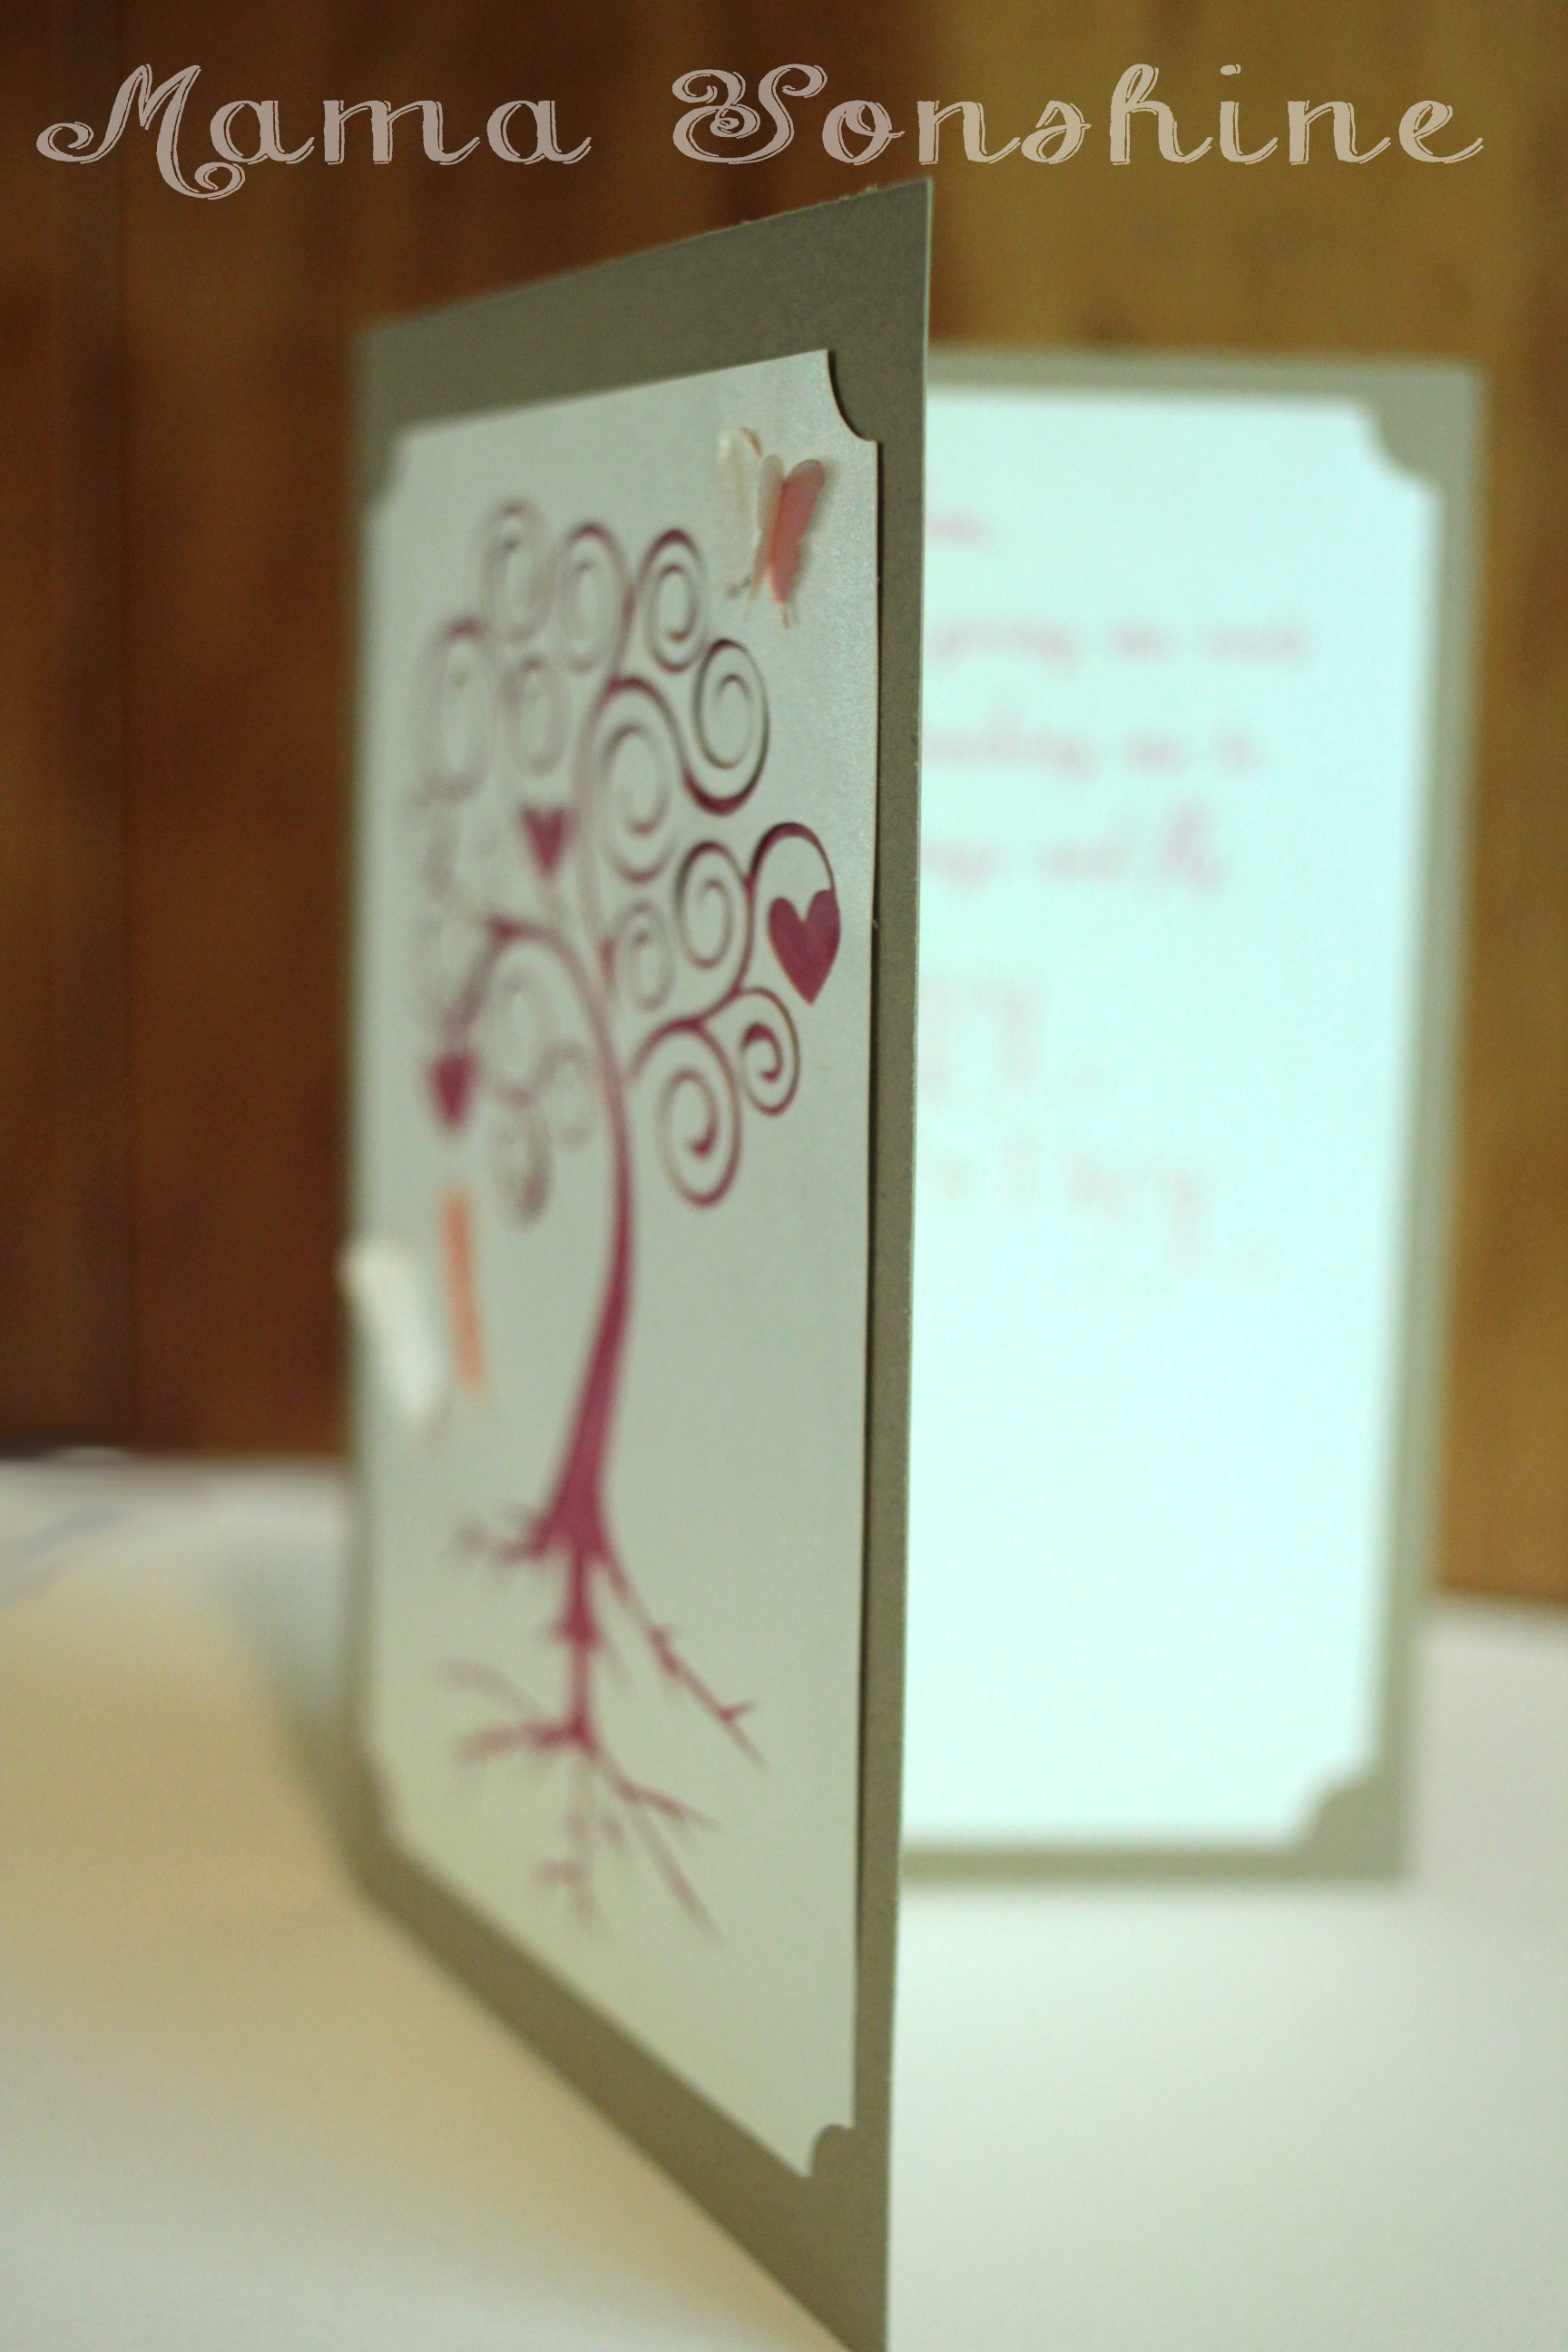
I came up with this next card after seeing the quote “There are two gifts we should give our children; one is roots and the other is wings” on-line while looking for mother’s day quotes. Turns out my mom has had this quote hanging in her house for decades….and I had no idea.
I used a champagne metallic paper for the top layer and on the inside of the card. I used Silhouette’s print and cut feature to write the sentiment and cut out a frame that matches the one on the front of the card. I used different colors for behind the butterflies and the tree. I only had the machine make a cut on the outer edge of the butterfly wings, so they just pop out a little.
The sentiment on the inside says “Mom, Thank you for giving me roots to grow and teaching me to spread my wings and fly. Happy Mother’s Day” While this one was probably the easiest to put together, it is my favorite. I think it is elegant in its simplicity.
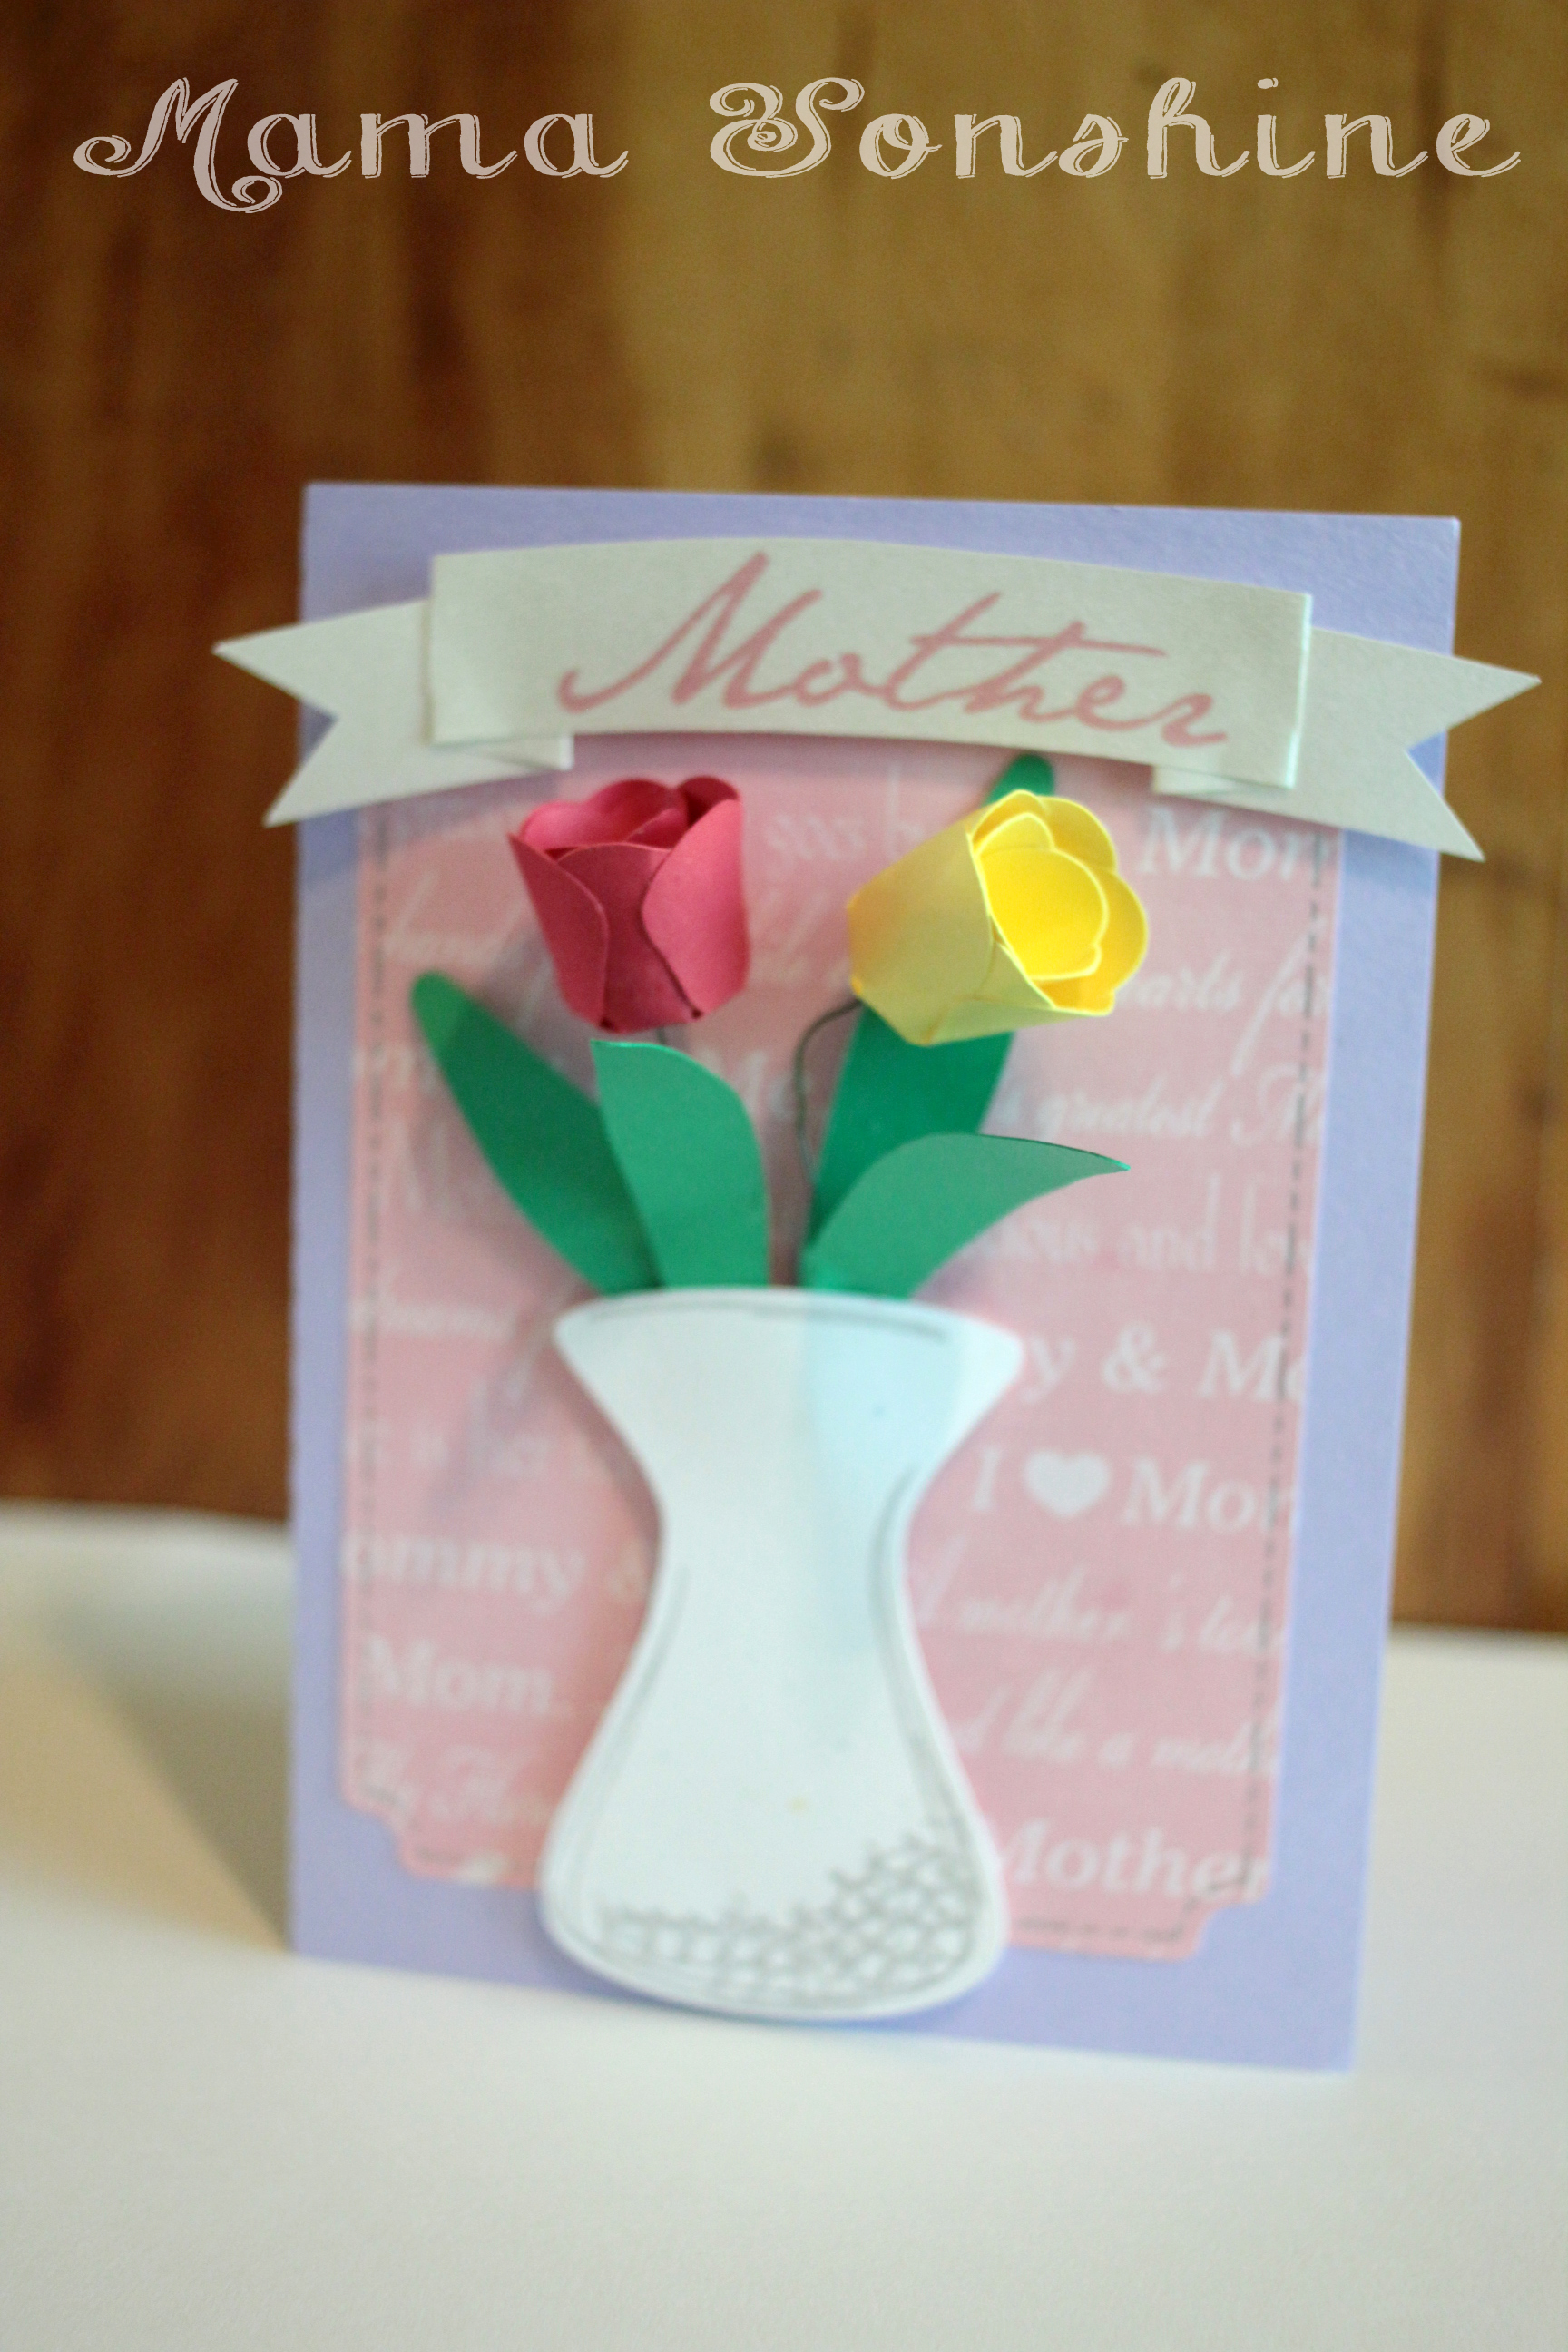
When I decided to make a floral themed mother’s day card, this next card is what I had in mind. I wanted to make a vase of flowers on the front of the card. The tulips would have been too difficult to put together if I had made them any smaller, and at that size, only two would fit in the vase.
In the end, two was the perfect number, because it didn’t clutter up the card. I used pre-printed mother scrapbooking paper for the background and a silver sketch pen for the faux stitching. For the “Mother” banner I used the champagne metallic paper and the print and cut feature. I tried using sketch pens, but it just wasn’t the right look.
I originally had thought about using velum or some kind of clear paper for the vase, to give it the look of glass, but then you could see the floral wire in the vase, and all the hot glue. Not a pretty sight.
I still didn’t like the vase, just made with plain paper, so I used the sketch pens to add some dimension to it. In the Designer Edition there is a sketch feature that allows you to fill in shapes, or change lines, to make the shape look more hand drawn, which is what I did to the vase.
I am very pleased with how this card turned out. On the inside it says “May all the love you give to others come back to you on this special day. Happy Mother’s Day”
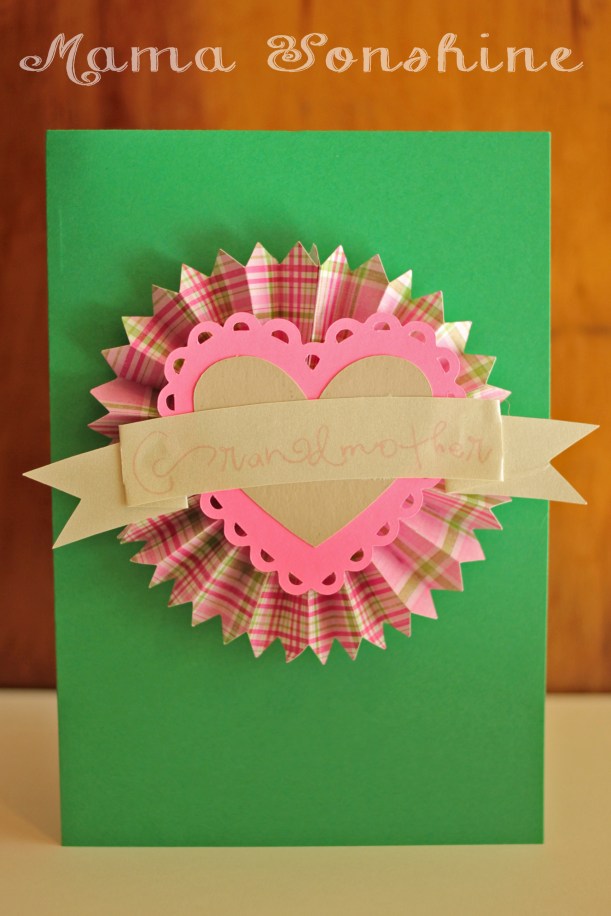
I didn’t want to leave the Grandmas out. So I made this card too, although it doesn’t have any flowers on it. I also made one in different colors. It is very cute, but thick, so it doesn’t really mail well.
Inside it says “Only the best moms get promoted to Grandmother. Happy Mother’s Day”
Happy Crafting
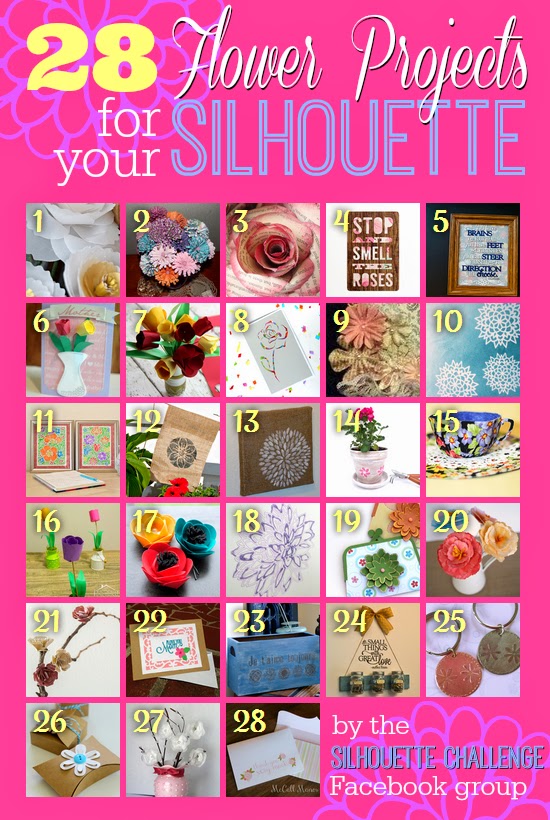
Want to Check Out More Silhouette Projects?
My Silhouette Challenge buddies and I are all sharing projects on our blogs today, so pursue the projects below for a wealth of Silhouette inspiration!
This past month I have been busy making Ian’s birthday party decorations. I wanted to share a few of the items I am making.
I don’t want to spoil the surprise, so this is just a sneak peek at what I can do now that I have my Silhouette Cameo to help me.
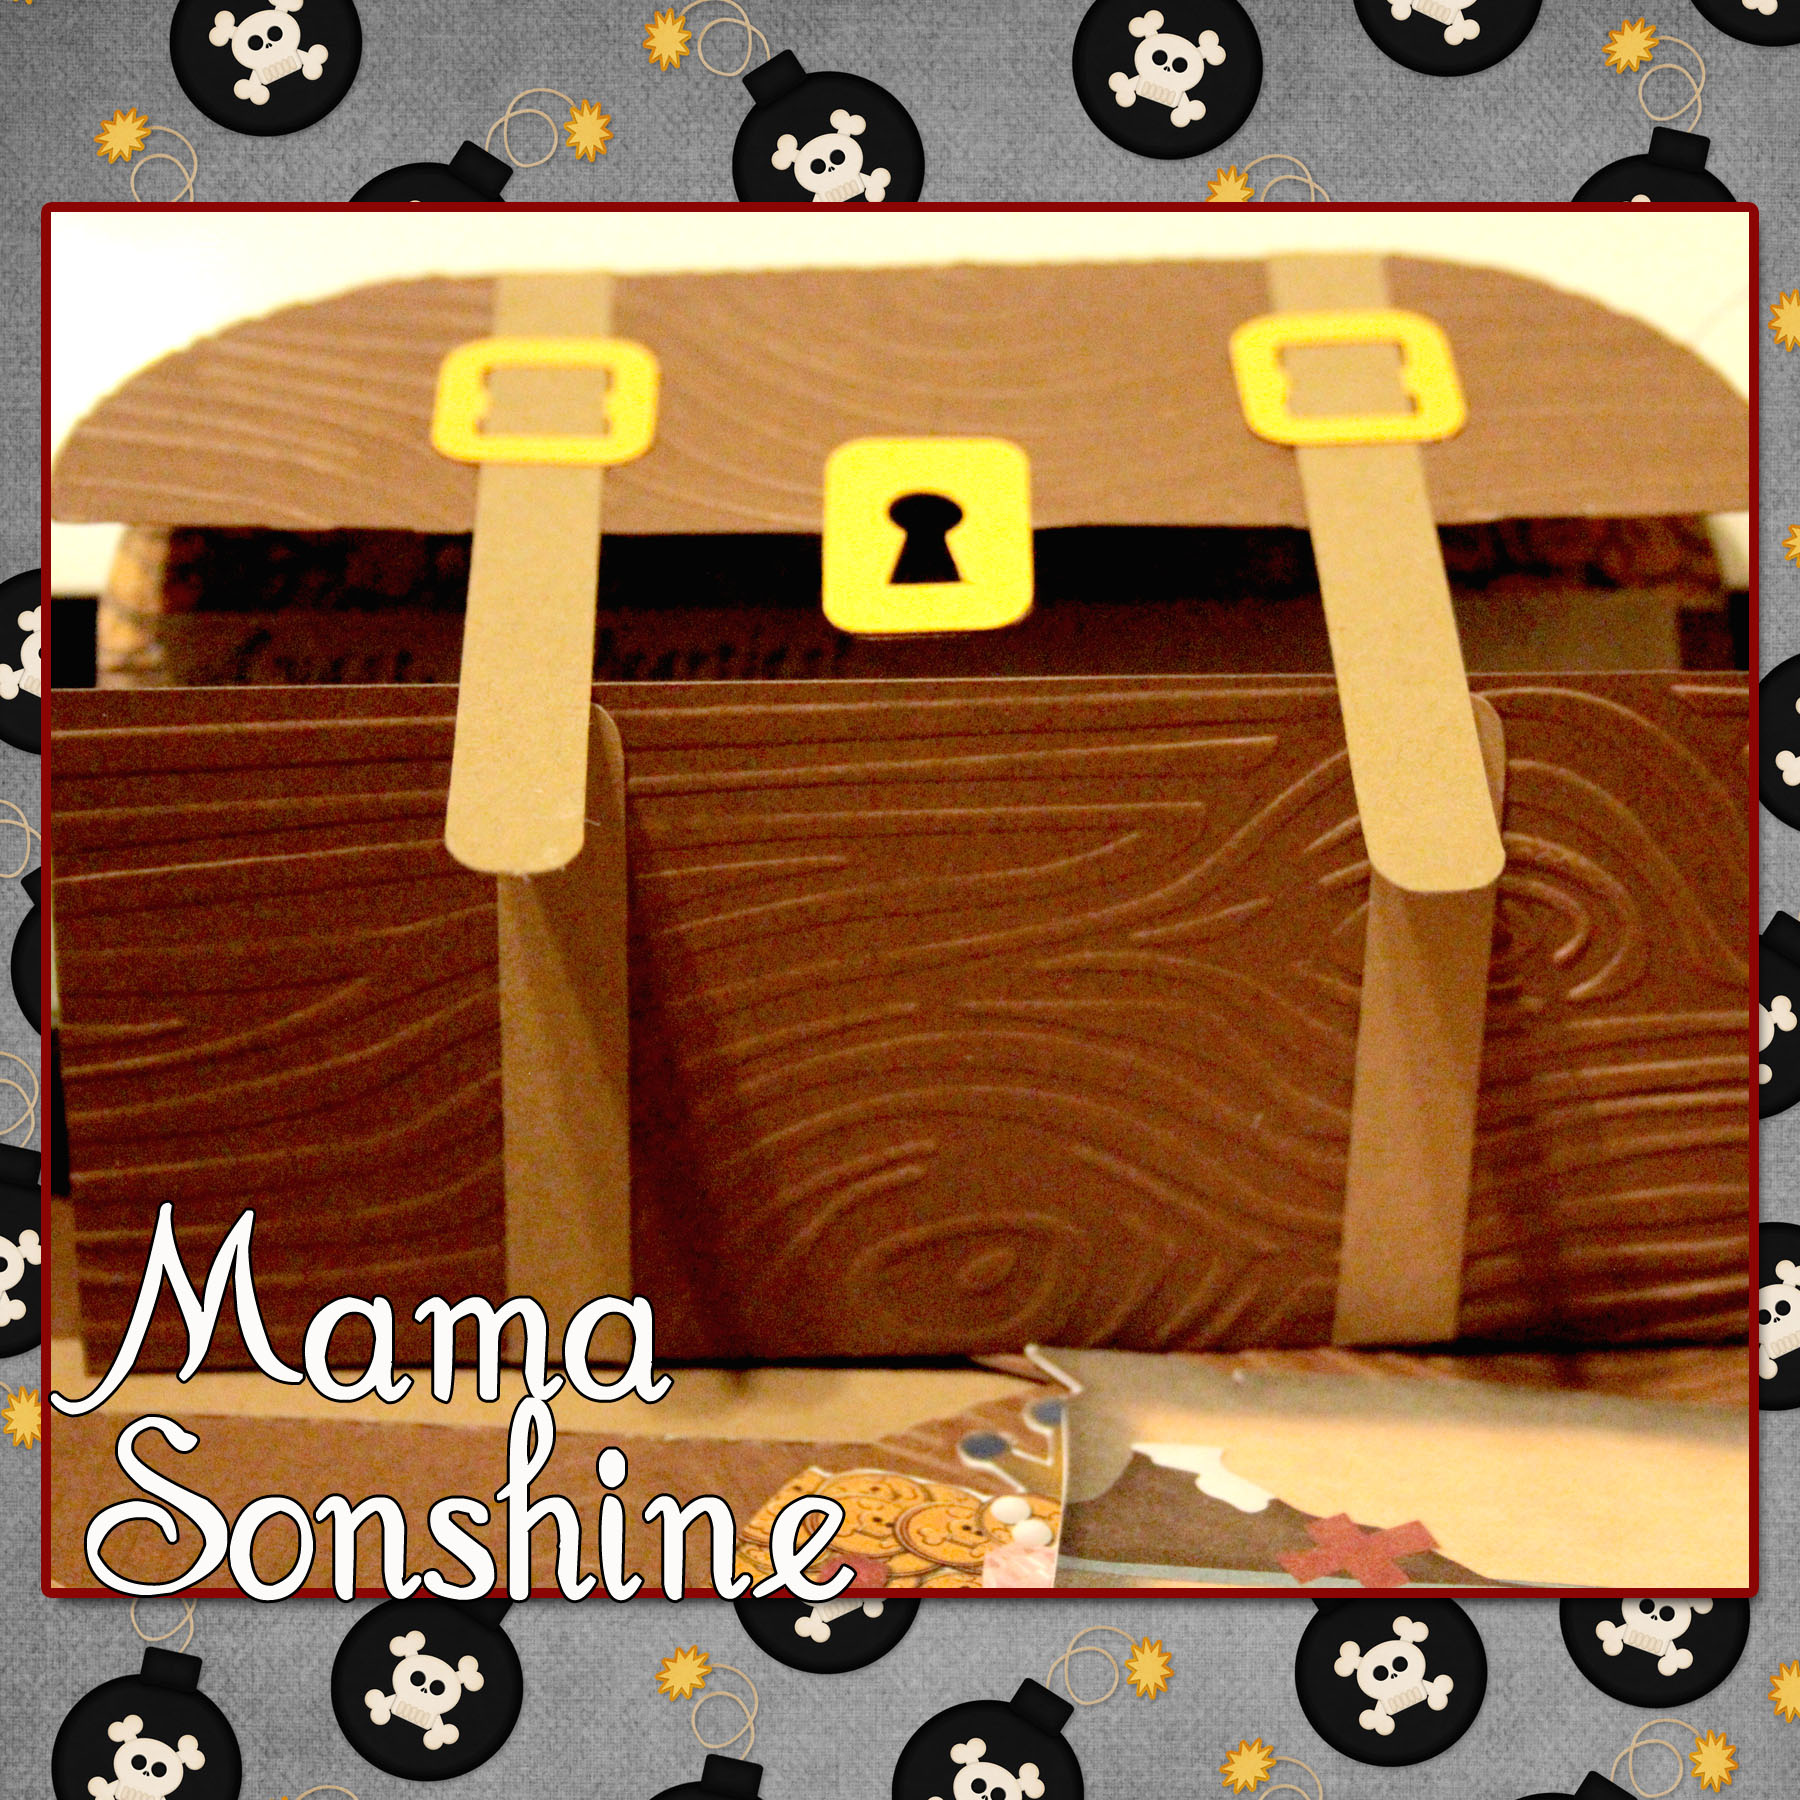
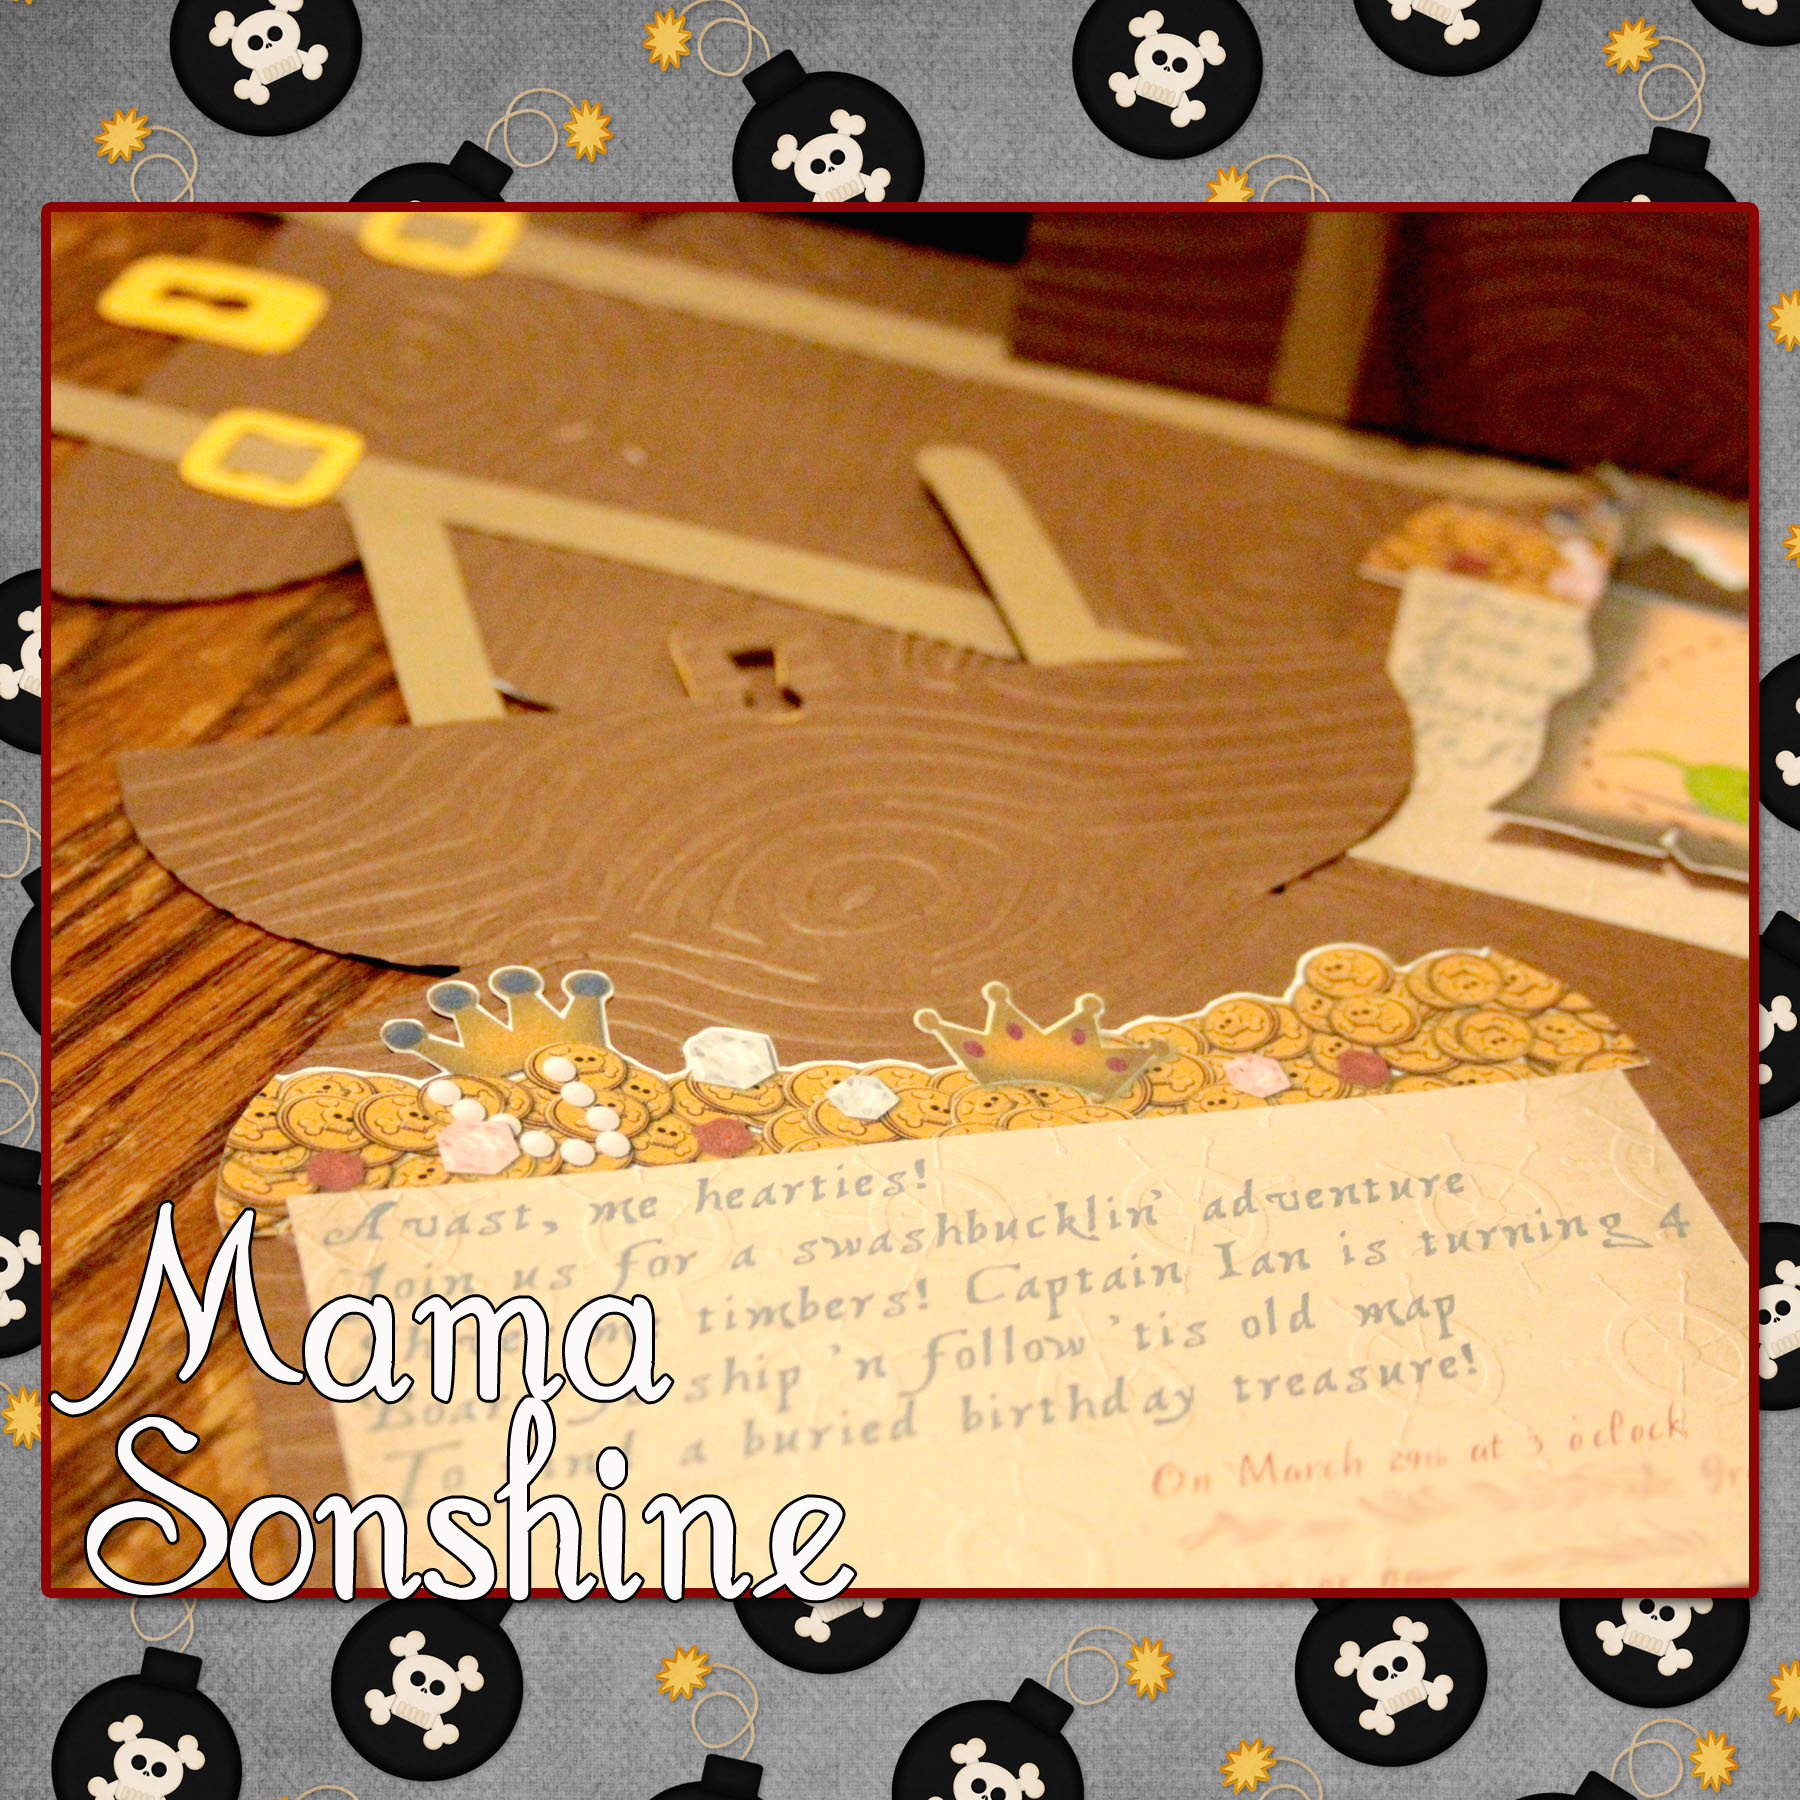
Ian had decided he wanted a pirate birthday party this year. I wanted his invitations to be pirate chests that open up to revel treasure, and a treasure map.
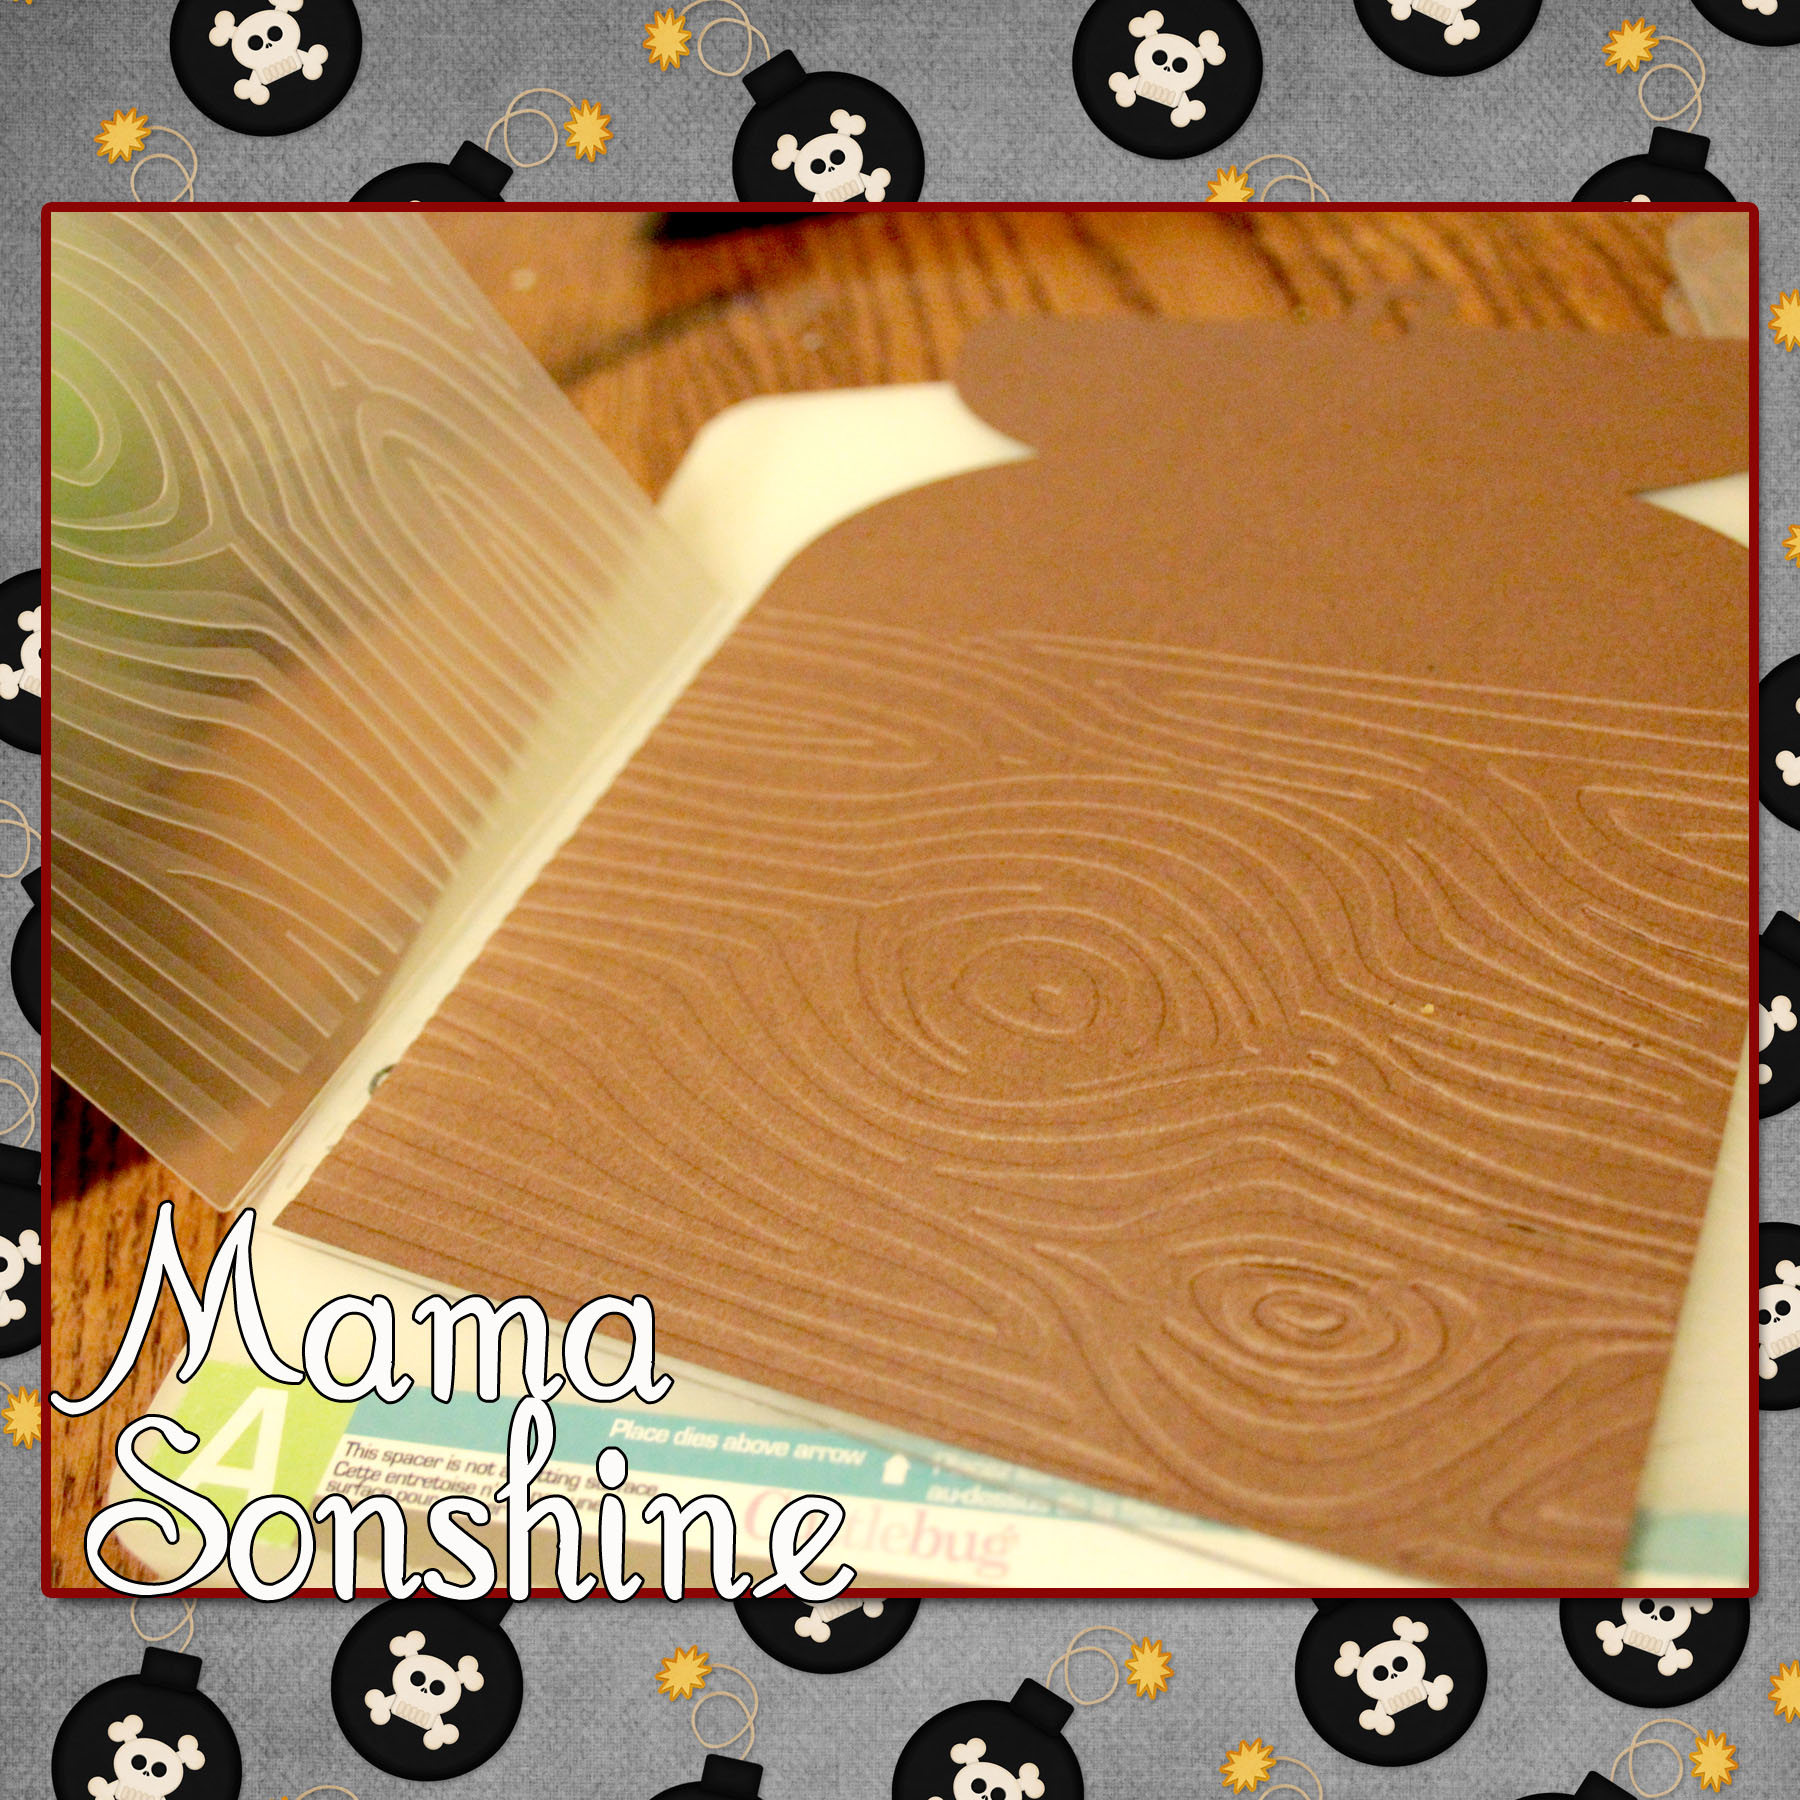
I quickly gave up trying to draw a treasure chest and just purchased a cut file from the Silhouette Studio Store. After which I ran it through my Cuttlebug to emboss the paper with a wood grain.
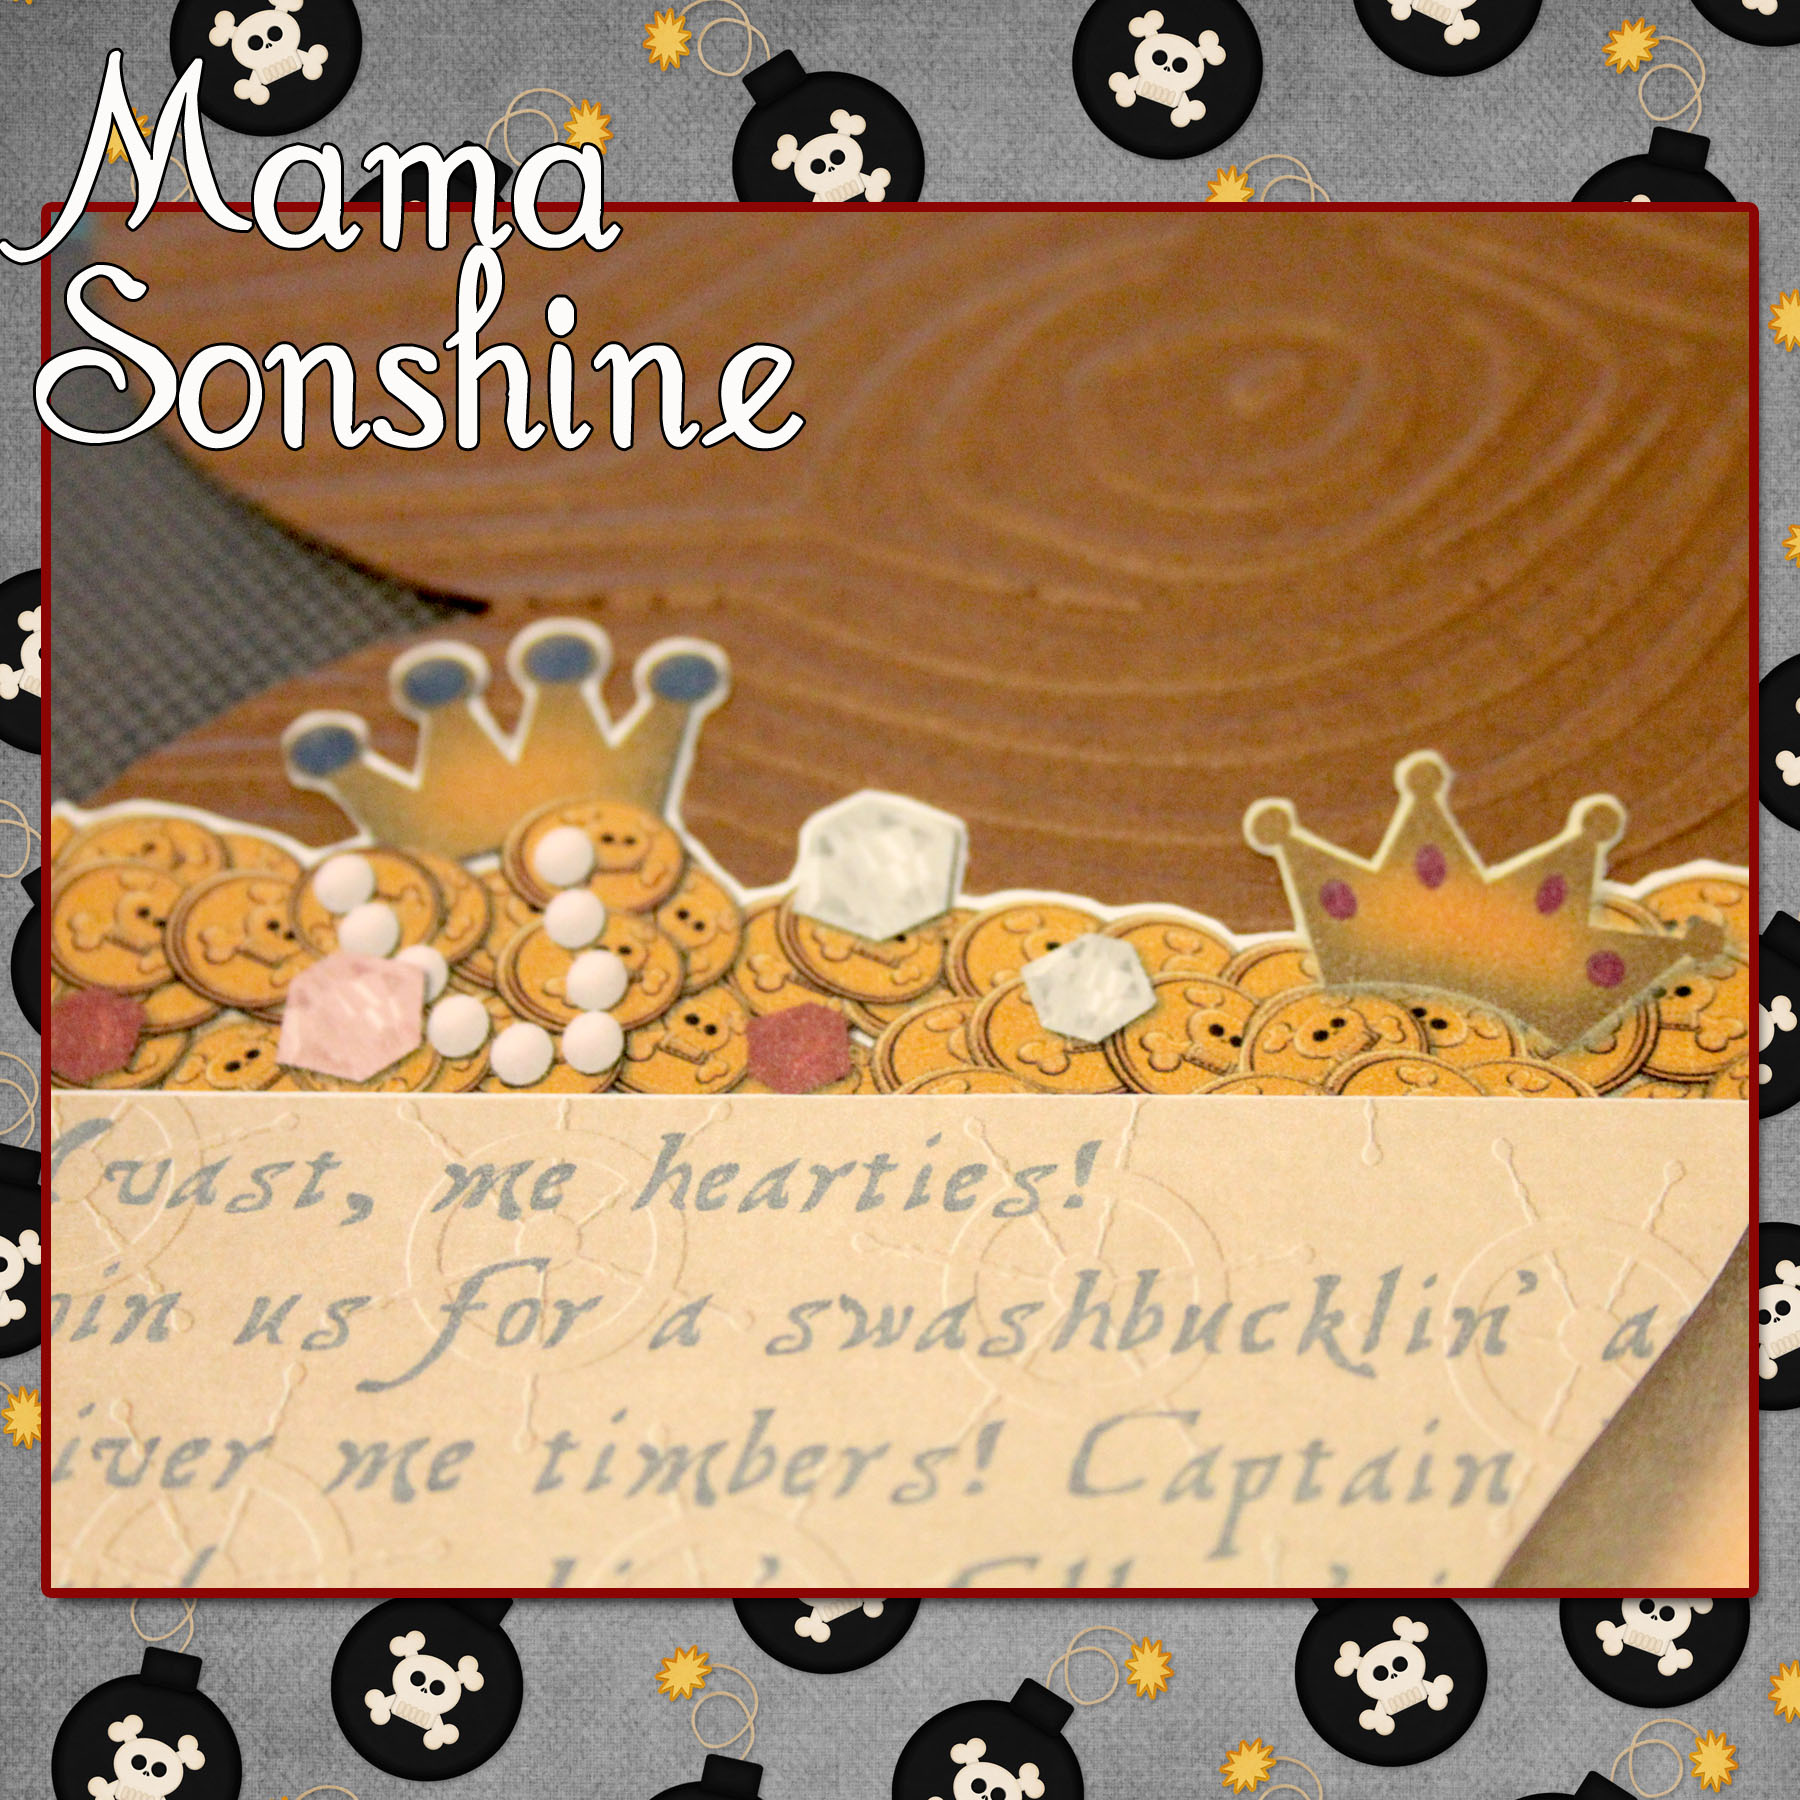
I went to Photoshop and created a picture of coins and jewels that matched the shape of the card. I imported that image into the Silhouette Studio software so that my machine would cut around all the little shapes for me.
I also created a cut out that would contain all the information on the card.
It says
“Avast, me hearties! Join us for a swashbucklin’ adventure Shiver me timbers! Captain Ian is turning 4 Board ye ship ‘n follow ’tis old map to find a buried birthday treasure!”
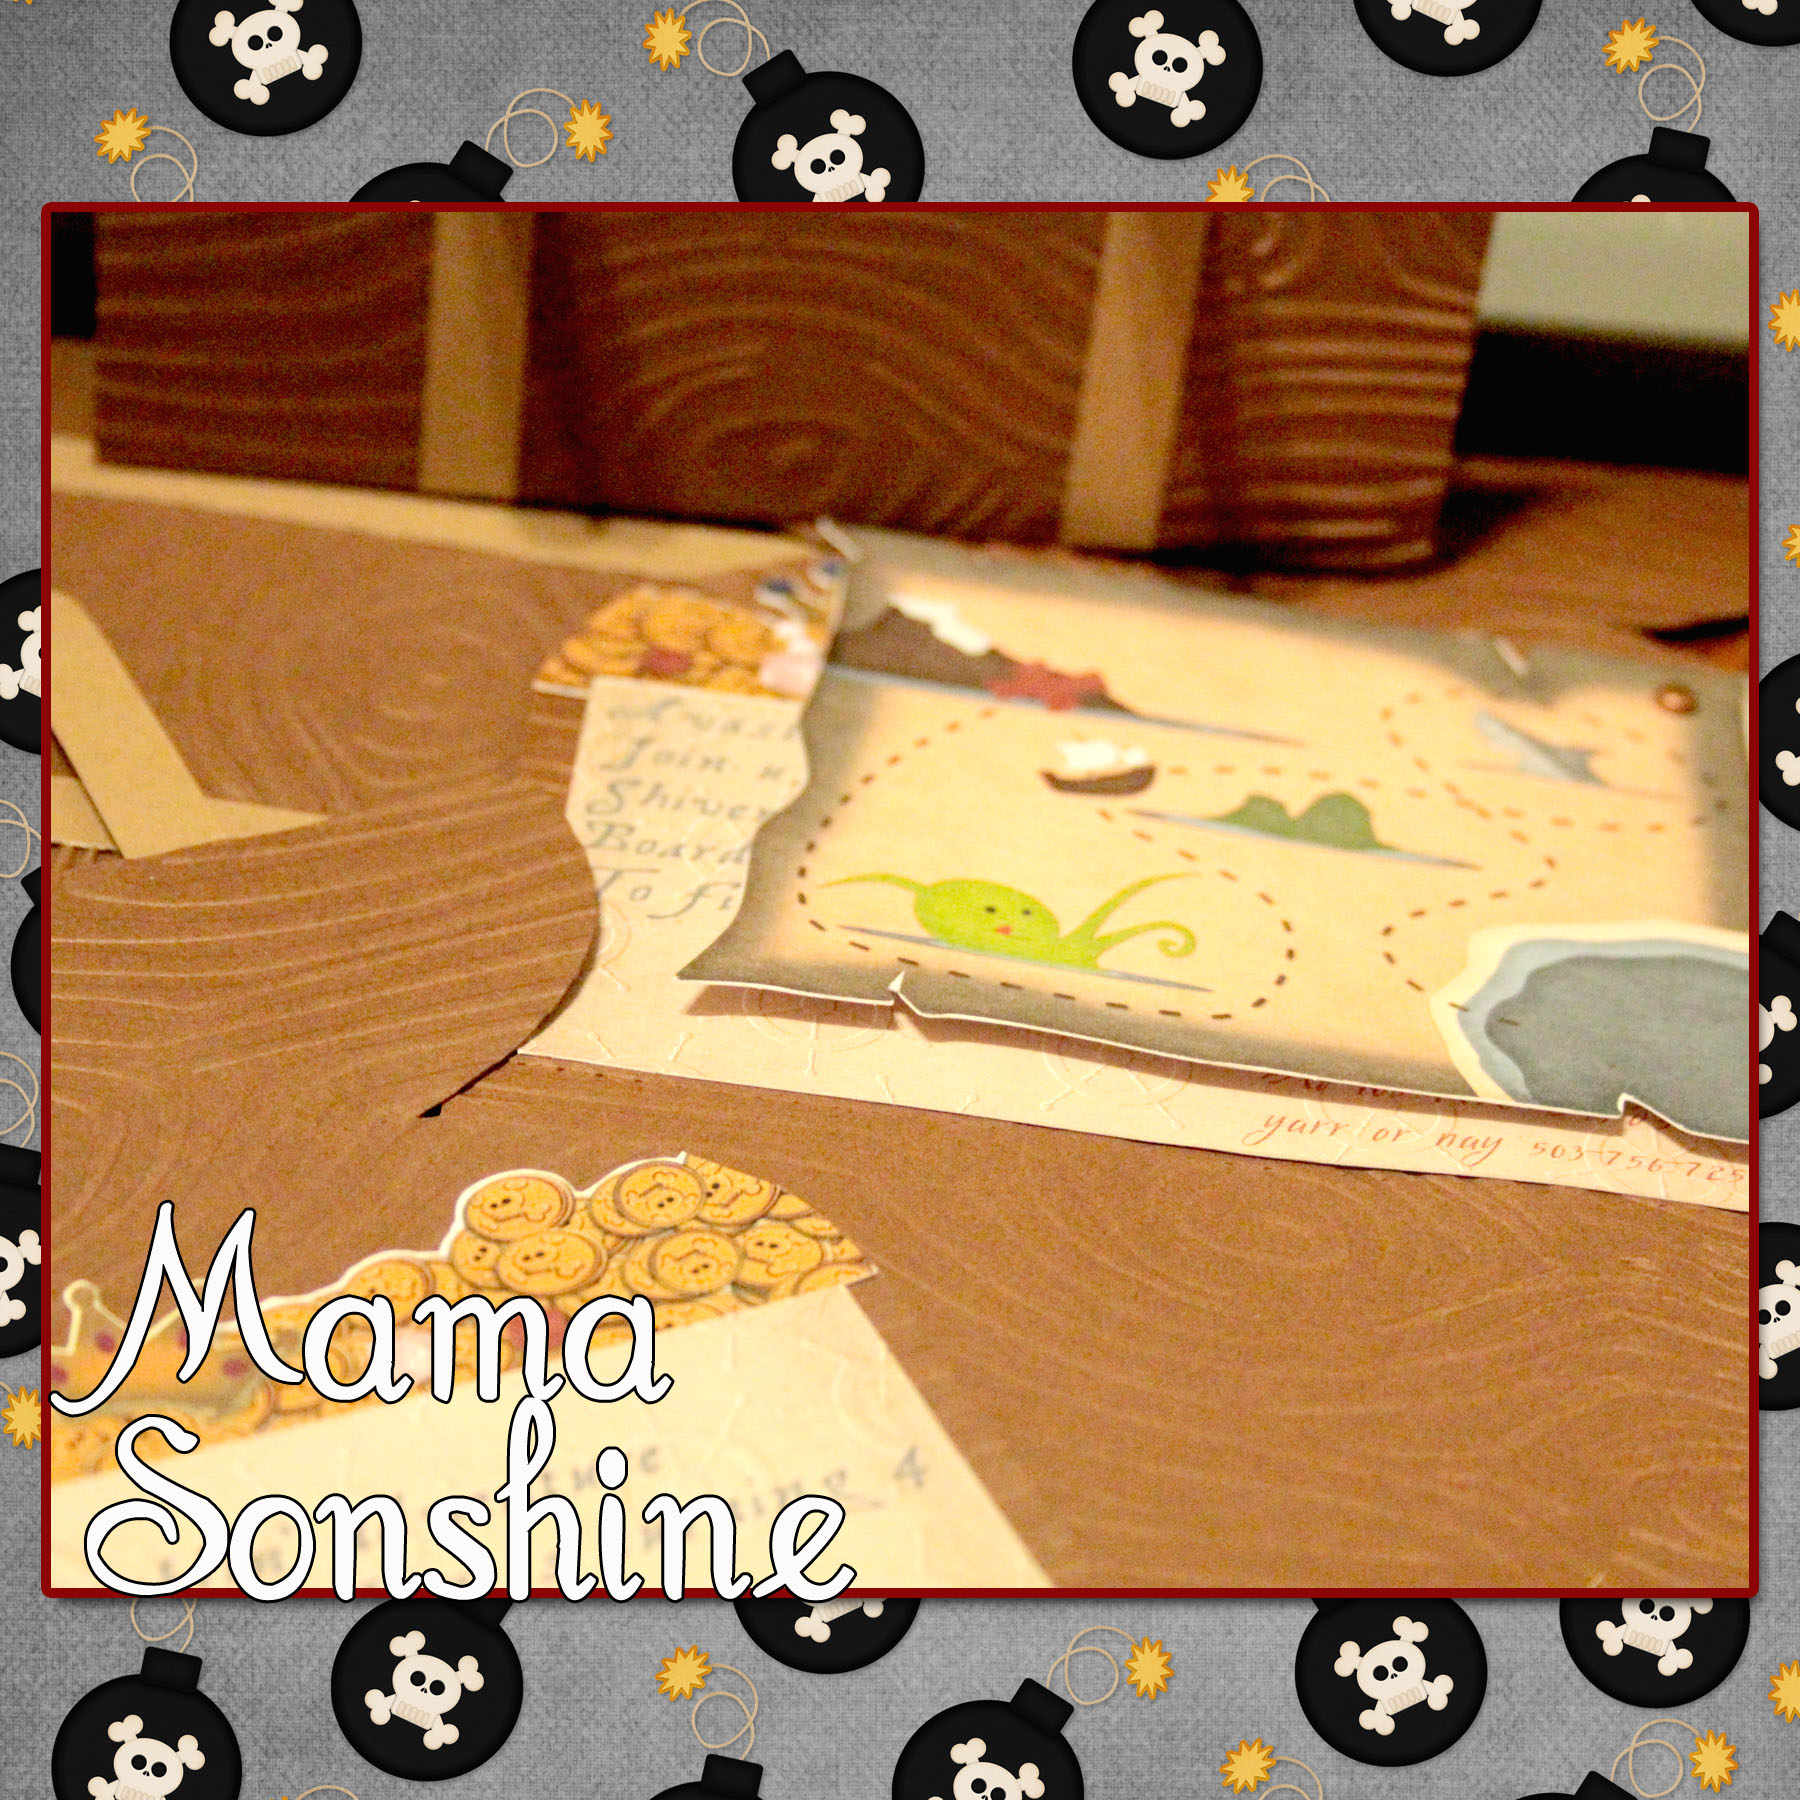
I used the digital graphics from Just So Scrappy‘sYoHo Pirate kit (as I will do for various other items I made for this party) to make cut out a treasure map.
The three elements inside the card were made with the Silhouette’s Print ‘n Cut feature, which I think is da bomb!
I cut the treasure chests out in a light brown and dark brown cardstock. I also cut the straps in the same two colors, I then used the light straps on the dark chest and vice versa. The buckles and locks were cut out using a gold-colored cardstock. I glued all the elements together, except the map, which I attached with a brad so it can be moved.
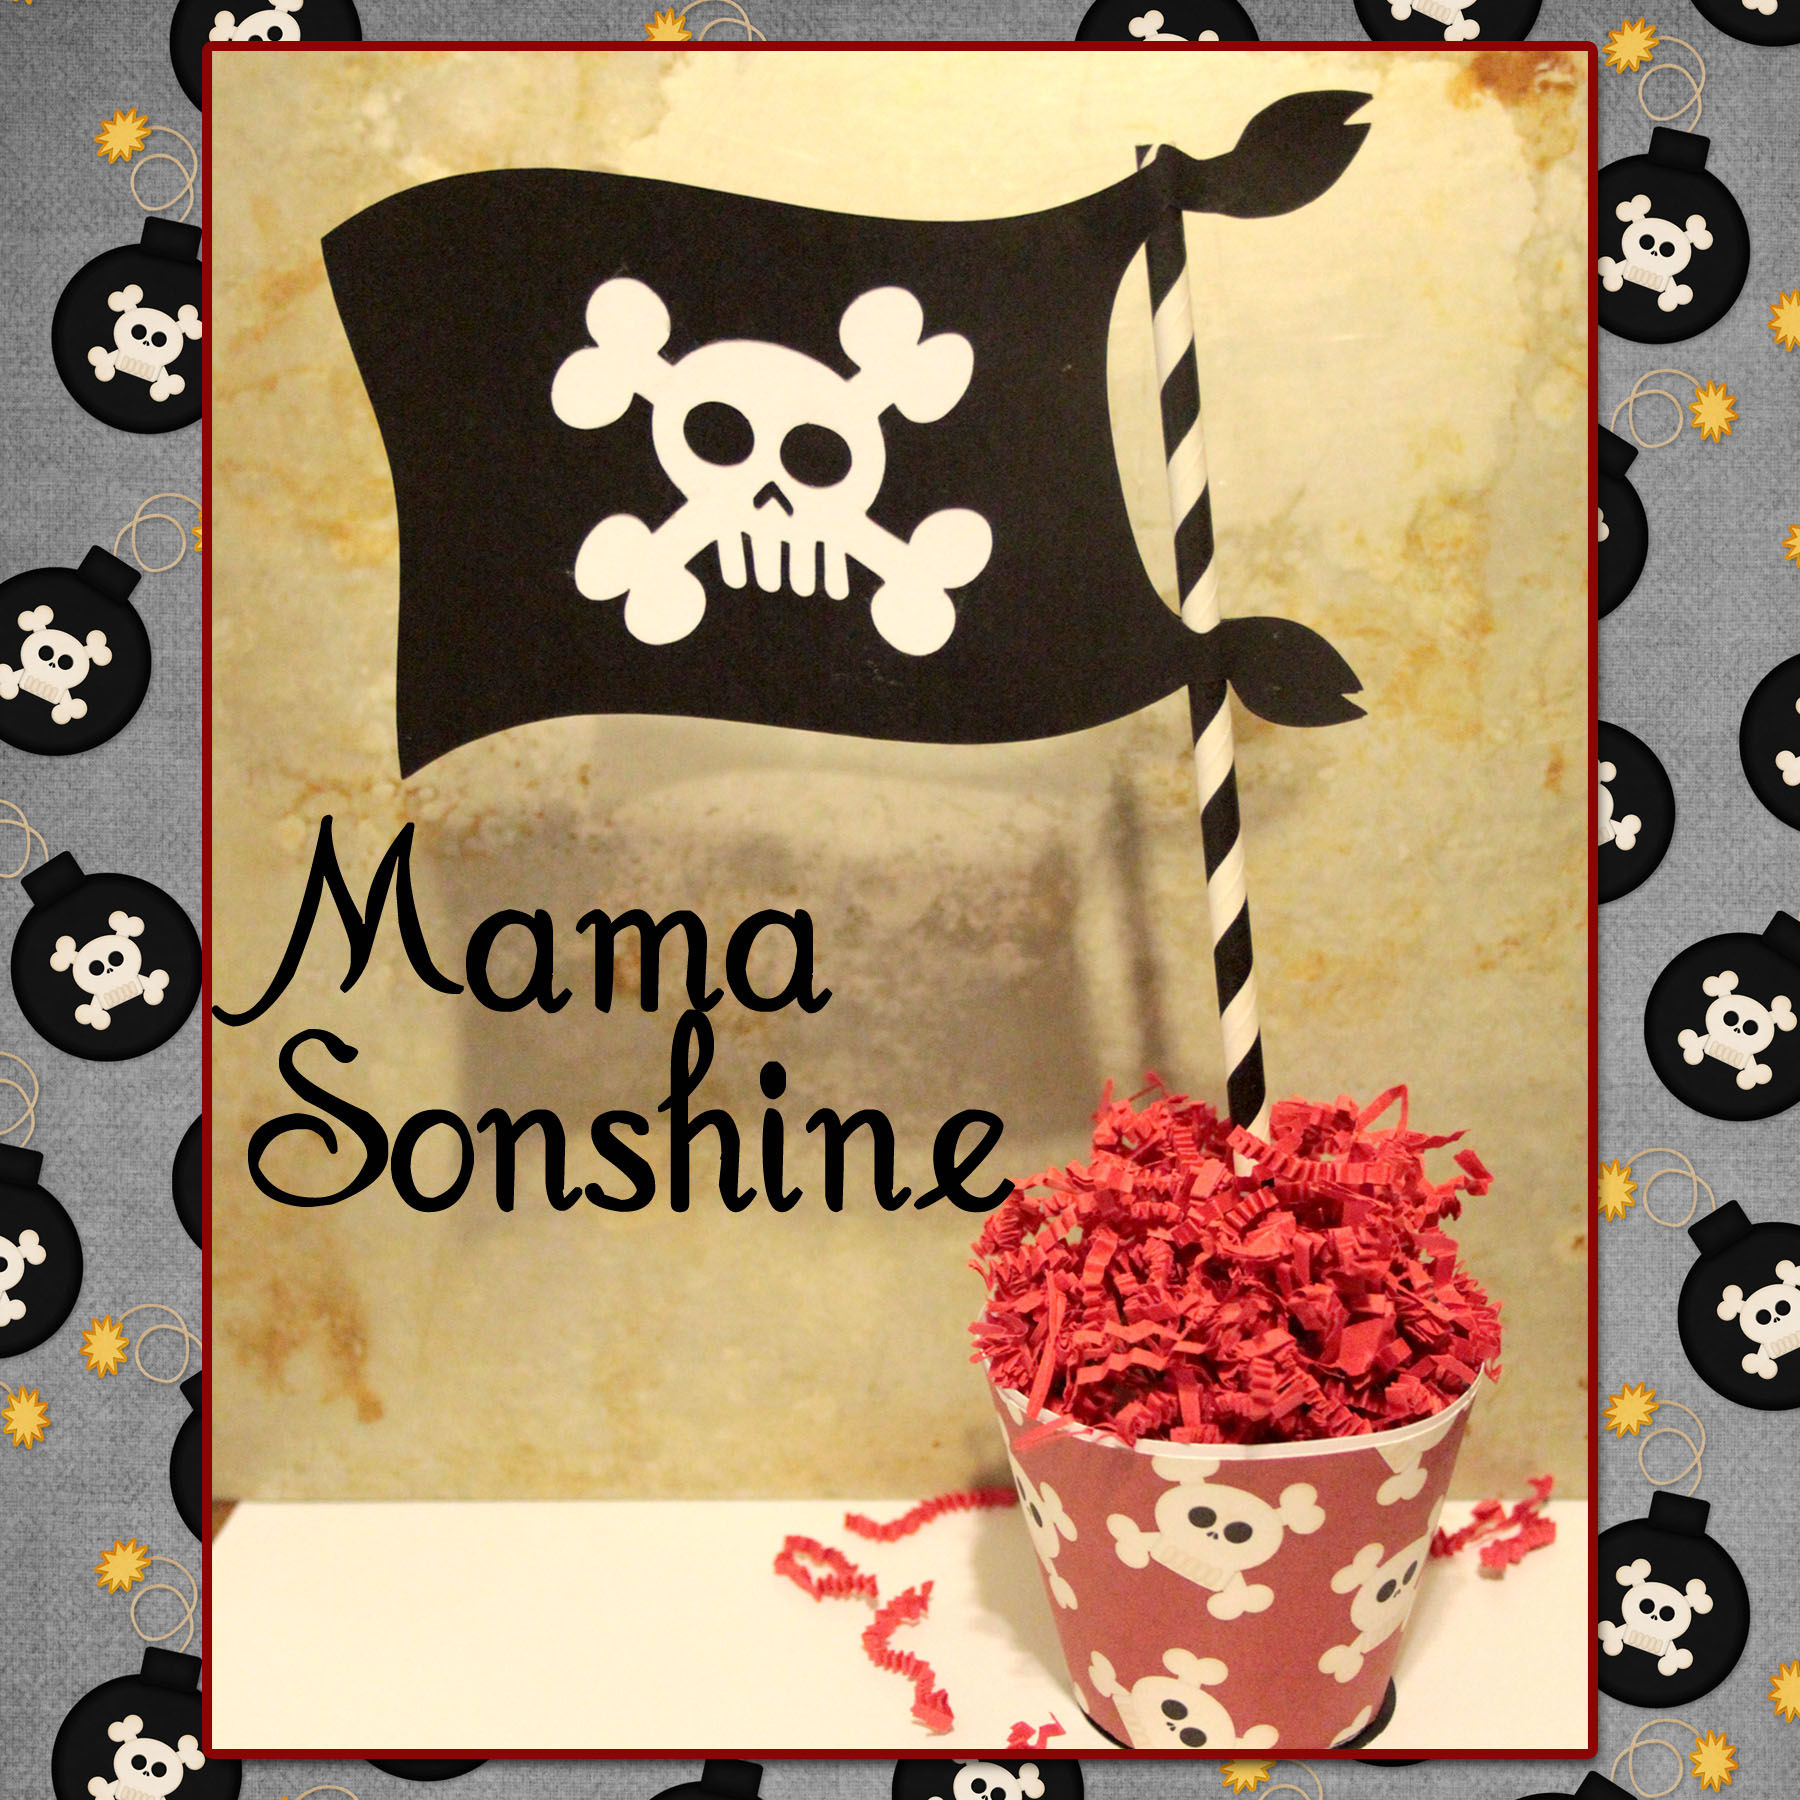
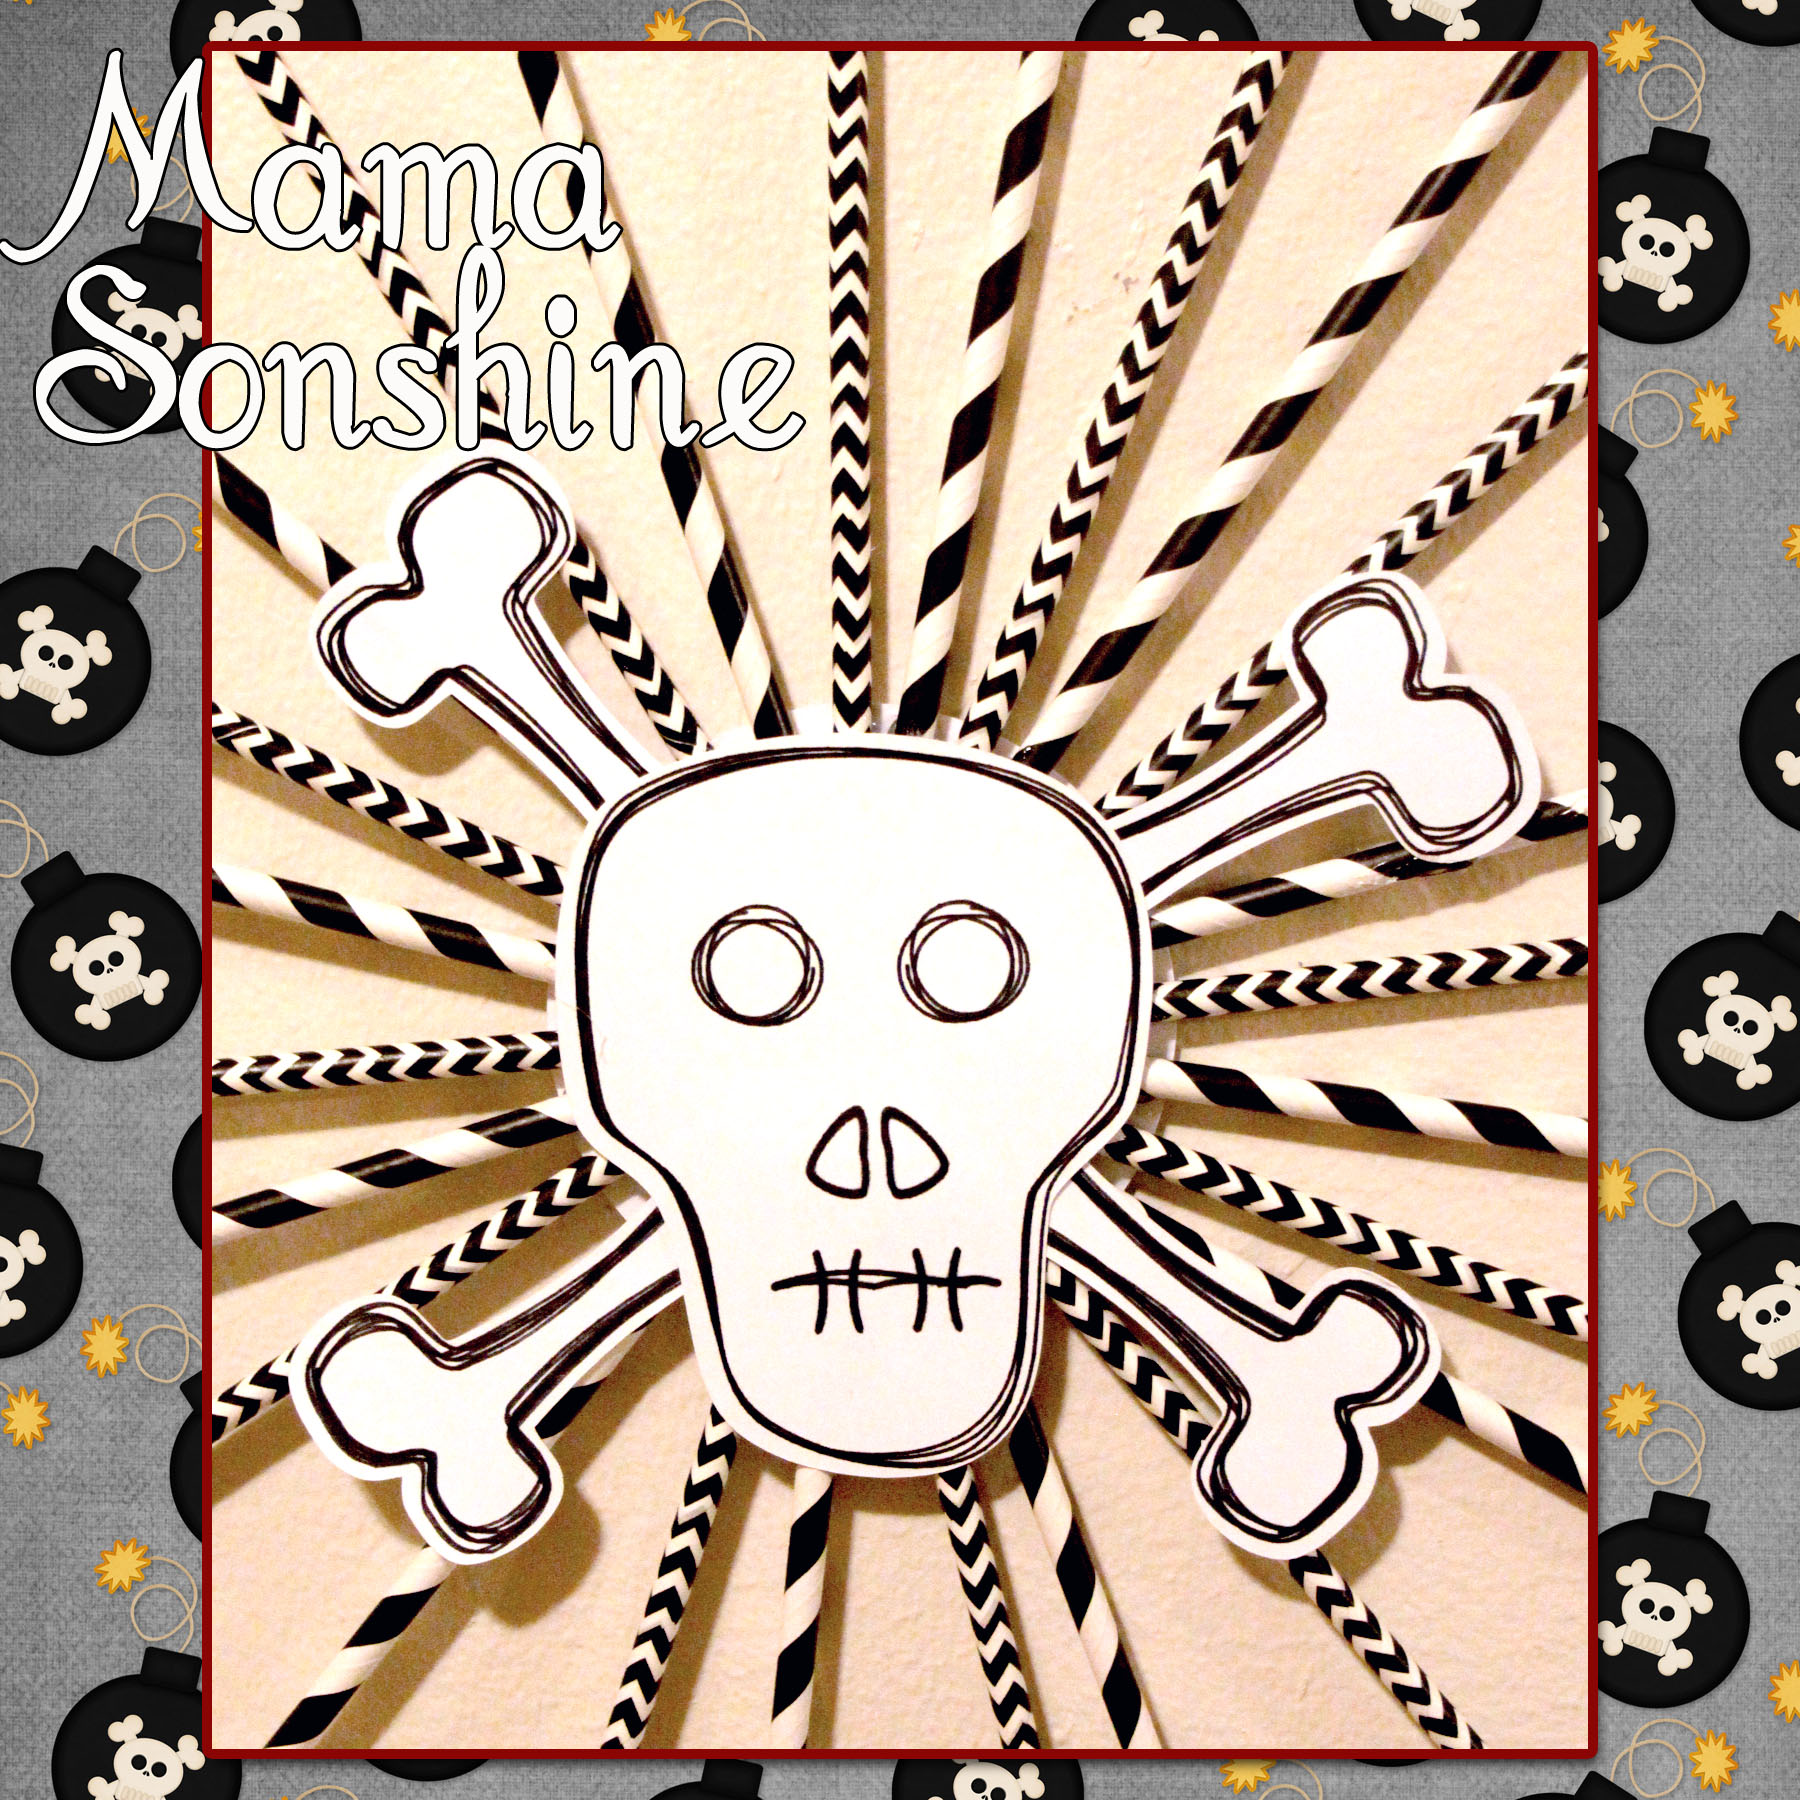
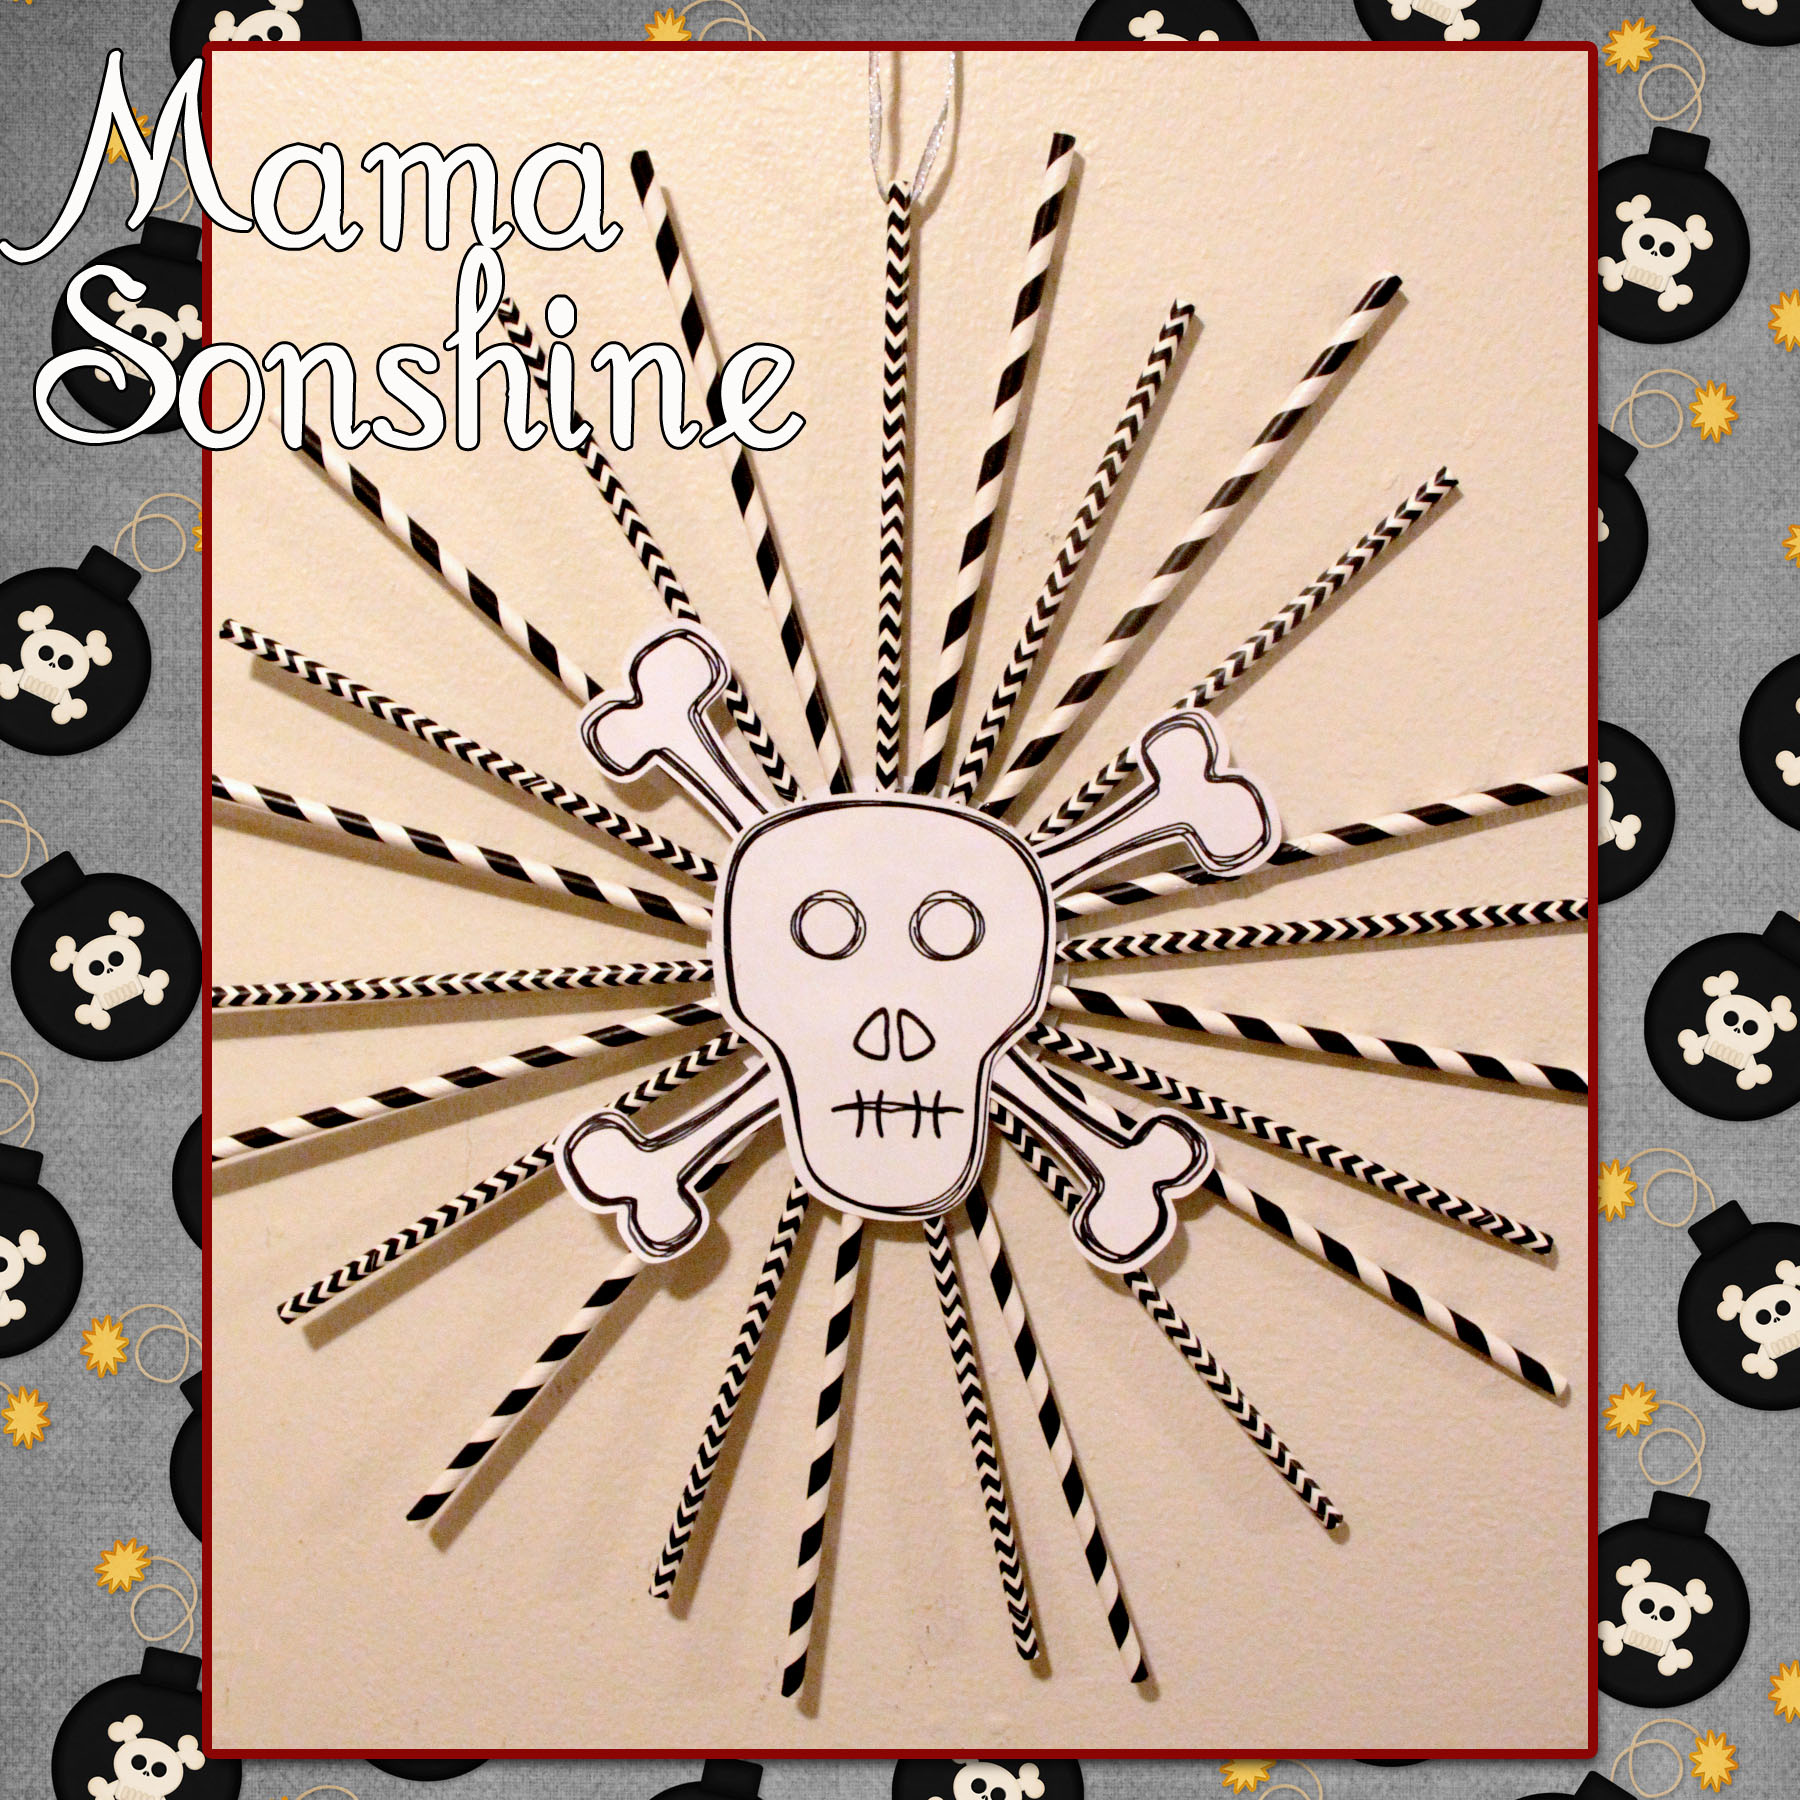
Using the same digital graphics I created a pirate flag topiary table decoration. I had to create my own cut file for the flag portion, cutting out the skull and crossbones.
I sandwiched a white piece of cardstock in between the two flag pieces, which I glued to a paper straw. The base is made using the print and cut feature, it is an adapted cupcake wrapper shape.
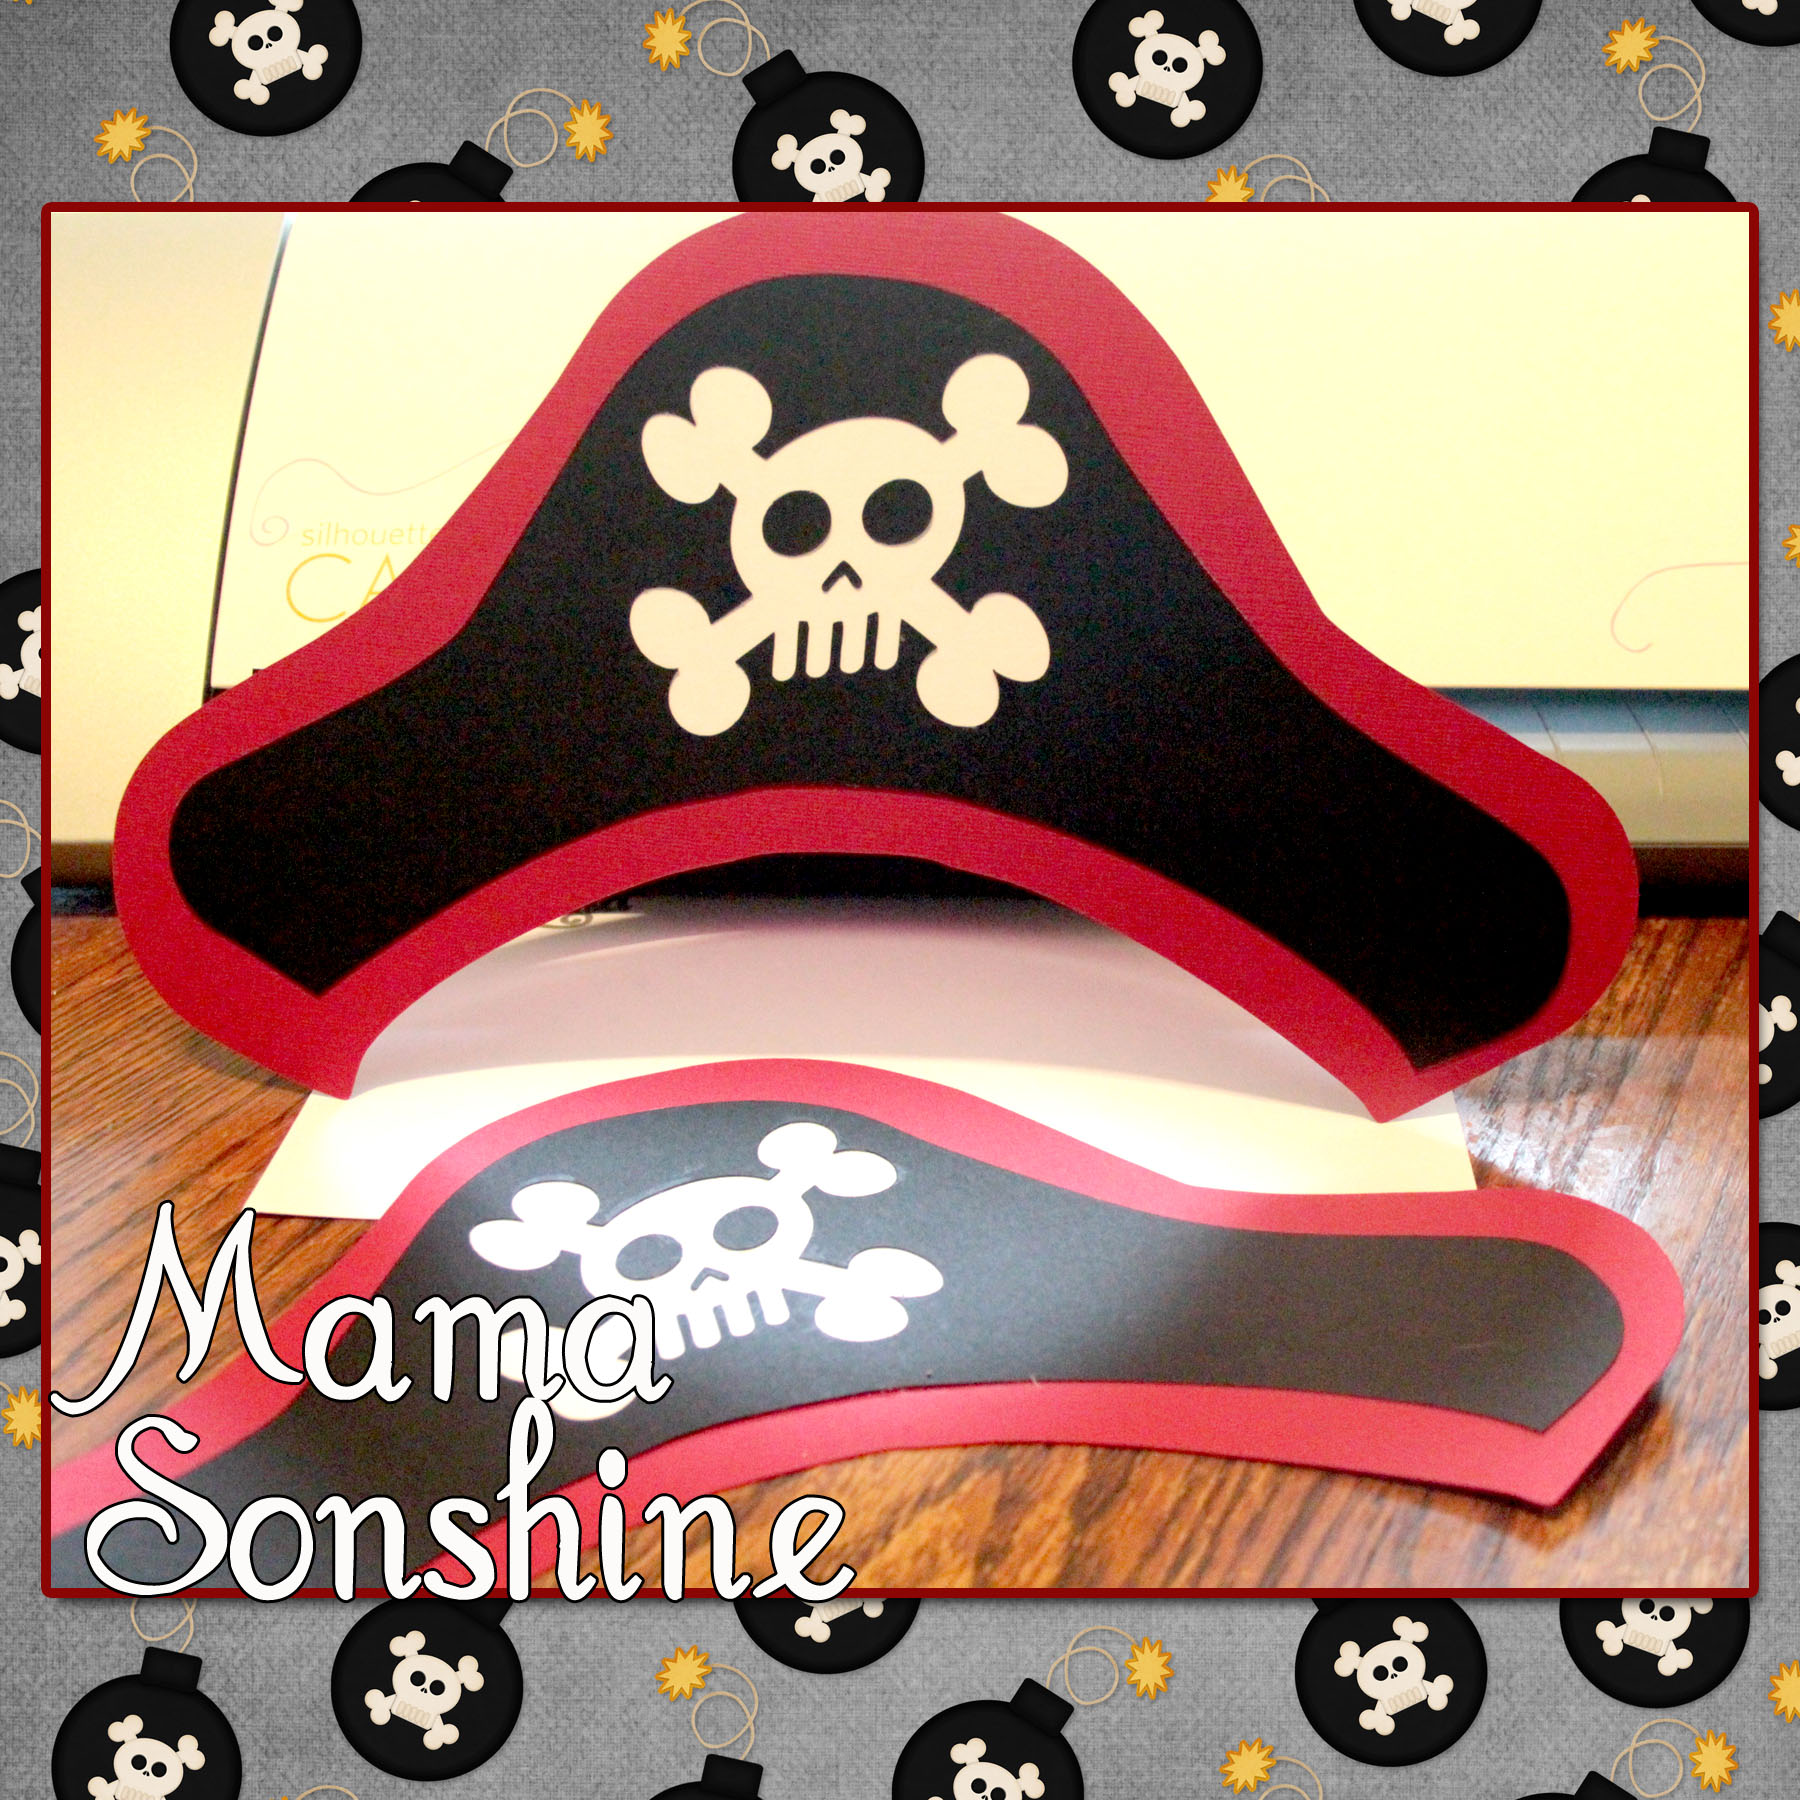
And what it just wouldn’t be a party with out party hats!
For the pin wheel I used the sketch feature that can only be found in the Silhouette Studio Designer Edition.
I ‘hand’ drew the skull and bones, and by hand I mean I used the draw polygon tool. I used the sketch tool to make the skull look more hand-drawn. I used a black Sharpie Marker to draw the lines with the Cameo and then made the cut around it.
This is only the tip of the iceberg when it comes to decorations that can be made using a personal cutting machine. I would never have been able to cut out all the pieces to make forty invitations, if I had to do it by hand.
I have much more planned and will revel more after the party.
Happy Crafting
Want to Check Out More Silhouette Projects?
My Silhouette Challenge buddies and I are all sharing projects on our blogs today, so peruse the projects below for a wealth of Silhouette inspiration!