Valentine’s day is coming up. Not really my favorite holiday, because I am not really all that fond of hearts. Never really have been. I even had an anti-pink period in my life. Don’t worry, I got over it.
I have boys who need to give out Valentines at school, to both boys and girls. They are two and four so I have a hard time wanting to hand out cards that say ‘be mine’ or ‘my valentine’ or anything like that. There are lots of great alternatives now, and really punny ones too. I typically like to make something for the kids to hand out, but this year I am so far behind and if I did make something I would have to double it cause now both kids are in preschool.
Yesterday I decided to just buy valentines for the kids to hand out.
EEKK!!! I KNOW! who is this lady?
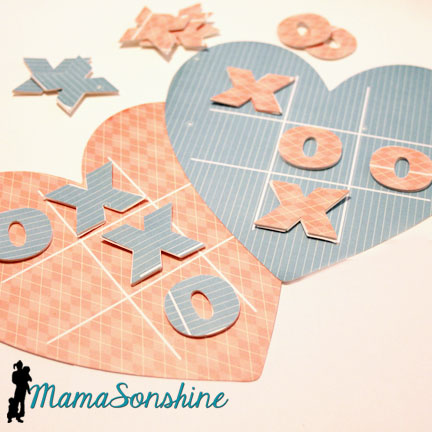
But I couldn’t go with out making anything for the kids. I love the Tic-Tac-Toe Valentine’s I have been seeing lately and decided to design my own for the kids at school.
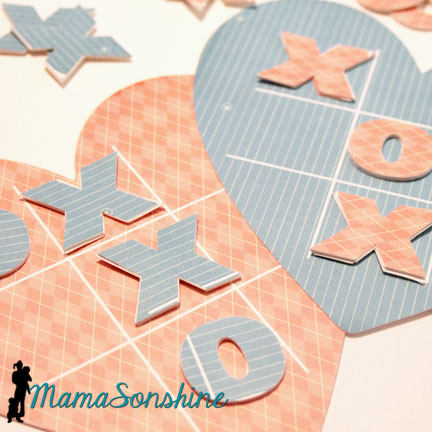
In Silhouette Studio I designed the game board and some x’s and o’s. Only I wanted them a little thicker so I cut out 5 layers of each x & o and glued them together.
The boys will give one to each kid, from both of them, but not as their valentines cards. Just a fun gift and they can play it at school during the party.
I wanted to make a free printable for you guys, but didn’t want you to have to cut out all those little x’s & o’s. So I made your game pieces in circles to cut out.
You can click on the picture to download it or go here.
Please note this design is for PERSONAL USE only please. Please do not forward, share, sell or distribute the files for any commercial purposes or claim as your own design. Thanks a bunch!
Who know that almost one year ago I would run my first race and become an addict?
After running the Shamrock run last March I knew that I would continue to race as long as I can, as many races I could. Last year I was able to participate in five races. Two of those races included finisher medals.
I was a loss for what to do with the bibs and medals from the races. I am kind of sentimentalist so I knew I wanted to keep them, but how do I display them?
I figured I wanted a sign with an encouraging phrase on it and hooks to hang everything. I also wanted to incorporate the distances I ran and one that I will run. I found a blank wood sign at the craft store for less than $5. I picked up the hooks at my one-stop-shopping store for a couple bucks, including the back brackets for hanging. Because of the size of the sign I decided to attach the medal hook to the back and purchased a hook specially designed for that. The paper and vinyl I already had.
I first painted the wood, but didn’t like that look, so I covered it with scrapbook paper using Mod Podge.
After determining the size of the area I had to work with I went to my Silhouette Studio to design my sign. I used the distance (in miles) of a 5k, 10k, half marathon and full marathon (which I plan on running this year). I used the quote “Take in the fact that you just did that” I really liked the quote because it reminds me that every race, every run is an accomplishment.
I planned on using white vinyl for the numbers, because I wanted them in the background and not over powering the sign.
After cutting out the vinyl and taking the backing off the numbers I realized my vinyl was clear, not white. I am not even sure where I got clear vinyl….
I thought it would be ok, and that the clear vinyl would make subtle. It was, too much so. If I looked at the right angle I could see the shiny numbers but I needed them to stand out a little more.
I took my white chalk pen and went around the numbers, it gave them more depth and I was now able to see them. I actually like it better than if I used white vinyl because it is visible but subtle. I went over the whole thing with a coat of Mod Podge to protect the paper.
At first I thought I would position the bib hooks so they would hang flat, one hook in each corner of the bib. But I realized that even with only my five bibs there was a size difference, so that wouldn’t work and I decided I would just hang them by one corner. This also allows for another hook if I need it.
I attached the hanging brackets and medal hook to the back, with screws.
Side note: I had to use one hanging bracket on each corner because the sign weight was uneven with the weight of the medals. If I put one bracket in the middle it would tip towards the medal side.
I was going to put it in the living room, but decided the wall above my dresser was a better choice.
So now when I get up in the morning I get to see it.
It will also be easy to add my new bibs after each race.
Of course I am hoping that I will fill it up and need to make another one!
Just. Keep. Running.
Just a reminder that with my running I am raising money for St. Jude’s Hospital, click on the picture below to donate.
If you read my race recap about the half-marathon I ran this summer you saw that I made some motivational tattoos for my cousin and me to wear.
It was the first time I used the Silhouette brand Temporary Tattoo paper, but I knew that I would be using it again the following month for Sid’s birthday party. I ran into a few issues as a first time user and thought I would share them, in hopes that other’s don’t have the same troubles.
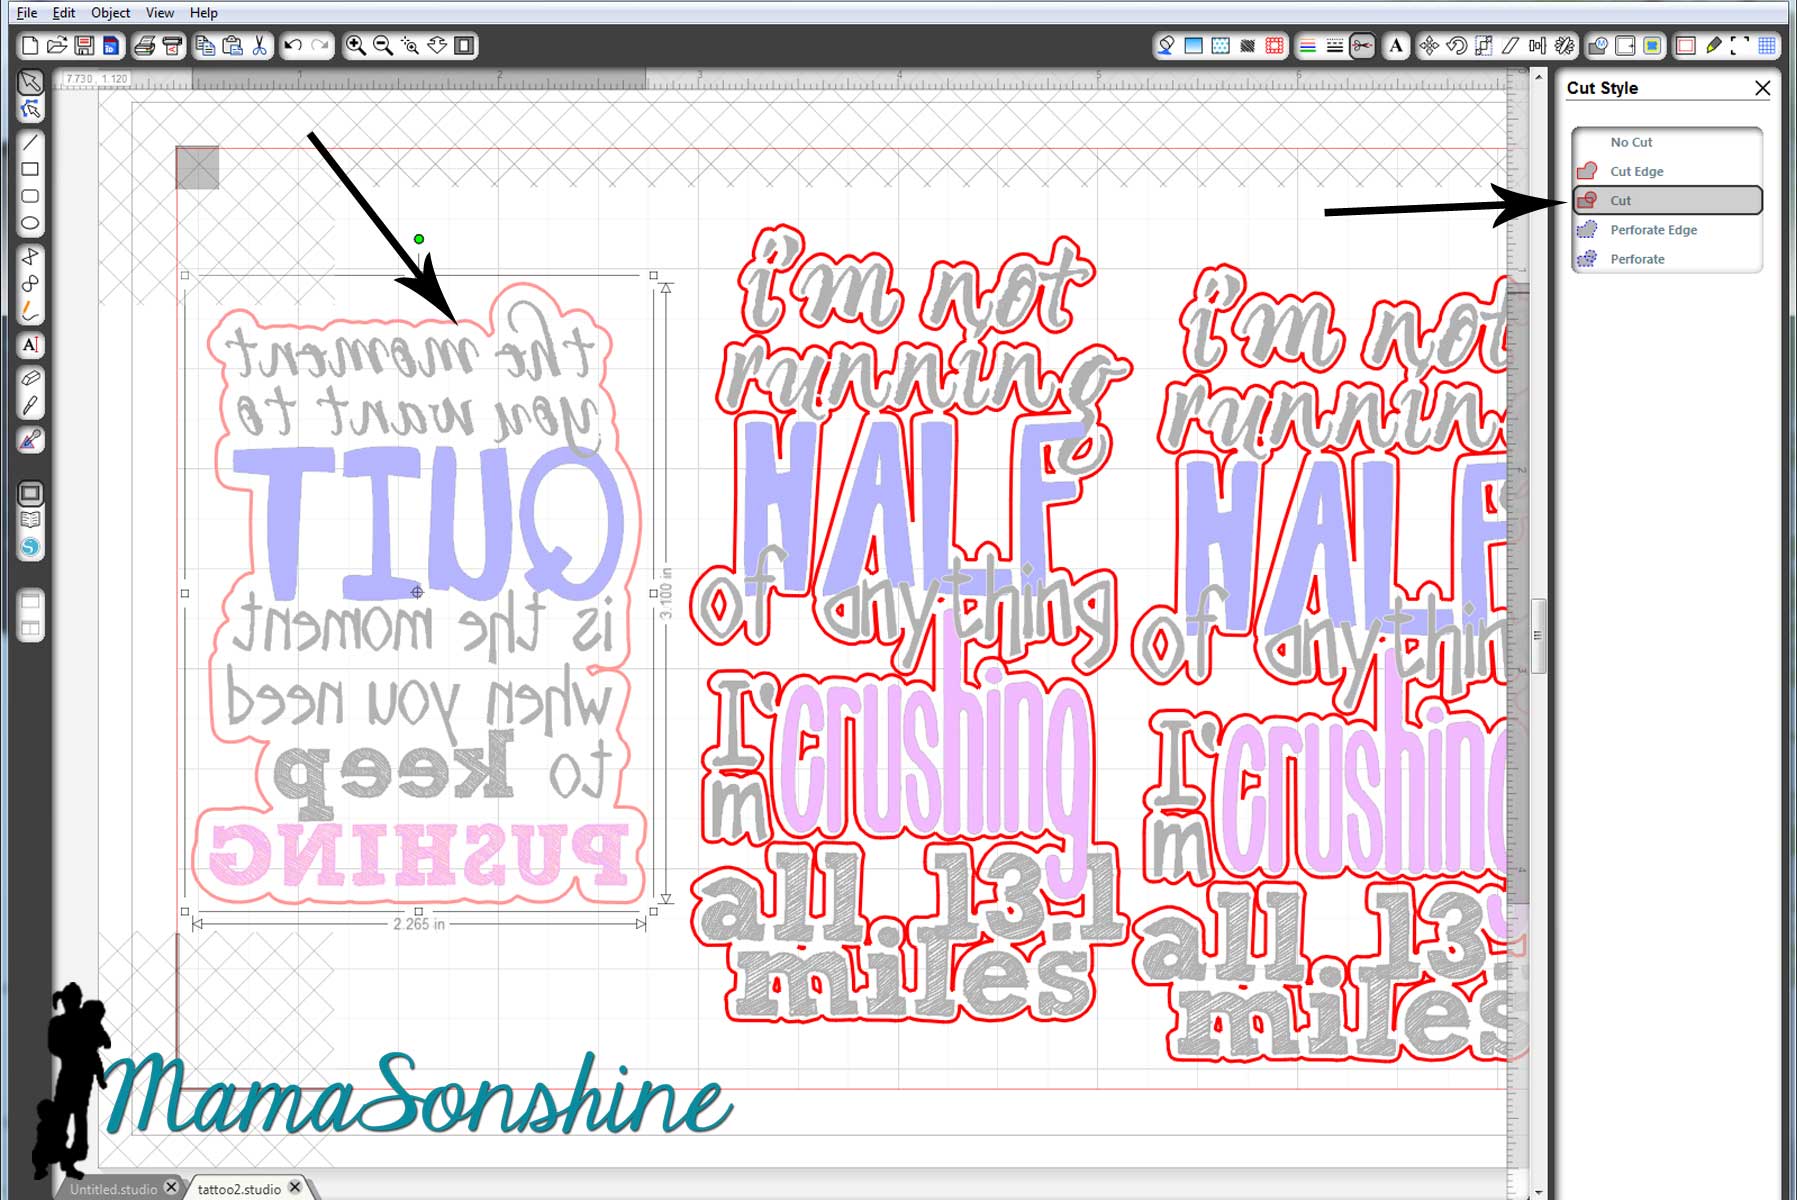
First I made my design. One of my favorite motivational quotes for running is “I’m not running half of anything. I’m crushing all 13.1 miles.” There are a few variations, but I like this wording the best. I made one for my cousin and one for me. I had room for one more quote, and since I had two arms I also used “The moment you want to quite, is the moment when you need to keep pushing.”
I sized out the space on my arm and made a box in Silhouette Studio. I then typed out my sayings and changed the fonts, sizes and colors for specific words. I then used the offset tool to create my cut lines around the words. Remember, anything that is white in your design will be clear on the tattoo, and your skin will show through.
My first instinct was to make a close-in offset, as I would when cutting other media.
Here is the problem: when you cut it, it cuts through the paper backing. So now you have all the words in different pieces that you would have to place on your arm individually. So again, remember that the tattoo paper is clear, and make your offset big enough that all the words cut as one piece.
And there is no reason you need to waste time cutting out the middle of your o’s or other inner parts since the paper is clear. Release the compound path,
select all the unwanted parts, then delete them.
Now you are left with a nice group of text that will stay together once cut.
Check out your cut lines, make sure you are not cutting out the words you are printing, but just the offset you just made.
Once you have your design and cut lines all set, flip your image horizontally. This is very important when doing something with words, or your words will be backwards.
The key to the temporary tattoos is Silhouette‘s print and cut feature using the software’s registration marks. I don’t know about you, but when I print and cut, I change the paper to ‘letter’ (because that is the size of the paper I print on) and adjust my registration mark settings to the smallest available. One day when I was printing something small I realized I don’t have to waste the whole piece of paper. I say ‘waste’ because once I printed the registration marks, I couldn’t reprint (for cutting) on that same piece of paper.
So I changed the size of the paper, I know it seems like a simple statement. But I made the paper size just larger than my image size, with the registration marks, and that left the rest of the paper blank, for use again! So simple, yet so helpful.
The tattoo paper is a bit pricey, about five bucks a sheet; the pack comes with two sheets and is priced at $9.99. You can find it on sale at Amazon, and sometimes through Silhouette. I didn’t want to waste any of the paper, and I wasn’t ready to print out the favors for Sid’s party, so I just adjusted the size of the paper to fit my quotes. That way I still had half a sheet of unprinted paper I could use again.
Printing.
First you want to make sure when you print, that you print the lines of the words, but do not print the lines of the offset. (Note: this feature is different if you are using V3)
Here is where I had the main problem that I really didn’t want to admit to anyone. It’s a little embarrassing.
I opened the pack of tattoo paper and pulled out the first sheet on top. The instructions say to print on shiny side then peel of green backing to apply adhesive material. So I printed on the shiny side.
My ink wouldn’t dry. I left it while I went to work, when I got home it still wasn’t dry. I wiped it off, tried different print settings, still wouldn’t dry.
I googled instructions looking for a video tutorial. Finally when watching my second video I wondered why their paper was white when my paper was clear with a green paper backing….
Maybe I have to use my own paper, but that seemed silly because the instructions talk about printing on the shiny side…
I went back to the package and looked inside it. Behind the two pieces of clear paper with green backing was two pieces of white paper with a shiny side.
*hand hits forehead*
Start over. Printed on the shiny side of the white paper, and ink came out dry and sharp.
Followed directions by adding the adhesive layer. That is the clear paper with the green backing that I was trying to print on first.
This is actually a picture of the tattoos I made for my son, but this is how you apply the adhesive layer
Because I wasn’t using the whole sheet of paper, I used a paper-cutter to trim down both the white sheet and the clear adhesive sheet before joining them. Then used my Silhouette to cut out the tattoos.
They look great and just the motivation we needed.
Now that I am a pro at the temporary tattoos, I made some as favors for Sid’s party. However, I neglected to flip the image horizontally, so the words were backwards. There is always something with me, right? I decided to let it ride (yep, pun intended) as the guest were toddlers who really couldn’t read anyway.
I am already planning my tattoos for my Halloween costume!
I love chalkboard art. I love that it can be changed really easily, just erase it and write something new.
The problem I have….
I have horrible handwriting and I can’t draw a stick figure.
Ok, seriously, look at the one on the left, would you want that on your dresser if you were a kid? Can you say SCAR-RY. Nothing about it says ‘I love you.’
But I found these super cute little chalkboards at the craft store and a chalk marker and wanted to make something for my son. So I thought I would turn to my Silhouette Cameo and some vinyl to make a stencil.
I just colored in the lines of the stencil using the chalk marker. Much cuter, and way easier than writing.
I made two stencils because I have two chalkboards. There is no way I would have been able to draw this moon by hand.
The marker says it will come off with water, but as you can see with the moon one, it doesn’t really come all the way off if you leave it on for a while.
Ian really likes his little signs, even if he can’t read them yet. They are super easy to make, and super easy to change the sentiment.