Yes, yes, I know, it’s Tuesday not Monday….I had wanted to put my meal plan out on Sunday night, so it wouldn’t interfere with the Silhouette Challenge post yesterday, but the best laid plans of mice. Right?
Why is dinner time so trying for my children?
Sid is such a little copycat, he does everything his brother does. So when Ian doesn’t stay in his seat at dinner, neither does Sid. Sunday was one of those nights. I got the boys their plates and Ian informed me they wanted to eat outside. So I put the plates down on their little table outside and proceeded to get mine ready.
Twice I had to go out to tell them to sit down. On the benches, not the table. And no, they don’t need to ‘just go get a toy’ or a stick or a ball or a blanket or anything else. I hadn’t even gotten food on my plate by this time. I turn back to the kitchen when I hear that distinct sound of a plastic plate hitting the ground.
Ian had gotten up, again, and Sid decided brother’s identical dinner looked better than his own. So he reached for it, and Ian rushed back to save it and somehow Sid’s plate got knocked to the ground.
Mama lost it, and so did dad. OK. We didn’t really flip out that much, but we did have to raise our voices, to which a very tired Sid responded with loud bawling and refusal to eat at all. After I finally got my dinner plate ready I relented and let Sid sit on my lap, and he still wouldn’t eat, but at least he wasn’t screaming any more. I somehow tricked him into taking a bite and he was hooked after that. But who could resist pulled pork slowly cooked in beer?
Both boys finally ate their dinner, I still had to remind Ian to keep eating, and to stay sitting but we got through it.
This was not taken on Sunday, they just love to eat outside
Freezer paper is every crafters’ best friend and I can now see why.
I have made shirts for the boys before using Heat Transfer Vinyl and Printable Heat Transfer Material, but never using fabric paint.
For this month’s Silhouette Challenge the theme was patriotic. Seriously you could go anywhere with that theme, but I decided the boys needed custom shirts to wear on the 4th of July.
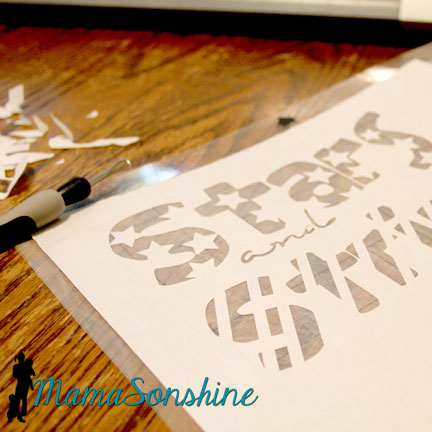
I wanted to make a stencil out of freezer paper that I cut with my Silhouette Cameo. I didn’t want the basic plain old flag, but I wanted something kinda flag related.
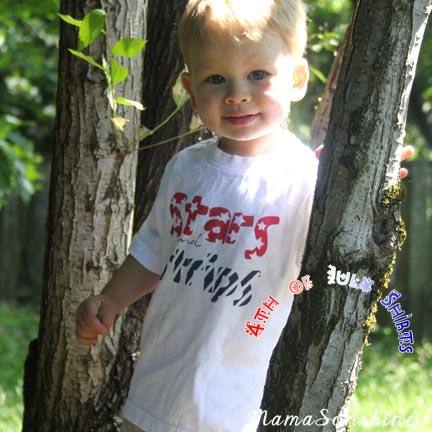
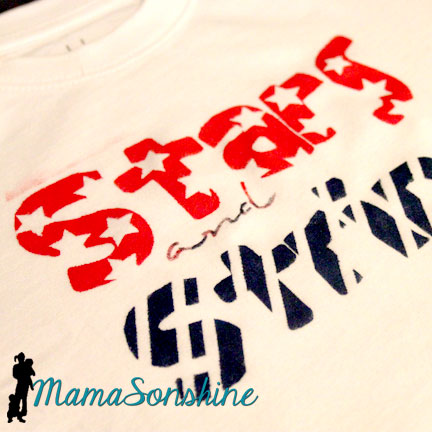
So I cam up with this shirt for Sid. It says “Stars and Stripes” and has coordinating graphics with the words. And it was done in Red, White, & Blue. Tots Adorbs huh?
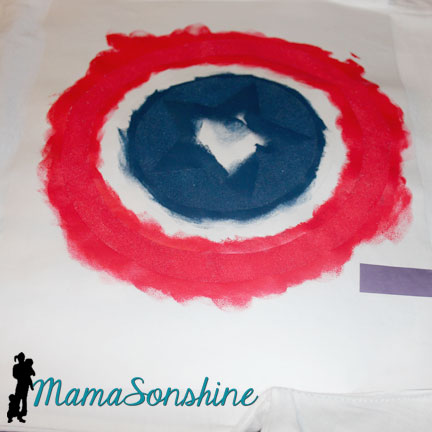
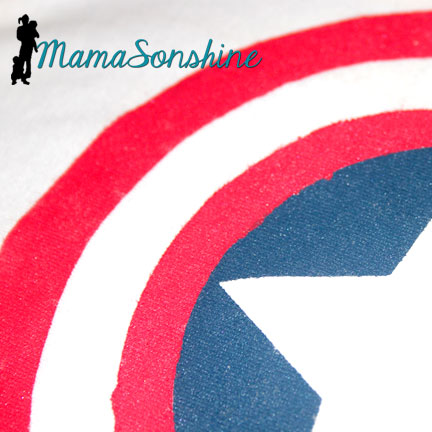
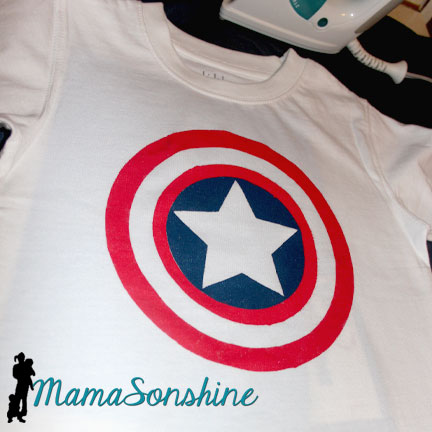
Since I didn’t actually want them to match I decided to make Ian a Capt. America shirt. Because who is more patriotic than Capt. America?
The process
Create and cut your design, you don’t have to use a cutting machine to make a shirt out of freezer paper but it sure is helpful.
In the cutting machine the freezer paper can be cut with shiny side up or shiny side down. However, the shiny side is the side you will iron to your fabric, so if you cut shiny side up, you will need to mirror (flip horizontally) your design. I used a blade of 2, speed of 3 and thickness of 10. But there has been a variety of recommended settings on-line, so make sure to do a test cut first.
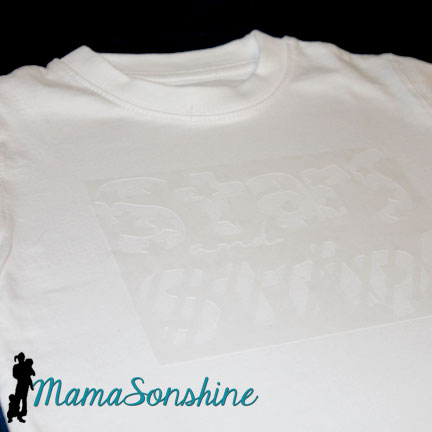
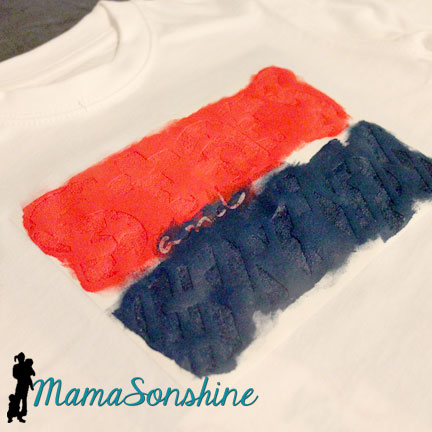
Iron on your stencil. Put the shiny side down on your fabric and use a dry iron on the setting for your fabric. Use lots of pressure, and pay extra special attention to the edges. You don’t want paint to bleed under the stencil. Freezer paper and transfer tape don’t mix, so you will have to put all those little letter innards back by hand. I made font decisions with this in consideration.
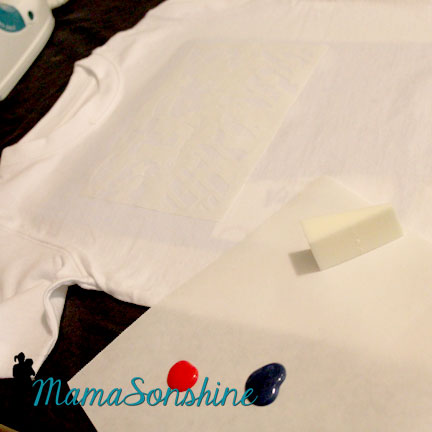
Here is a little confession. I don’t paint much, so I didn’t have any paint sponges or foam brushes or anything at home. You know what I did have though? Make-up foam applicator, which worked just fine.
Make sure you place a piece of cardboard or a few pieces of cardstock between the layers of your shirt. The paint can bleed through, and you don’t want it showing up on the back of your shirt.
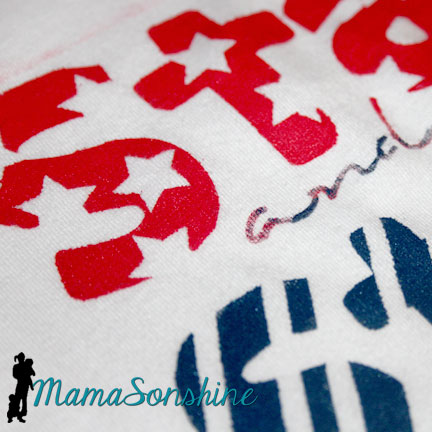
Make sure you dab and lift, do not brush. Brushing can lead to paint bleeding under your stencil. The idea is have many thin layers of paint instead of one thick one. I decided I wanted the ‘and’ to be a mix of red and blue, because I didn’t want too much of one color.
Let your paint dry and peel up your stencil. You may have to hold down the shirt to avoid stretching the newly painted fabric.
Most fabric paint requires you to heat set it, running the iron over the design so the paint doesn’t wash off. The fabric paint I bought did not have that on the instructions, but I did it anyway. I ran the iron over the front of the shirt, with a pillowcase in between, after is had dried for a couple of days. I turned it inside out and washed it after that.
If you notice above the word “stars” you can see a little smear of red pain because the frame of my stencil was too small. I didn’t run the iron over that part, and it was mostly gone after washing it. So I am glad I did heat set the rest of the shirt.
The Captain America shirt seemed like it was going to be easy, but I forgot about the fact that there is a red circle next to a blue circle with no white between.
So I had to paint it on two different days.
The stencils were different circles, so the inner white circle is actually two. After all the above was dry, I removed the circle next to the blue, but left the one where it should be white. I then added another circle to cover the blue center. This one didn’t stick as well because I was afraid to mess up the paint, so I didn’t press to hard or long.
This lead to some bleeding of the red paint in to the blue circle.
But it only looks bad close up.
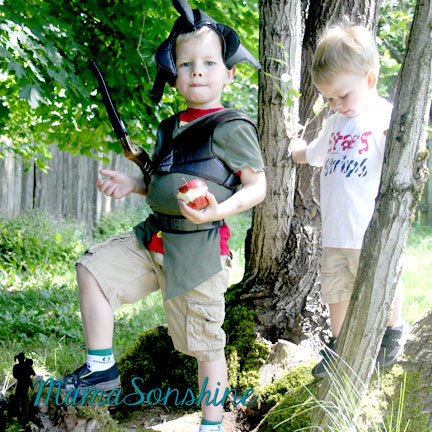
My older son then informed me he no longer likes Capt. America, so he wouldn’t wear the shirt for me.
He did tell me he was a Mystic Forest Ranger Zombie Hunter though.
At least Sid was cooperative.
Happy Crafting
Want to Check Out More Silhouette Projects?
My Silhouette Challenge buddies and I are all sharing projects on our blogs today, so pursue the projects below for a wealth of Silhouette inspiration!
My last running log talked about how I think I have shin splints and it is slowing me down. So let’s take a minute and talk about shin splints.
What are shin splints?
Shin splints are a common injury in the lower leg. It affects the muscles & tendons attached to the tibia, the medial (inner) leg bone. Shine splits, , also called medial tibial stress syndrome, is kind of a general term for multiple injuries that involve the lower leg. The underlying cause could be micro tears in the muscle that is pulled off the bone, inflammation of the muscle, inflammation of the periosteum (a thin sheath of tissue surrounding the tibia), or all of the above. They can also be caused by stress fractures of the tibia, but that gives you slightly different symptoms, and is a much more serious injury. If you suspect this is the cause of your leg pain, please seek medical attention.
Click Pic for where I found this drawing
Here’s the kicker. The best treatment for shine splints by not running, or at least decrease training. Did you hear that? How am I supposed to train for a half marathon if I don’t run?
Whatever. I’m probably not going to do that.
One way to combat shine splints is to strengthen your lower leg muscles and stretch them out. While sitting extend your leg and trace the alphabet with your toes, repeat on the other leg, this will help strengthen your muscles. If you run on hard surfaces, like the road or treadmill (guilty) switch to a track or trail. The soft uneven ground will strengthen the lower leg muscles and provides a cushion for your pounding feet.
Cross training also helps you stay active and allows for healing, replace running with a bike or swimming once or twice a week. Make sure your running shoes are not worn out, and fit properly. The other thing that is recommended is to tape your shin or use a compression sleeve/socks.
What are my plans to recover and prevent shin splints?
I am going to get a new pair of shoes. I am going to go to a running store and the experts there will help me find the right fit for my feet and running style.
I added a long trail run to my week. Once a week my cousin (whom I running the half with) and I will run on a trail gradually increasing our distance. Last Sunday we ran 6 miles. Of course I took a few walking breaks, but short ones, which meant I then and to catch up to her.
I am replacing at least one run with riding a bike at the gym, because I don’t own a real bike. Last night I was able to ride 16 miles in an hour. Although the seat was horribly uncomfortable and I don’t think I really fit well on that machine. I don’t think I got as good a cardio workout as I do with running, but my legs worked hard.
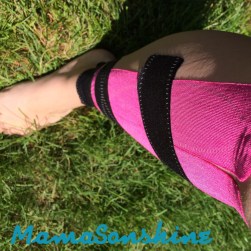
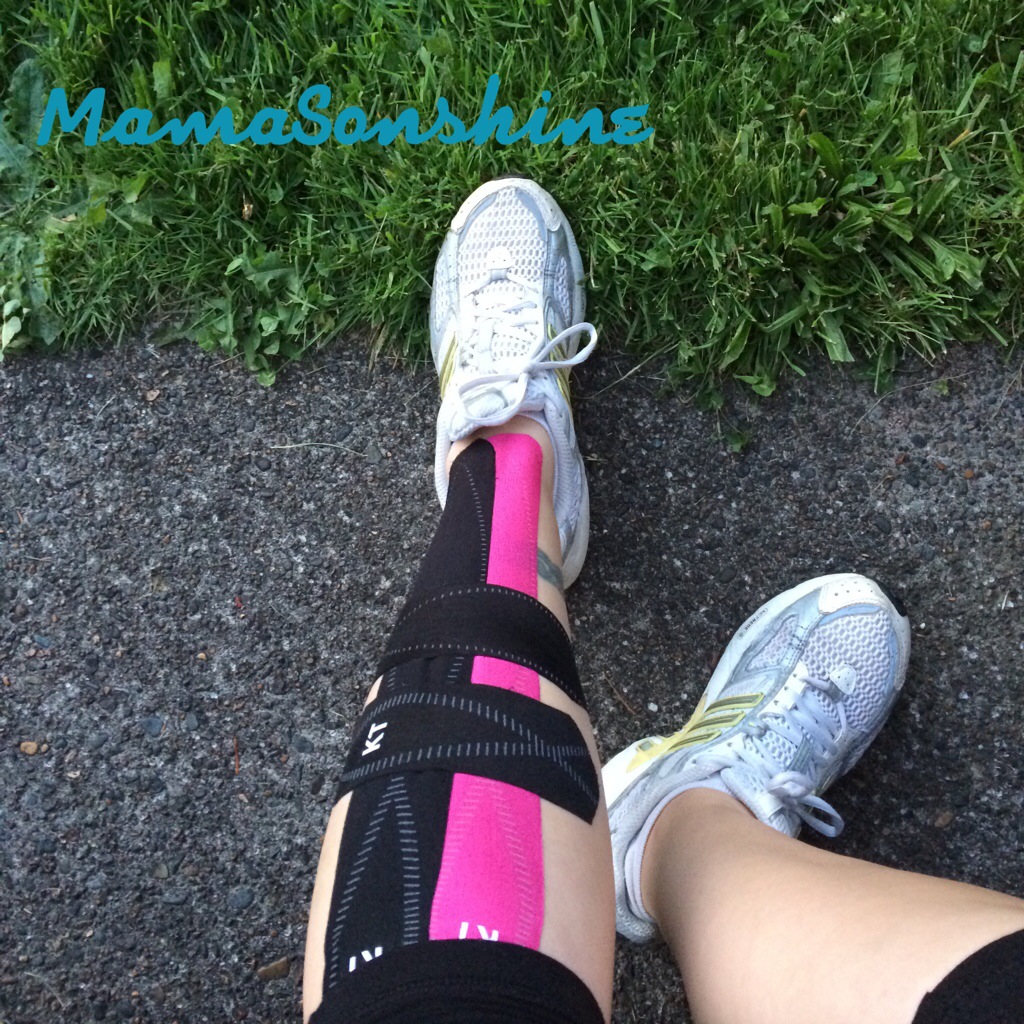
But the major thing I am doing is taping. I am still a bit of a skeptic, but I figured it won’t hurt. I went out and purchased some KT tape to tape my leg up. The KT stands for kinesiology therapeutic tape, and is a brand of tape.
The purpose of the tape is to increase blood flow and provide some stability to the muscles and tendon on the affected area. This brand of tape claims “KT TAPE is applied along muscles, ligaments, and tendons (soft tissue) to provide a lightweight, external support that helps you remain active while recovering from injuries. KT Tape creates neuromuscular feedback (called proprioception) that inhibits (relaxes) or facilitates stronger firing of muscles and tendons. This feedback creates support elements without the bulk and restriction commonly associated with wraps and heavy bracing. KT Tape gives you confidence to perform your best.” (copied directly from their FAQ page)
There is some debate if taping or compression sleeves/clothes work, but that is a topic for another day. I am not going to swear by it yet, but I have had less pain this week.
I first used in on Thursday last week, Sid helped me tape my leg, and used the packaging to try and tape his. He was very helpful.
I was able to get through over 3 miles of jogging and 1.5 miles of sprint intervals with minimal pain. I took the next two days off (due to a very busy schedule) and ran six miles on Sunday (on the trail), four miles on Tuesday and rode 16 miles on the bike last night. I keep my leg taped for 24-48 hours, and apply the tape at least an hour or two prior to activity. The company claims you can wear it for a week, but I find that it starts to lift after a day or two, plus I can’t shave my legs with it on.
It’s kind of bold and a little ‘hey look at me’ which causes people to ask me about it, so I don’t really like to wear it that long. However it is expensive and I don’t want use 2-3 strips everyday, so I leave it on. I am going to look into a compression sleeve, because that is reusable and easy to slip on.
Trigger point therapy can also help with shin splints but I have not really tried it yet. I found this video on Another Mother Runner’s blog, so I am trying to do what she recommends. But I don’t really have two trigger point balls to attempt the release properly.
What I haven’t tried and I am not sure I will is ice. I hate ice. I loath being cold and the thought of icing my leg sounds horrendous. I have attempted icing things in the past, but could never do it.












 major thing I am doing is taping. I am still a bit of a skeptic, but I figured it won’t hurt. I went out and purchased some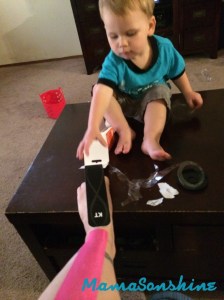
 I Tri and Craft