I Tri and Craft

thoughts from a mother of boys, a marathoner, a triathlete, a crafter, a wife, and a scientist


1 Comment

How to Sketch from a Coloring Book Page with your Silhouette

One great feature of the Silhouette machines is the Sketch feature.

You replace the blade with a pen and it draws instead of cuts.  This gives the project a hand drawn feel instead of one that came off a printer.  This feature is also usefully for writing sentiments in cards or labels.  Actually the possibilities are endless.

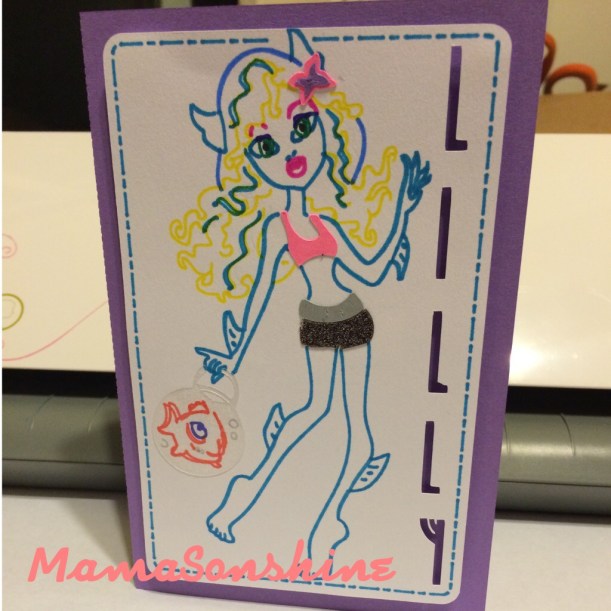
I made this card for a friend’s daughter using the sketch feature.

MSS_MH_LagoonaCard

First you need to go online and find a coloring book page that you want to sketch using your Silhouette.

Here is the one I will be using.


Lagoona Blue Coloring Page from cartoonjr.com

Click picture for source

Please remember that this is for personal use only.  I do not condone using or selling other people’s art/work without permission.

You want to find one that is at a fairly high-resolution that you can download.  The benefit of the coloring pages it that it is more easily traced than an image with coloring.

The down side of the Silhouette Studio software is that when you open the image and attempt to trace it you get this.

MSS_SilSketchTut_MH01

The software is tracing both sides of the black line.  You can work with this, by ungrouping, releasing compound paths, point editing, cutting and erasing.  All of which is really time-consuming.

There are other software programs that can do center line tracing.  I use Adobe Illustrator, but not everybody has that program.  Kristy at Please Excuse my Craftermath has three posts on center-line tracing using Illustrator, Wintopo and AutoTrace, the last two are free.  Wintopo is a freeware and AutoTrace is an online program.  I won’t go into details about how to do the trace, because Kristy does an excellent job.  What you end up with is a SVG file that you can open in Studio that has a single line.  If you do not have the Designer Edition you can save as the new files as DXF files, which should open in the regular edition.

This tutorial will be about what to do now that you have a single stroke path file.  The new SVG file will have thick lines, which make it easier to see, but when you go to sketch will need to be changed (I will explain later).

MSS_SilSketchTut_MH02

While the image looks like it is one line it is really made up of a bunch of little lines.  Which is also fine if you want to sketch in one color, but that was not look I wanted.

Fist you want to release the compound path, and ungroup until it is no longer an option.  This way you can remove the black border around your image.  You will be able to see the multiple bounding boxes around all the lines.

MSS_SilSketchTut_MH03

I found it was easier if I made each section a different color.  I want the outline of her extremities, face, torso, etc. one color.  Her hair a different color, her clothes different colors, and so on.

It doesn’t have to match the color I want in the end, because the final color will depend on what color pen I use.  This just helps distinguish each portion, and makes it easier when I go to select which area to sketch.

First choose one line and change the color.

MSS_SilSketchTut_MH04

While fist line is still selected hold the shift key and select another line (or multiple lines)

MSS_SilSketchTut_MH05

You want to make the selection a compound path, through the “modify window,” selecting object ->make compound path, or right clicking on your mouse (Sorry, I don’t have a Mac, so I don’t know the commands for it).  When it is a compound path, the new line colors will be changed to the color you selected for your first line.

MSS_SilSketchTut_MH06

Continue to do this until you have made everything you want in that color one compound path.

Repeat the steps on the next section and again until the picture is color coordinated.

MSS_SilSketchTut_MH07

This makes it easier for me to select which portion to sketch.  I can just select the body to be sketched in one color, send to Silhouette, change the pen, got to cut style window, select a different part to be sketch, send to Silhouette and repeat.

The new compound path for the body is selected, so it will all be drawn at once, and I only have to select one line.

MSS_SilSketchTut_MH08

If you need to resize or move the image, you simply group the different elements together.  But you will have to ungroup them to sketch them at different times.

MSS_SilSketchTut_MH09

You will also need to change the line thickness to zero, if left as is, the Silhouette will do a ‘double cut’ or more accurately will draw two lines to get the set thickness.


Keep in mind, that while you have made the lines compound paths, they are still disconnected.  This means that they can not yet be filled with a color or pattern.

This slideshow requires JavaScript.


You will need to go back and connect the lines together using the point editing window.  Sometimes you may need to delete some points, break paths, or move things depending on how it looks.  This might also change the outcome if you try to cut, instead of draw.  I can’t attest to that, because I have not tried to cut while the lines were unconnected.

This slideshow requires JavaScript.

For this card I wanted to add dimension and I didn’t want her clothes to be just an outline.  So I duplicated the clothes, fishbowl and flower elements.  I connected the outside lines using the point editing tool and cut them out of colored cardstock, and clear sticker paper for the fishbowl.

MSS_SilSketchTut_MH15


MSS_MH_LagoonaCard03

MSS_MH_LagoonaCard02


I used the sketch pens to make the faux stitching around the border and write the sentiment inside the card.


This slideshow requires JavaScript.

I hope this has helped you take a black & white coloring page and turn it into a custom drawing.


Happy Crafting


signature-black
facebook instagram pinterest parties by mamasonshine etsy bloglovin google+ email twitter Image Map
Enhanced by Zemanta


5 Comments

Monster High Birthday Card with the Silhouette Sketch Feature

I have been loving the sketch feature that my Silhouette Cameo has.

Being able to draw with it gives me more options than just print n’ cut.

This weekend we will be attending a birthday party for a little girl who is turning six and just loves Monster High.  Since her favorite character is Lagoona Blue I made her a personalized birthday card.


Laggona Blue Birthday Card

Lagoona Blue Birthday Card


I will be providing a tutorial on how to make this card, so tune in next week for the details.

Lagonna Blue

Lagoona Blue


I think my favorite thing about the card is the fish bowl purse.  I used clear sticker paper to give the appearance of glass.


Happy Crafting

signature-black
facebook instagram pinterest parties by mamasonshine etsy bloglovin google+ email twitter Image Map


I shared this project on the Silhouette Challenges Blog

Silhouette Challenges


Enhanced by Zemanta


3 Comments

Frozen Crafts on my Silhouette

This month my cousin’s daughter turned four.  And of course she loooovvvveees Frozen.  She is a princess through and through, this child.

For her birthday I decided I wanted to make her a card with images from the movie.  I also decided to make my first shaker card.  I thought it would be great to have some ‘snow’ to shake around.

MSS_FrozenCard01

I used Silhouette’s print and cut feature to make the card.

I used foam pads to pop out the characters.   I made two copies of the background and cut a square out of one.

MSS_FrozenCard03However, I neglected to place a spacer between the levels, so the stuff inside doesn’t really ‘shake’.

MSS_FrozenCard02But, it was my first shaker card, and I didn’t actually read any directions on how to make one…

MSS_FrozenCard01The Birthday Girl loved the card, so it was a win in my book!

I also wanted to make something using the sketch feature.

MSS_FrozenSketch05

So I made her this picture and mounted it on canvas for her room.

MSS_FrozenSketch01

I didn’t like the way the words at the top looked just sketched out, so I gave them more dimension and added some layers.

MSS_FrozenSketch04

I added some snowflake brads and some adhesive jewels.  I printed out the small snowflakes on the paper before beginning the sketching process.

MSS_FrozenSketch03

I also used my embossing ink pen in the Silhouette and went over the sketch lines for the large snowflakes, her hair and the silver in her dress.  I then used a transparent opal embossing powder, because glitter makes everything better.

MSS_FrozenSketch02

I used a combination of pen types; Sharpies, Silhouette Sketch Pens, and Bic Mark-It ink pens.

It took a few passes to get everything right, and I had the hardest time figuring out how I wanted the eyes.

This project was really fun and I can’t wait to find something else to sketch!


If you want to learn how to turn a coloring book page into a sketch check out my tutorial here.


Happy Crafting

signature-black
facebook instagram pinterest parties by mamasonshine etsy bloglovin google+ email twitter Image Map


I shared this project on the Silhouette Challenges Blog

Silhouette Challenges


Leave a comment

Birthday Pirate Shirt ~ A Silhouette Cameo how to (Part 3)

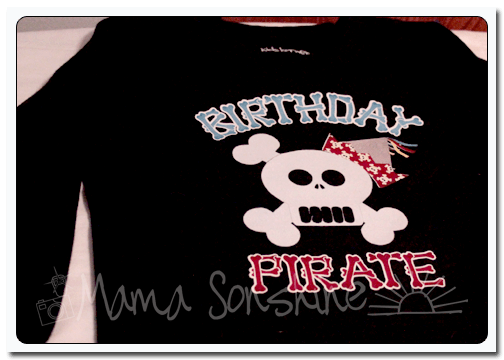
I wanted to share with you the steps I took to make my son’s birthday shirt. There was a few problems I had that I was able to work through.   Hopefully this will help so others won’t get stuck like I did.

In this tutorial I use my Silhouette Cameo and the Silhouette Studio DE software to make a custom shirt for my son’s birthday party.  I used graphics from Just So Scrappy‘s YoHo YoHo Pirate kit.  I used the Silhouette brand Flocked Heat Transfer Material for the skull, and Avery Dark T-Shirt Transfers for Ink Jet Printers.

Part One will be how to make the Skull & Crossbones

Part Two will be how to do the words & party hat

Part Three will be how to iron everything on and some tips.

MSS_BirthdayShirt01

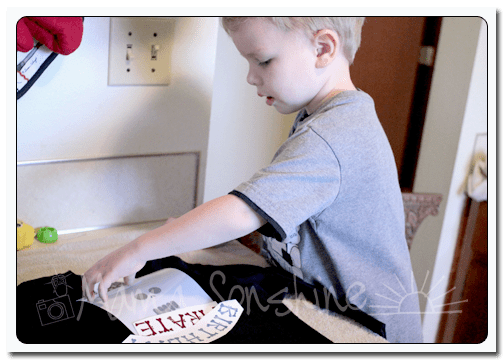
My first tip; if you want your words to be in the correct direction I would advise you not to let your three-year old place them on the shirt.

MSS_BirthdayShirt04

The flocked transfer material has a clear plastic film over the top.  This is the side you face down when cutting, you want the Silhouette to cut through the transfer material but not this film.  After weeding out the areas that you want the shirt to show through, lay your transfer material with the film facing up.  I would advise ironing on one piece at a time, just to ensure proper placement.

Use a dry iron, on the highest setting (please read the directions that come with your material) and a piece of thin cotton fabric between the iron and your material.  I used a pillowcase after determining a dish towel was too thick.  You want to apply a lot of pressure for up to a minute, or more.  Again, this is where you want to double-check the instructions that come with your material.  The time can very depending on manufactures, but the main thing is if isn’t sticking, you need more time and pressure.  Try not to move the iron around like you are ironing your clothes.  Just hold for a minute, then move to another area and hold, with lots of pressure.  Have I made it clear that pressure is important?

Some material is cool peel, meaning you need to wait until the ironed on design has cooled before removing the top film.  If this is the case, wait!  You will only ruin your design if you get impatient.

MSS_BirthdayShirt02


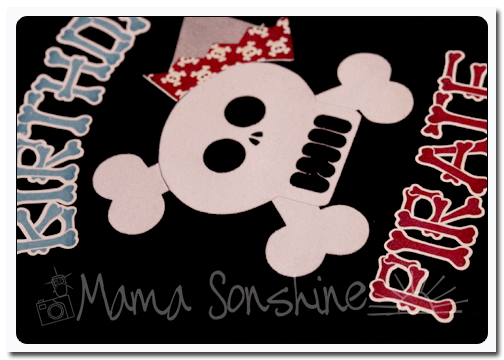
The intricate cut around the words was done as stated in the previous tutorial, but I wanted to separate the words from the page and lay them on the shirt without yet removing the backing, so I just cut them out with scissors.  The Silhouette settings I used made a ‘kiss cut’ meaning it cut through the transfer material but not through the backing.  When you are ready to iron on the material you peel it off like a sticker.

After placing the elements where you want them use the same iron settings but use the piece of parchment-like paper that comes with  the printable transfers between the material and your iron.  Again using lots of pressure.  Also, make sure something is covering the areas that have already been ironed on.  If you apply direct heat to this material you could melt it.

MSS_BirthdayShirt03


As I have stated above I used the printable material for dark fabric and ink jet printers.  The dark fabric is like a sticker.  What is face up is what will show, this is different from the material for light fabric.  The dark fabric material also leaves a white area on the printed material where there is a white area on your screen.  With the light fabric material, where there is white on your screen the shirt fabric will show through.  This is something to consider before purchasing your transfer material.  Also it is very important for you to  know what kind of printer you will be using.  The way an ink jet and laser printer adhere the ink to the paper is different and for this type of material it does make a difference.

The first time I printed this out I used a laser printer without thinking of the consequences.

MSS_BirthdayShirt05

It looks fine, there wasn’t any difference between it and the one I ended up printing on my ink jet printer.  At least not until I ironed it on.

MSS_BirthdayShirt06

See how the hat has faded?  This is because of the toner in a laser printer.  It can come off the printable heat transfer material when heat is applied.  I had to go back and reprint everything on an ink jet printer.  At this point I also had to make the hat a little bigger to cover up  the faded one.

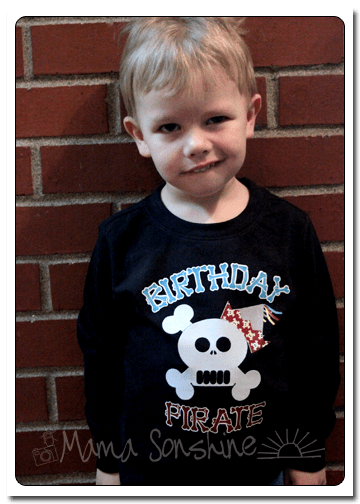
But the end result was still one happy birthday-boy-to-be.


MSS_BirthdayPirateShirt

If you want to see how I designed the skull check out Part one.

If you want to see how I designed the print and cut words and hat see Part Two.


Happy Crafting

signature-black

facebook instagram pinterest parties by mamasonshine etsy bloglovin google+ email twitter Image Map


Enhanced by Zemanta