Ian started T-Ball this year and I couldn’t be more excited!
This is my very first time being a sports mom. I have been there for my nieces’ sports, and so I kinda know what is going on since my sister has experienced it all.
Each week one player brings snacks for after the game. Since it was my turn I just had to make cute little gift bags with my Silhouette and Just So Scrappy’sBatter Up kit.
I also made Thank You cards for the people who contributed to Ian’s fundraiser.
I think they turned out pretty cute. And I made Ian write his name in each one.
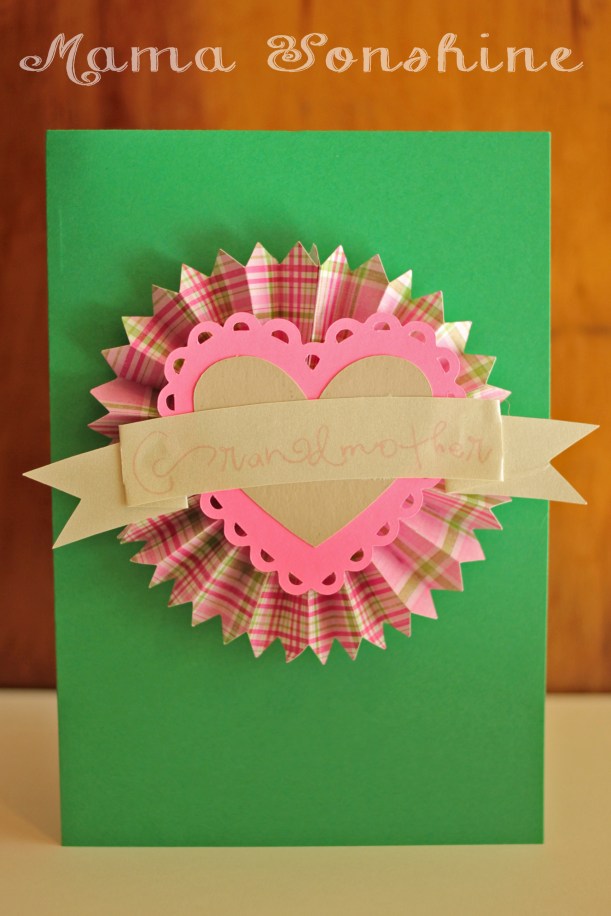
This month’s Silhouette challenge had to involve flowers. With it also being the month of Mother’s day I decided to combine the two topics.
This year I made three mother’s day cards and one Grandmother card (but the Grandma one doesn’t have flowers on it).
All of these cards were made with the help of my Silhouette Cameo.
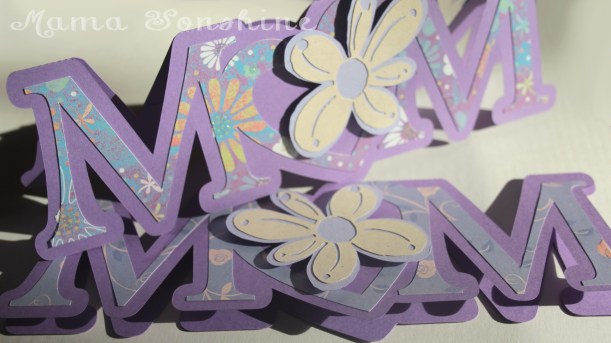
The first card I made was a shape in the word MOM, but I replaced the O with a heart. I added a layer of floral scrapbook paper and to give it more depth I cut out a two layered flower which was attached with dimensional foam tabs. Because of the font I used for the letters, there wasn’t a whole lot of room to write inside the card, so the sentiment is a simple “Happy Mother’s Day.”
This was my first shape card and while I am pleased with the results, I won’t make the Ms so thin next time.
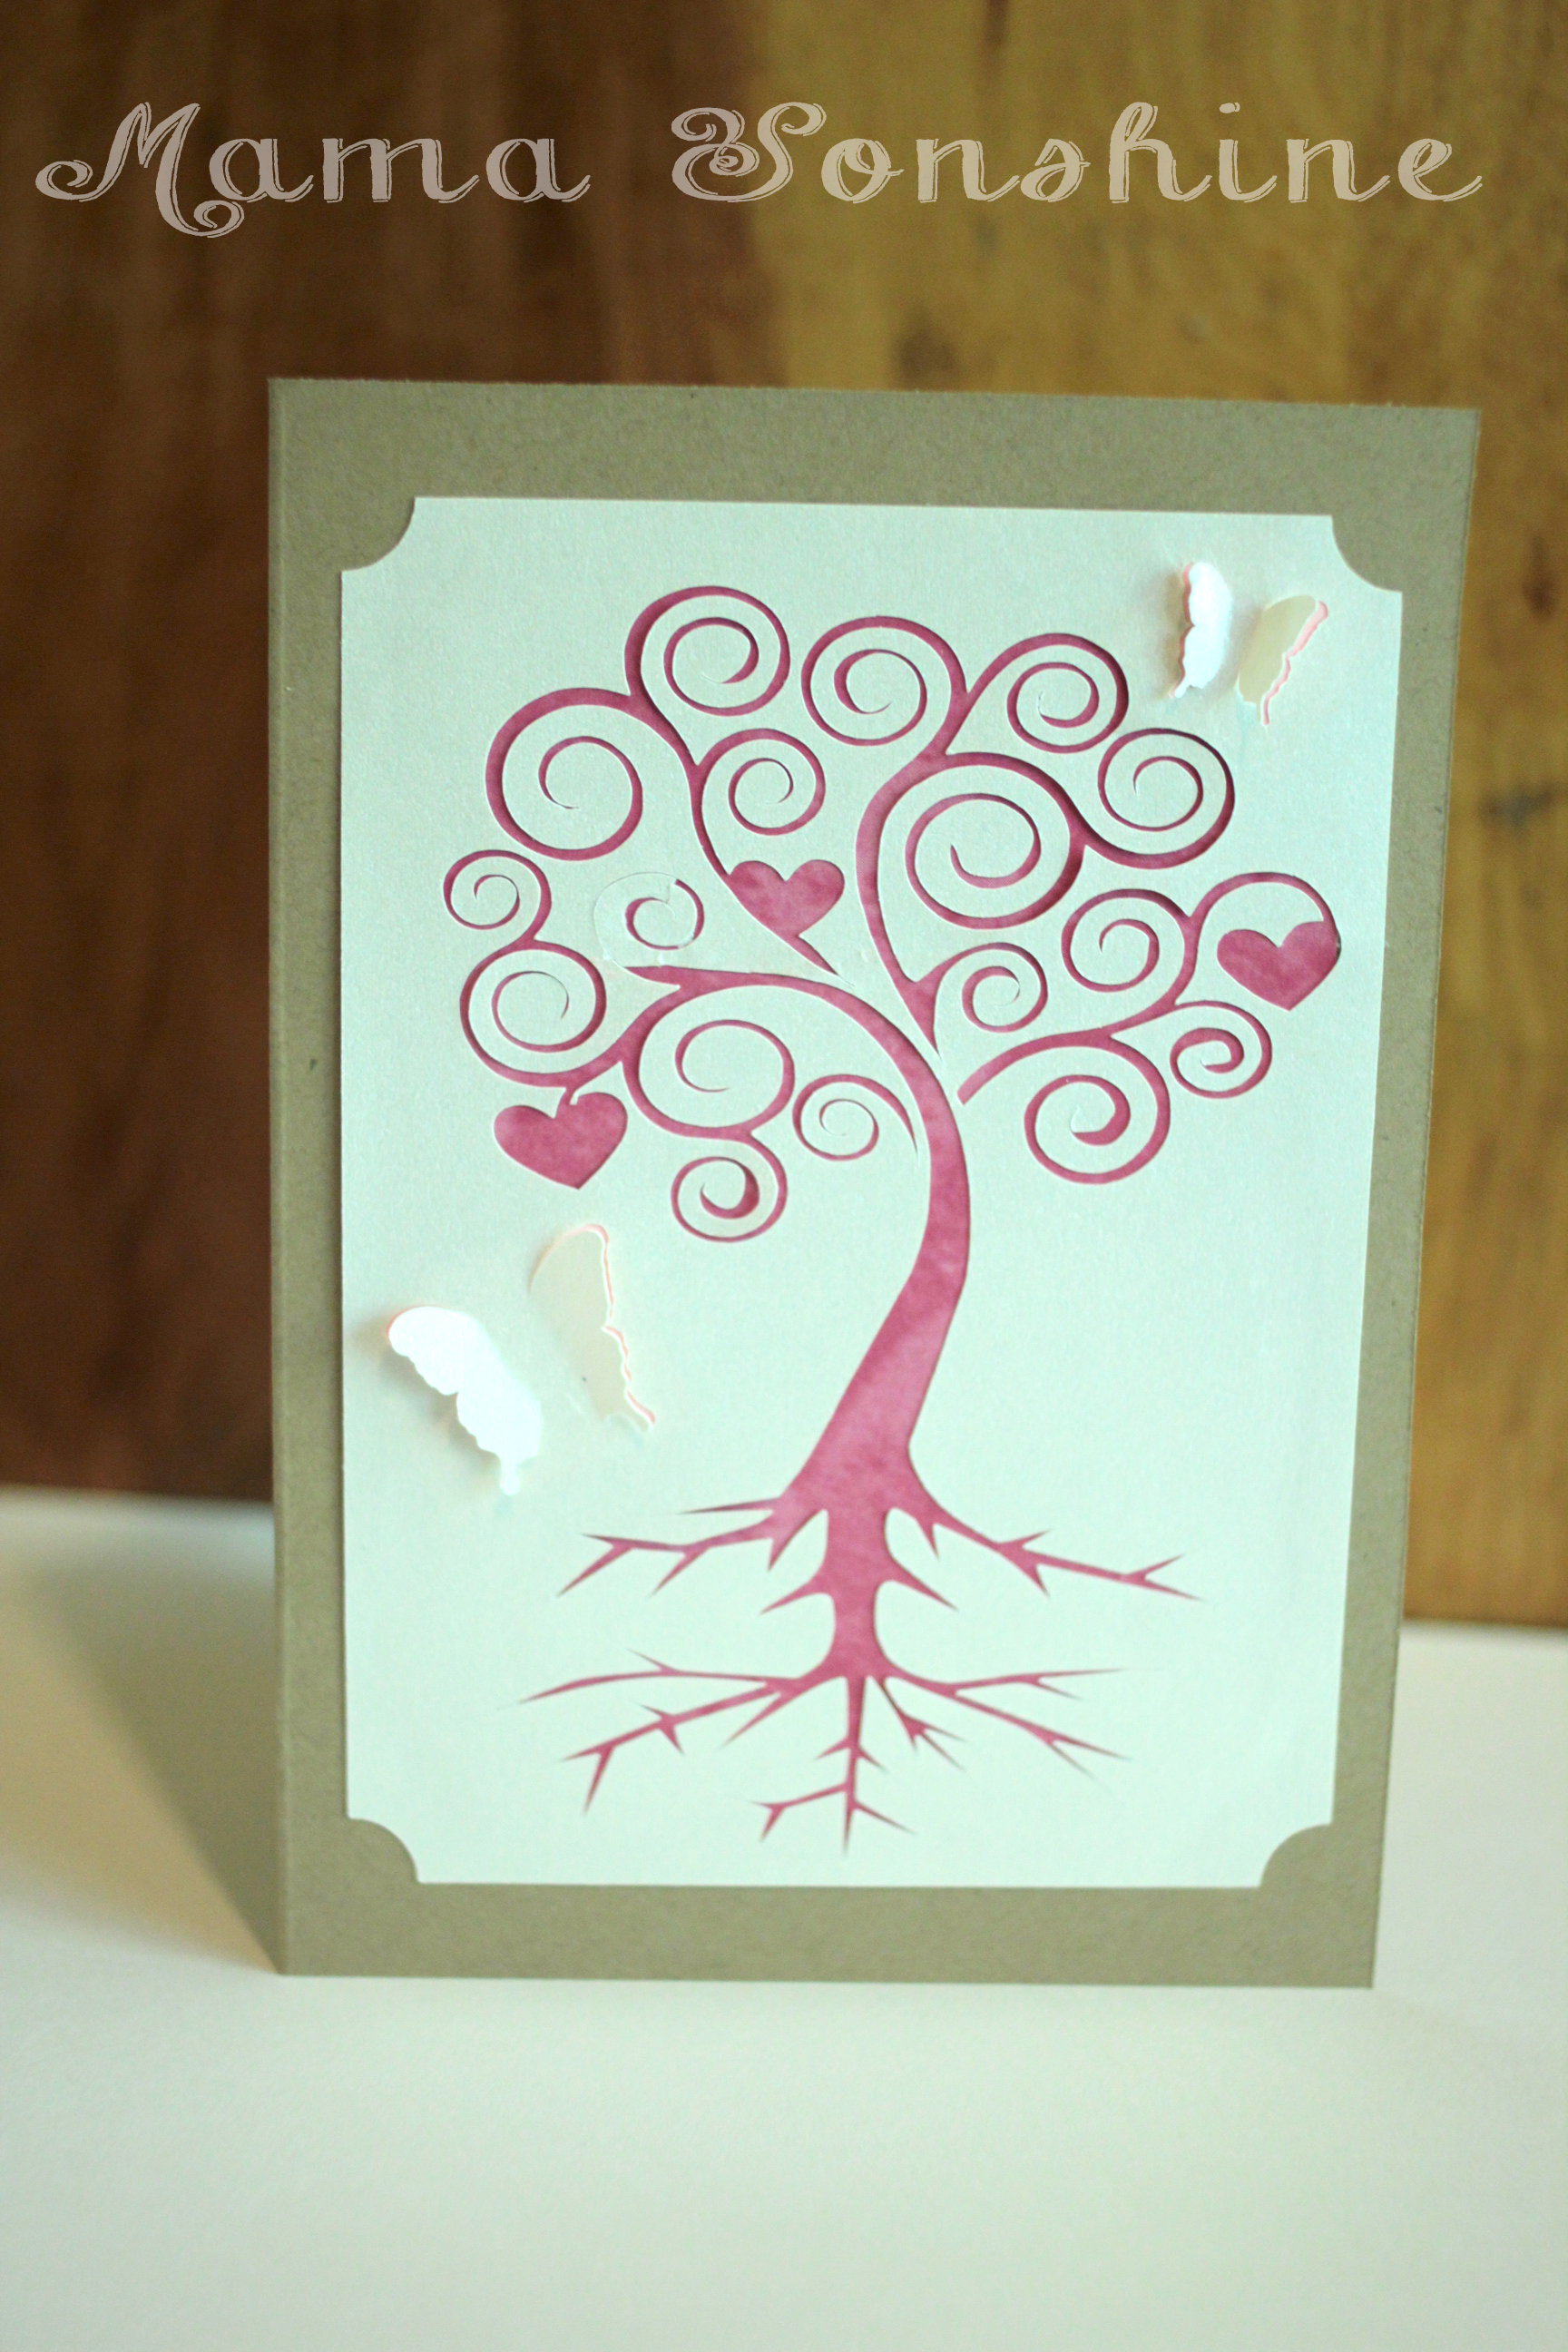
I came up with this next card after seeing the quote “There are two gifts we should give our children; one is roots and the other is wings” on-line while looking for mother’s day quotes. Turns out my mom has had this quote hanging in her house for decades….and I had no idea.
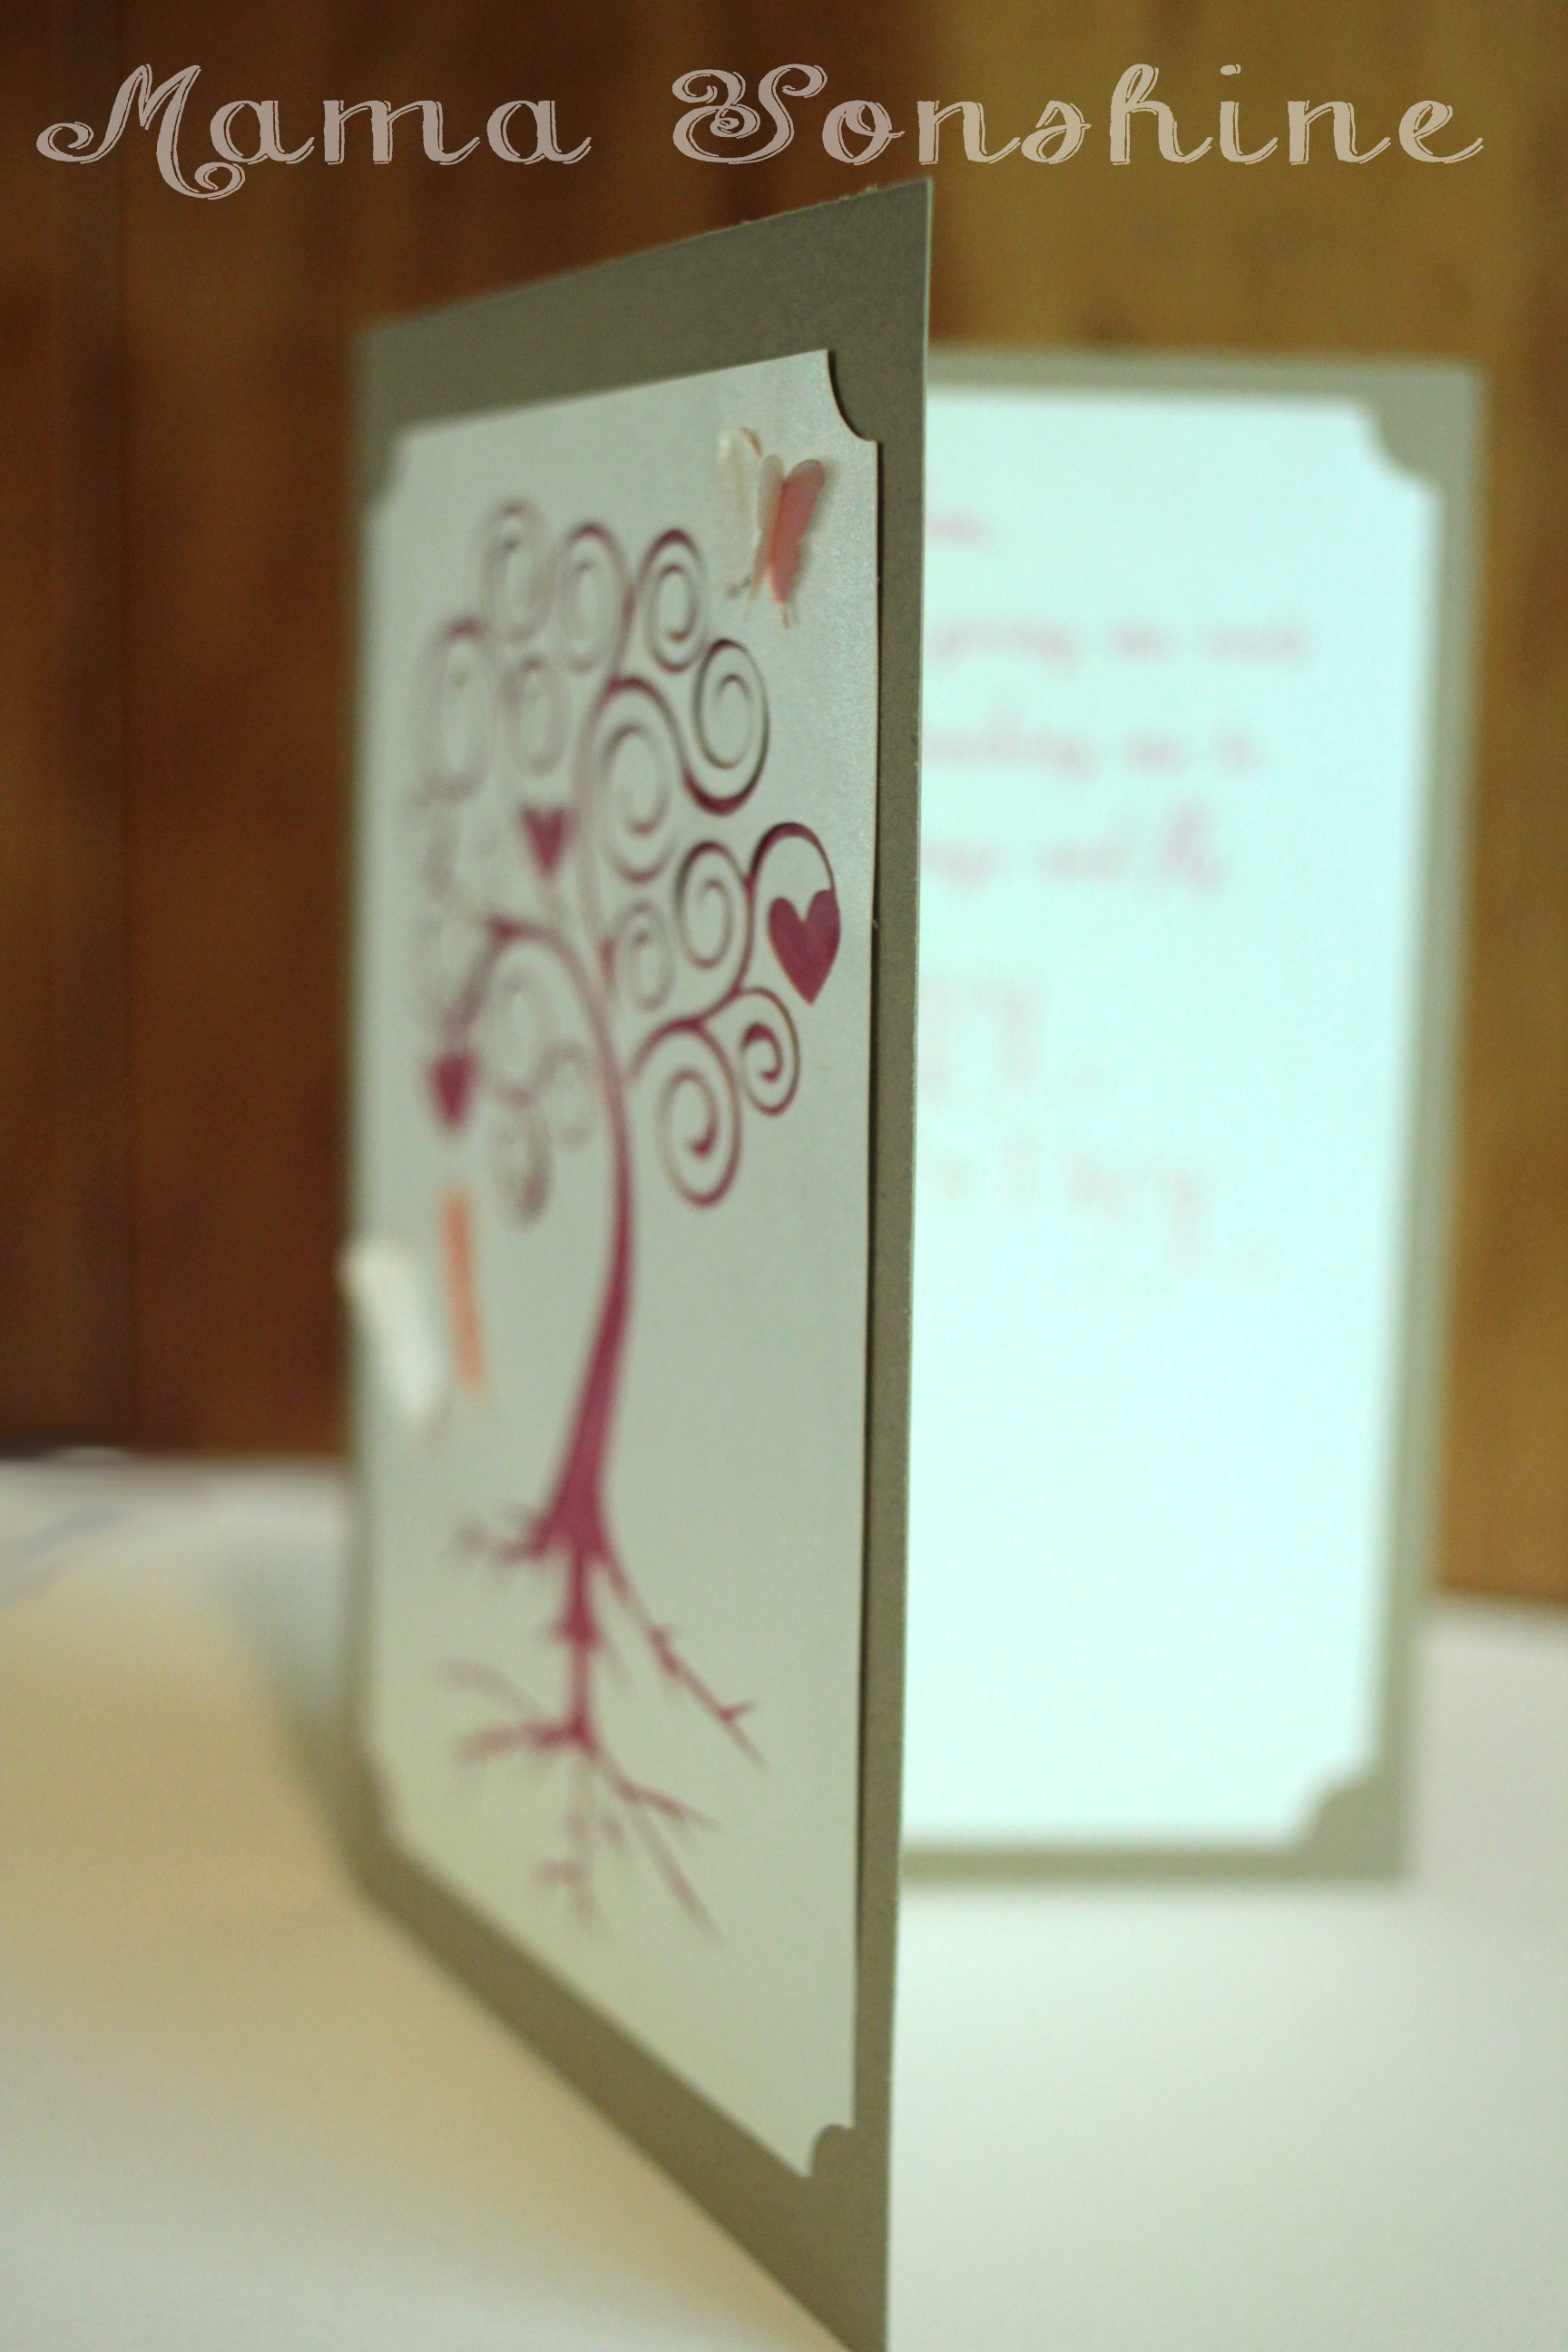
I used a champagne metallic paper for the top layer and on the inside of the card. I used Silhouette’s print and cut feature to write the sentiment and cut out a frame that matches the one on the front of the card. I used different colors for behind the butterflies and the tree. I only had the machine make a cut on the outer edge of the butterfly wings, so they just pop out a little.
The sentiment on the inside says “Mom, Thank you for giving me roots to grow and teaching me to spread my wings and fly. Happy Mother’s Day” While this one was probably the easiest to put together, it is my favorite. I think it is elegant in its simplicity.
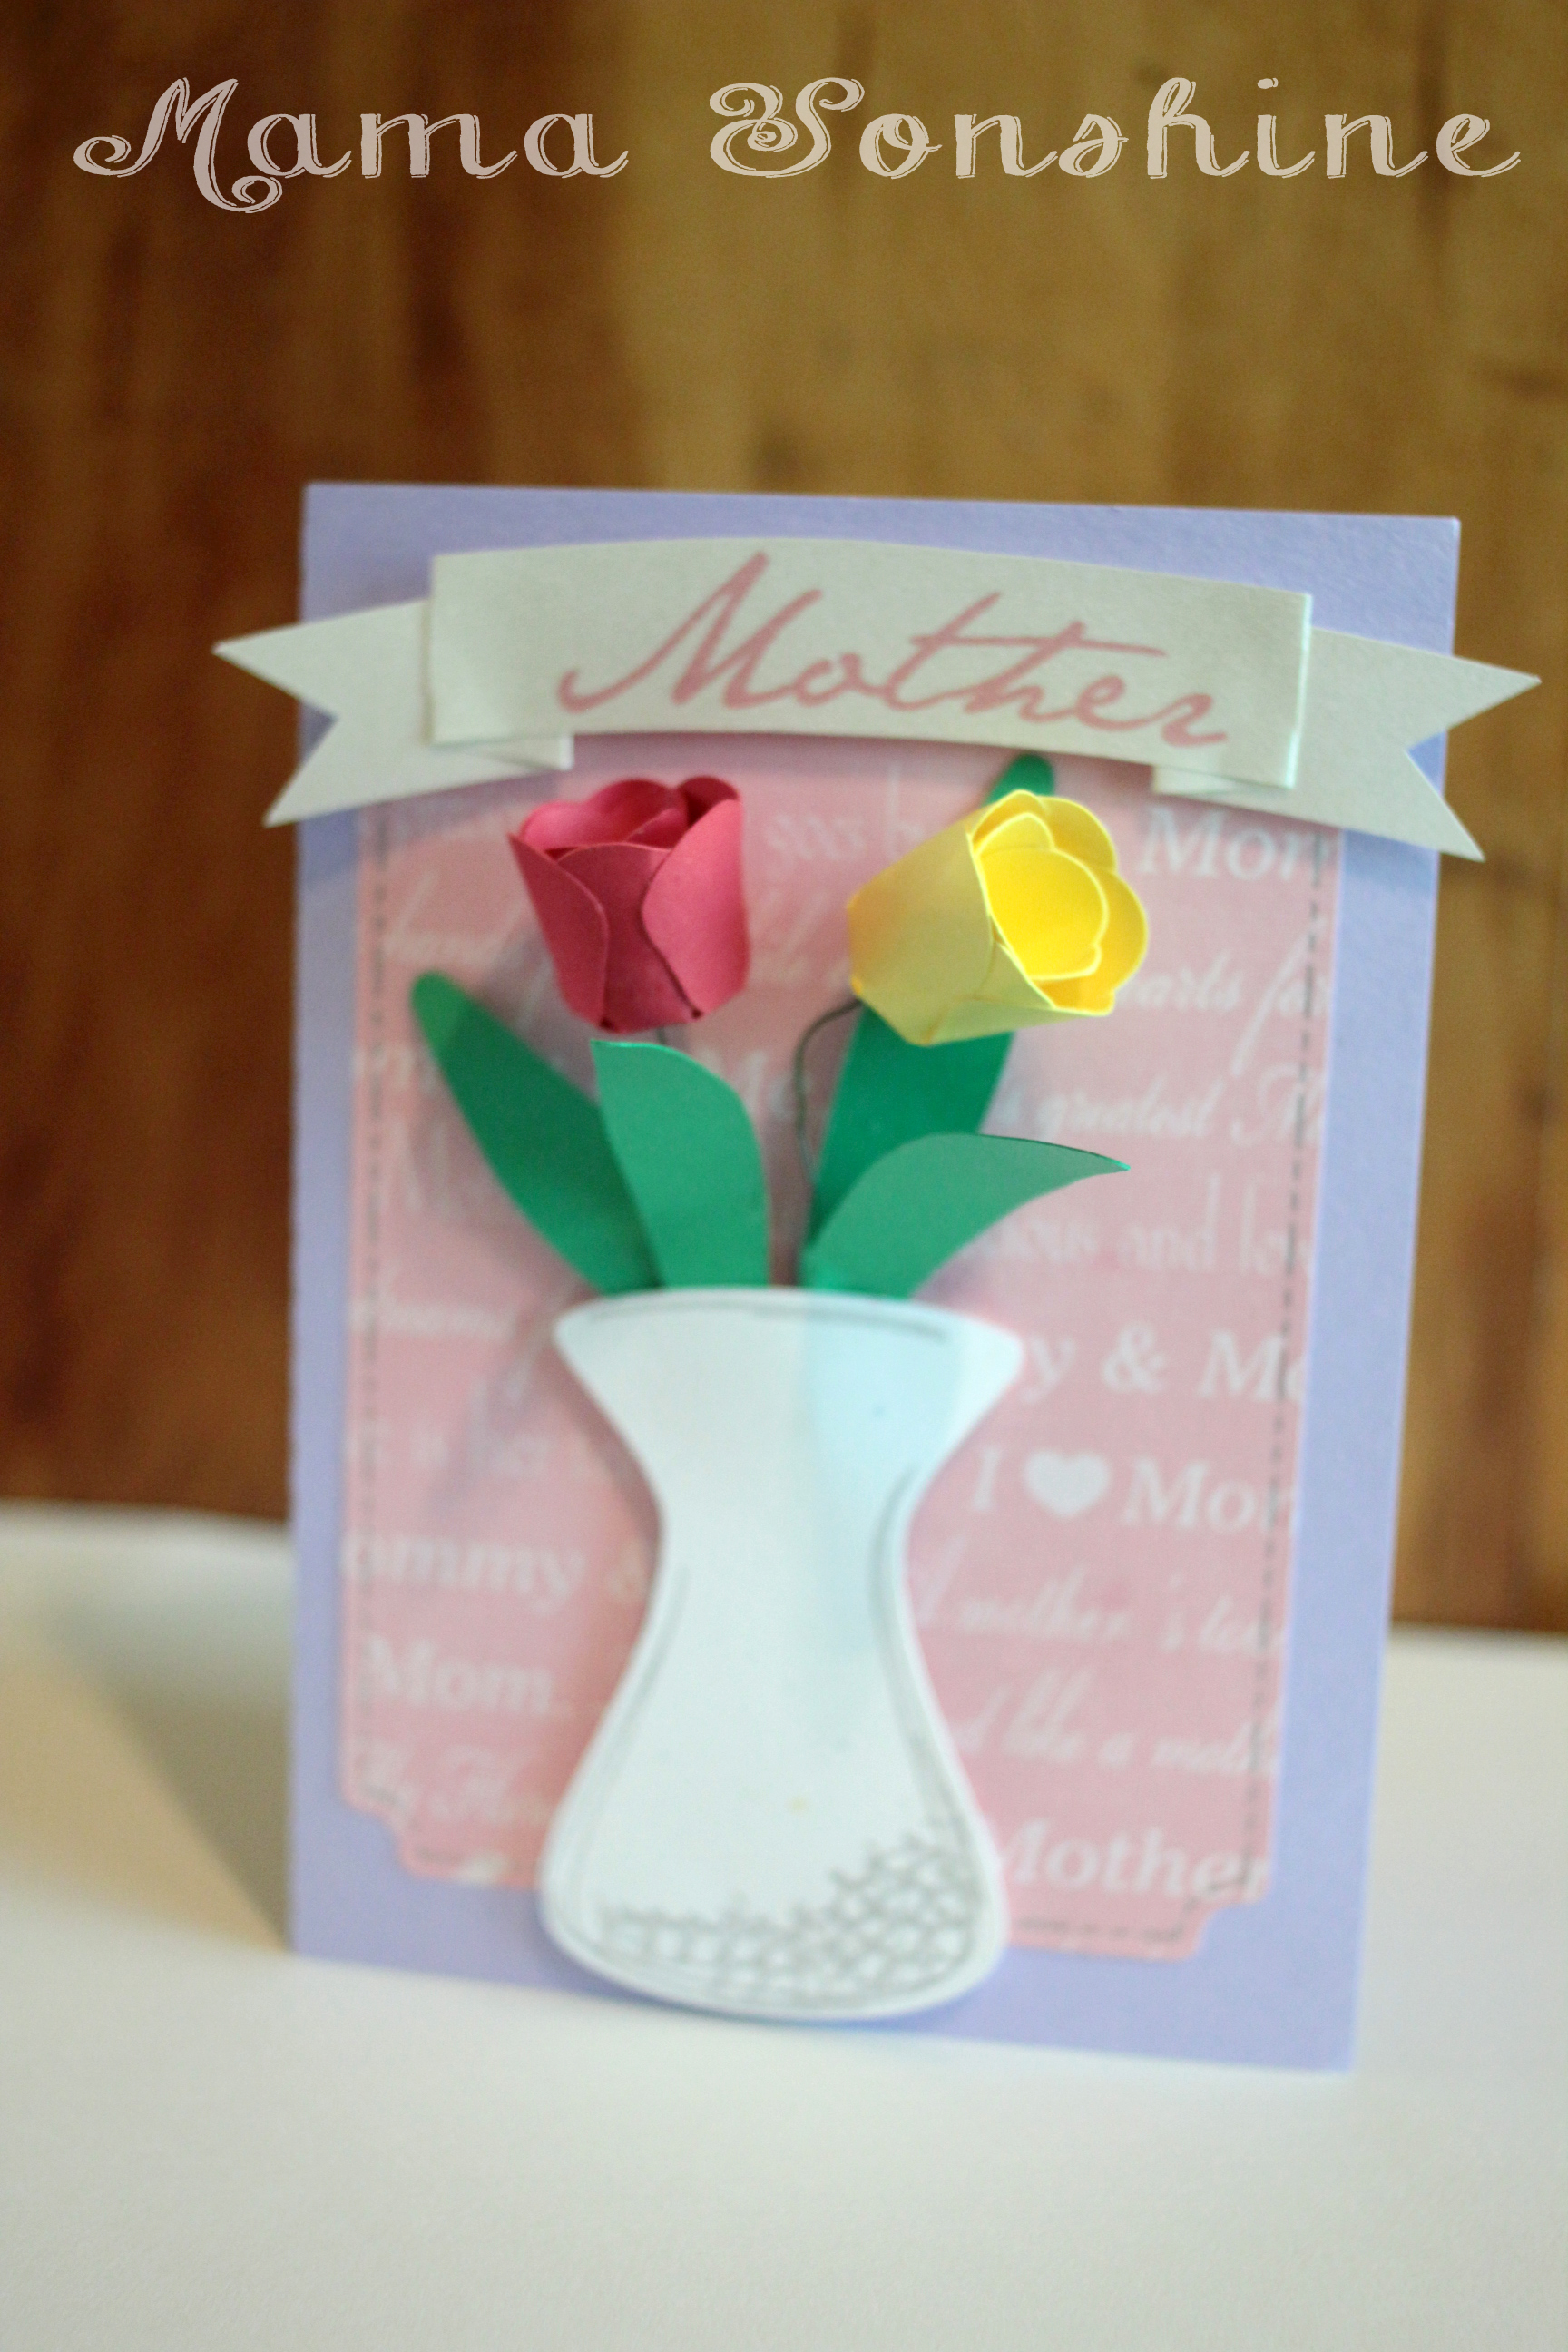
When I decided to make a floral themed mother’s day card, this next card is what I had in mind. I wanted to make a vase of flowers on the front of the card. The tulips would have been too difficult to put together if I had made them any smaller, and at that size, only two would fit in the vase.
In the end, two was the perfect number, because it didn’t clutter up the card. I used pre-printed mother scrapbooking paper for the background and a silver sketch pen for the faux stitching. For the “Mother” banner I used the champagne metallic paper and the print and cut feature. I tried using sketch pens, but it just wasn’t the right look.
I originally had thought about using velum or some kind of clear paper for the vase, to give it the look of glass, but then you could see the floral wire in the vase, and all the hot glue. Not a pretty sight.
I still didn’t like the vase, just made with plain paper, so I used the sketch pens to add some dimension to it. In the Designer Edition there is a sketch feature that allows you to fill in shapes, or change lines, to make the shape look more hand drawn, which is what I did to the vase.
I am very pleased with how this card turned out. On the inside it says “May all the love you give to others come back to you on this special day. Happy Mother’s Day”
I didn’t want to leave the Grandmas out. So I made this card too, although it doesn’t have any flowers on it. I also made one in different colors. It is very cute, but thick, so it doesn’t really mail well.
Inside it says “Only the best moms get promoted to Grandmother. Happy Mother’s Day”
Happy Crafting
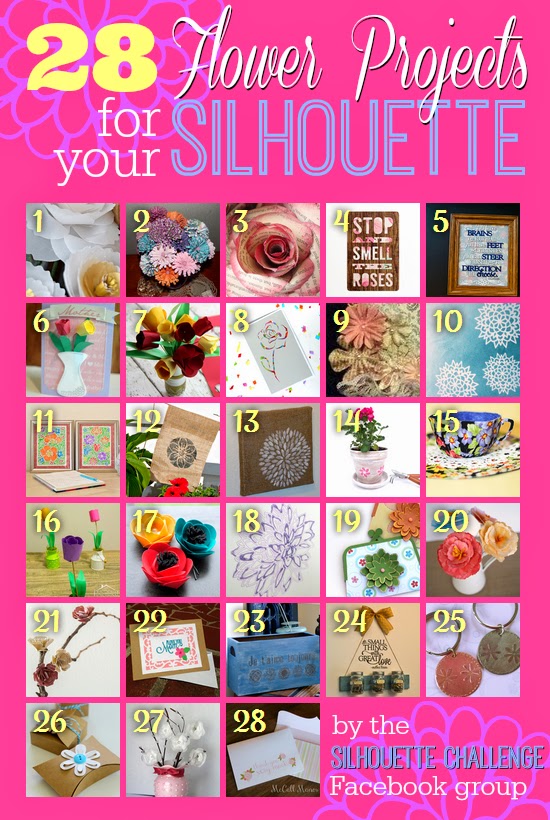
Want to Check Out More Silhouette Projects?
My Silhouette Challenge buddies and I are all sharing projects on our blogs today, so pursue the projects below for a wealth of Silhouette inspiration!
I belong to a few Silhouette related Facebook pages. They are a wonderful support group for beginners and experienced users.
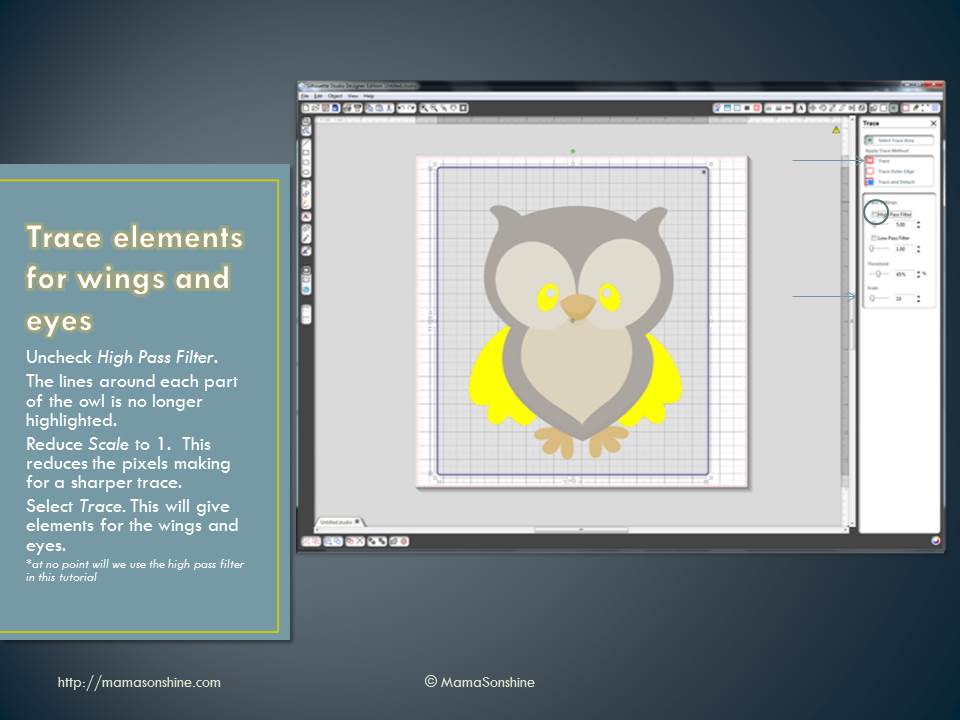
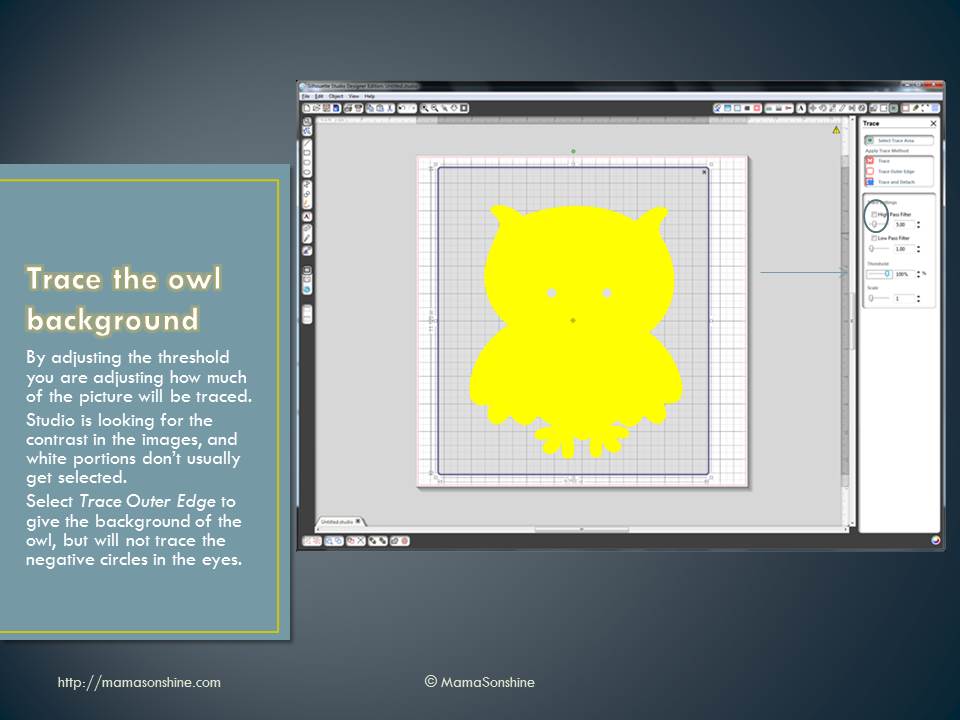
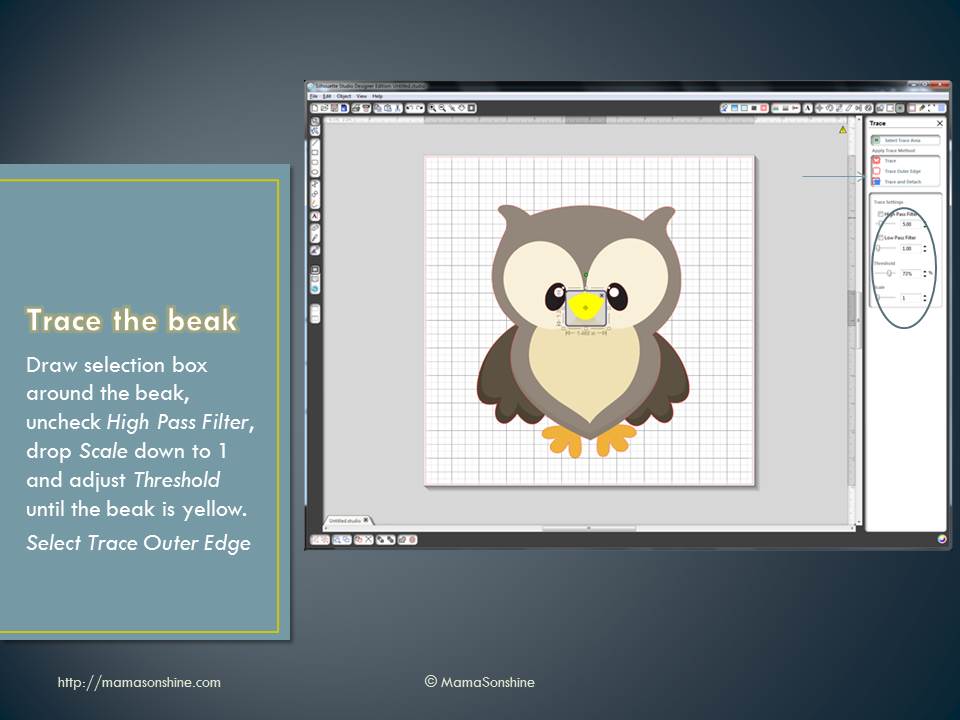
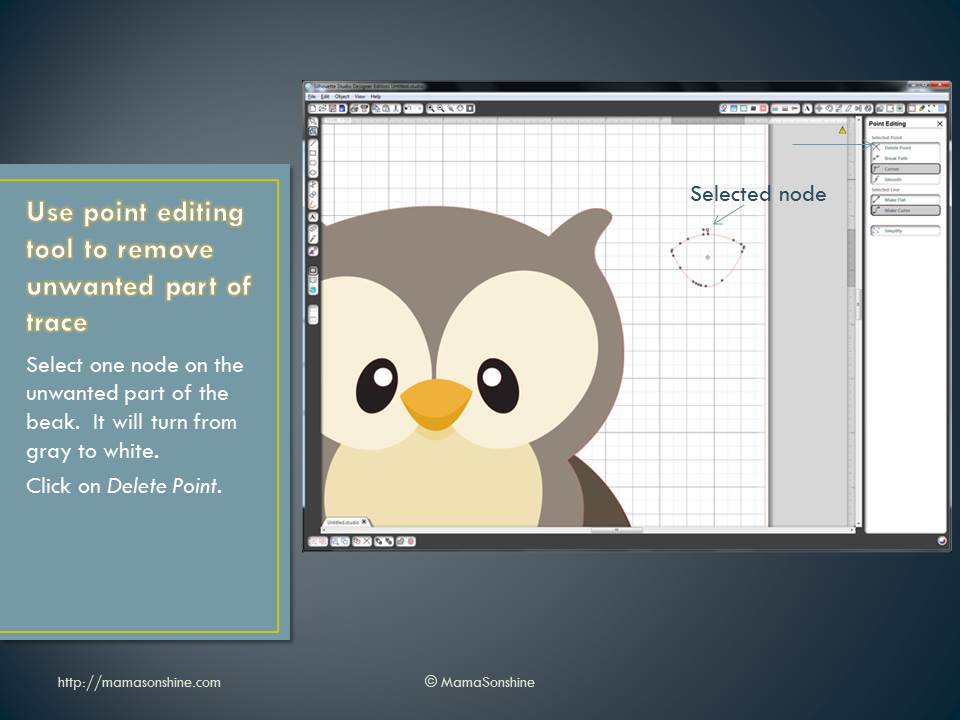
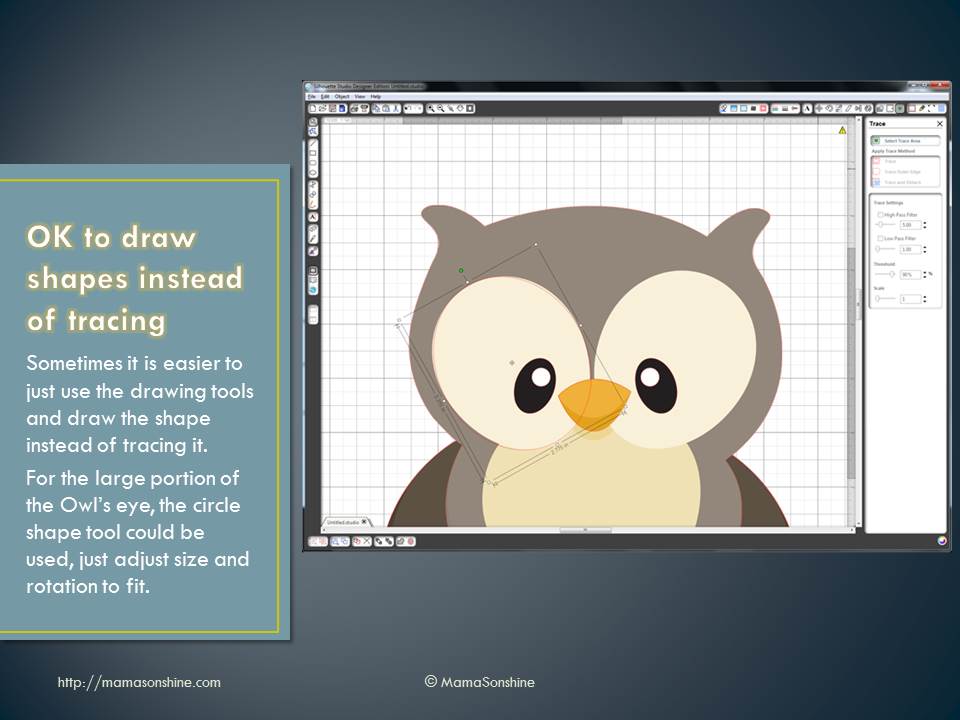
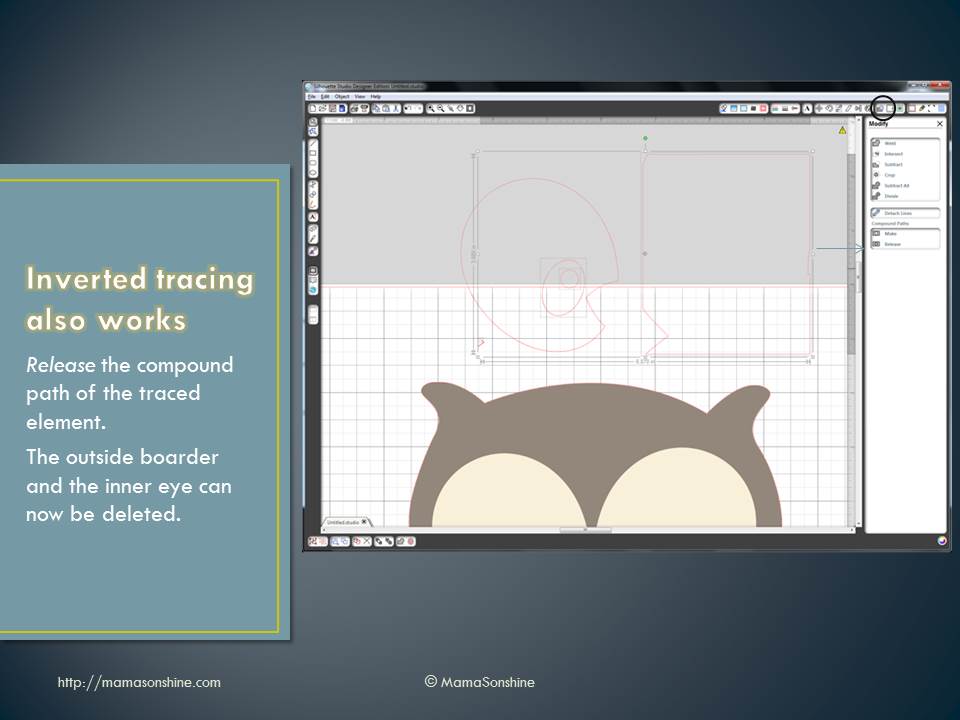
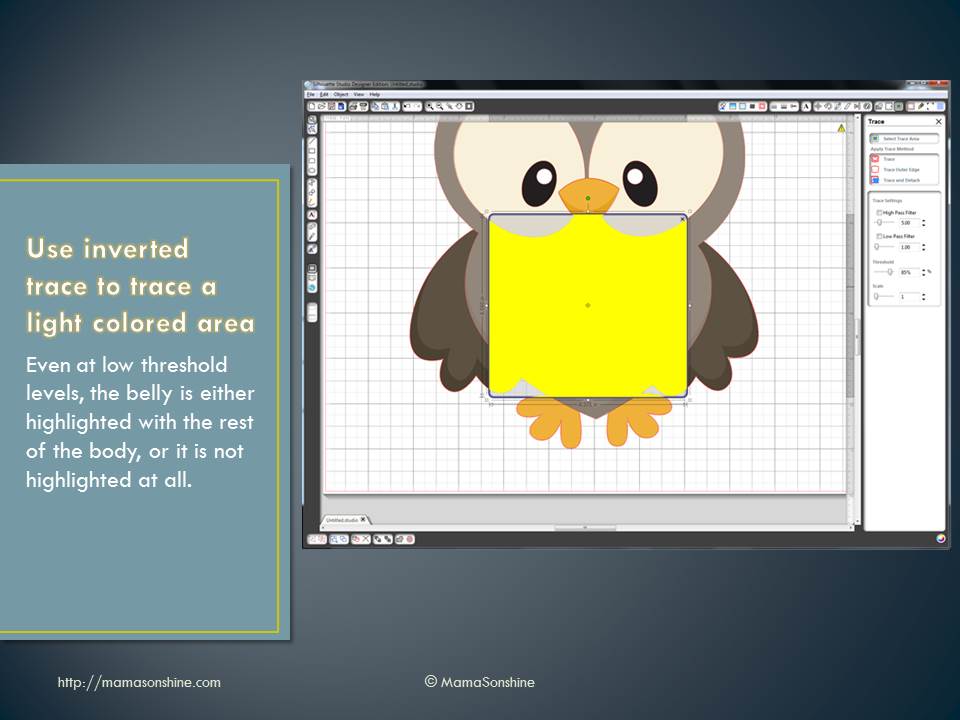
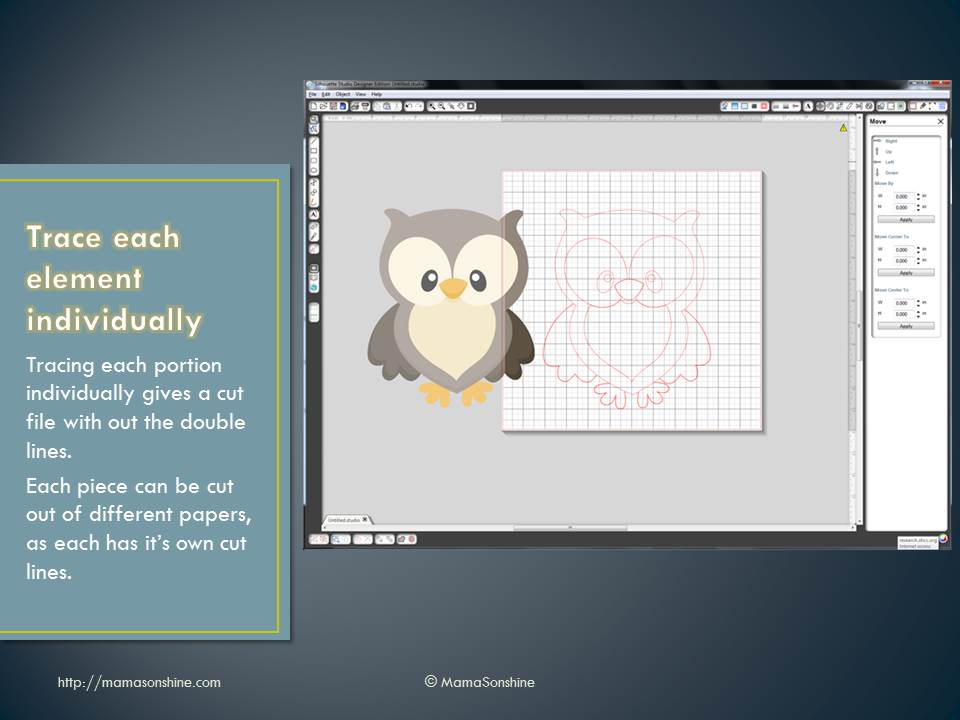
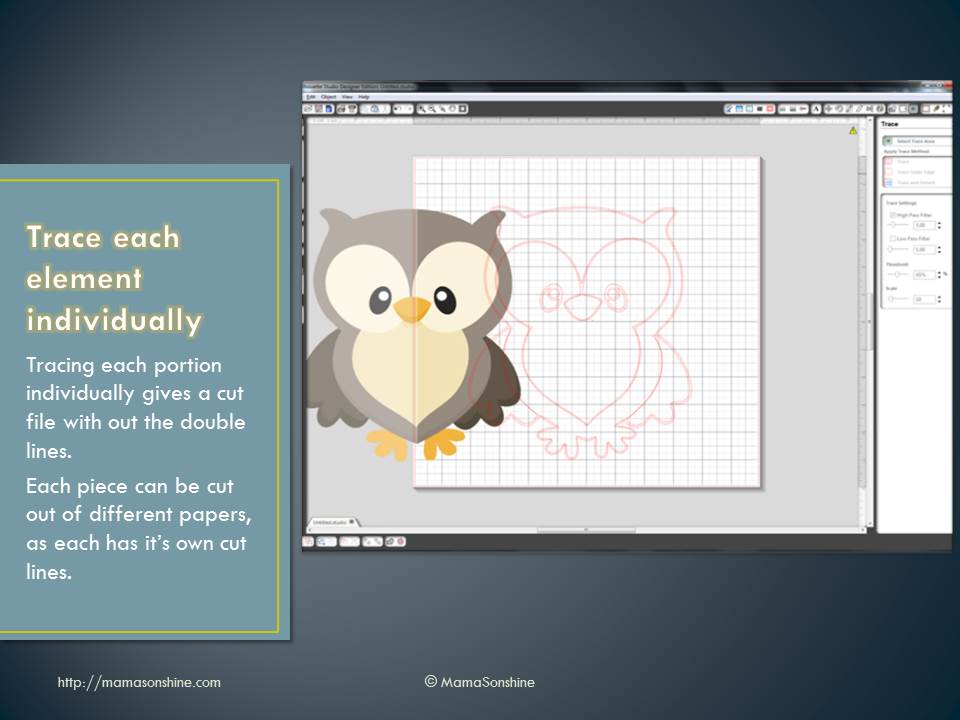
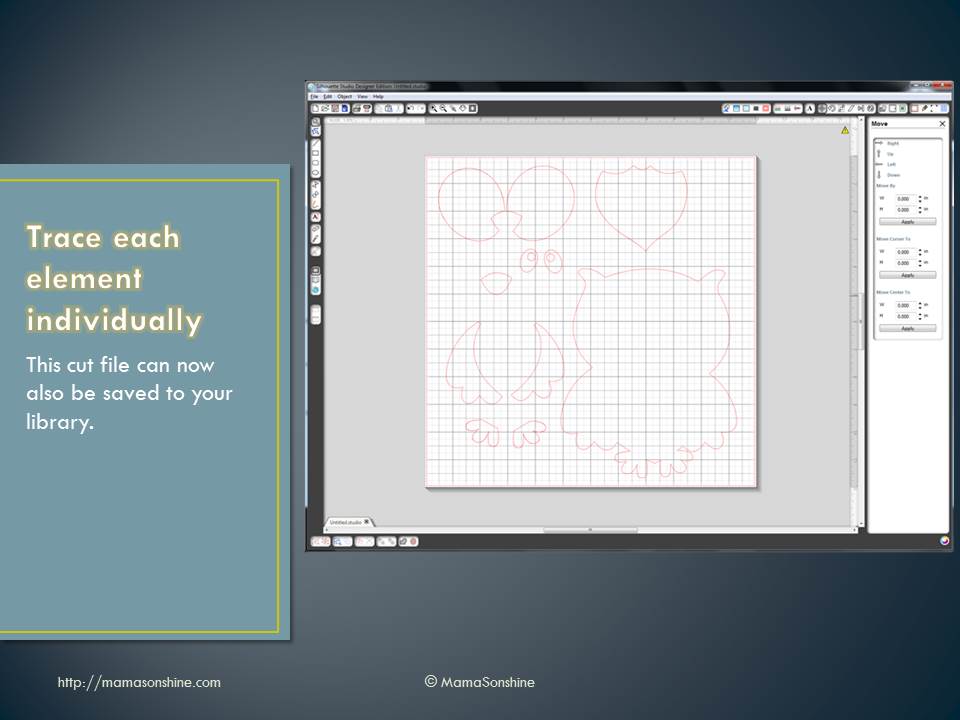
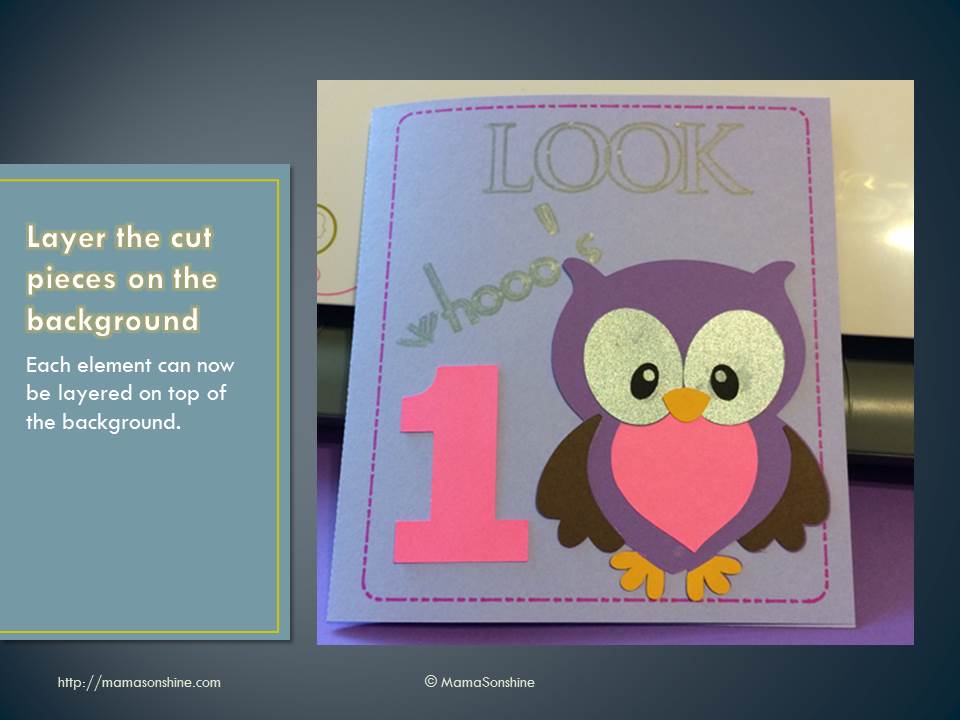
More and more I see questions about tracing images in the Silhouette software in order to make them cut files. This is one of the main reasons I decided to go with the Silhouette brand cutting machine.
You are able to take any image and make your own cutting file. I make a lot of decorations and invitations in Photoshop, then cut them with my Silhouette.
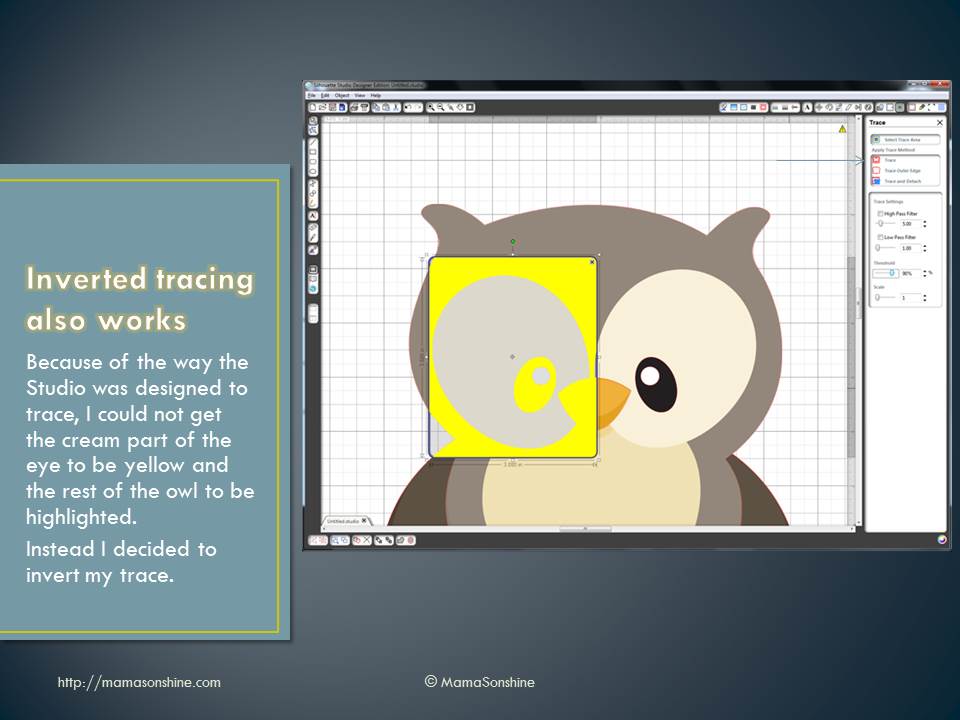
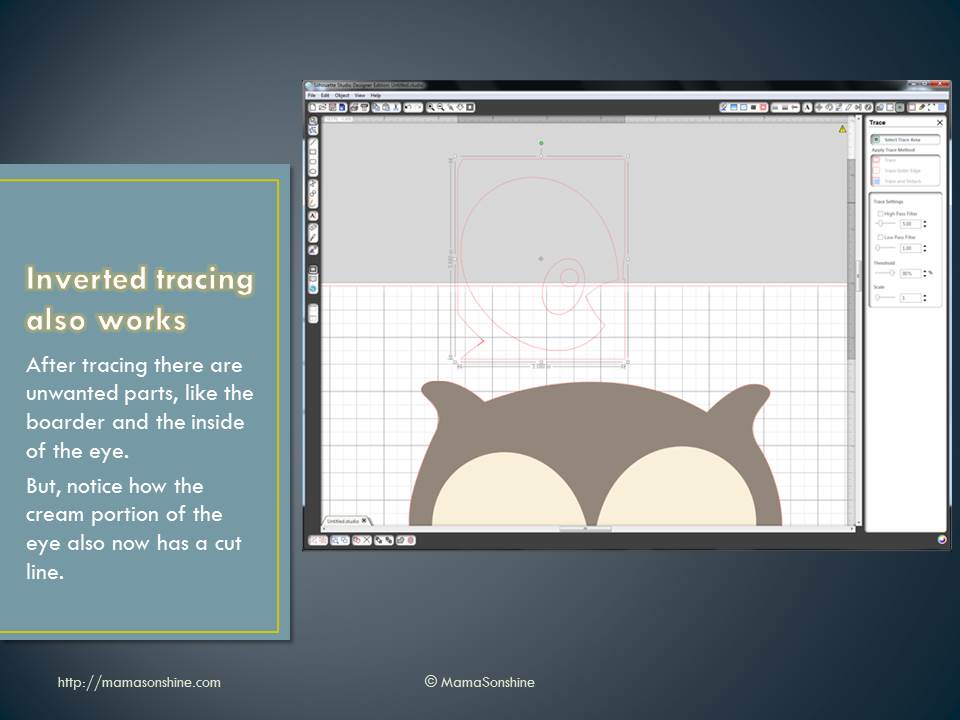
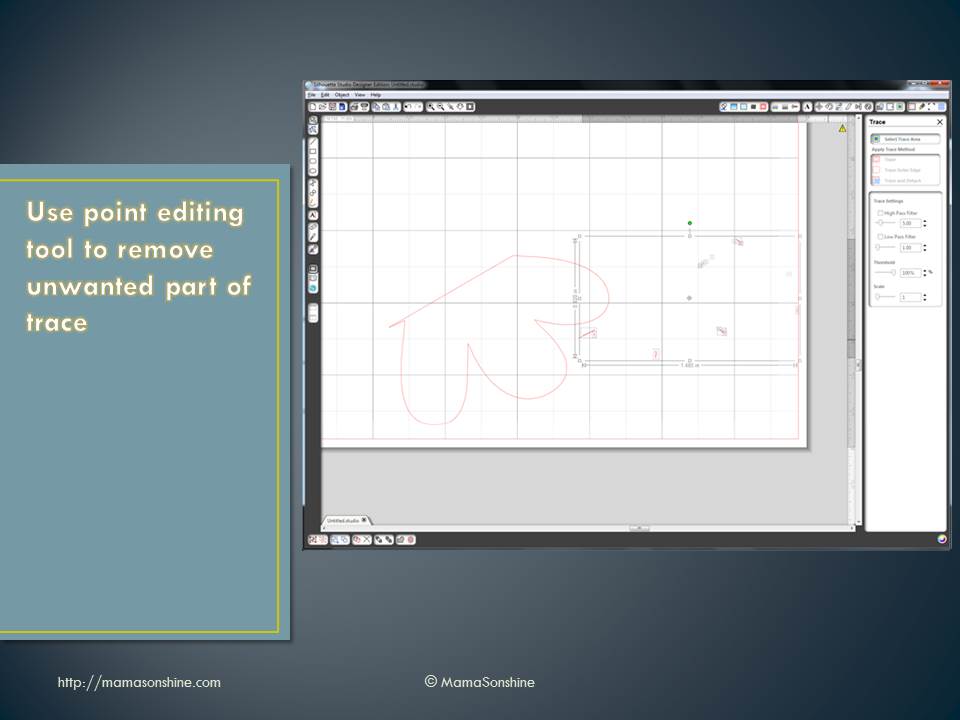
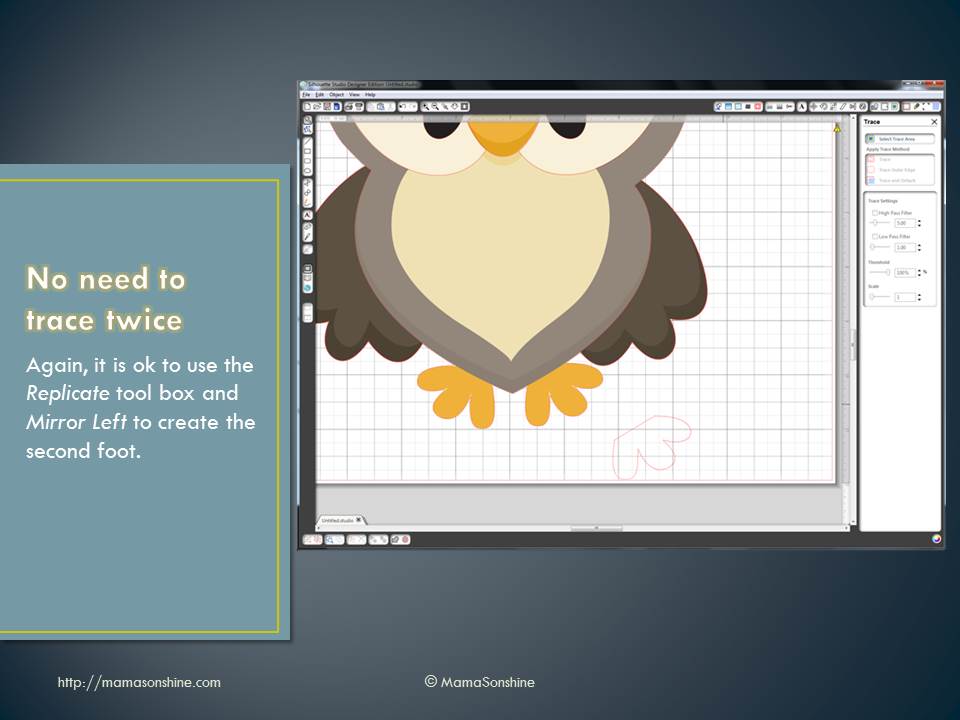
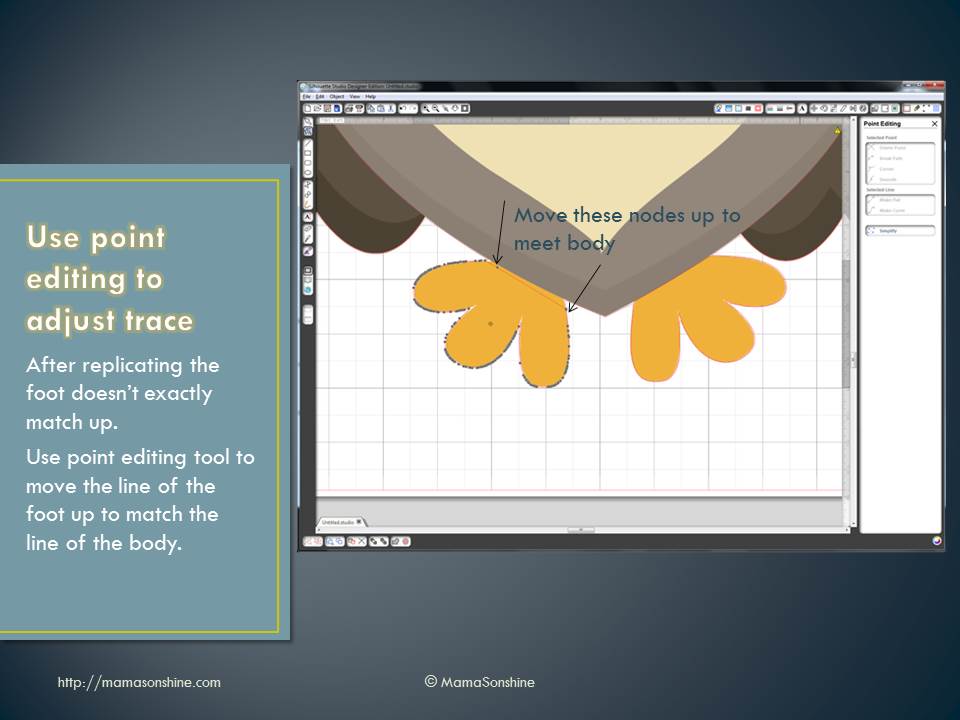
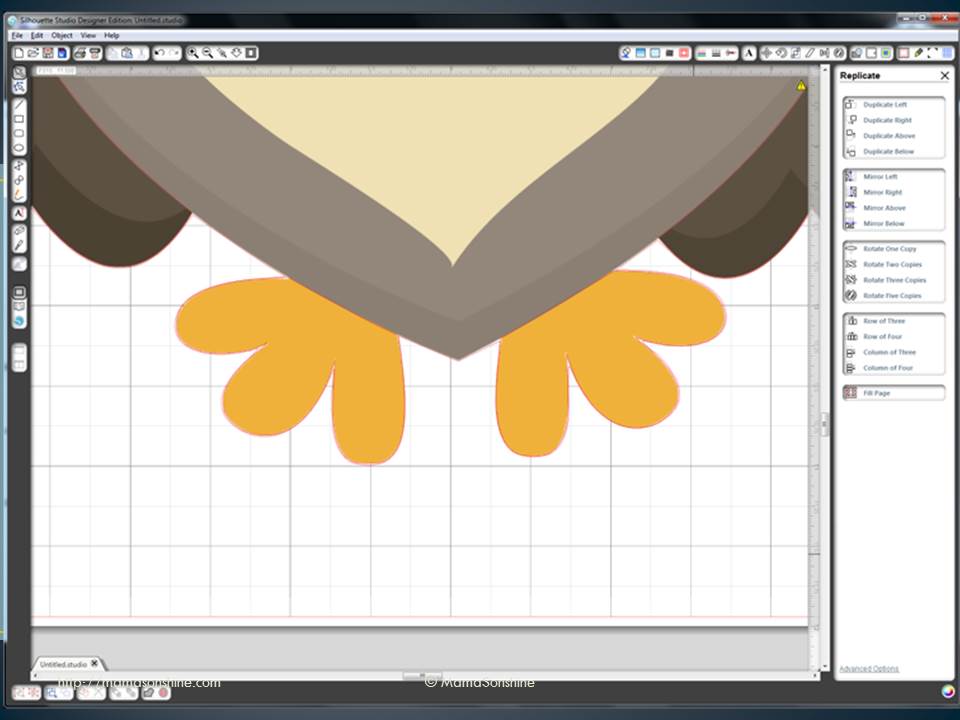
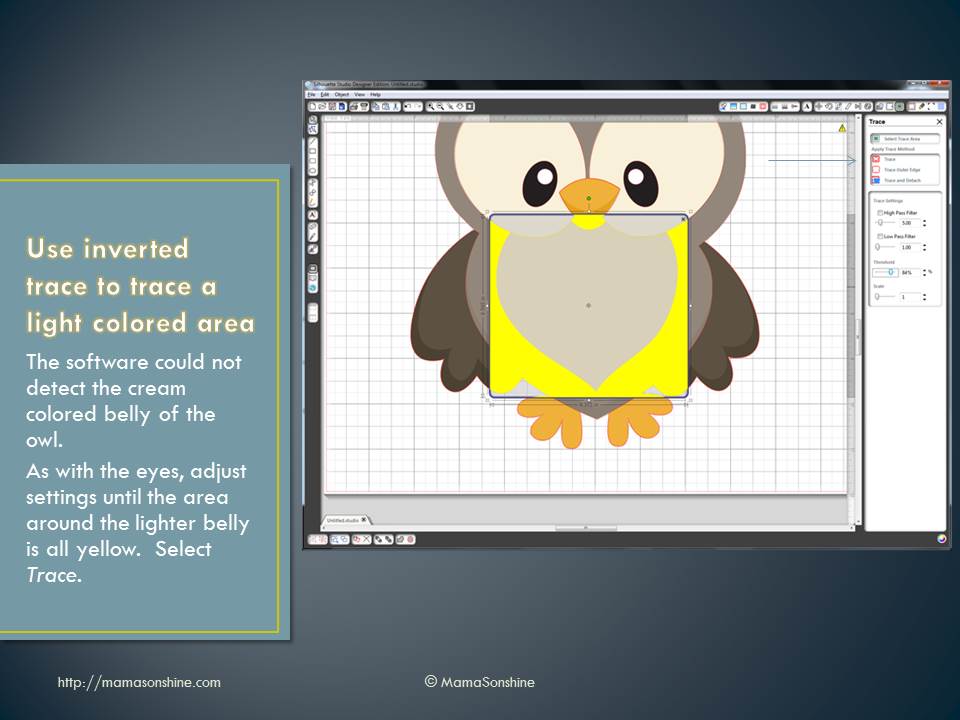
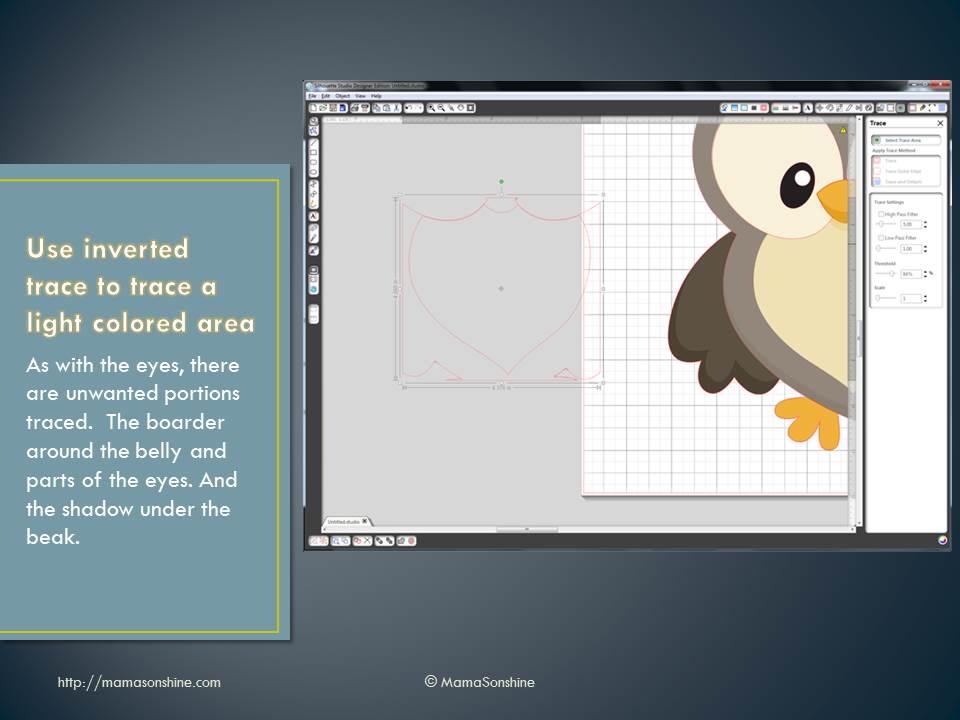
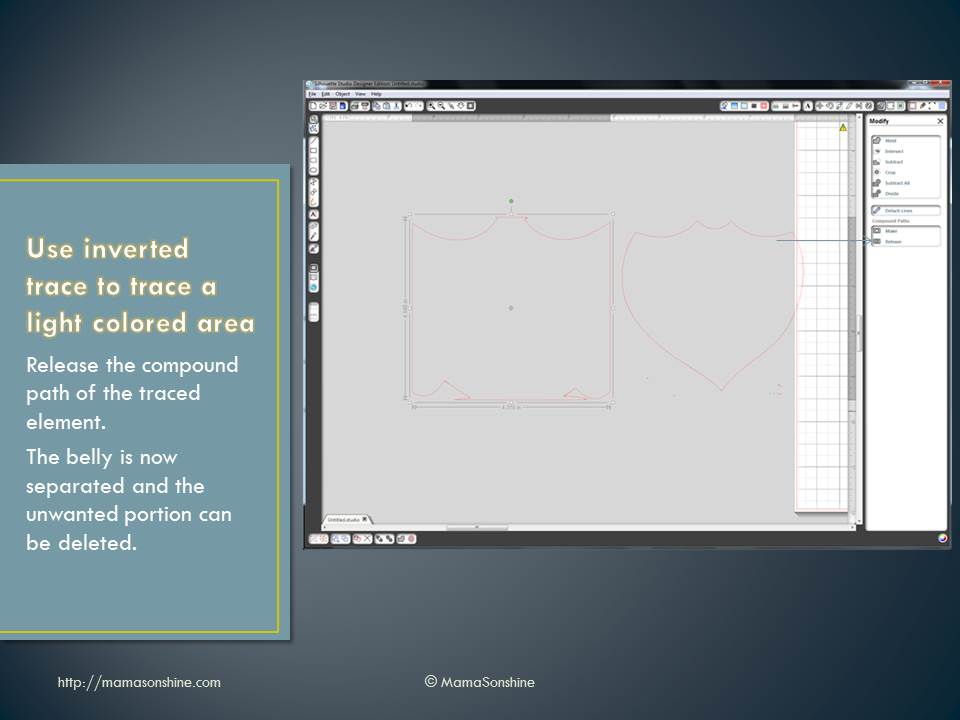
However, the tracing tool in the software is not that intuitive, so there is usually a number of questions about tracing. I put together this power point to help someone with tracing and thought I would share it with everybody.
Please note, I have the second version of the software, as I have not taken the plunge and upgraded to the third version. While the settings and option are the same, their location and how you do things might be different. I also have the designer edition, but everything in the tutorial is available in the standard addition.