I wanted to share with you the steps I took to make my son’s birthday shirt. There was a few problems I had that I was able to work through. Hopefully this will help so others won’t get stuck like I did.
In this tutorial I use my Silhouette Cameo and the Silhouette Studio DE software to make a custom shirt for my son’s birthday party. I used graphics from Just So Scrappy‘s YoHo YoHo Pirate kit. I used the Silhouette brand Flocked Heat Transfer Material for the skull, and Avery Dark T-Shirt Transfers for Ink Jet Printers.
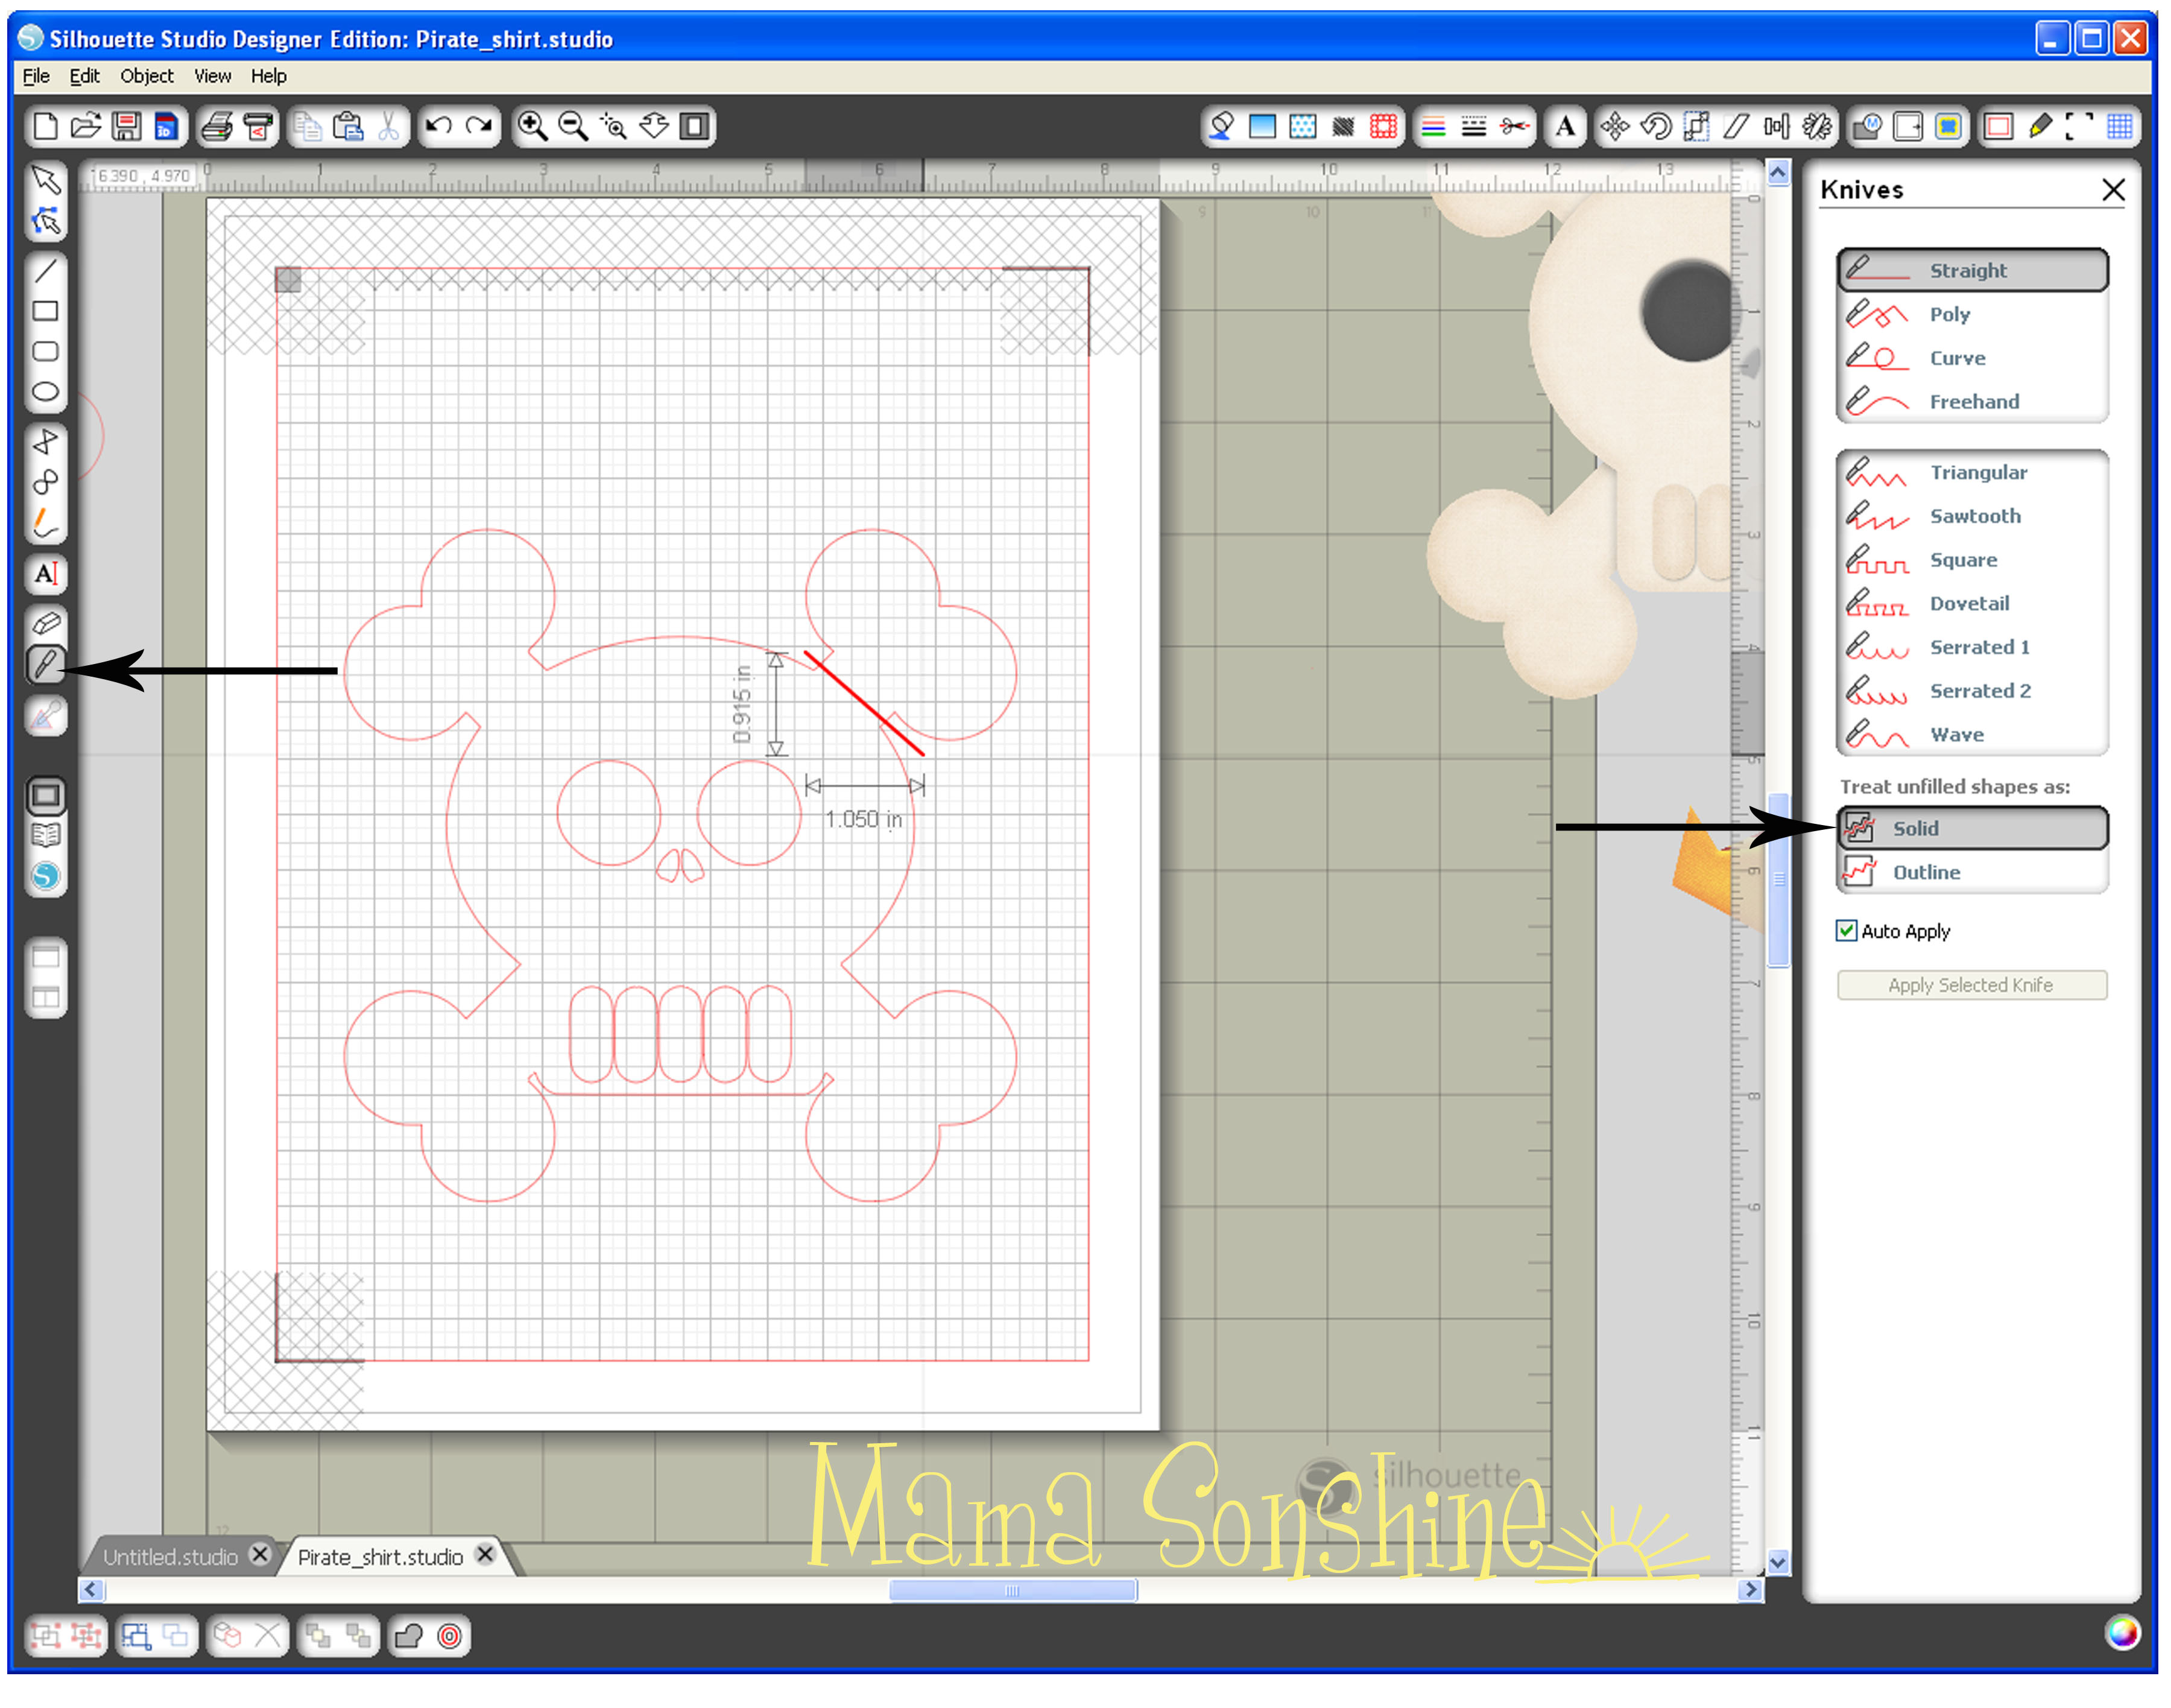
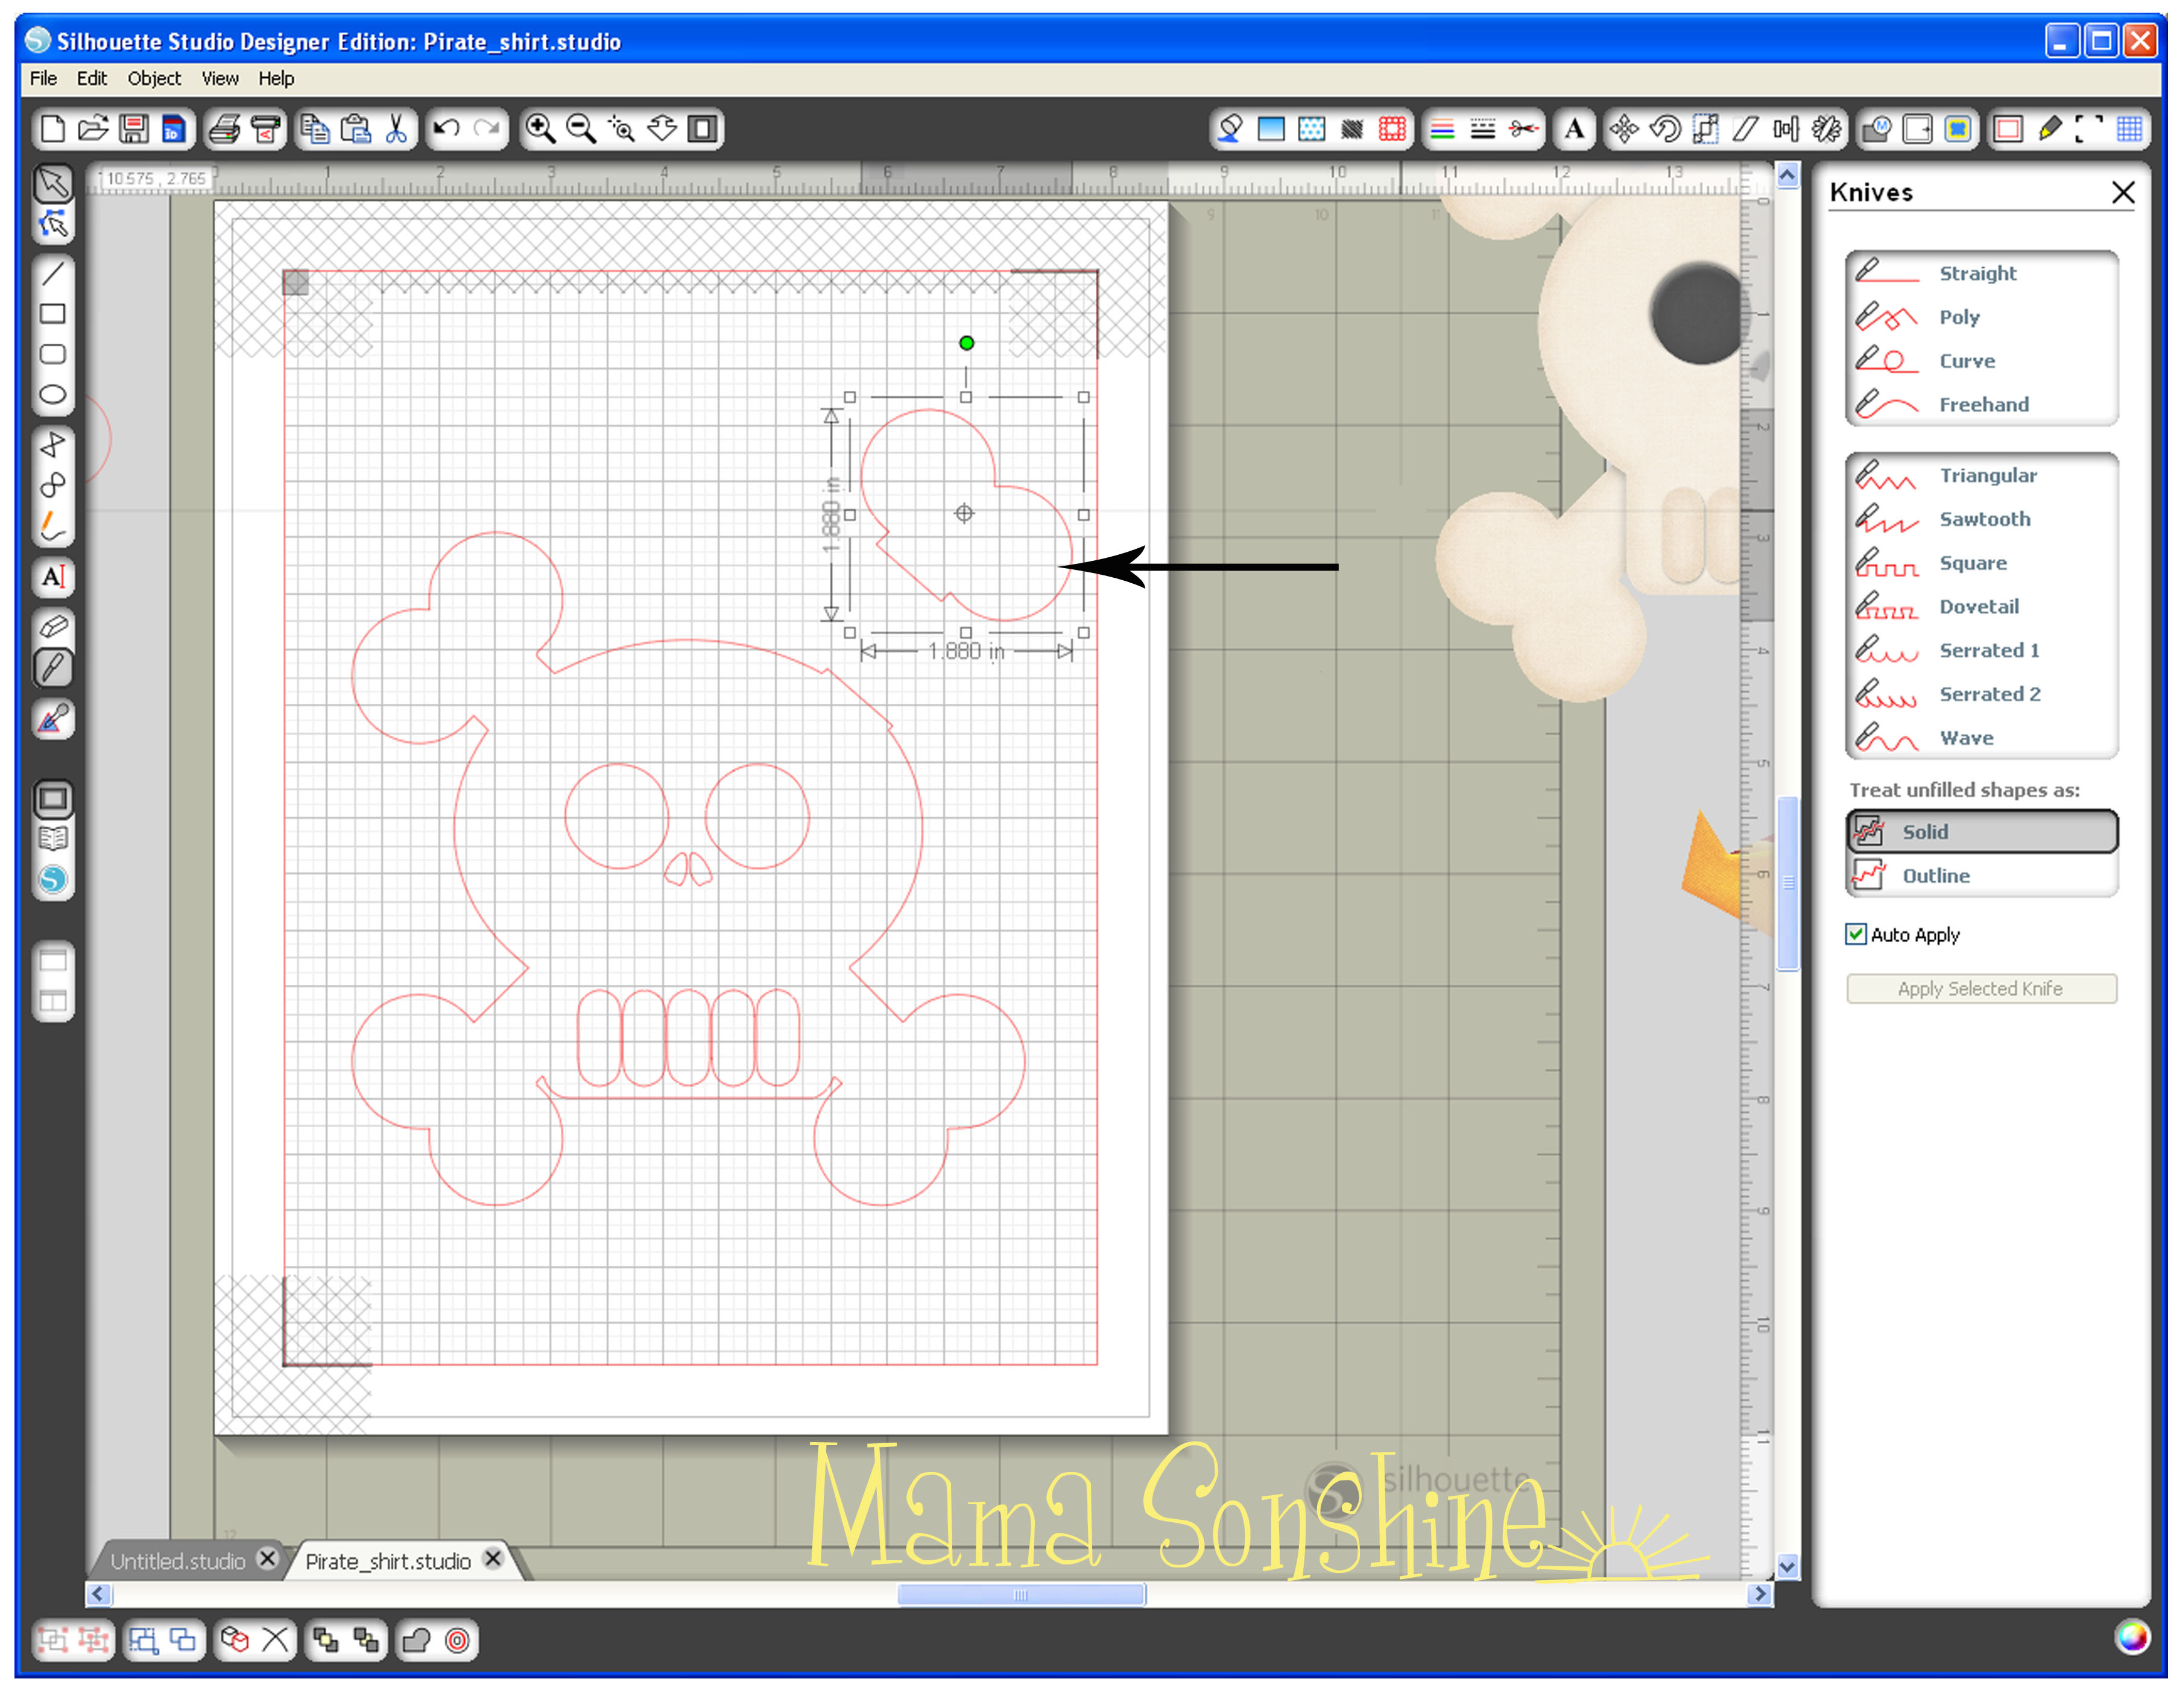
Part One will be how to make the Skull & Crossbones
Part Two will be how to do the words & party hat
Part Three will be how to iron everything on

This part of the shirt was made using printable heat transfer material for the Dark Shirt Transfer Material and an Ink Jet printer. The HTM for light material is different and the steps you take to print and cut are different. Also be sure you know what kind of printer you are going to be using, either ink jet or laser, and get the appropriate transfers. The way the ink sets on the paper is different, if you use a laser printer on the ink jet papers your color will come off when ironed.
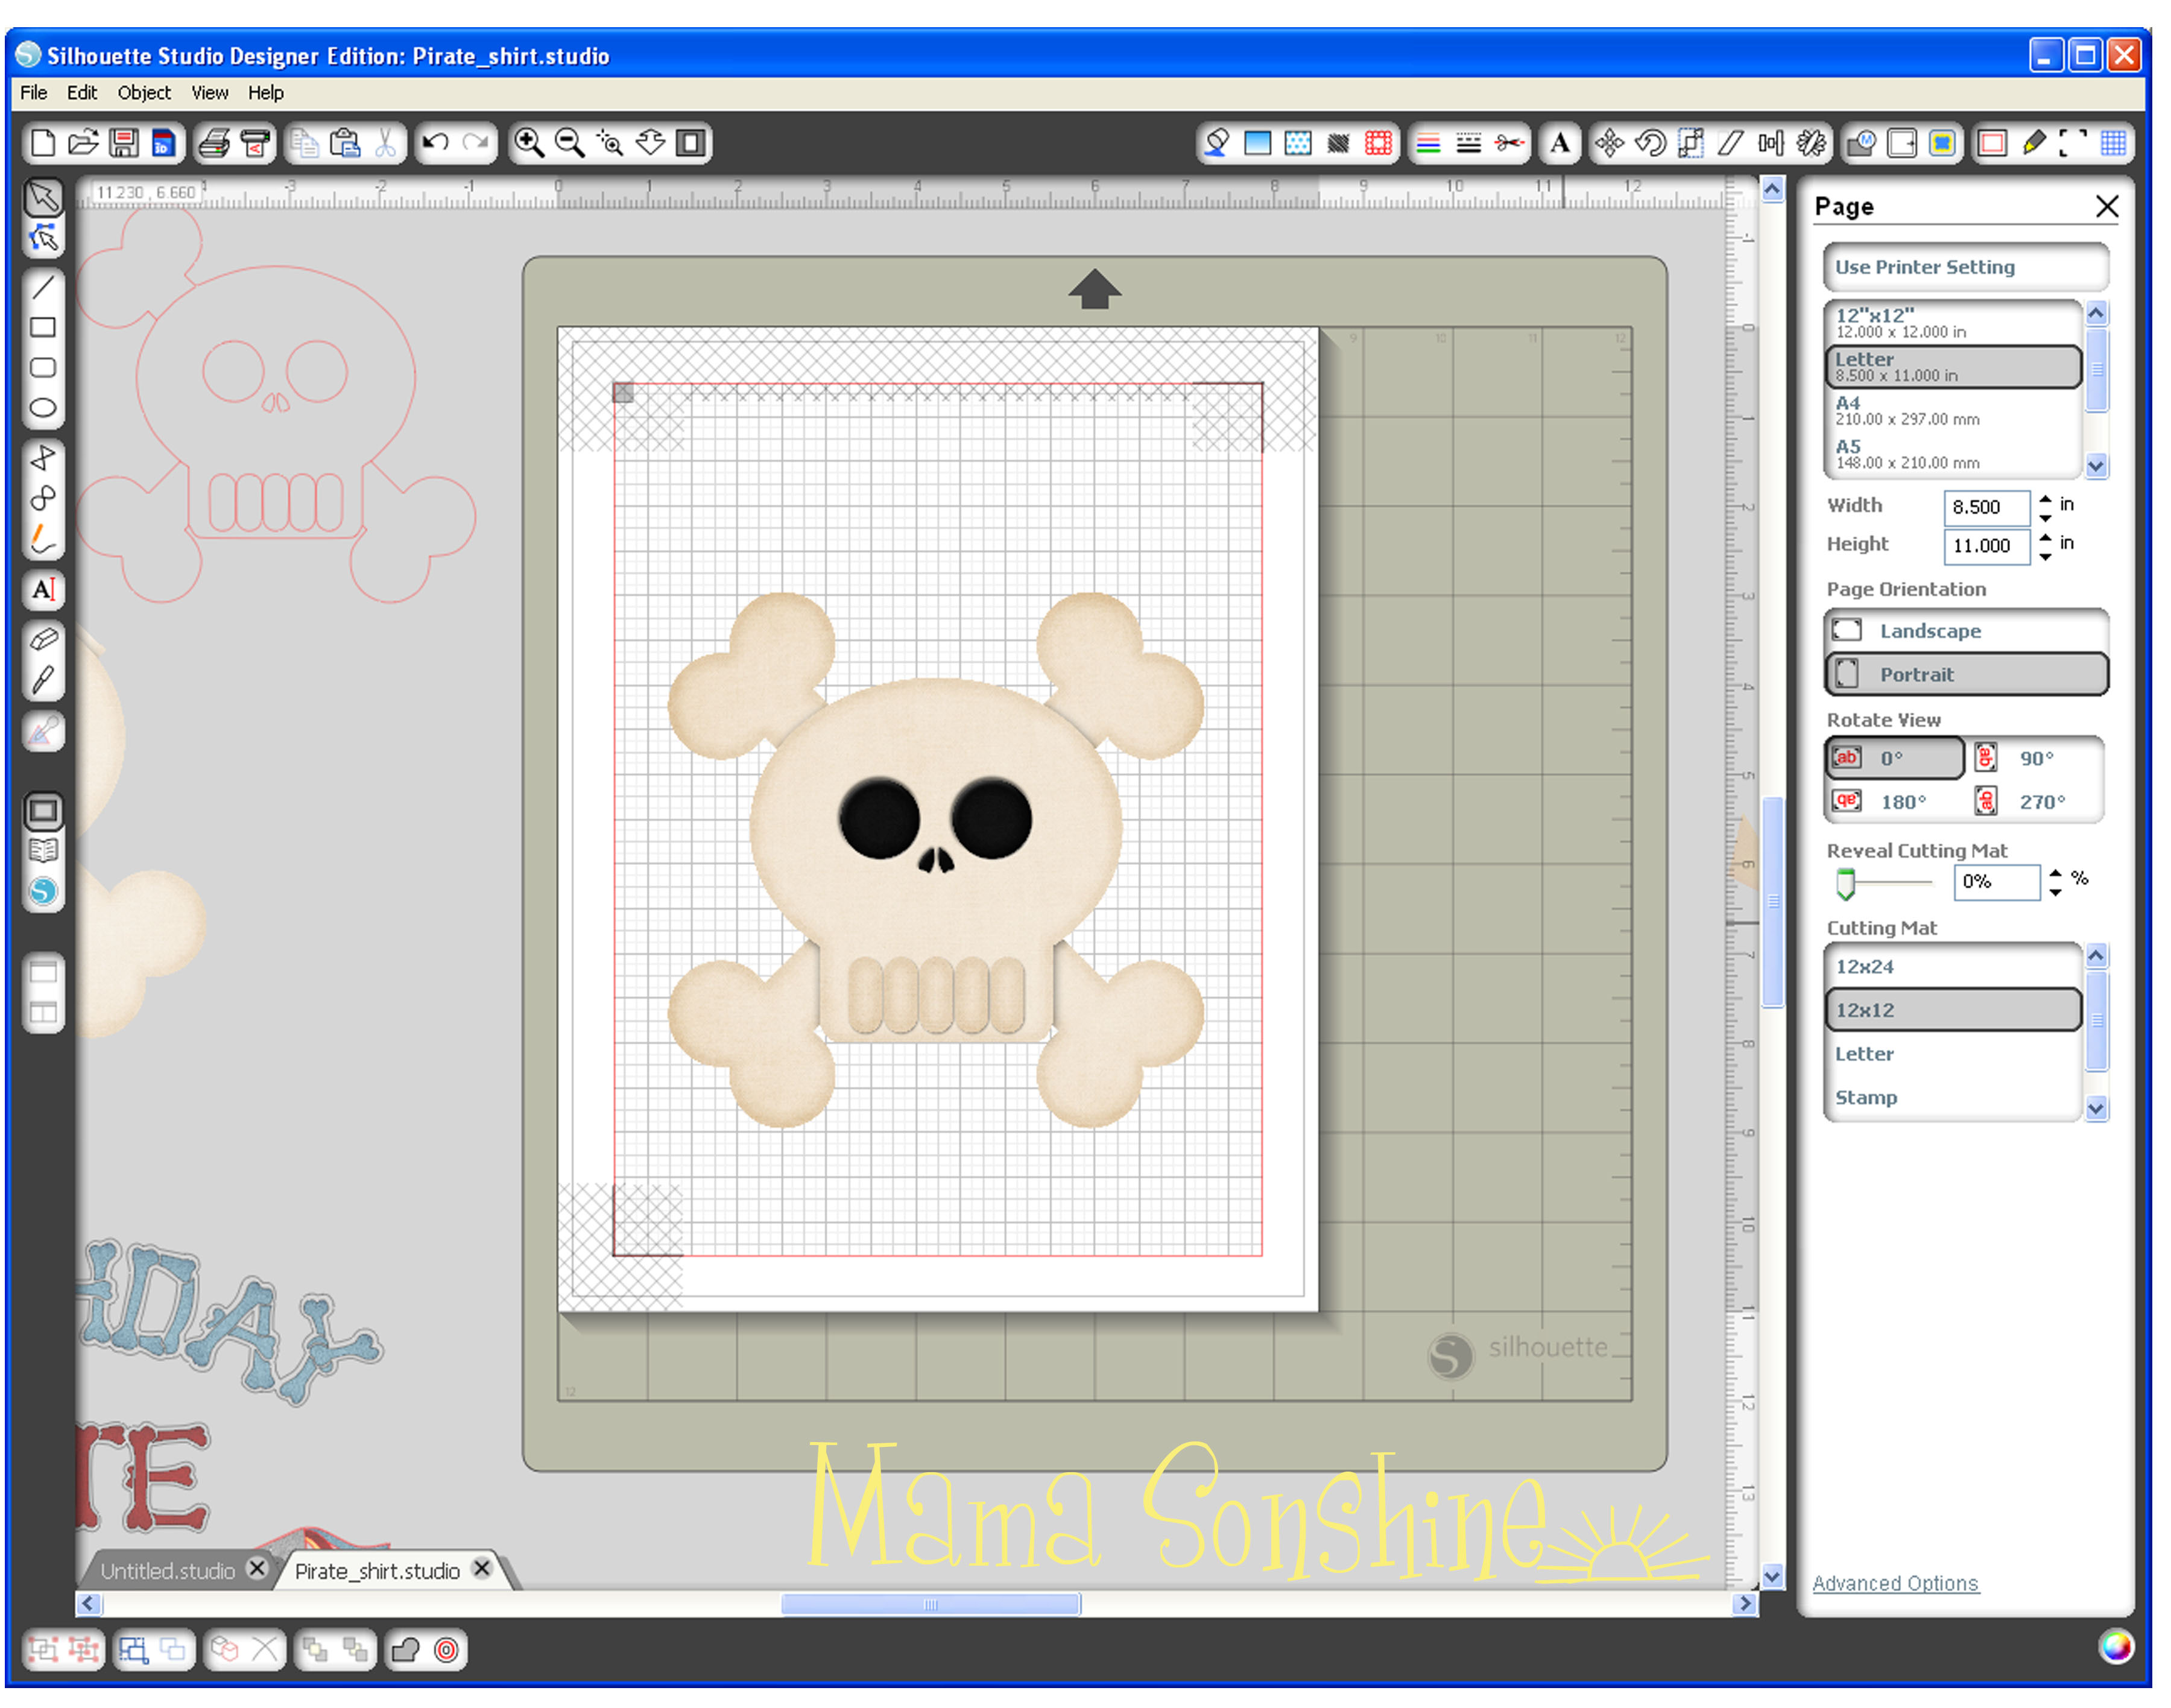
In the studio software I used the same file I had open for the skull & cross-bones because I needed the skull for a size and placement reference. When I didn’t want it on the screen I simply moved it off the mat.
First the party hat:
I wanted a birthday hat shape that I could fill with a pattern, using the digital papers from the YoHo Pirate kit mentioned above. I chose a party hat .png file I had because I liked the shape. Since I don’t want the pattern or colors that are currently I made a new cut file using the .png as a template.
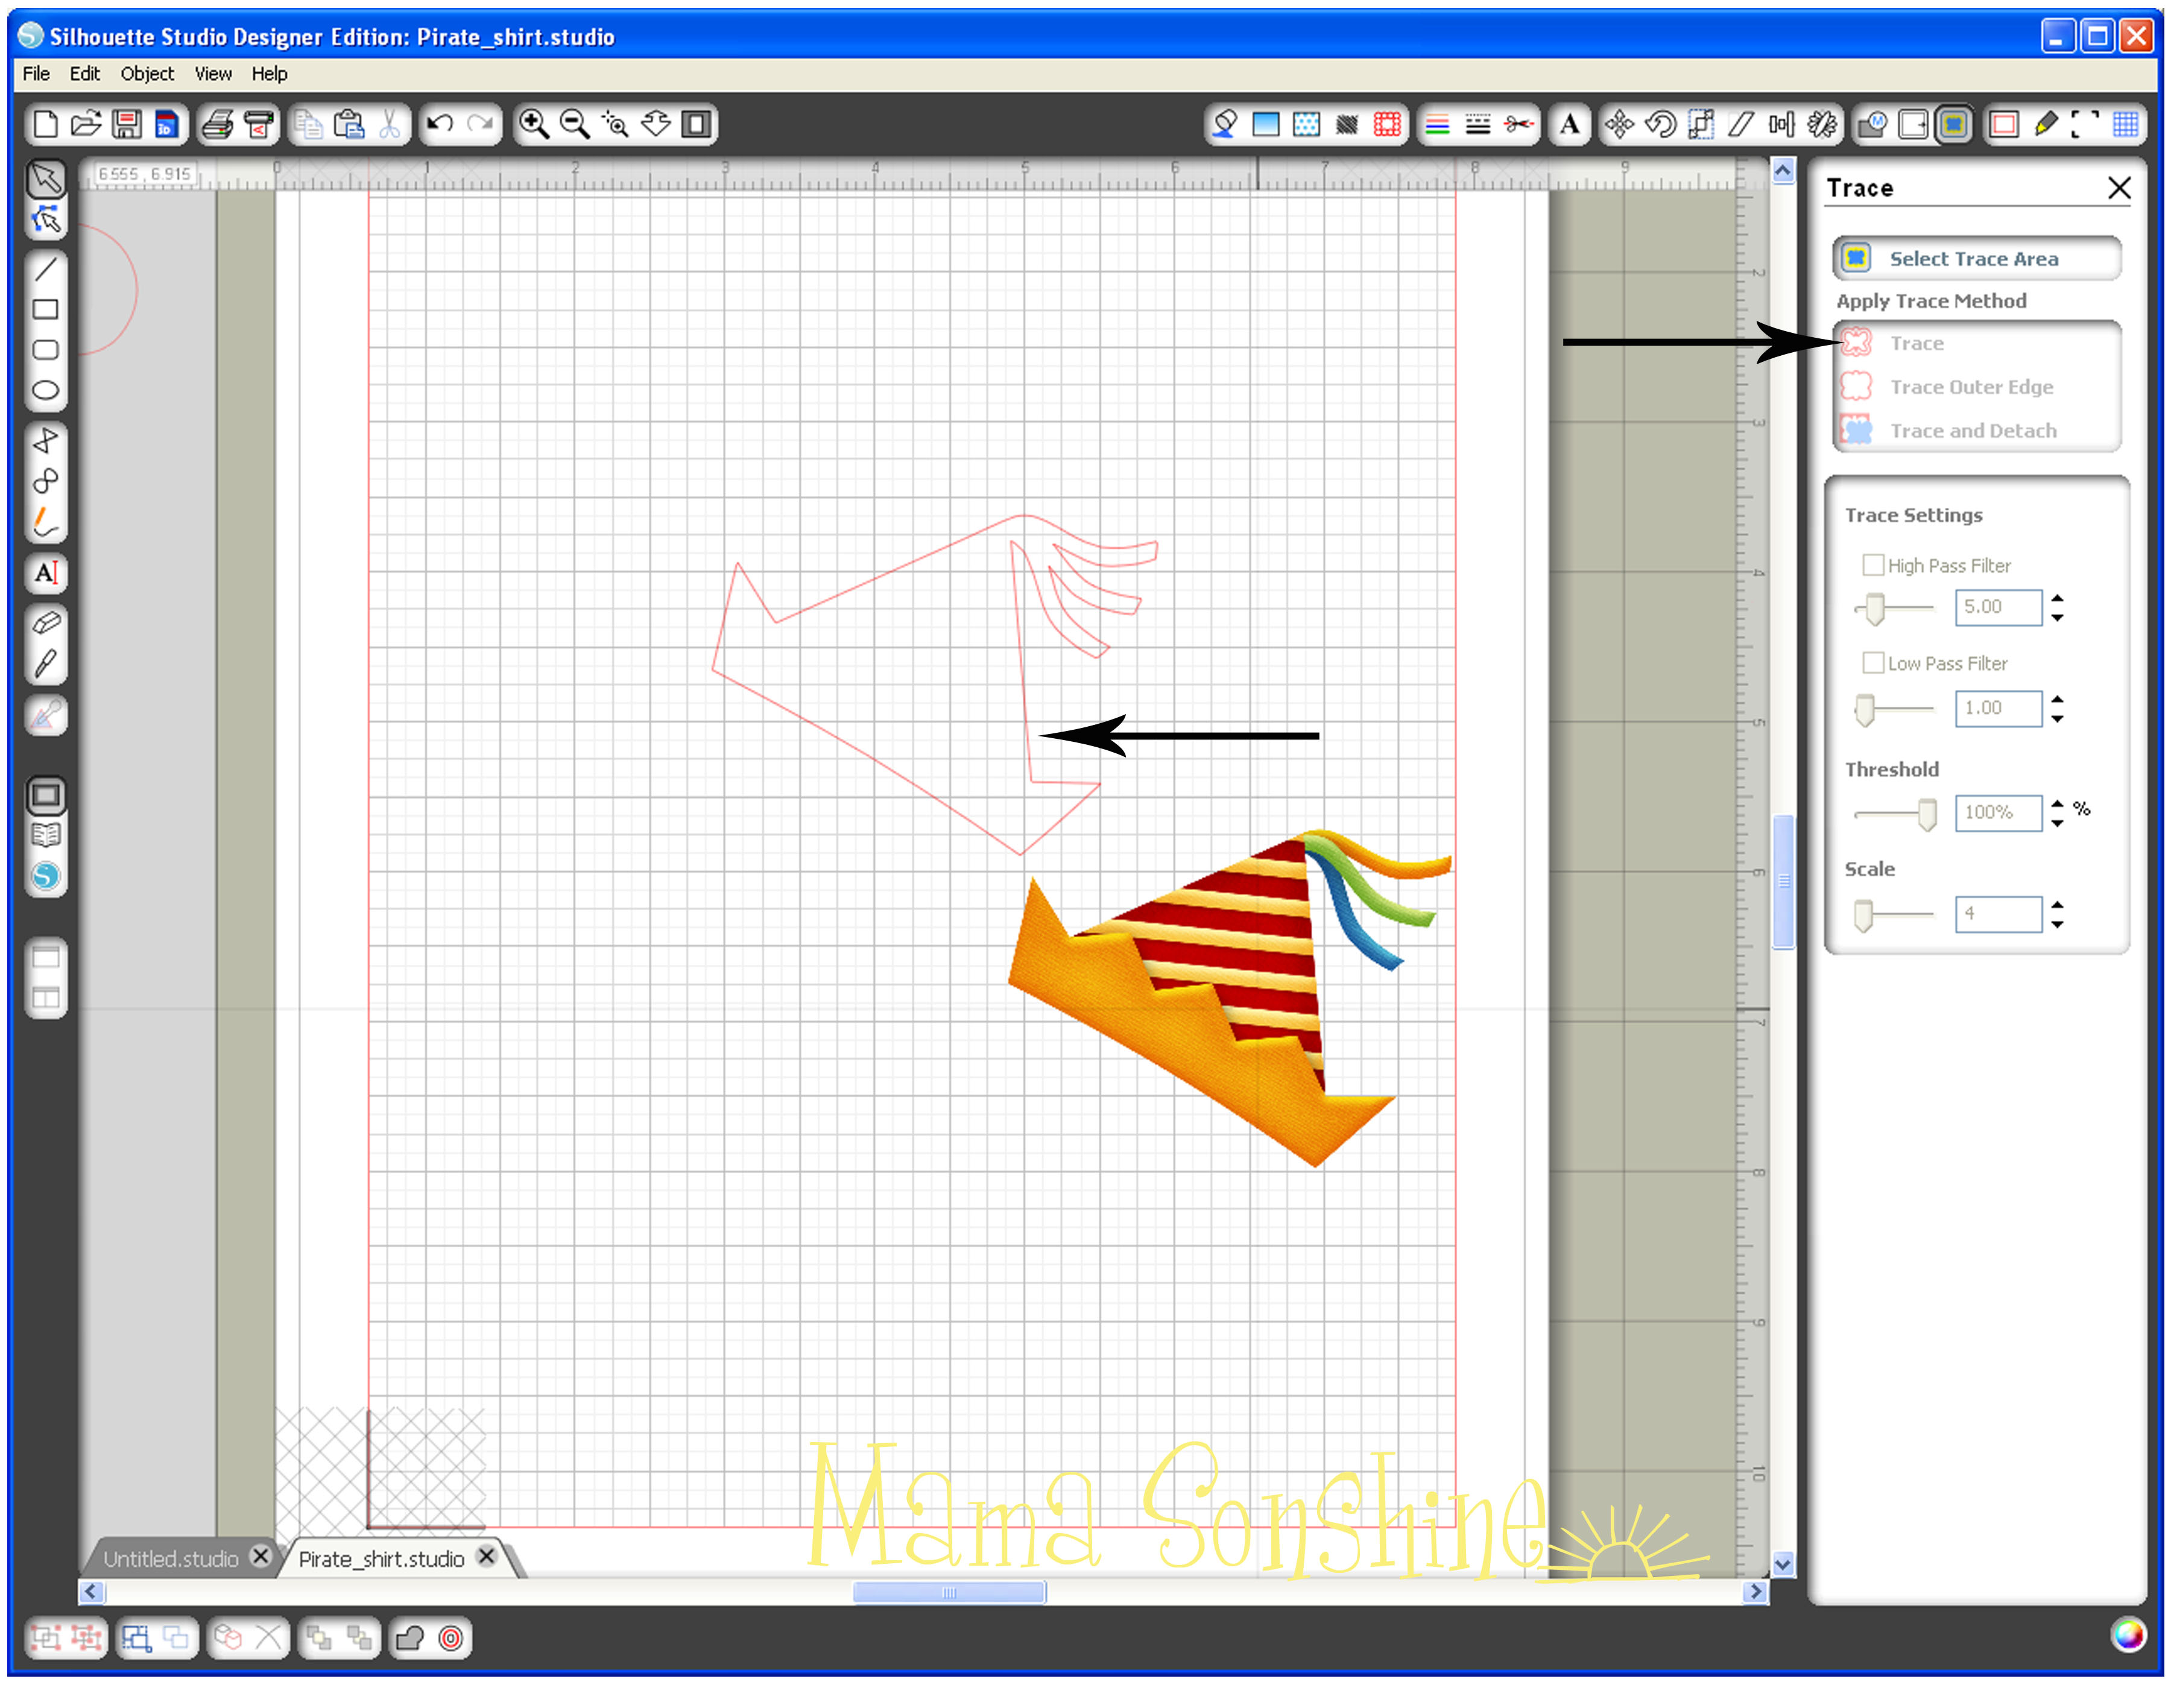
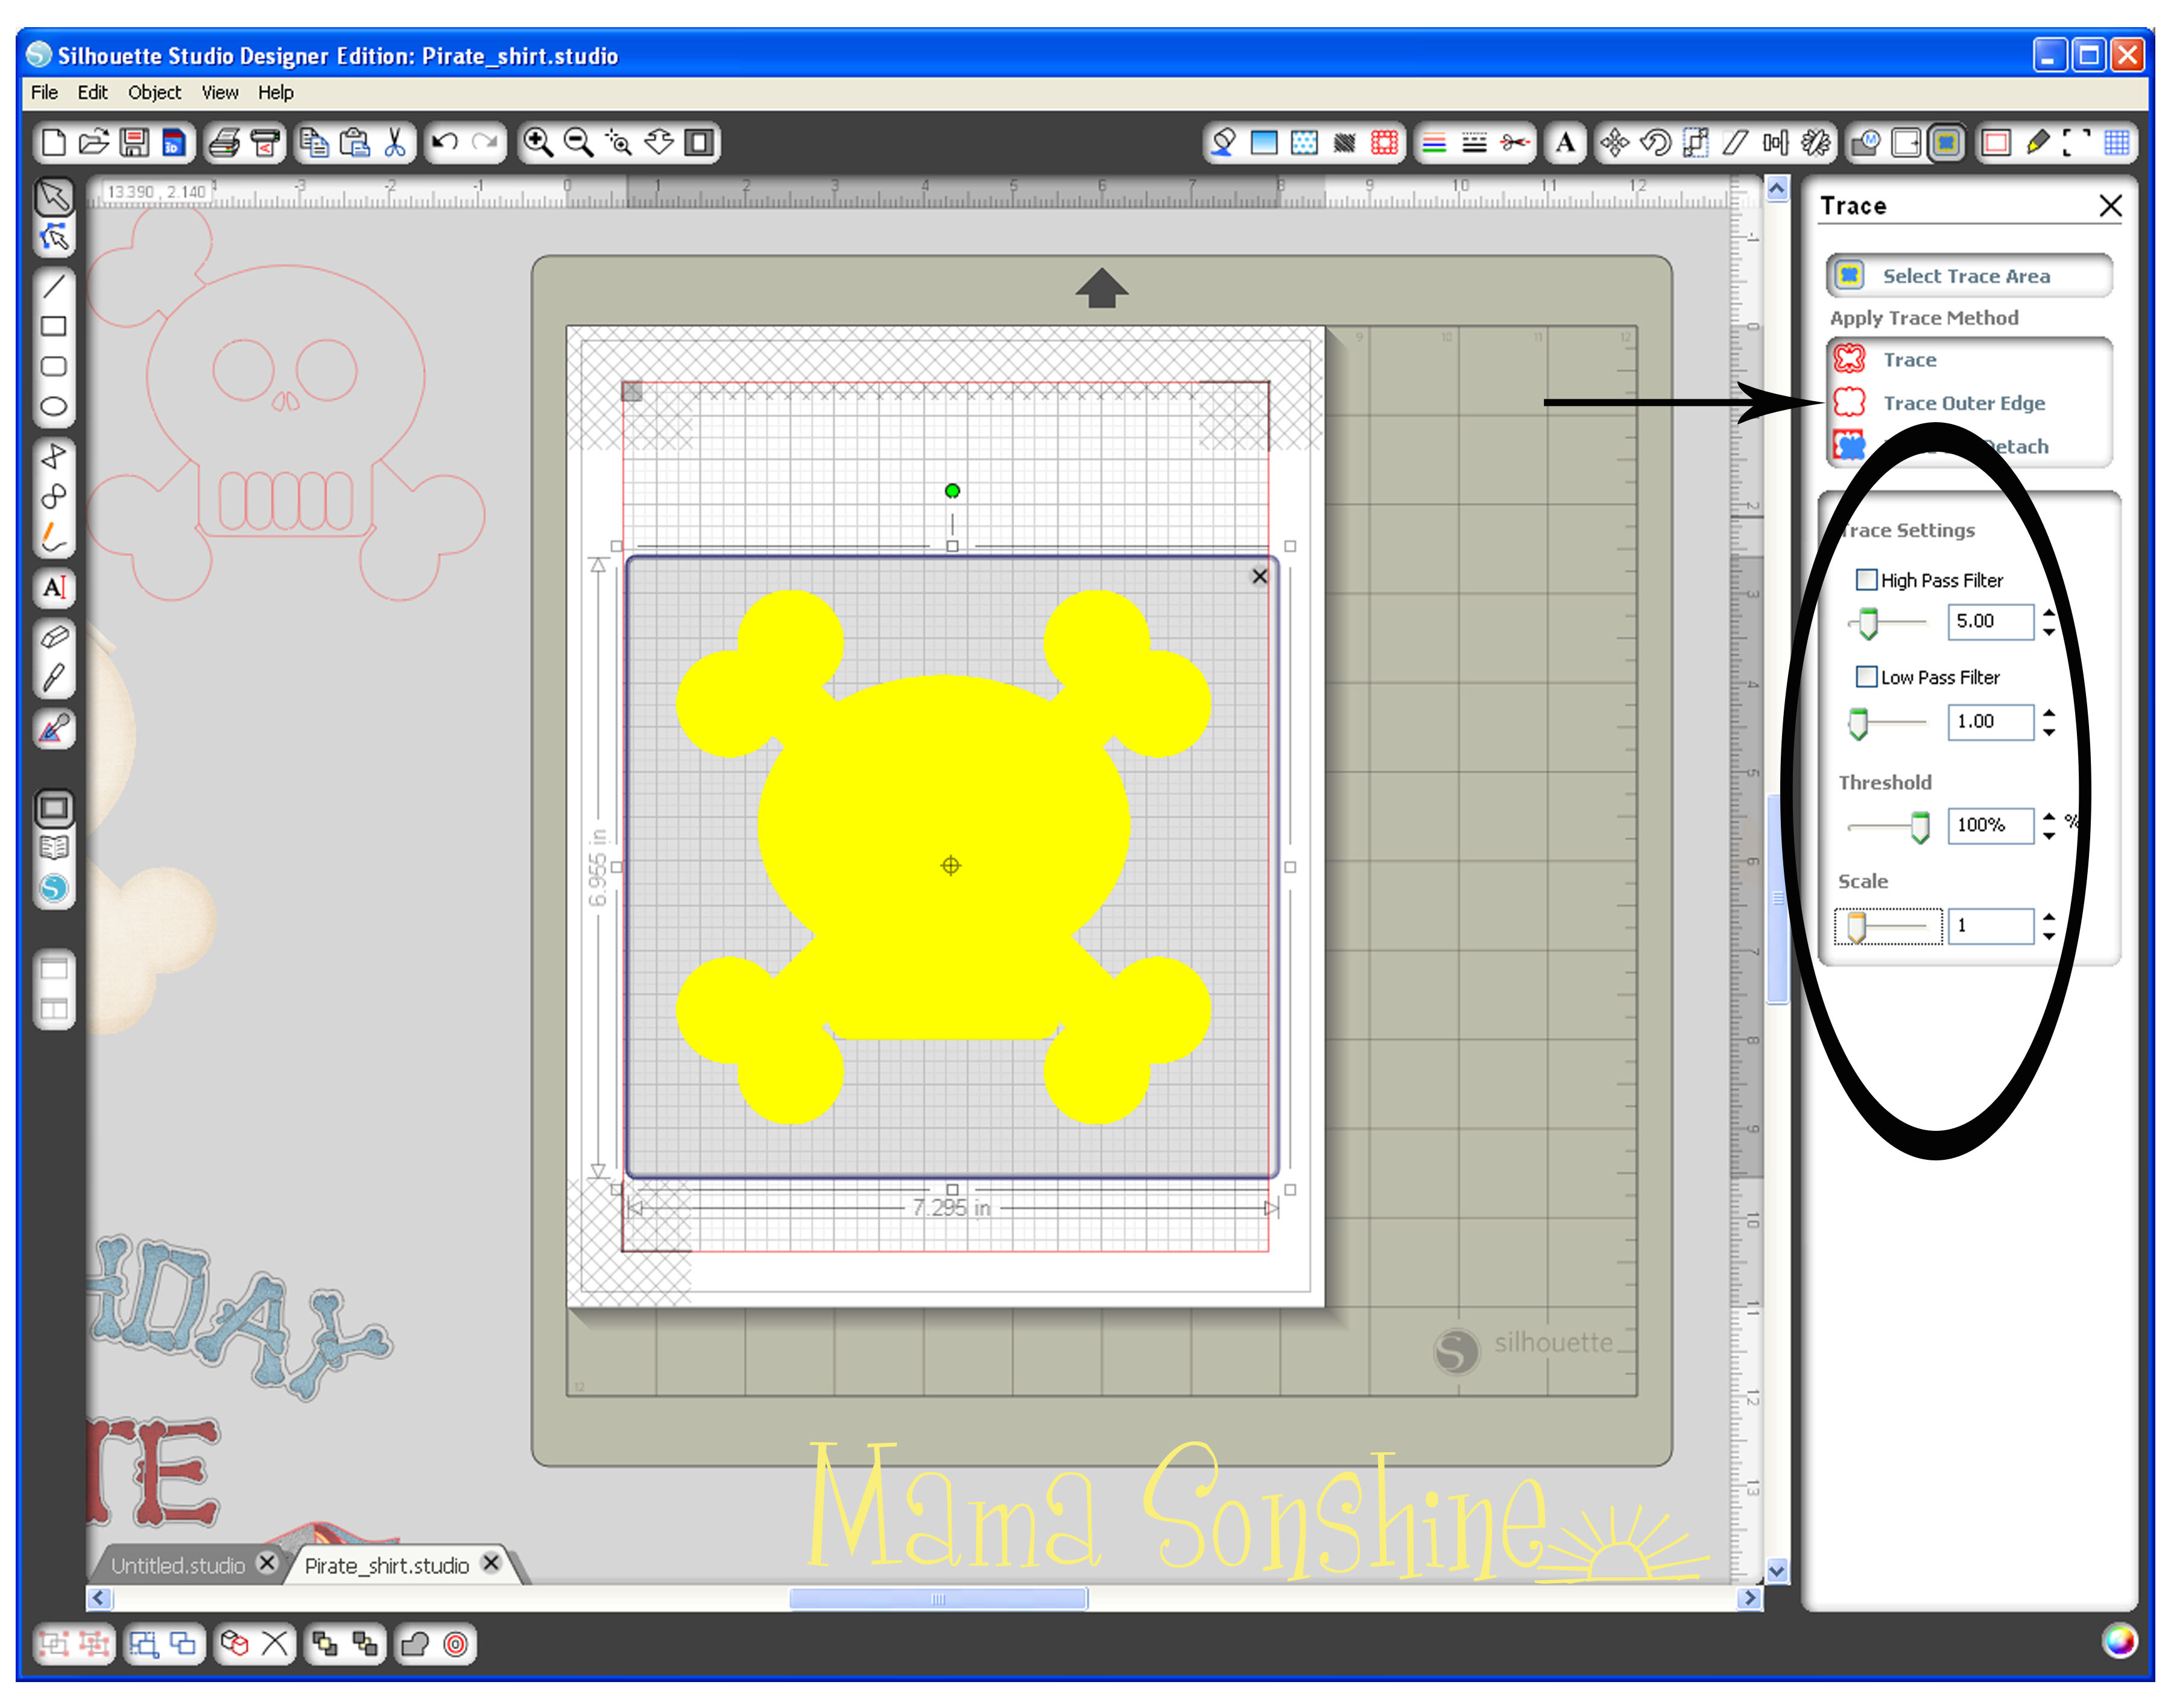
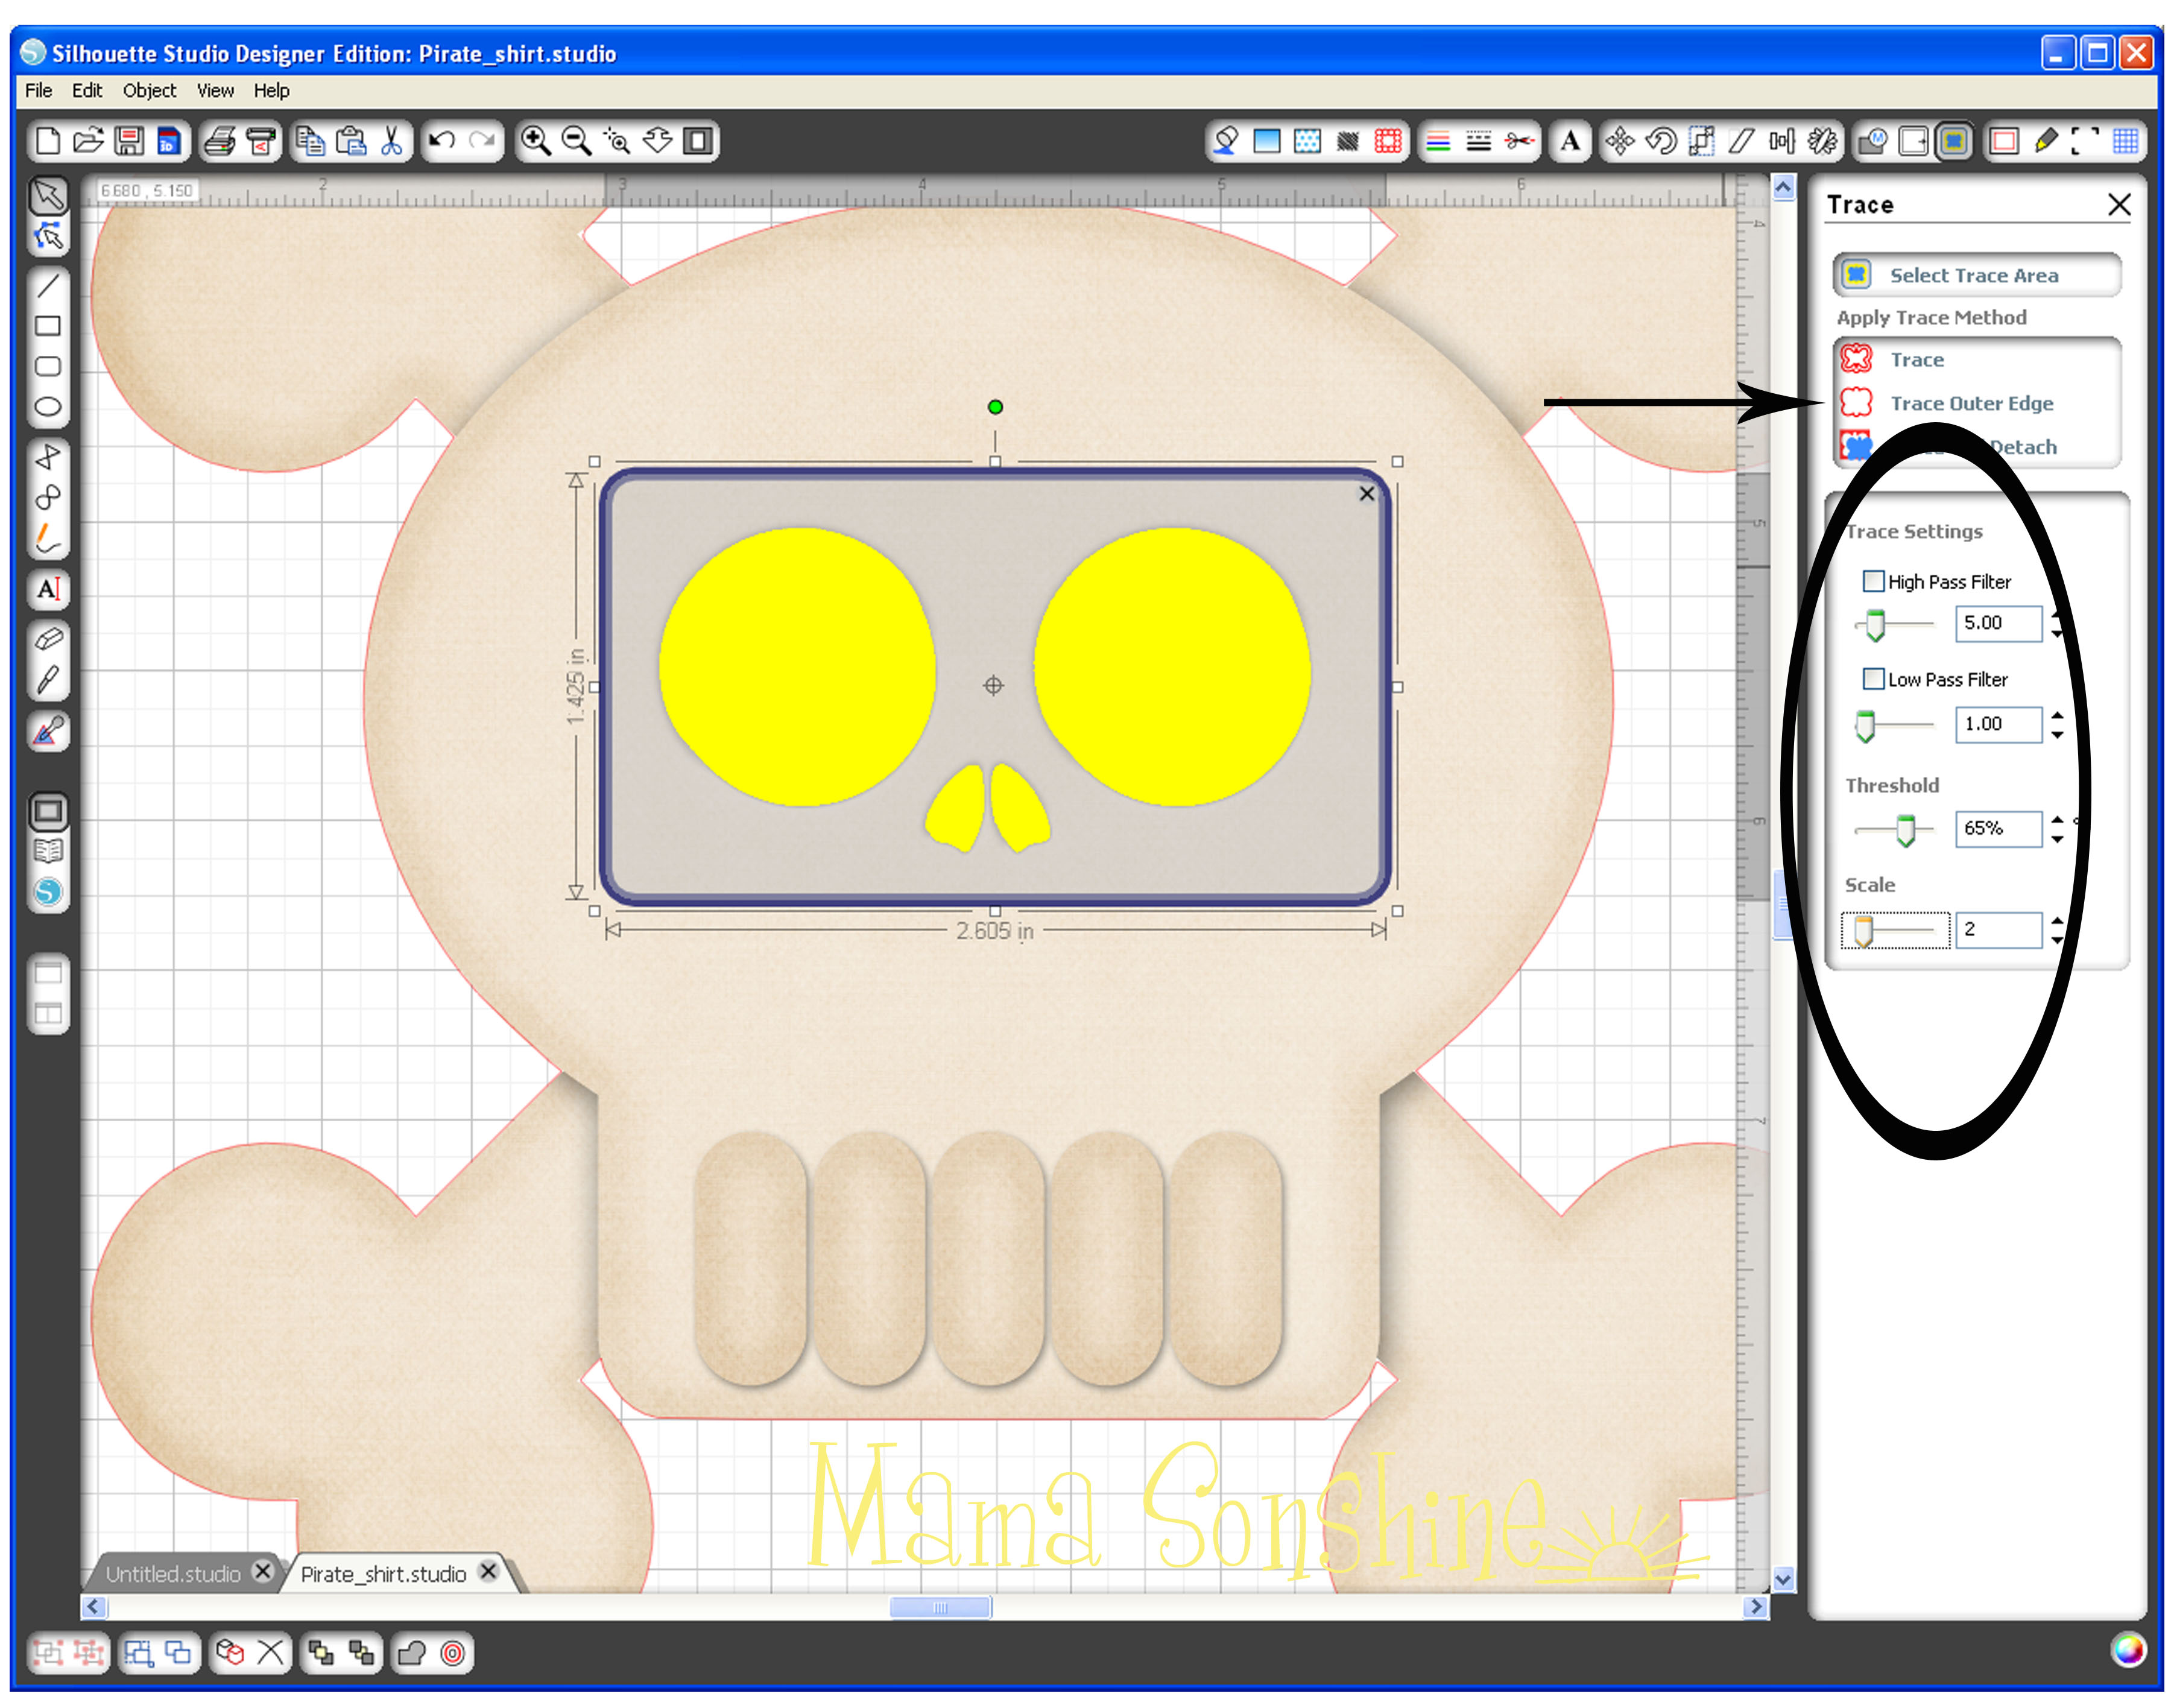
I wanted to make the stripe portion one pattern, the yellow portion a different pattern, and I wanted to change the color of the ribbons. The trace tool could not cleanly make these five individual elements. Even when I selected trace instead of trace outside edge, I still only got the outside edge traced.
I found it more difficult to try to trace each portion than to simply make a new shape. I selected the draw polygon tool and made a new shape for the yellow portion of the hat. It is important not to move the picture after tracing it and drawing the shape. You also don’t want to use the line tool, because you want an element that can be filled with a pattern.
I used the draw curve tool to make the three different ribbons on the top of the hat. Again, the ribbons are three different shapes that sit on top of the traced hat. After this you no longer need the picture of the hat, so you can delete it or just move it off the page.
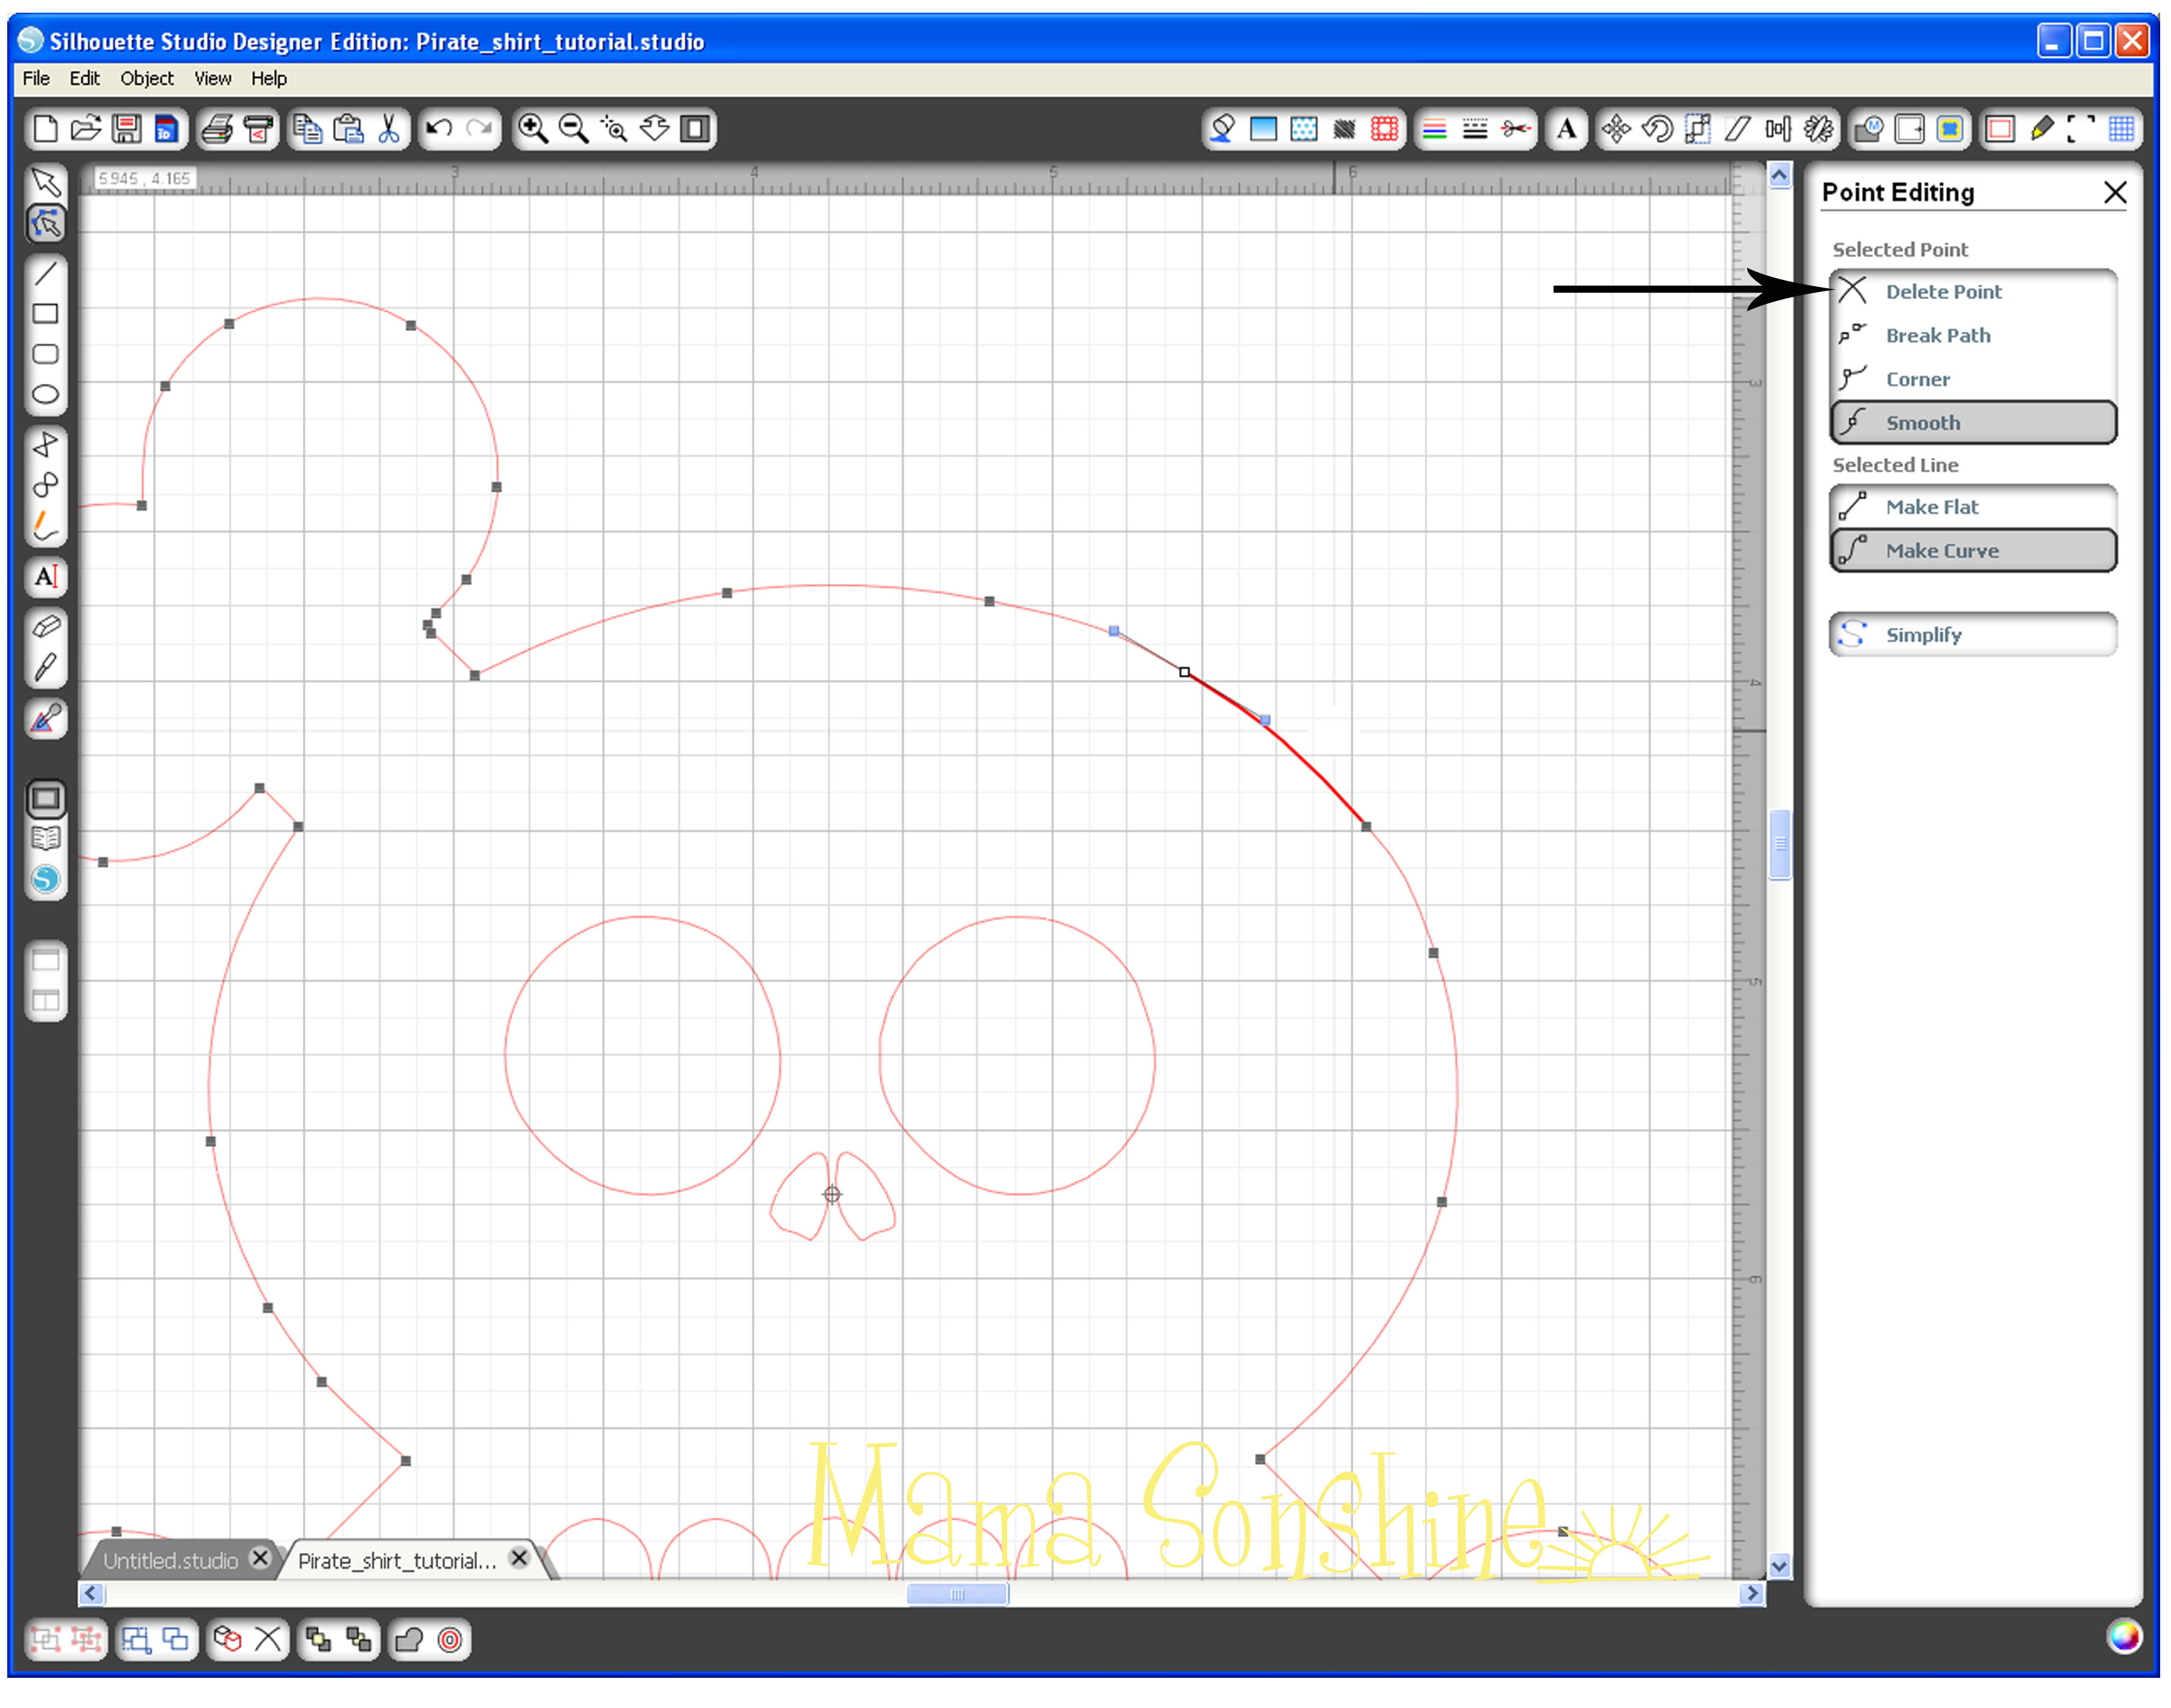
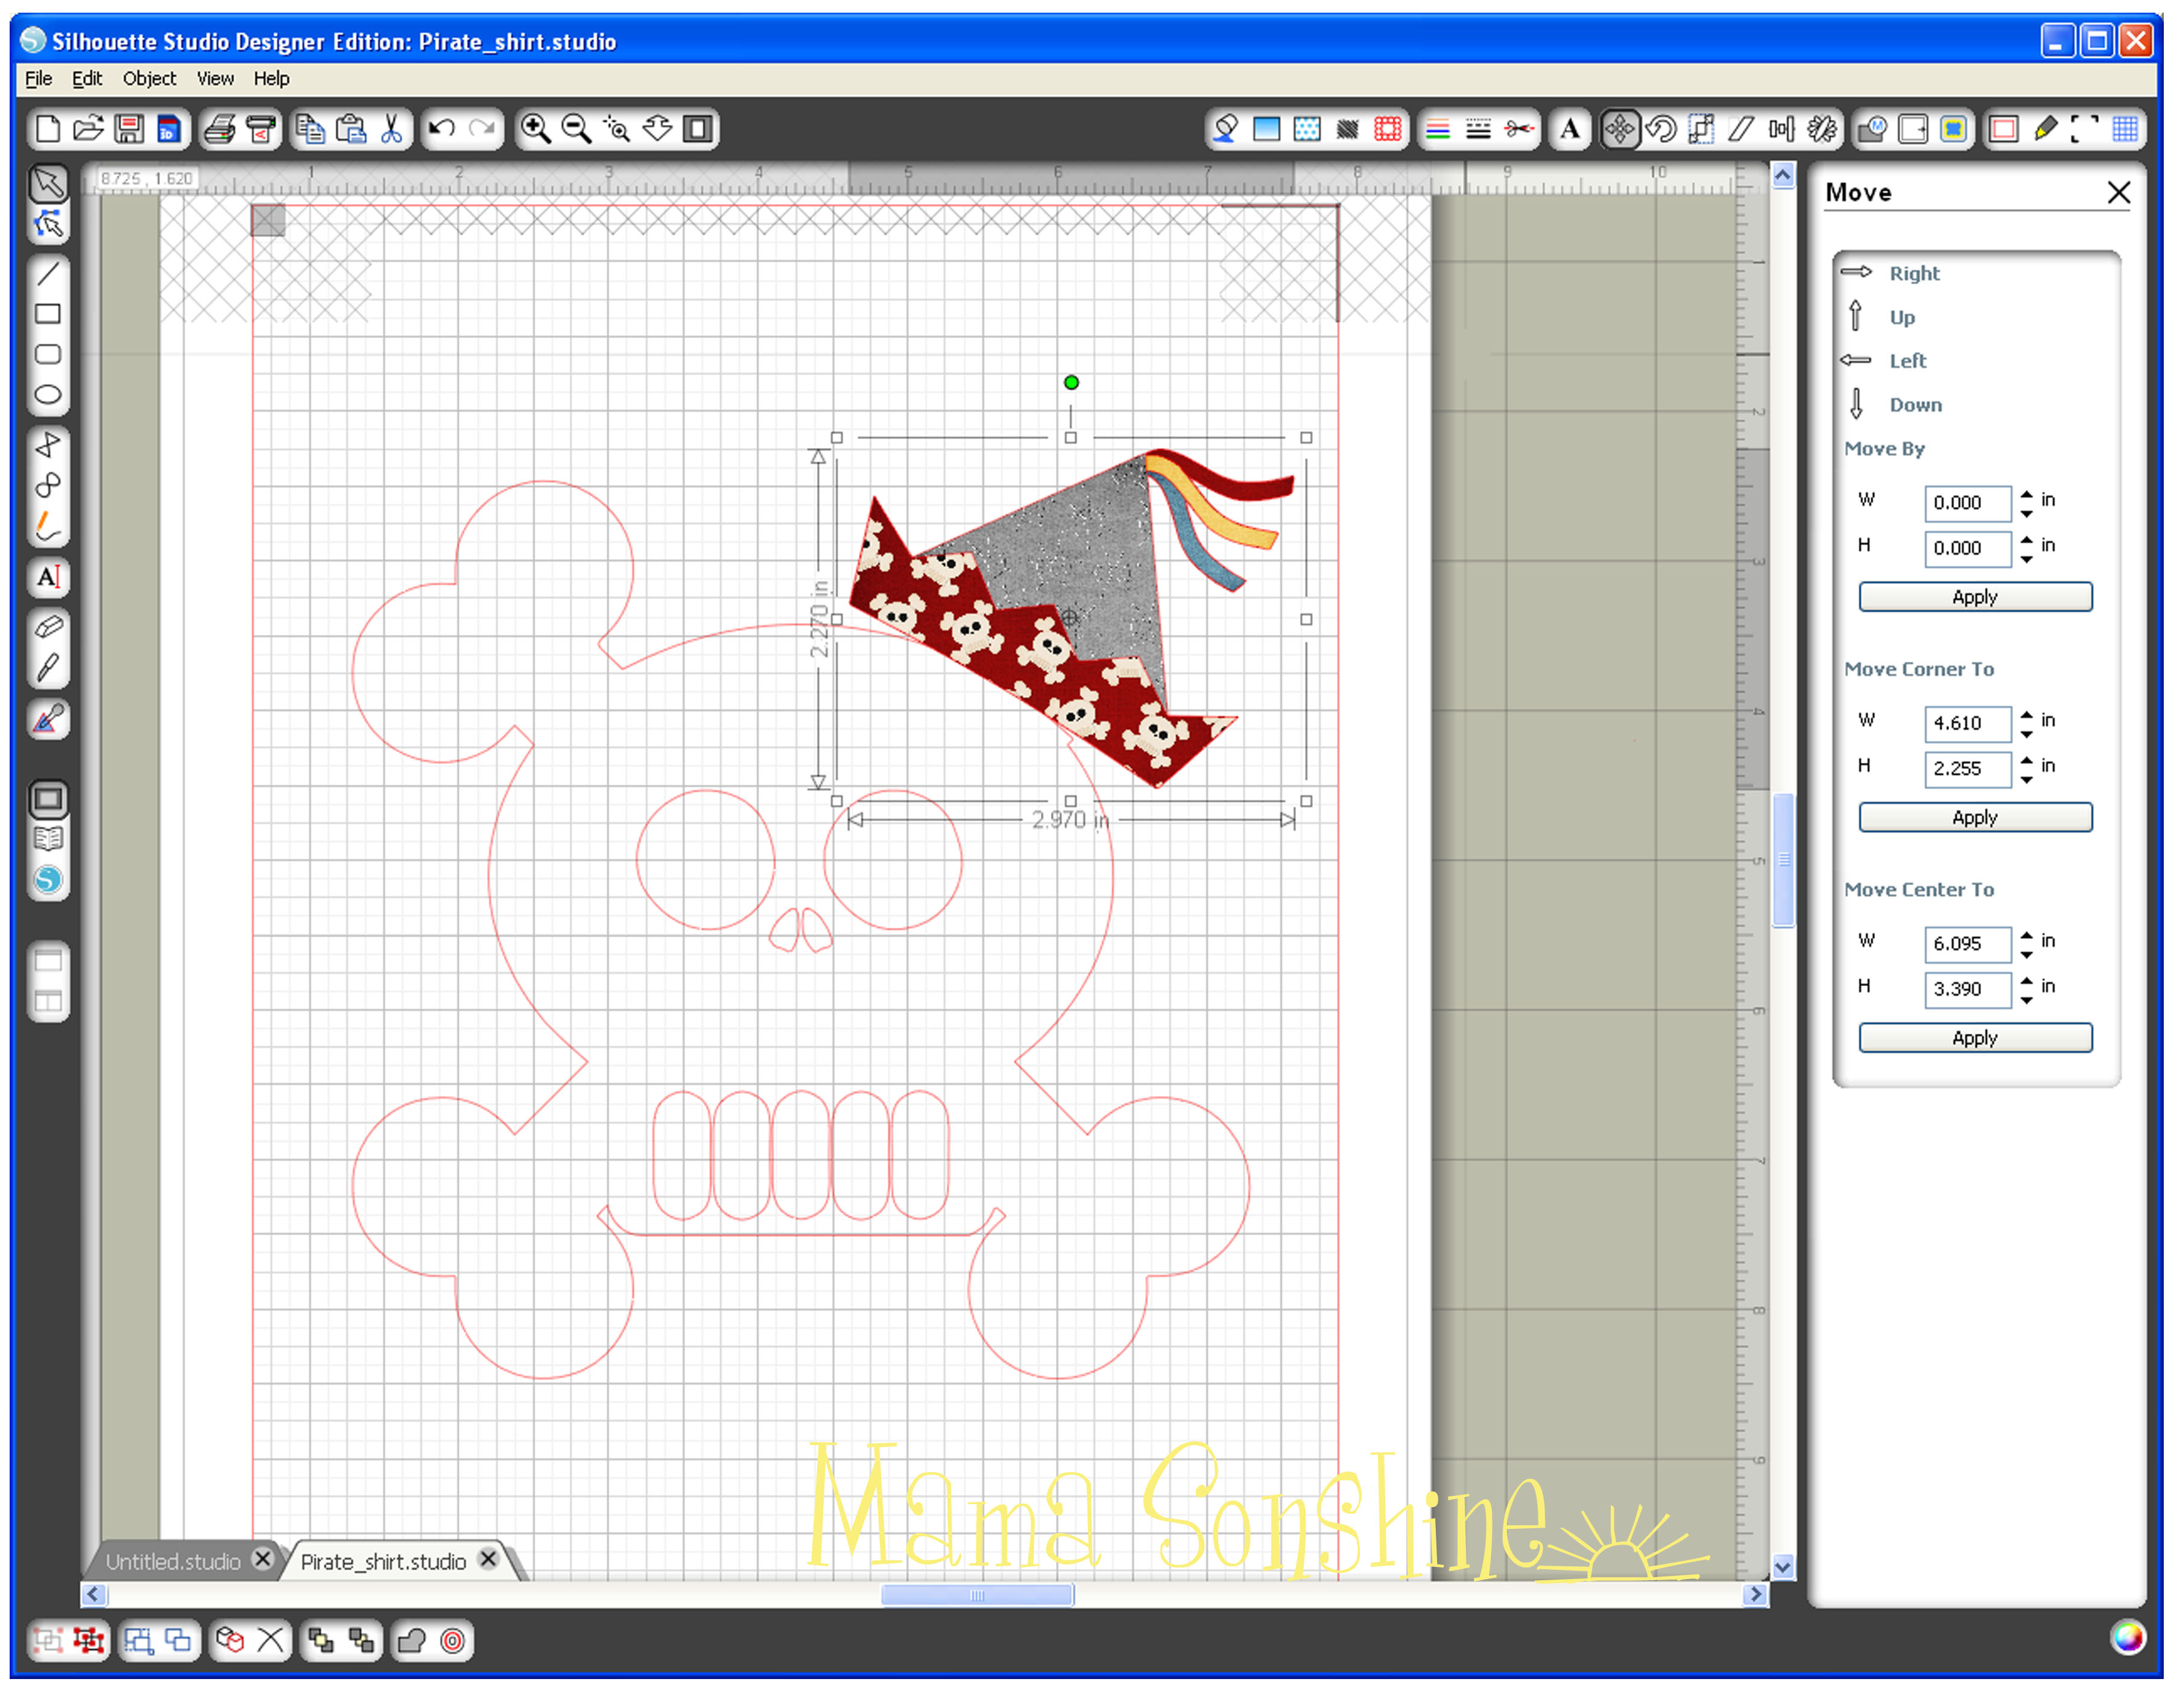
Use the fill pattern window to select the patterns for each element. Bring back the skull & cross-bones to fit the hat on the skull. Select all five elements of the hat, re-position and re-size the hat until you get the look you want. Unselect all elements, then select only the bottom border of the hat, here the red portion. Use the point edit tool to fit the hat to the shape of the skulls head. At some point you may also need to edit the points of main hat shape.
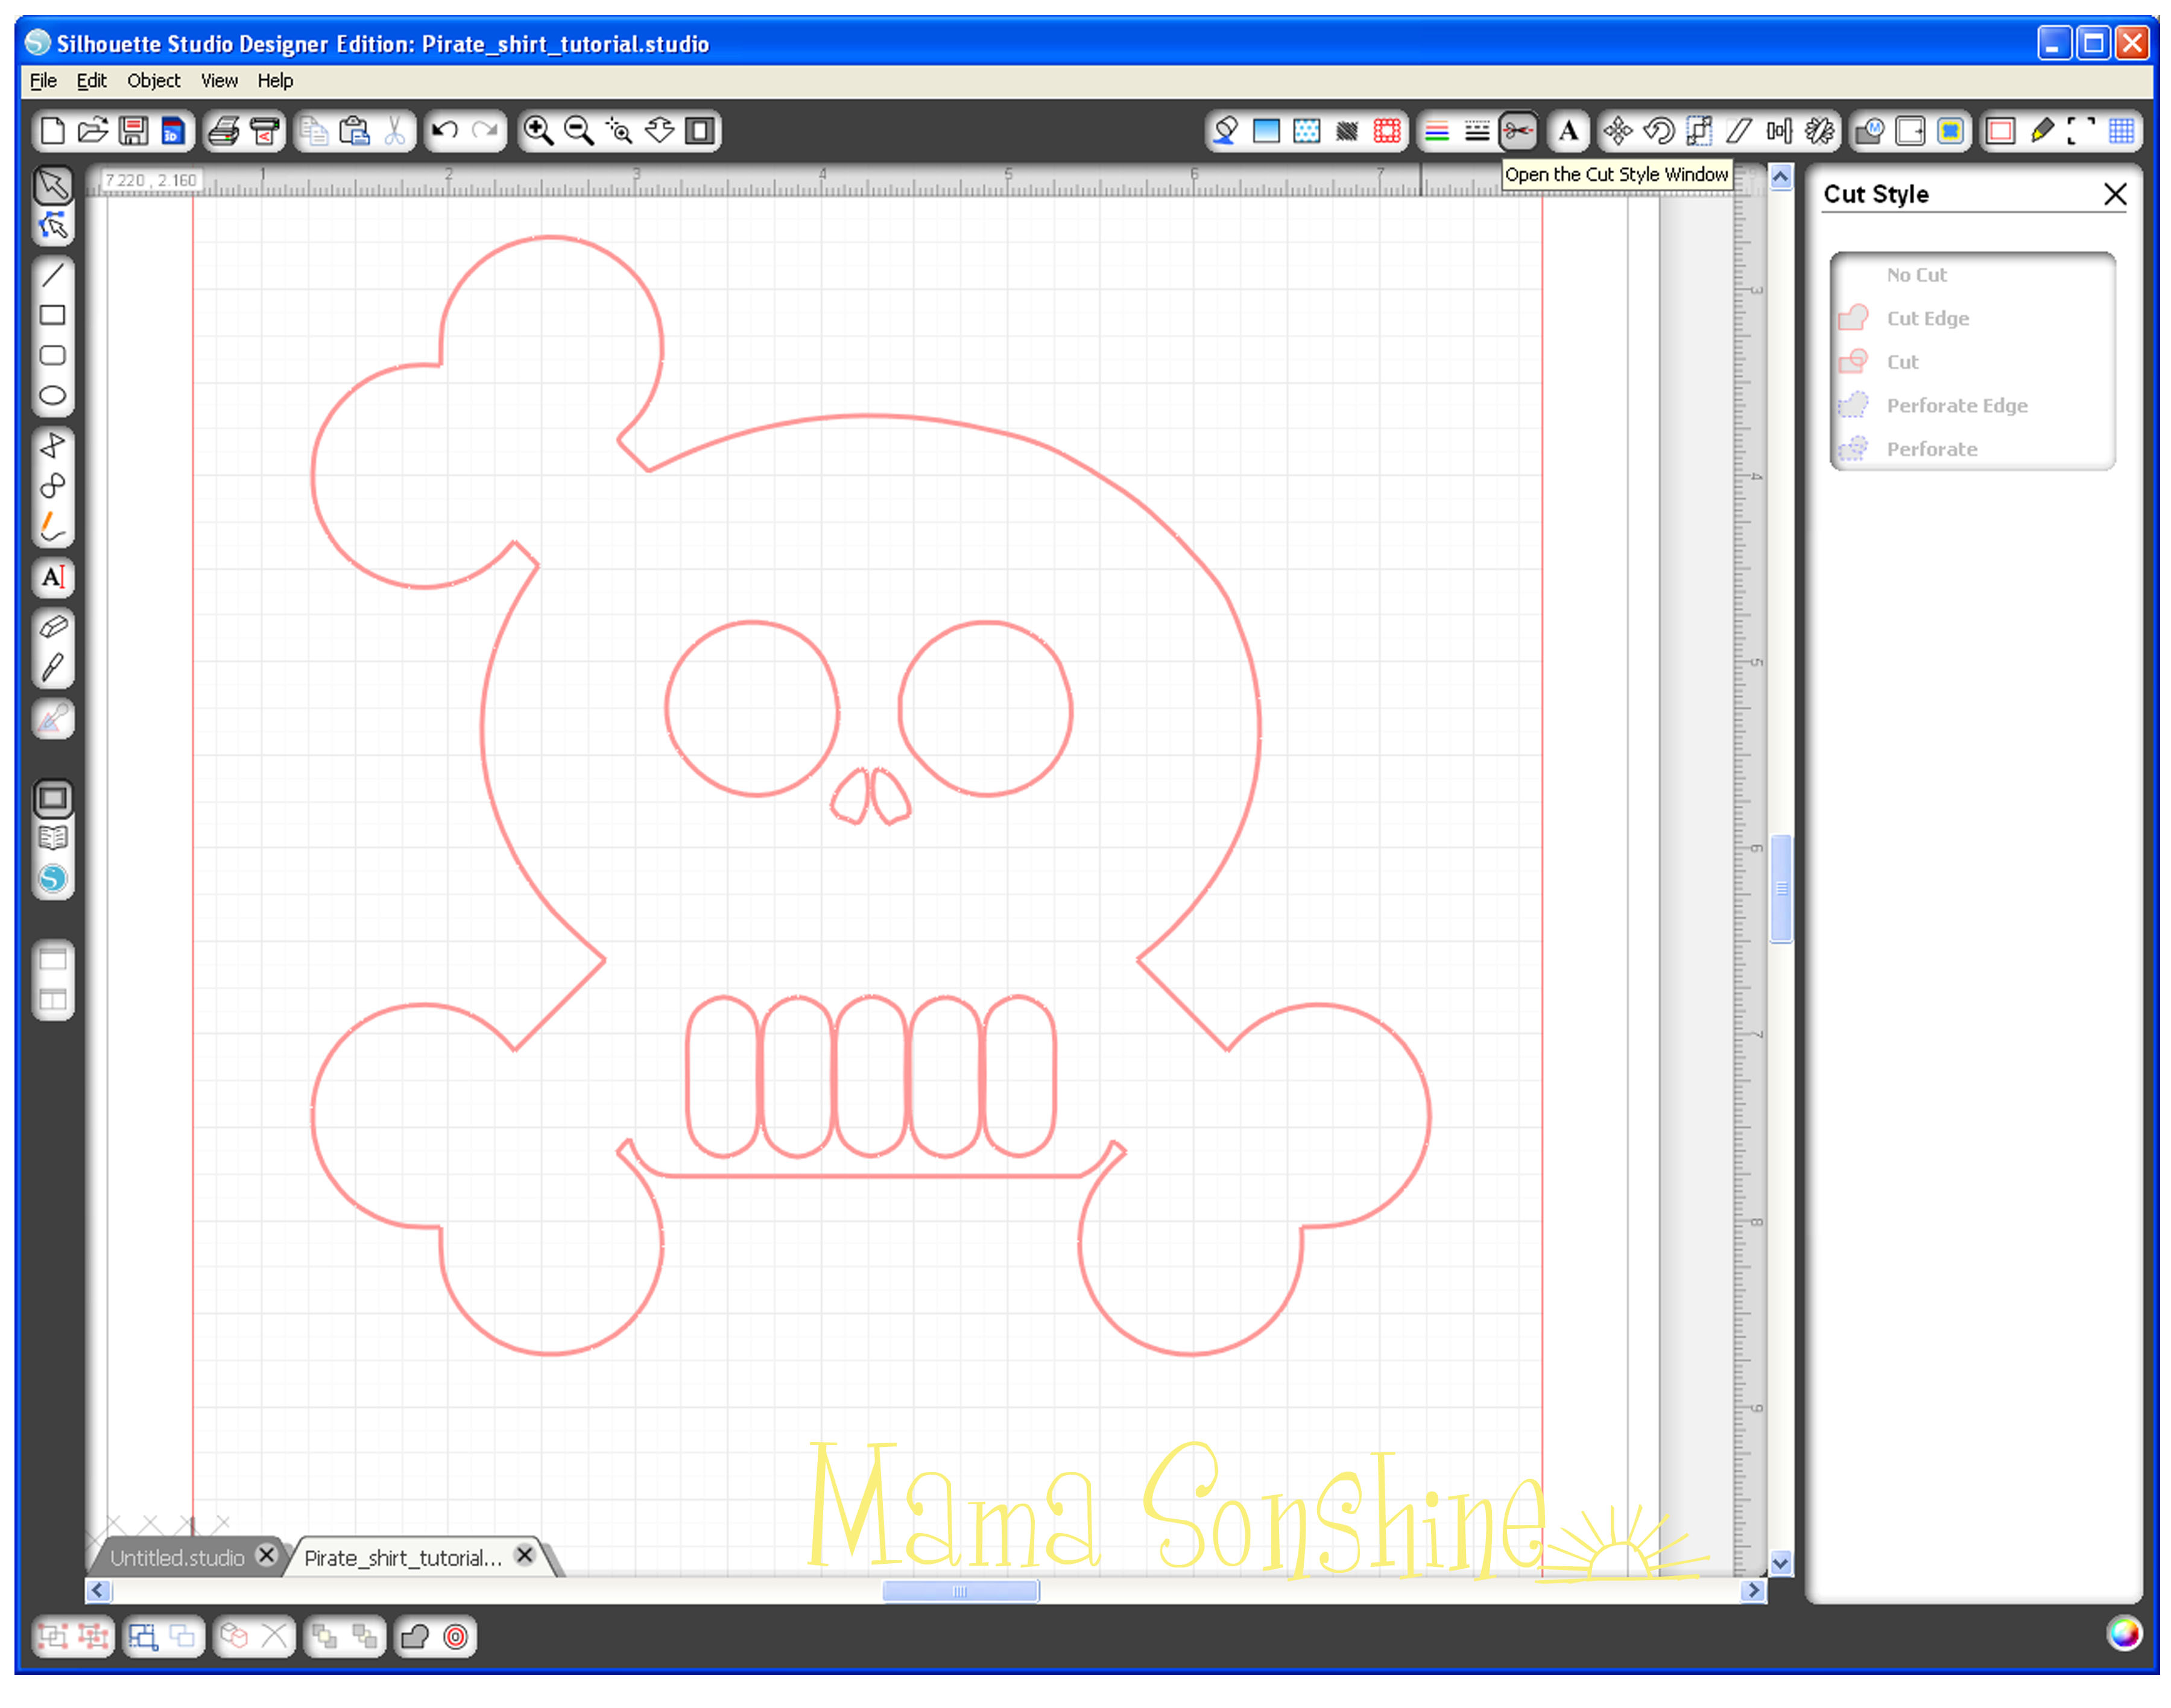
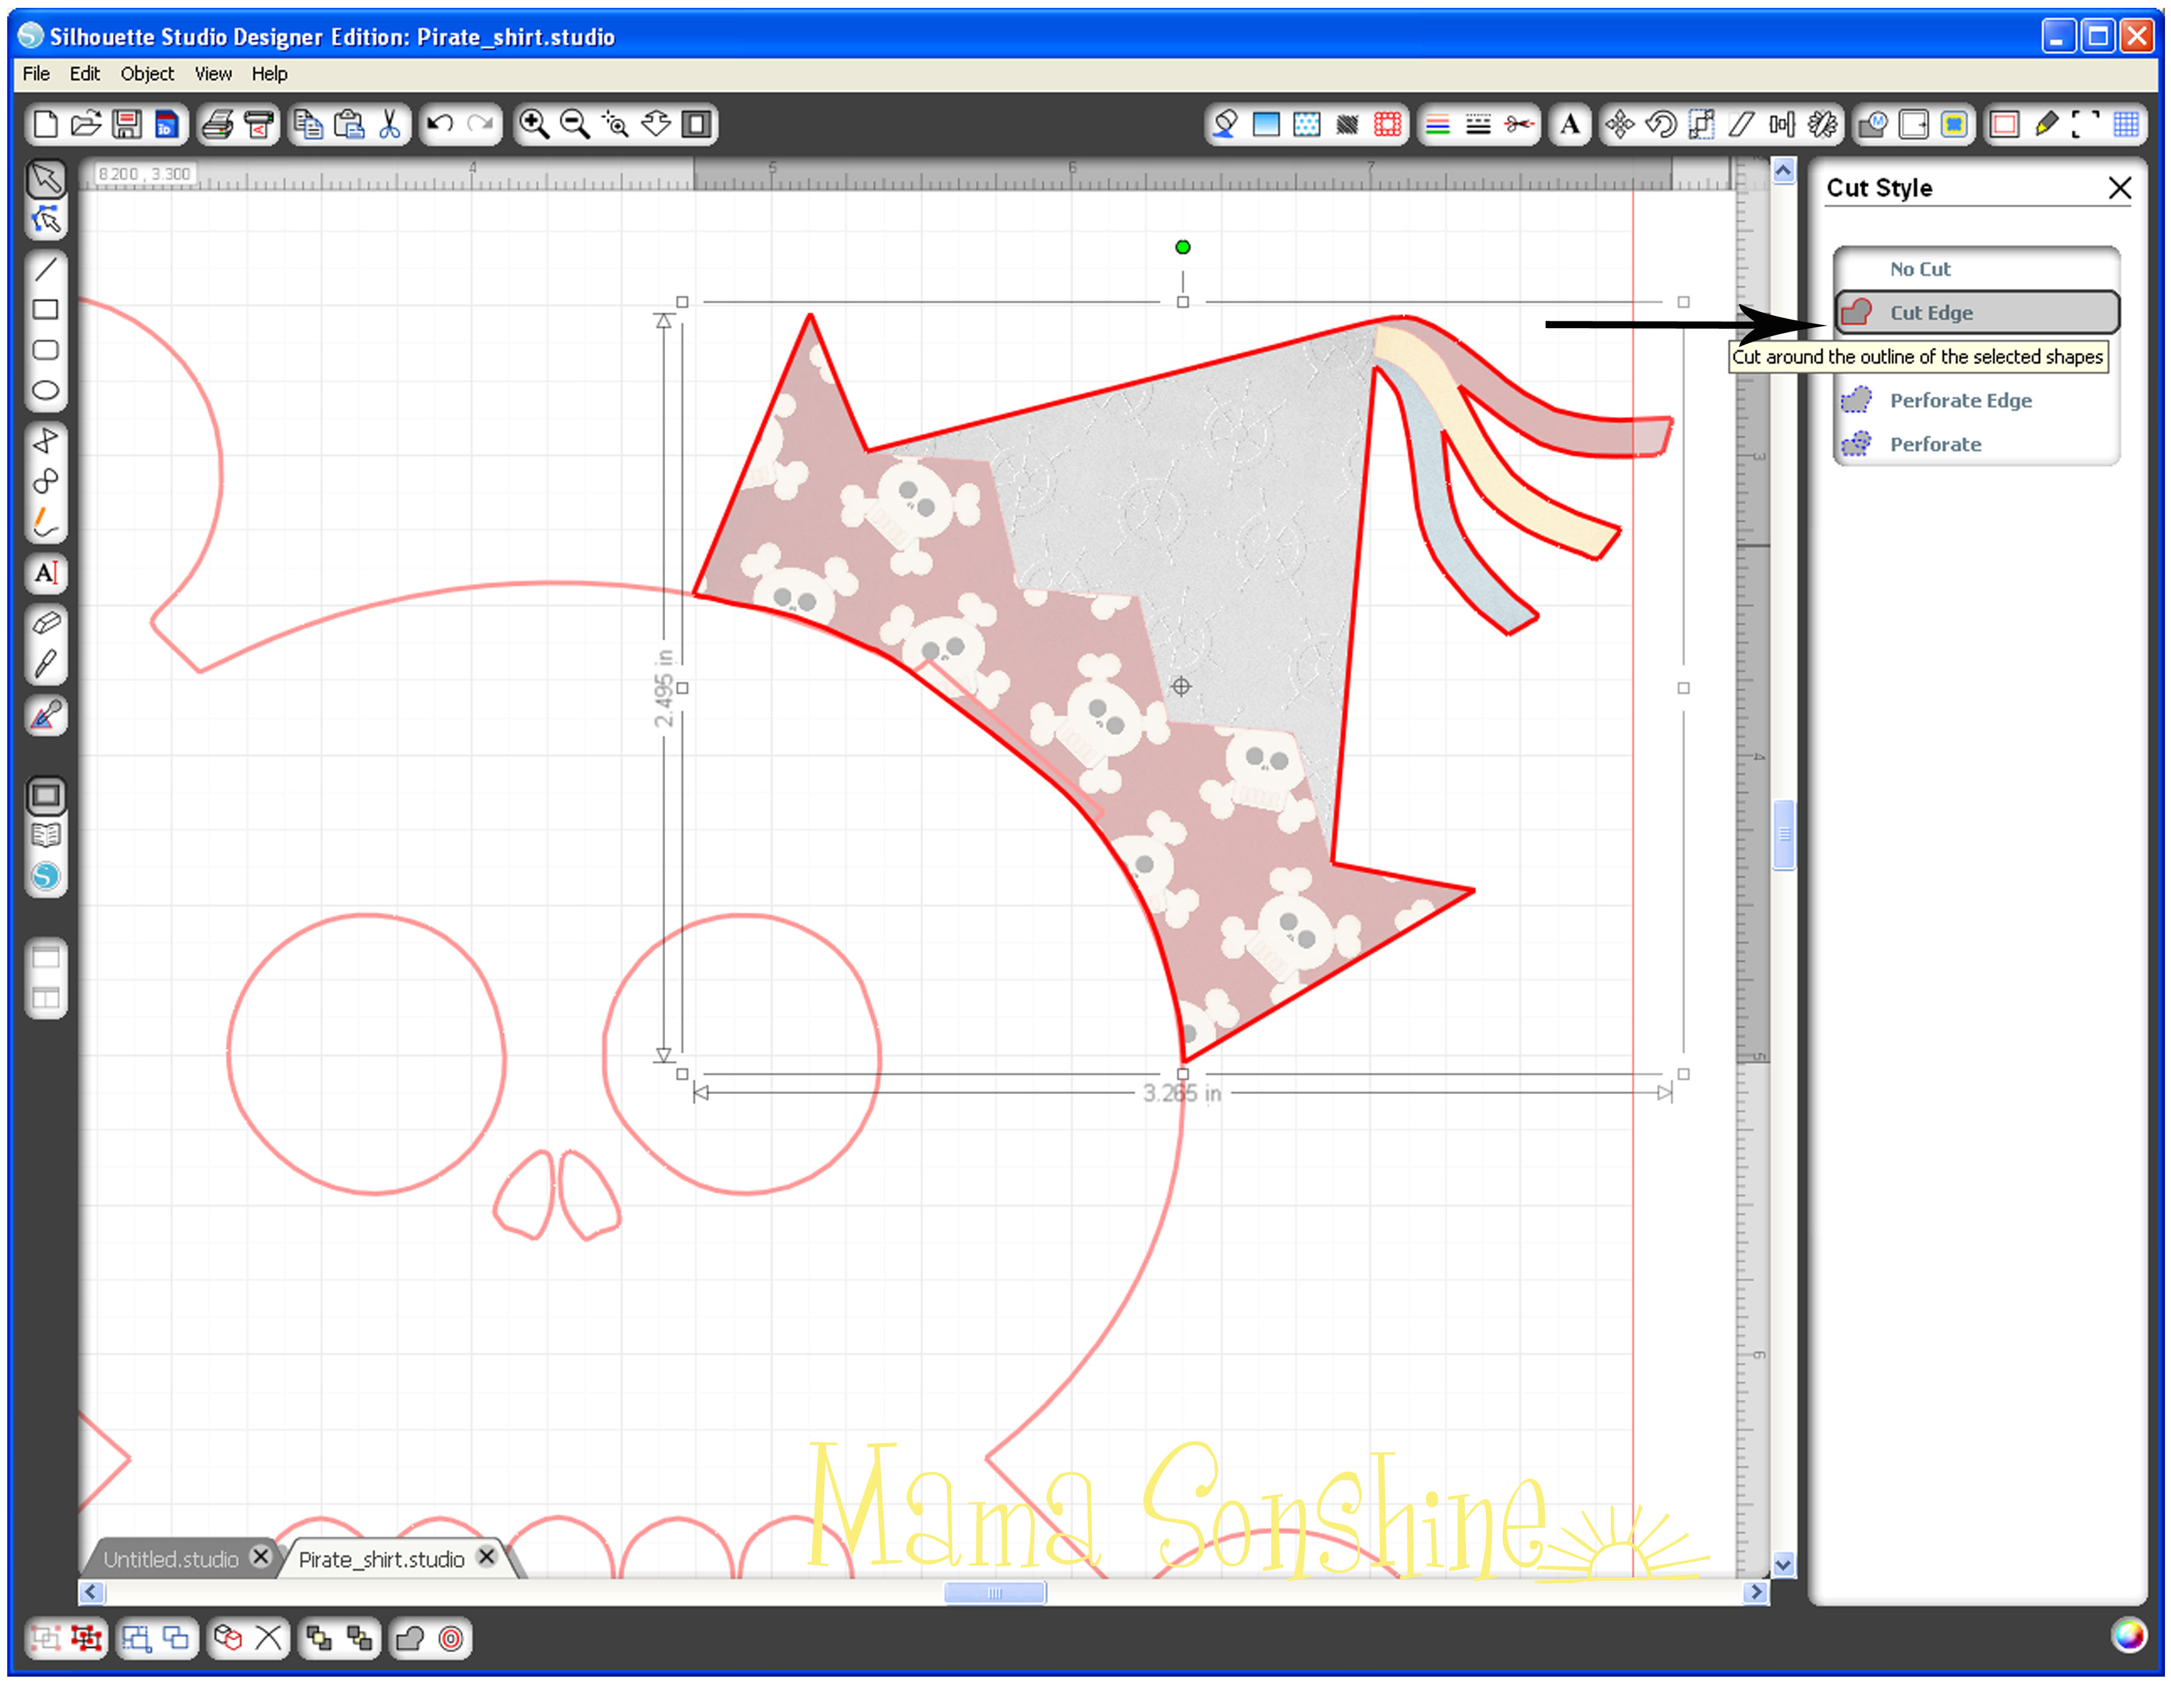
Once you have the hat fitting the shape of the head go to your cut style tool box because you don’t want the elements of the hat cut in separate pieces. Select all the elements, and select no cut, then select only the main hat shape and select cut edge. This ensures that you are only going to cut around the hat’s edge after printing. Select the five elements of the hat and group them together, you don’t want any of them moved away from each other now.
Now for the text:
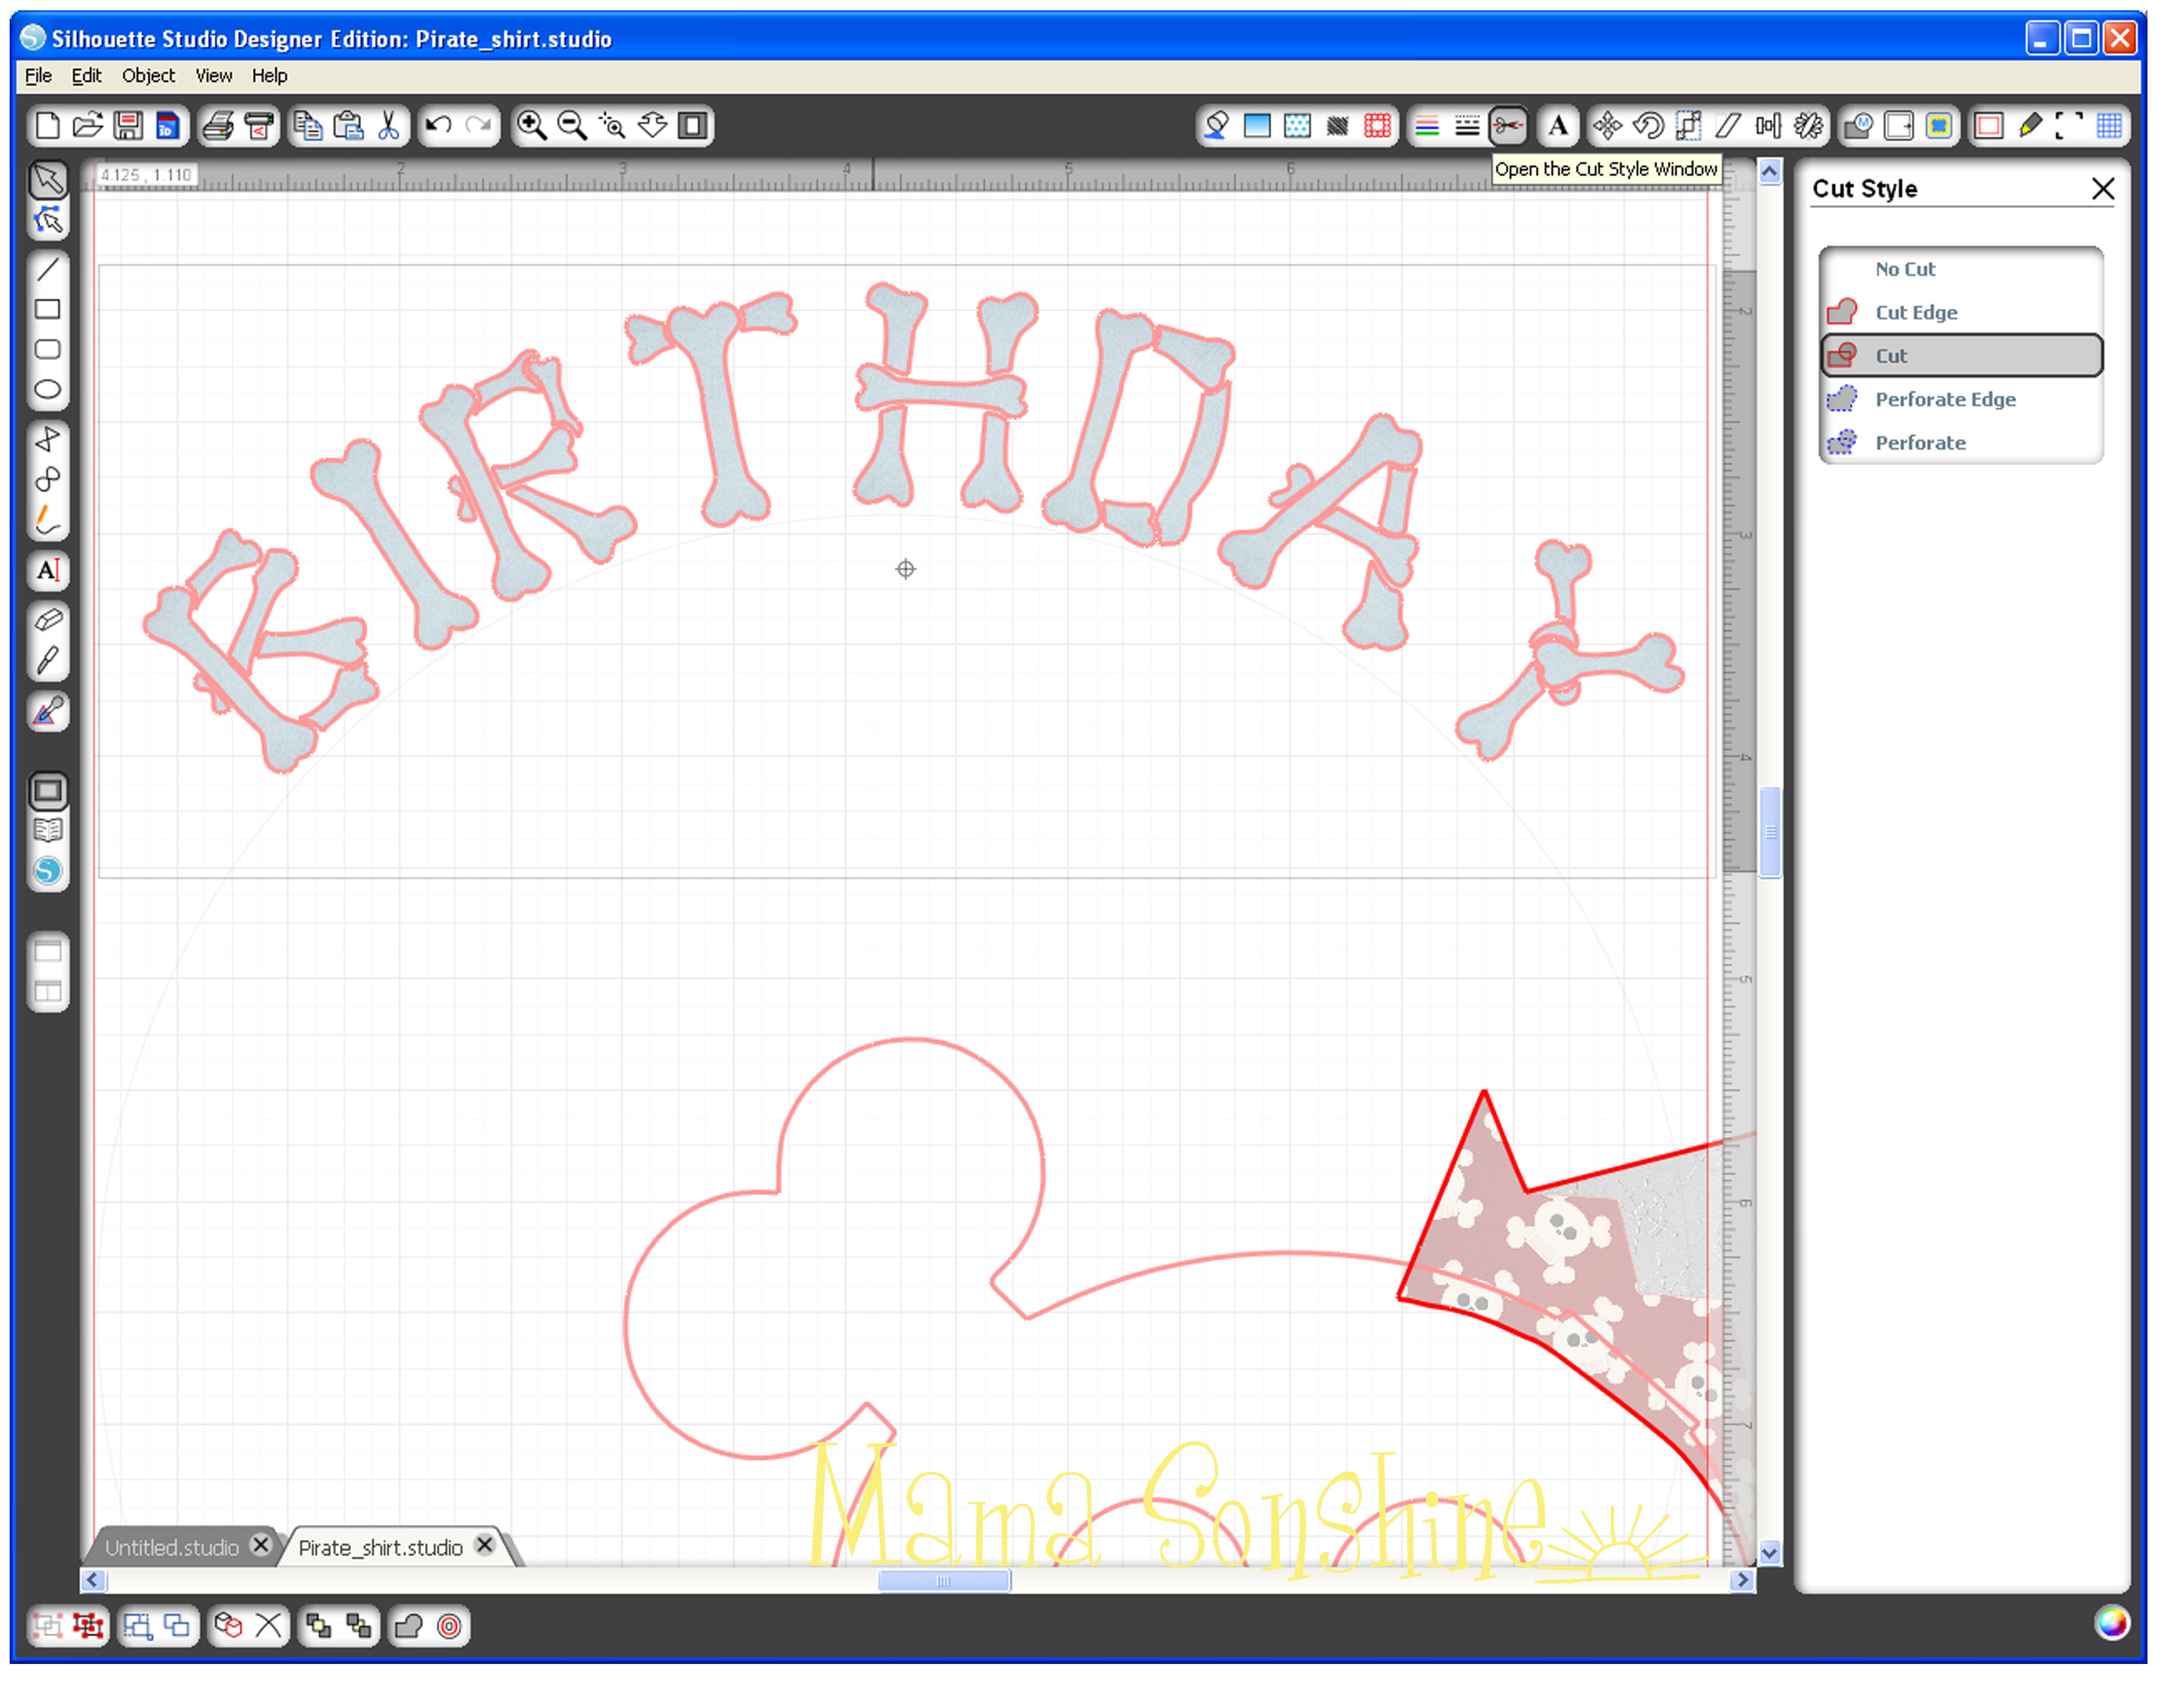
First I wanted the word birthday to be arched, I drew a circle, typed the text then dragged the text to the circle using the little circle with a cross inside. Resize and move the text until you get it the desired results. If the green outline and move tool go away because you had to select off the text, just double-click the text till they come back. I had to move the skull off the page, because the text kept trying to link with it instead of the circle and move it back to fit the text to the skull size.
This next part is where I had the most difficulty. I really liked this Bones font I found, the problem is that each letter has little bones that would be cut separately. This would happen even if cut edge was selected, because the software sees each bone as a different element. After hours of trial and error I finally figured out the simplest way to cut around the word, and not each individual letter or bone.
The first time I did this I took a very long route to get where I wanted. I released compound paths, duplicated, filled patterns, made new compound paths, welded, grouped, un-grouped, made offsets, moved, re-sized, moved again, etc. After I got the result I wanted I realized I was adding a bunch of extra steps.
First select your text and go to the offset tool box, create an offset and adjust size so it is just slightly bigger than your text. If you are using the dark T-shirt transfer material your offset will show as white, so it is up to you how much white you want to show. At this point each letter will cut out separately, which I didn’t want because I didn’t want to align them on my shirt, I wanted the whole word as one element. So I move my text up slightly to work with my offset. I moved each offset letter closer to each other with a very slight overlap so I could weld them together. The offset and the text no longer match up, so you may have to ungroup your text to move each letter back to the offset, but do not release compound path.
Choose a pattern to fill the text for printing.
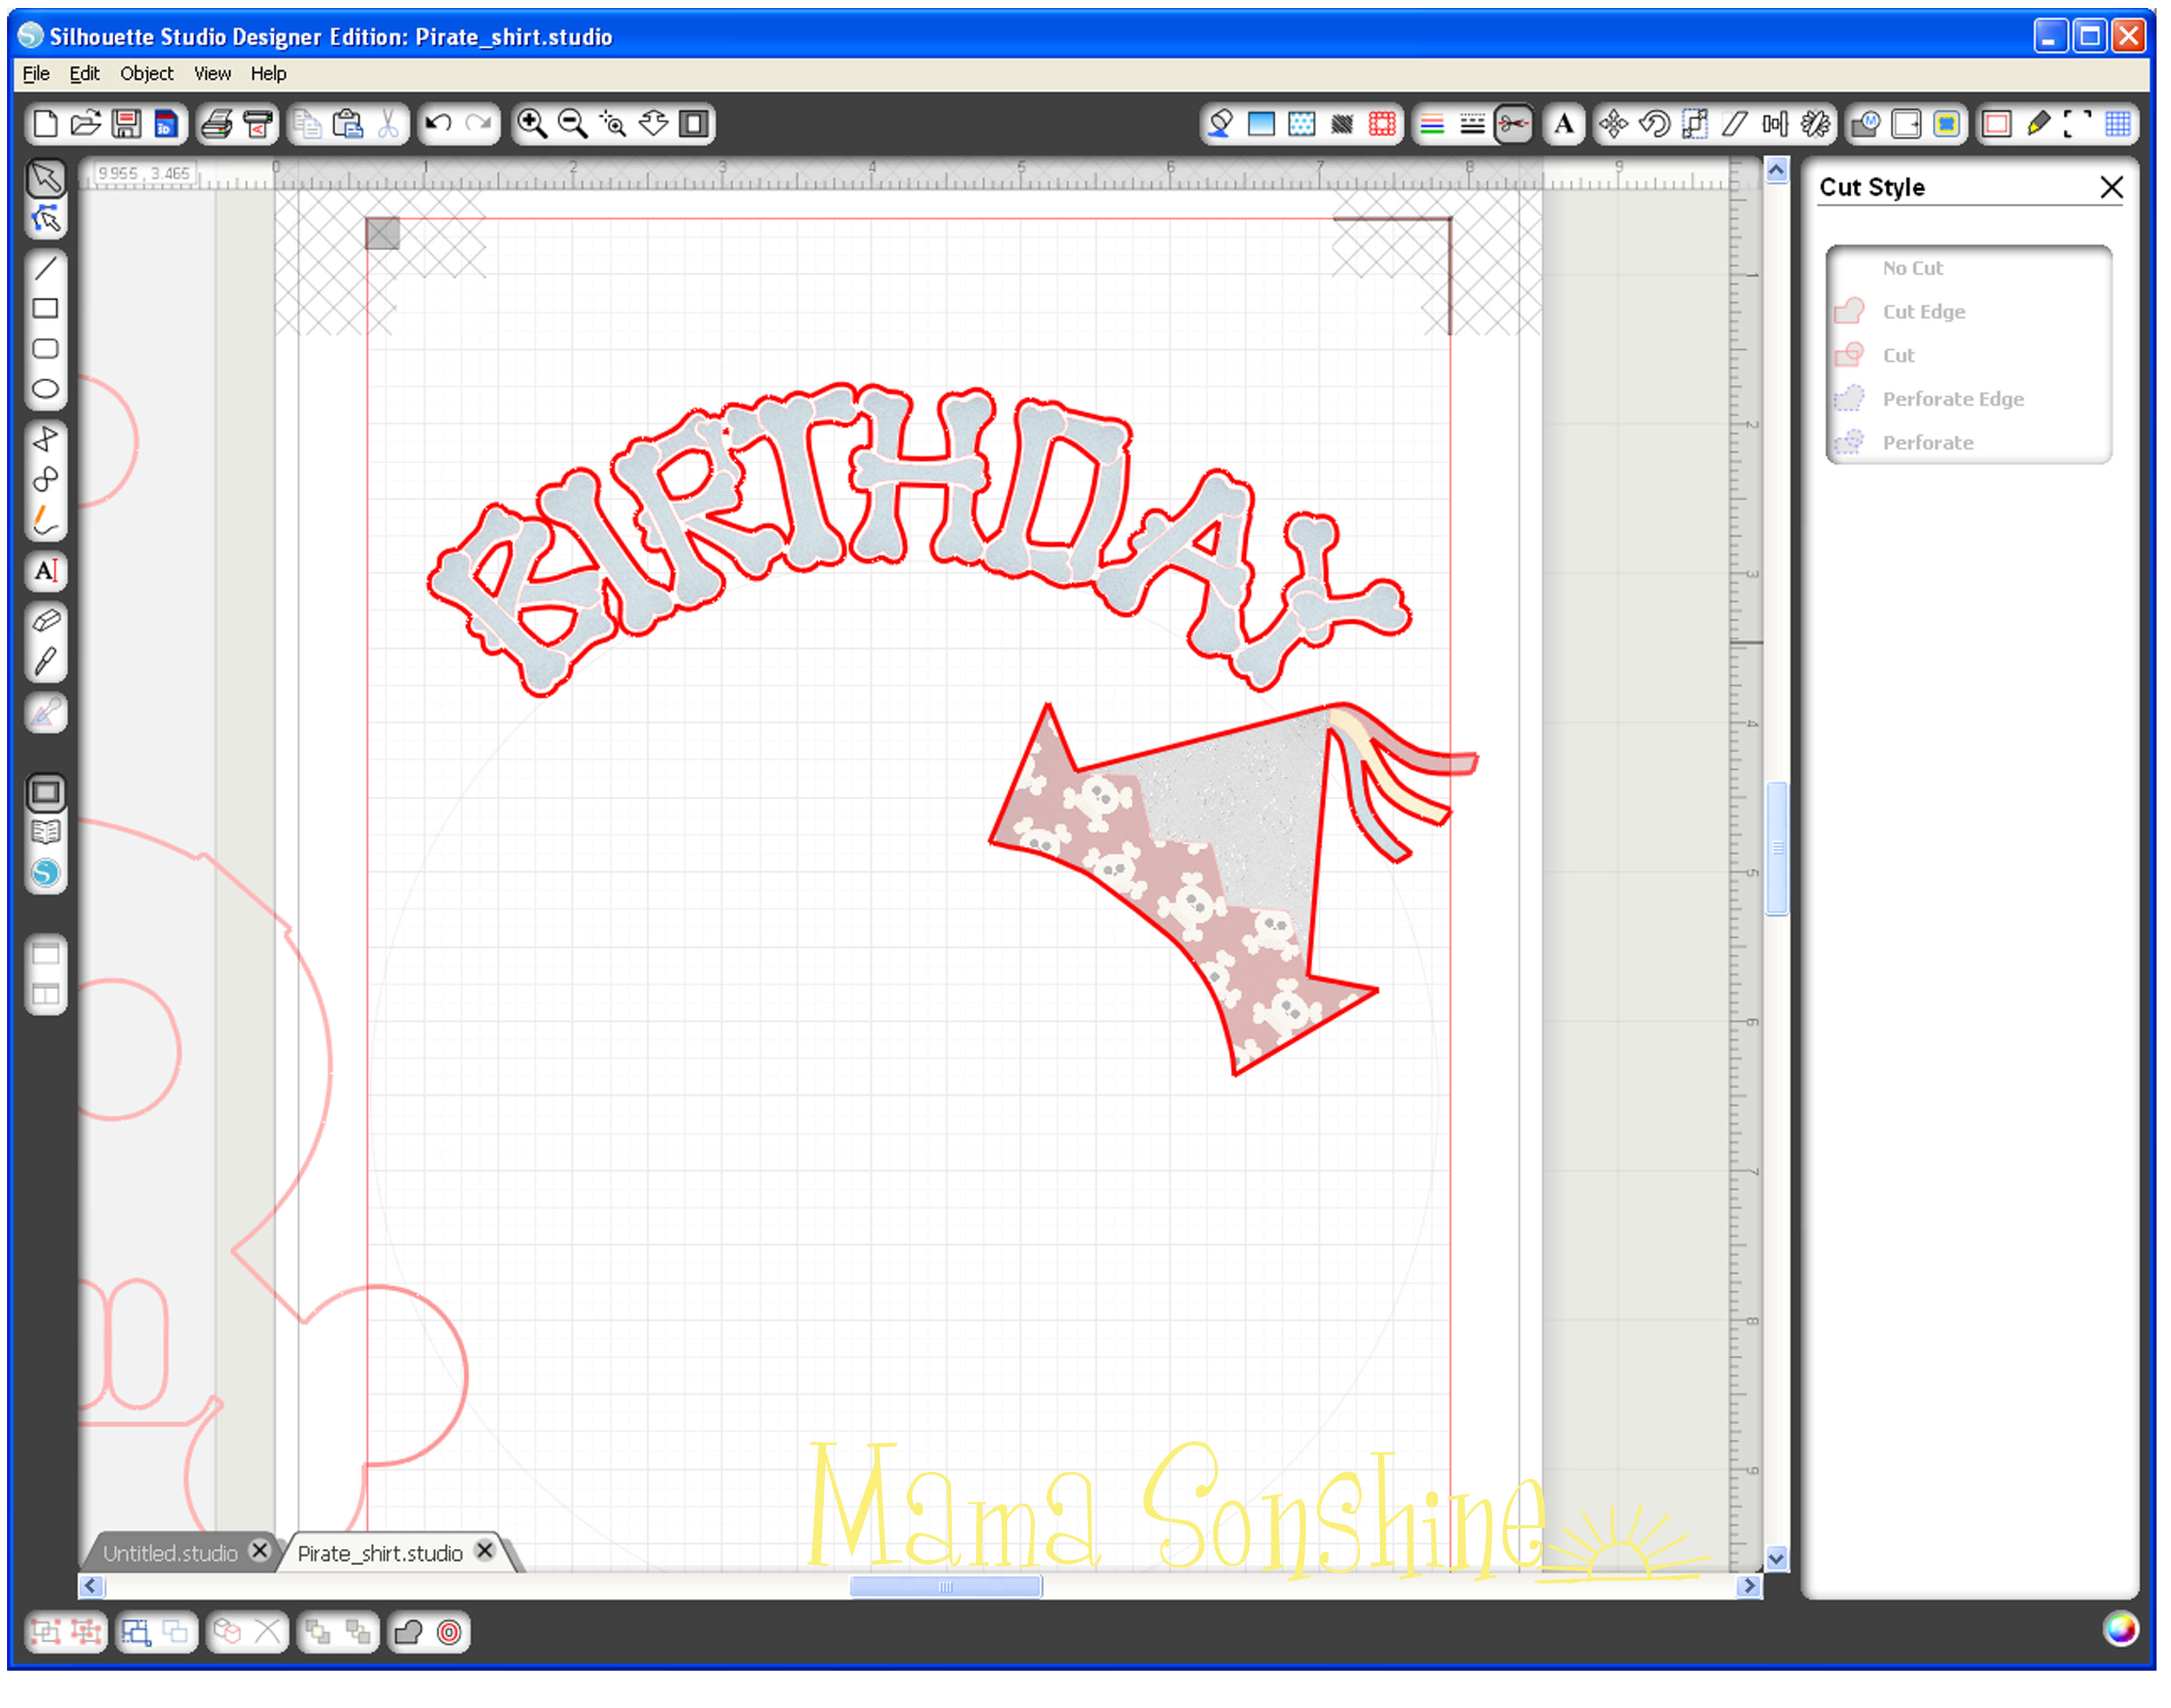
Go to the cut style window and select all the letters of your text, then select no cut. Select the offset and cut edge. You will see that your machine will now cut around the letters as one piece.
Repeat the steps for your second word and align everything, including the skull, to make sure size and proportions look good.
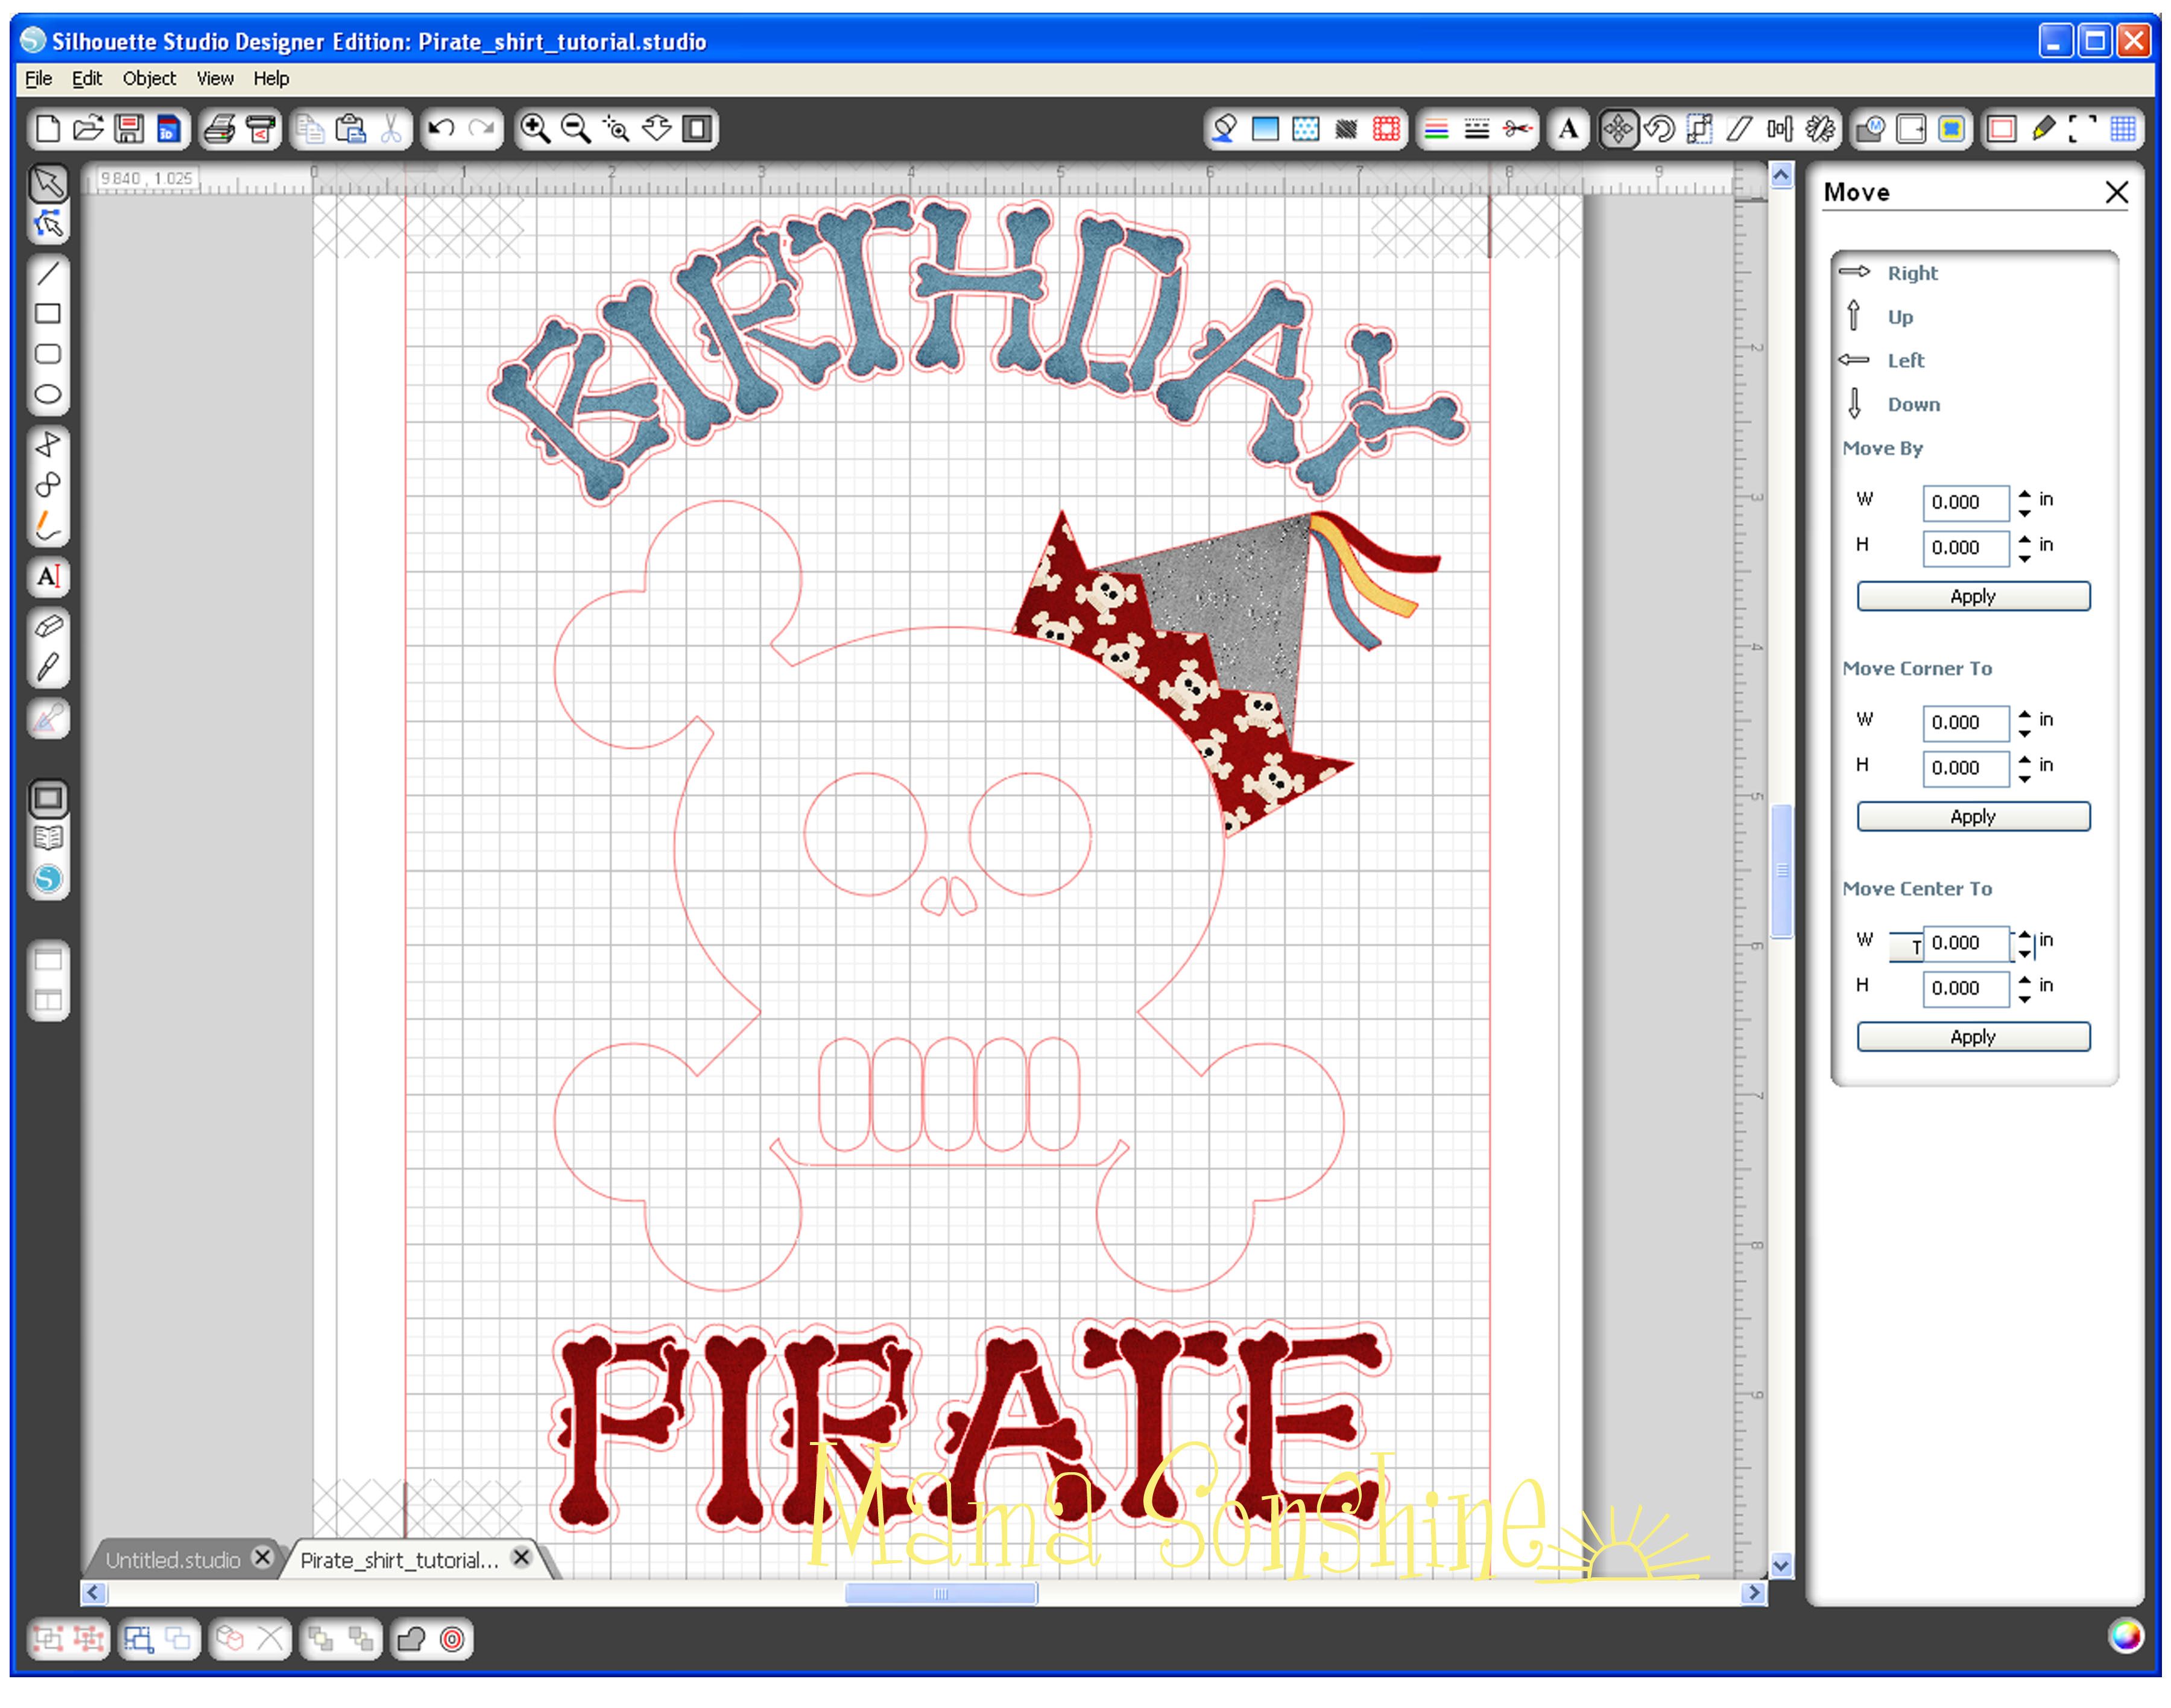
Since the skull is not part of the print ‘n cut, you would move it off the page. Show registration marks and move your elements on your page for printing. Just make sure your hat elements are grouped together and the text and offsets are grouped together. After printing, do not move anything, it will need to be in the same location for cutting.

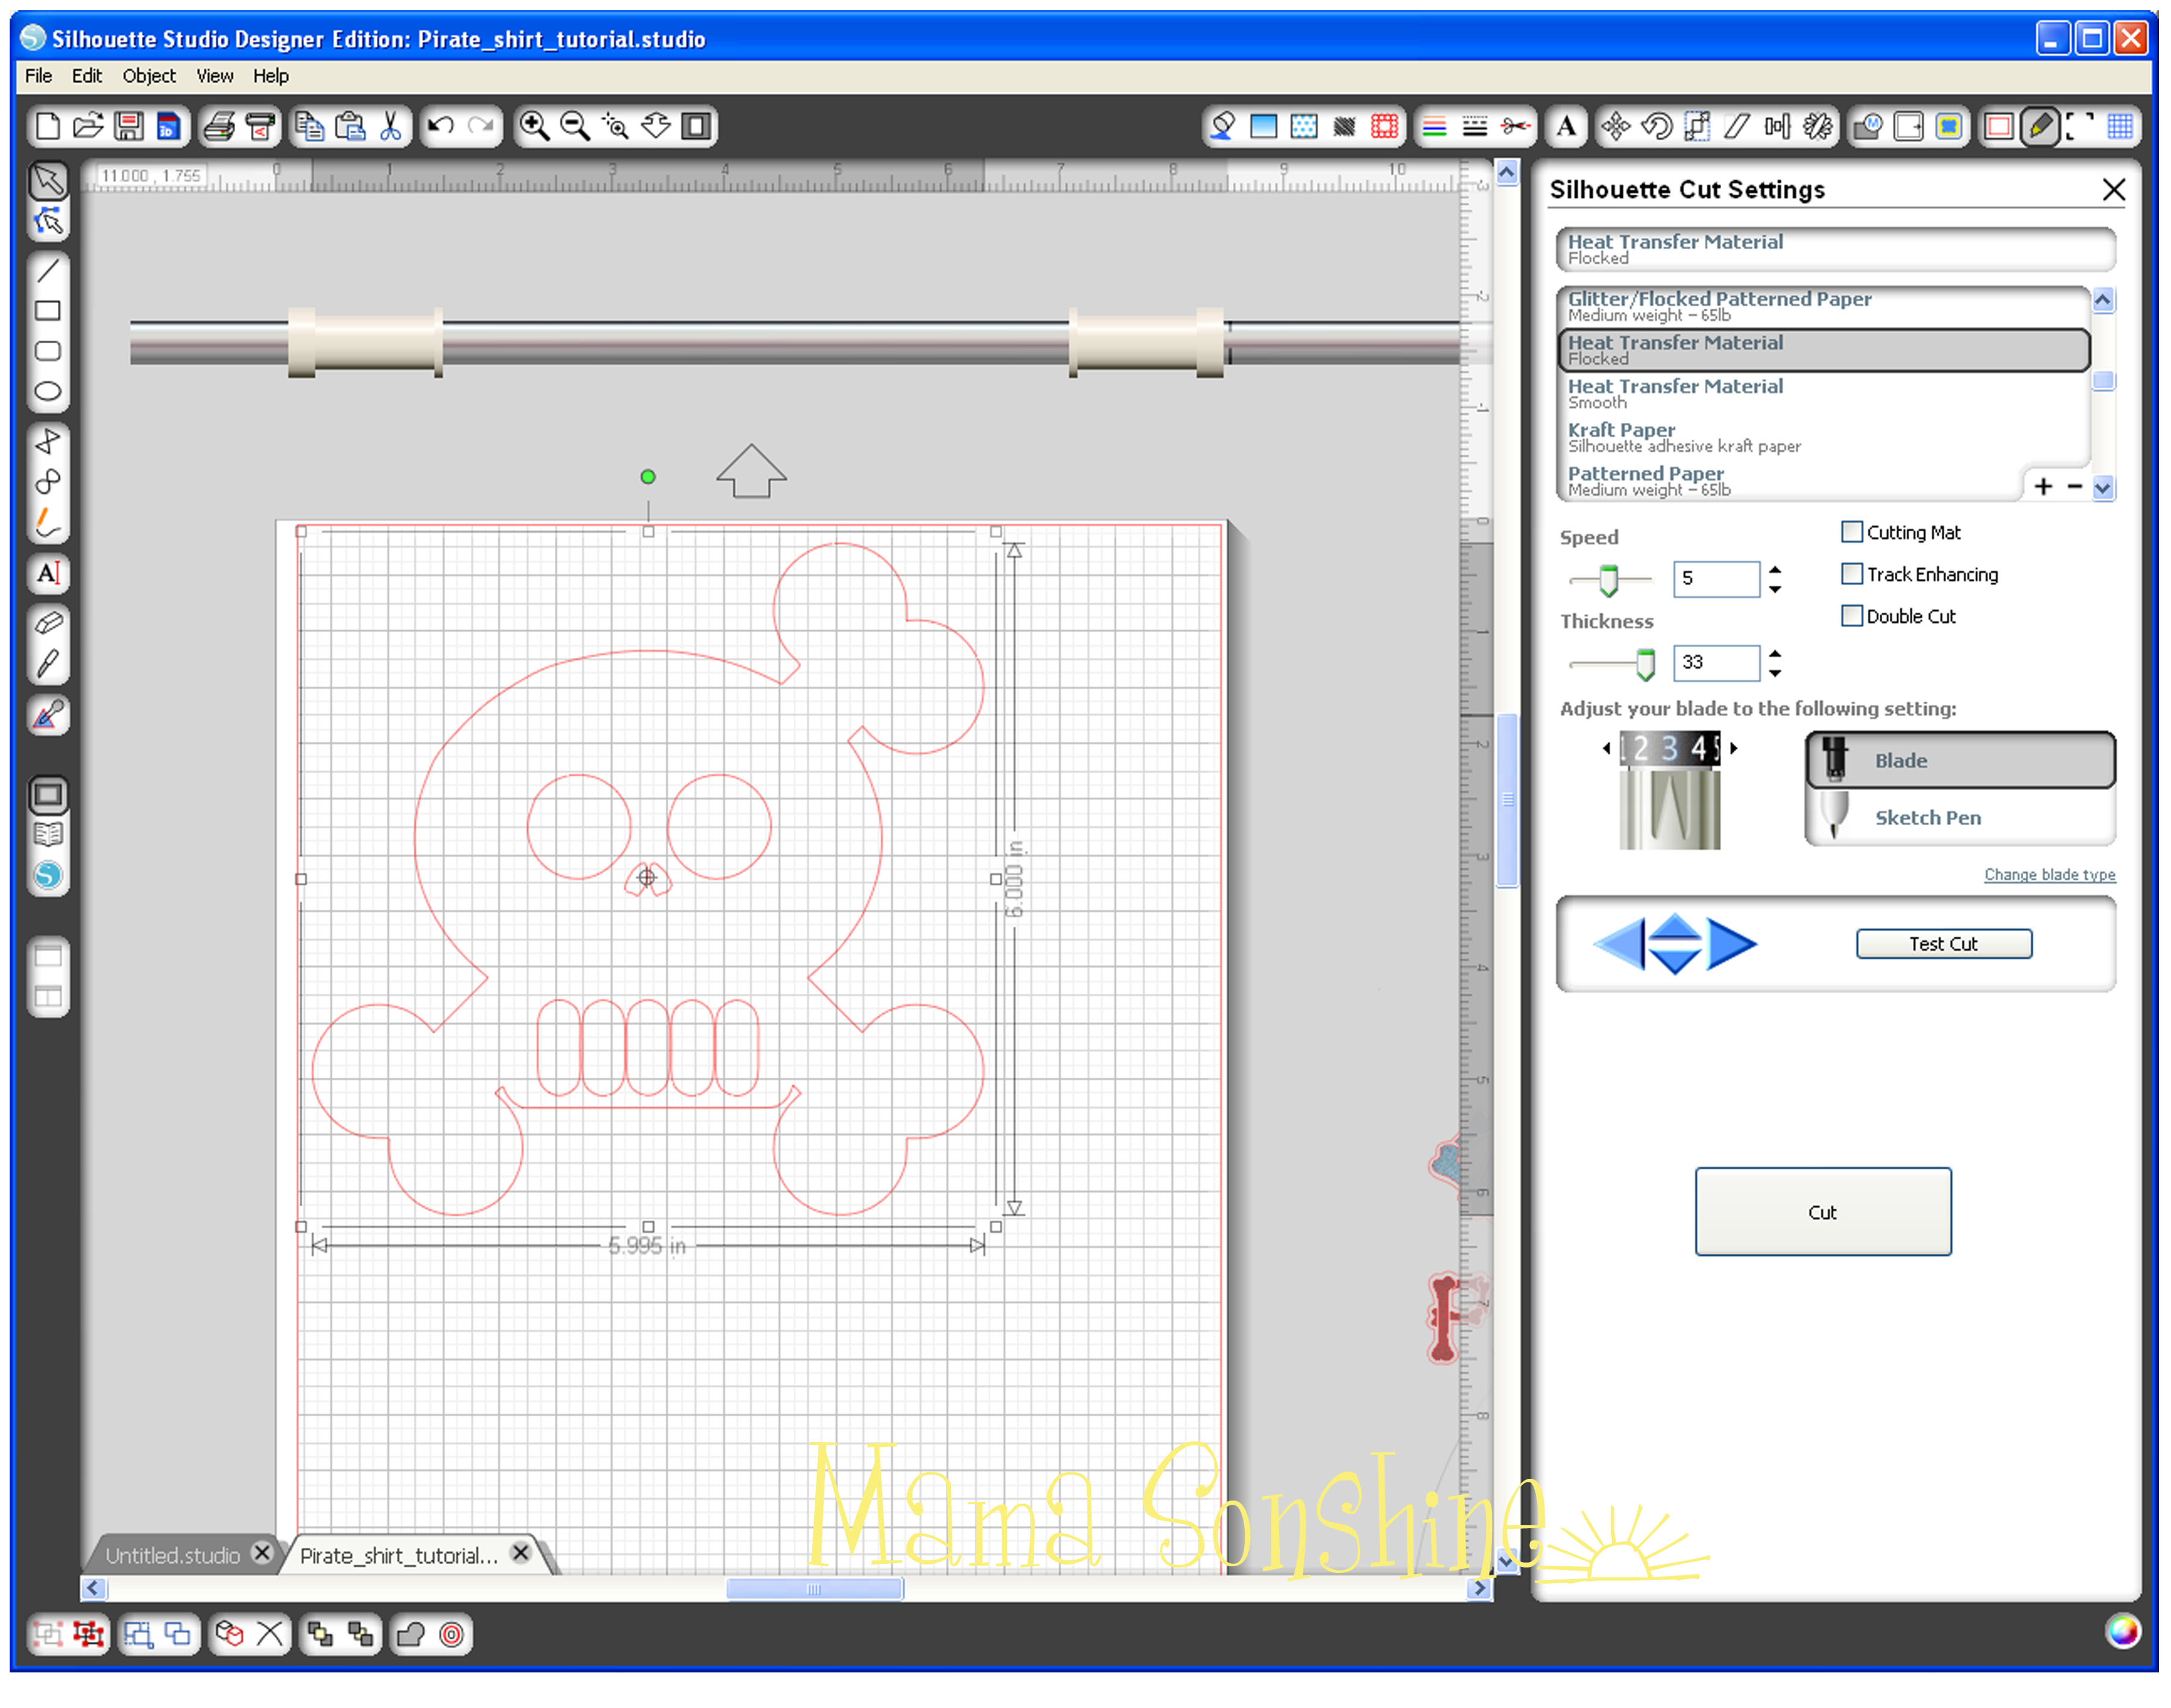
I found the cut settings for Silhouette Studio has for printable heat transfer-dark material worked great.
For the rest of the shirt check out Part Three.
If you want to see how I designed the skull check out Part one.
Happy Crafting


I have shared this project at