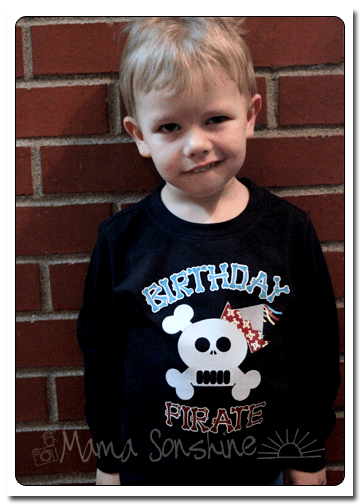
I wanted to share with you the steps I took to make my son’s birthday shirt.
There was a few problems I had that I was able to work through. Hopefully this will help so others won’t get stuck like I did.
In this tutorial I use my Silhouette Cameo and the Silhouette Studio DE software to make a custom shirt for my son’s birthday party. I used graphics from Just So Scrappy‘s YoHo YoHo Pirate kit. I used the Silhouette brand Flocked Heat Transfer Material for the skull, and Avery Dark T-Shirt Transfers for Ink Jet Printers.
Part One will be how to make the Skull & Crossbones
Part Two will be how to do the words & party hat
Part Three will be how to iron everything on with some tips
The flocked heat transfer material I had is 9″ wide, I set my paper size to normal Letter 8.5″x11″ since I will also be doing a print ‘n cut portion for his shirt. Keeping the size the same helped me with proportions.
 I selected the skull and cross-bones from my library. Since it is a .png file I had to trace the element. I planned on cutting the skull out of the flocked heat transfer material, so I won’t need the picture after tracing it.
 No matter what my settings were, I could not get the eyes, nose and teeth to be traced. This is because they are colored parts of the png, so the software couldn’t differentiate between them and the skull. I chose to trace the outline first, then do the inside elements separate.
Since the teeth are basically the same color as the skull, I couldn’t get them to trace cleanly.
Notice all the yellow dots. I could have gone back and deleted them all, but it is easier to just use the drawing tools.
I used the circle tool to make an oval about the shape of one tooth, I then used the point editing tool to match the shape of one tooth. Using the Replicate tool box, I made copies of the teeth and aligned them with the original picture.
Since I no longer need the picture, I can delete it, or just move it off the mat. One part of the bones needs to be removed because this is where the party hat will be.
 Using the knife tool I simply drew a line through the bone, making sure that “solid” is selected in my tool box. If you don’t have the designer edition of the software this is the default setting.
 This portion of the bone can now be deleted. I then went back and smoothed the part of the skull where I made the cut.
Using the point editing tool box, I deleted all points above the curve of the skull and smoothed out the remaining ones. It is not shown in this tutorial, but I also added curved lines to separate the skull and reaming three bones. I didn’t want the separate but I wanted a cut line there to give more depth to the finished product.
 In the cut style tool box make sure “cut” is selected so that it also cuts out the eyes, nose and teeth. The shirt will show through on these parts.
 Before you actually cut your design you want to flip it horizontally, make sure all elements are selected (ok to group them together). You can right-click, or go to the edit menu, and select ‘flip horizontally.’ The cut settings for Heat Transfer Material Flocked worked perfect because it is a Silhouette media. If you are unsure make a test cut first. You don’t need a mat, so un-click that box and make sure the shiny side is down when cutting. If unsure, follow the directions on the package.
For the rest of the shirt check out Part Two & Part Three.
Happy Crafting


