I Tri and Craft

thoughts from a mother of boys, a marathoner, a triathlete, a crafter, a wife, and a scientist


Leave a comment

Running Log Dec 17th ~ Race Recap

12k Vancouver WA

This post has been a long time coming.  The race was actually Thanksgiving weekend, but I just haven’t had a chance to tell you about it.

I really wanted to do a Christmas themed run this year.  After looking into the ones that were available I decided on the Hot Buttered Run.  It sound fun and Christmasey and there was Hot Buttered Rum at the end.  What could be better.

The race offered two distances; a 5K and a 12k (7.28 miles).  I picked the 12k race.  The course was mostly flat and wound through downtown Vancouver, WA and through Fort Vancouver.  This also put us in the industrial district for a couple of miles, which wouldn’t have been bad except the smell coming from one of the plants.  It was either tires or asphalt, think burning rubber.  Not the best thing to inhale while running.
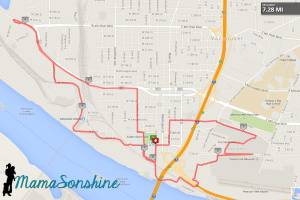
MSS_HBR course

12k course

Because of the distance and the small town, we had to run by the starting park twice.  Around mile 3 we run by the park, but that is ok, because the race just started and I was expecting to double back.  But then at the end, close to the 7 mile point we run along the park and you think you are going to take a left turn at the corner and cross the finish line.  WRONG!  You keep going, granted it is only about a 1/4 mile, but mentally it throws you.  The course took us down another block before turning left to come around the other side and up to cross the finish line.
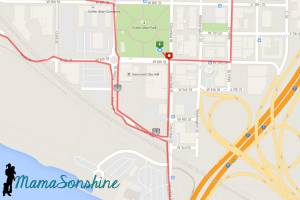
MSS_HBR course

close up of mile 3 & 7

The day was beautiful and cold.  I mean cold.  OK, it wasn’t below zero or in the single digits but it was cold.  However the sun was shining and there were parts of the run that I actually felt warm.
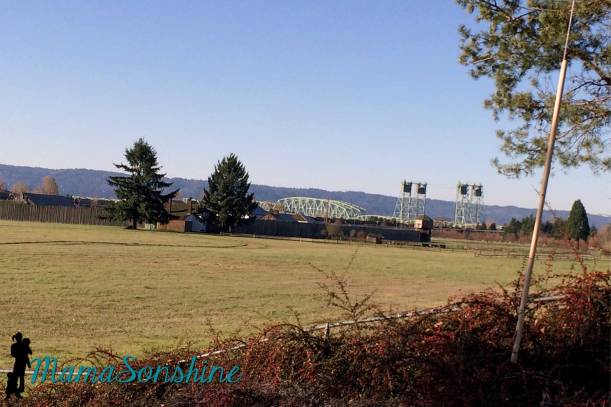
MSS_HBR

I-5 bridge and Fort Vancouver

Running through the fort with the sun on my face was glorious.  In fact it was so great I stopped to take a picture, which paused the Map My Run app and I lost about 3/10 of a mile.  Which means my split records are not really accurate.  My times were about ten and a half-minute miles to eleven and a half-minute miles.
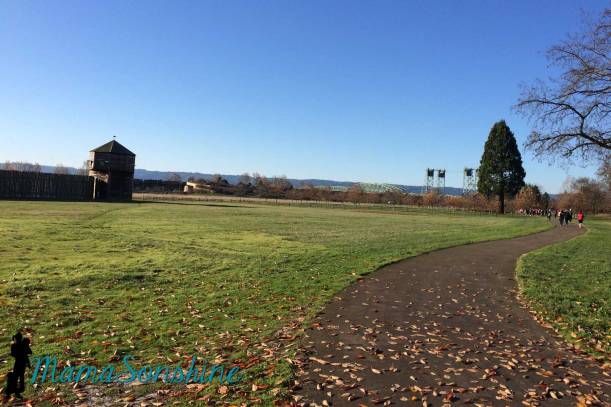
MSS_HBR

there was ice under the leaves on the path

There were less than 500 finishers with over 300 of them females.  I wanted my time to be under 90 minutes, and it was.  So I am happy about that.  I averaged an 11:18 min/mile officially running 1:25:50.  I am hoping that next year I will finish closer to an hour.  There was a few slippery spots of ice where it was better to walk than run and I stopped to take a few pictures.  I also took a walking break to have some Gu for refueling.
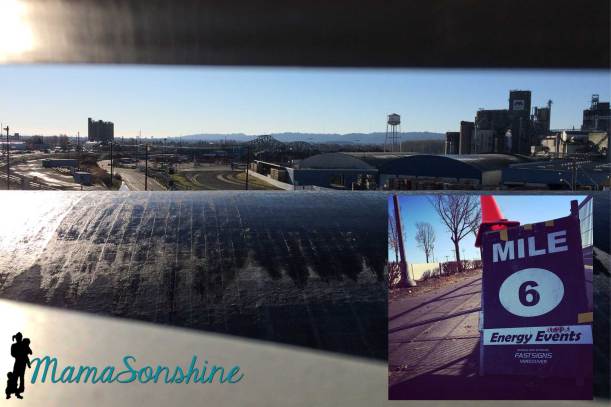
View at mile 6

View at mile 6

Then as soon as I was done I started to freeze! Did I mention how cold it was?
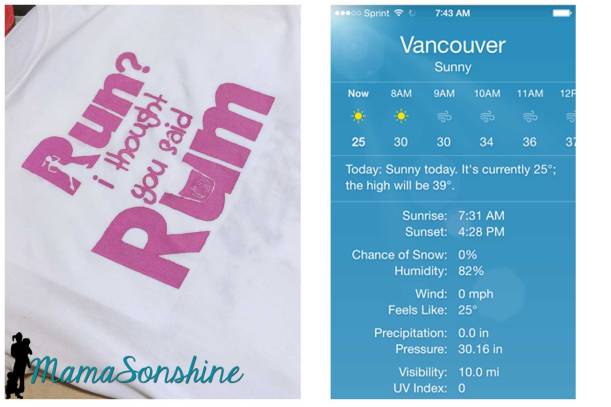
MSS_HBR

Of course I made a shirt to wear for the race, but I had to put my coat back on, which covered it up, as soon as I was finished!

The other reason I picked this race was because of the Kids Kandy Kane Race and the fact that Santa would be there.  Ian has been talking about doing a race with me and I figured this would be a fun one for him to do.
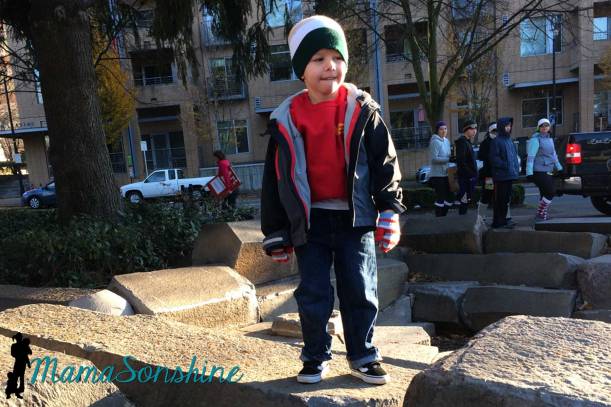
MSS_HBR03

There was two divisions of kids races.  One was a fun run, for the kids under the age of 8, and was supposed to be a distance they could reasonably finish.  There was two waves, the first one was for kids ages 3-6 and running with a parent, the second was 7-8 with no parents.  So if  you had to run with a parent you went first.  The second kids race was a 1k (.62 miles) for kids older than 5 and could run without parents.  The other benefit of this race is they had a kid zone, a secure area where the kids could play while parents raced.  The thought was, Ian would go to the kid zone, I would run.  I would come get him, see Santa and do his race.

The kid zone had one of those bounce house things in it, and was under a covered area, with only one wall, and no patio heaters.
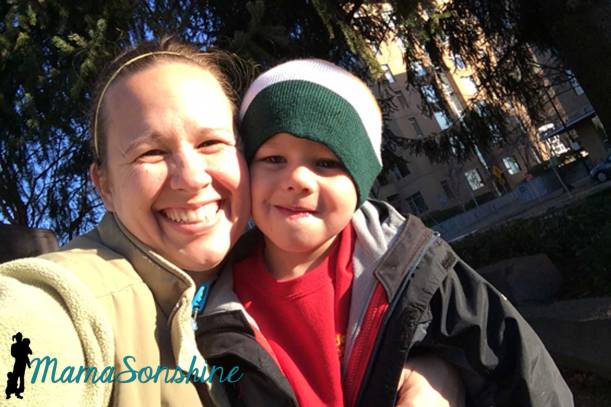
MSS_HBR04

Did I mention how cold it was?

The poor kids had to hang out in freezing weather while we ran.  I really felt bad at the end of my race.  Sure he had gloves, layers of clothes and a hat, but only one pair of socks.  Which would have been fine, but he had to take his shoes off to go in the bounce house.  (after we did his race he told me his feet hurt because they were laughing so hard)  The kid zone had hot chocolate and snacks, and he didn’t complain, I just wish I was faster.  I kept running and tried to run faster because I wanted to get Ian out of the kid zone as fast as I could.
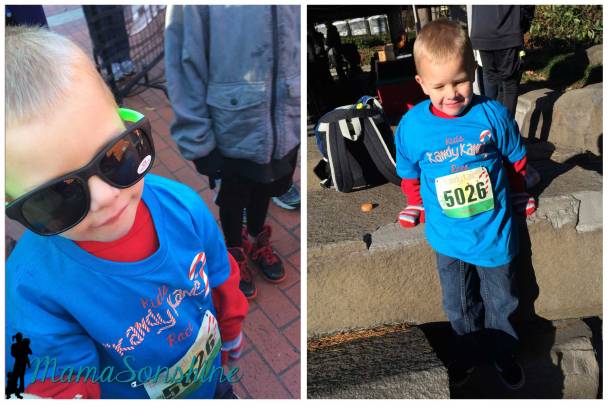
MSS_HBR08

The line for the rum tent was so long, Ian couldn’t come in with me and I didn’t want to leave him in the play area any longer….so I didn’t get my Hot Buttered Rum.  But that’s okay, I got to hang with Ian until his race started.  He decided he didn’t want to go see Santa just yet.

The kids races couldn’t start until all the other runners crossed the finish line.  Then they packed us all back into the starting gate and organized us by waves while Santa walked around talking to the kids.  MSS_HBR09
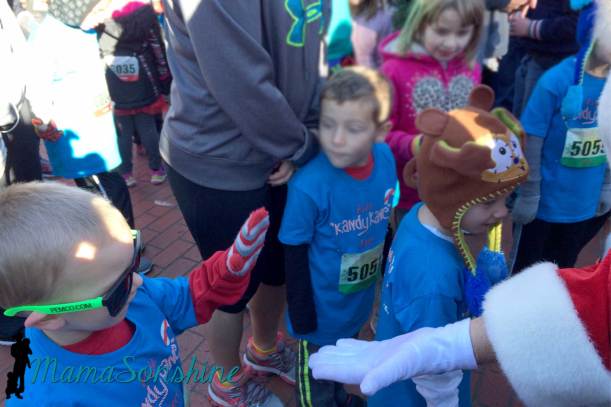
For our wave, the first wave, they told us to just run around the park, which ended up being 0.45 miles.  The actual course was supposed to cut through the park, giving a 0.34 mile course.  But all the kids made it around the park, including Ian and me.
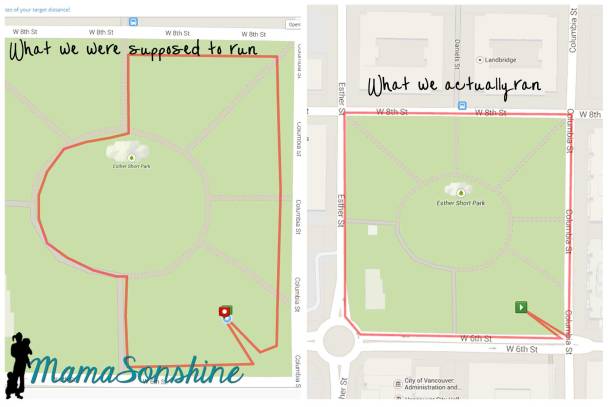
MSS_HBR kids course

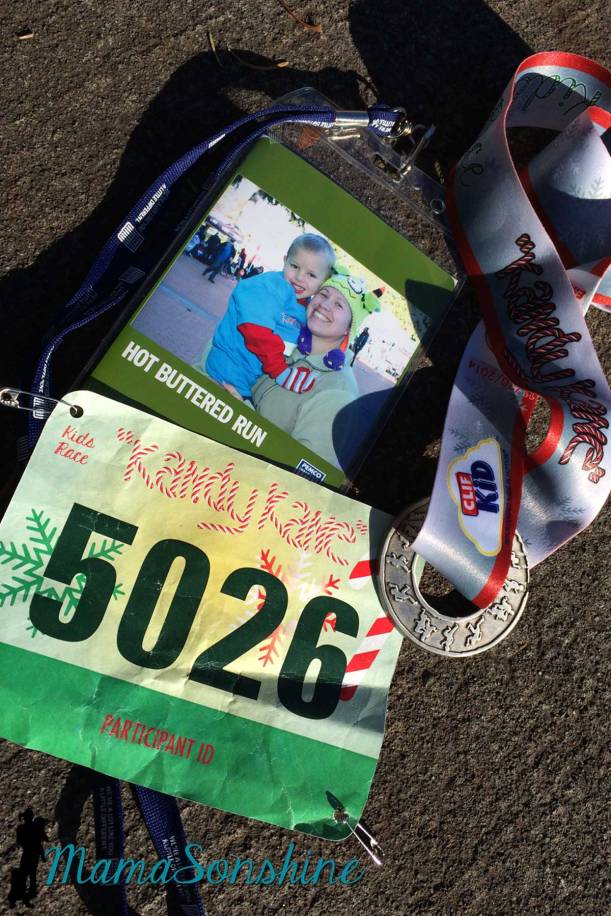
When the kids crossed the finish line they were handed a medal from either Santa himself or an elf.
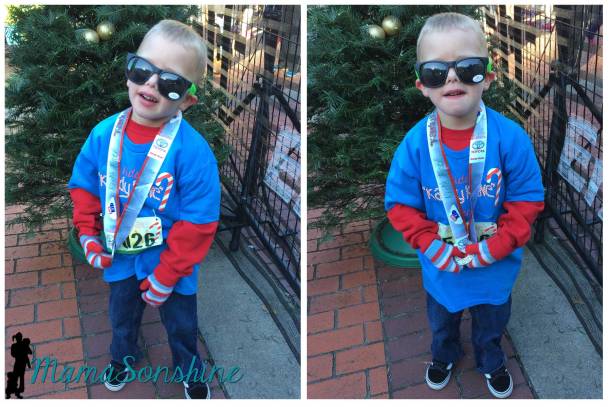
Ian with his new medal

Ian with his new medal and a super runny nose

Seriously, that made it all worth it.  Ian had a great time, loved his swag and loved the fact that he got a medal from Santa Claus.  Since the race area was at a park, there was a playground.  We went and played on the playground for a little bit then went to Starbucks for more hot chocolate and a cake pop & cookie for Ian.
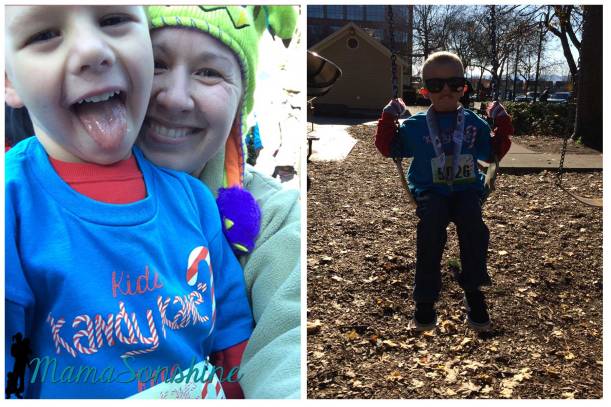
MSS_HBR11

However we talked about his next race happening when it is warmer.

I do plan on doing this race again next year and hopefully Ian will too.  Although we might figure something else out, like having someone with us to hang with Ian, or bring him before it is his time to race.
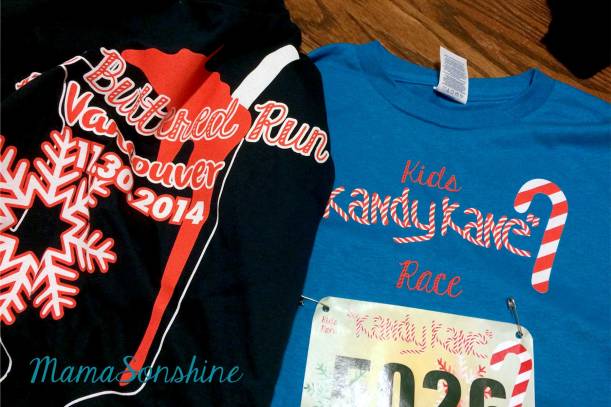
MSS_HBR shirts

Our shirts

MSS_HBR swag

Ian’s Swag from the race

Just. Keep. Running.

C25K interval information can be found here

Want to find out what races I’ll be doing next year?  Check out my list.

Dawn Marie

facebook instagram pinterest parties by mamasonshine etsy bloglovin google+ email twitter Image Map


Leave a comment

Menu Plan Monday Dec 15th

I can’t even believe another week has gone by in December.

I am so running out of time.  The to-do-list is just as long as it was last week.  Of course I might keep adding to it…

Cards are coming along, but not yet done….This week is more card assembly, present making, gingerbread house assembly (for our big house decorating party on Sat.) and wrapping.  No, don’t worry I didn’t mean rapping, ’cause I can’t throw down rhymes.

But what does that mean? I have no time to cook! OK, I have very limited time to cook.  So to the crock pot I turn.  And to meals that do not require a side dish.

Or I can turn to take-out, or eating at my sisters, or….are pop-tarts ok for dinner?


MSS_Breakfast With Santa

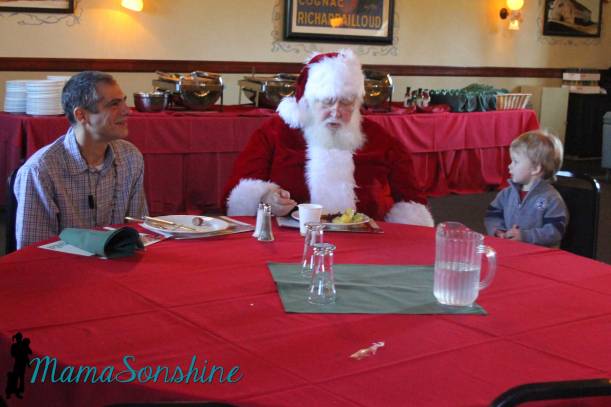
We had breakfast with Santa yesterday. No big deal.


Menu Plan 12/15-12/21

Mon: Korean Beef and Rice

Tues: Slow Cooker Nacho Grande Soup

Wed:  Beef Bourguinon with garlic noodles

Thr: Ham and Cheese Gnocchi 

Fri: Leftovers

Sat: Kitchen is Closed!

Sun: Roasted Pork Loin in Beer Sauce with roasted potatoes


Happy Cooking


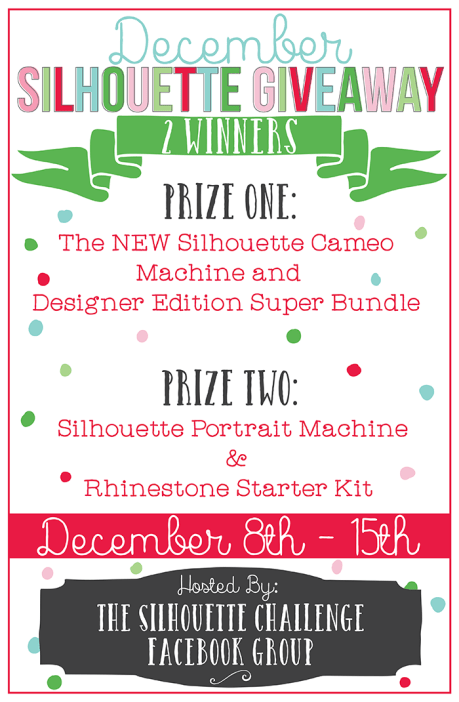
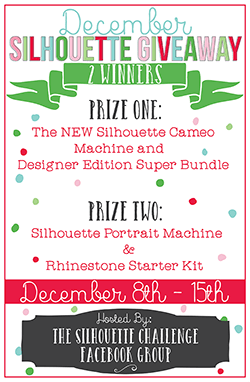
Today is the last day for the Silhouette Giveaway, so if you have not entered, now’s your chance.  Click on the picture below to enter the giveaway.

Click on picture to enter giveaway

Click on picture to enter giveaway


Dawn Marie

Need something to help plan your meals?  I use the Plan to Eat online meal planner.  Try it free for 30 days

Simple Meal Planning - Plan to Eat


Find more recipes at I’m an Organizing Junkie


Top Mommy Blogs - Mom Blog Directory


Leave a comment

Menu Plan Monday Dec 8th

Why is my Menu Plan Monday on a Tuesday? you ask….
Well yesterday I had this Silhouette Challenge post schedule with a mega huge giveaway! so the menu plan just had to wait.  It’s okay, you get it.


As usual life got in the way of my cooking plans on Sunday, so I made the pork chops last night.  And it had to be last night because I pulled them out of the freezer on Sunday.

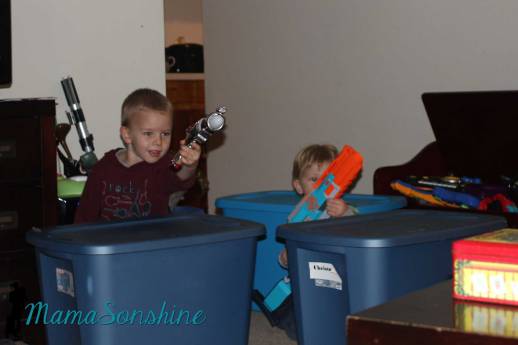
We got our tree on Sunday and I brought home a raging headache, which is why I didn’t end up cooking.  I could only handle the boys trying to decorate the tree for about 30 minutes and had to stop them, but I let them finish last night.  As a result the Christmas bins didn’t get put back into the attic and the boys made a fort.


MPM_2014Dec08

I am so busy this week trying to get Christmas cards and gifts made that I want really easy dinners.


Menu Plan 12/8-12/14

Mon: Bourbon & Onion Pork Chops with noodles

Tues: Chicken enchiladas with Spanish rice (I don’t know why, but I must always have Spanish rice when I have tacos or enchiladas)

Wed:  Italian Sausage and Pasta with Tomato Cream Sauce

Thr:  Crock Pot Bacon Ranch Chicken

Fri: Leftovers

Sat: Kitchen is Closed!

Sun: Beef Stew


Happy Cooking


Dawn Marie

Need something to help plan your meals?  I use the Plan to Eat online meal planner.  Try it free for 30 days

Simple Meal Planning - Plan to Eat


Find more recipes at I’m an Organizing Junkie


Top Mommy Blogs - Mom Blog Directory


7 Comments

DIY Christmas Coasters ~ and a GIVEAWAY!!!!

‘Tis the season for giving, and there is nothing better than giving someone a hand-made gift.

Except being able to giveaway a new Silhouette Portrait or Cameo, that is.

decembergiveaway250

That’s right, a wonderful group of bloggers and I have gotten together to giveaway not one, but two Silhouettes.  These ladies have also came up with a variety of holiday projects to make with your brand new Silhouette.  Just follow the links at the end of this post for some inspiration.

DIY Christmas Coasters

I thought I would share some of the gifts I have been making for Christmas this year.

MSS_DIYCoasters


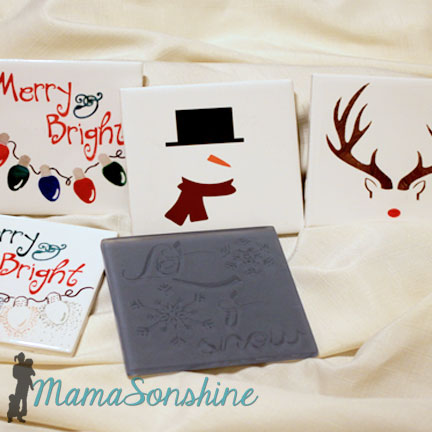
I made some Christmas coasters from tiles using a couple different methods, including etching cream, vinyl and sharpies.

MSS_DIY Christmas Coasters

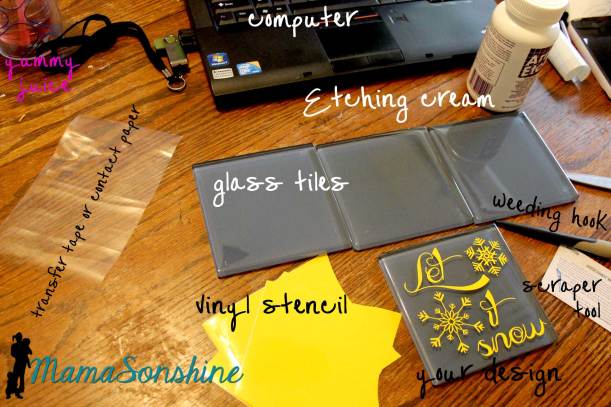
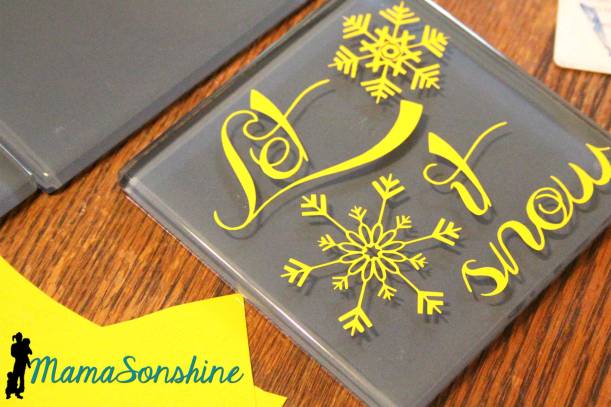
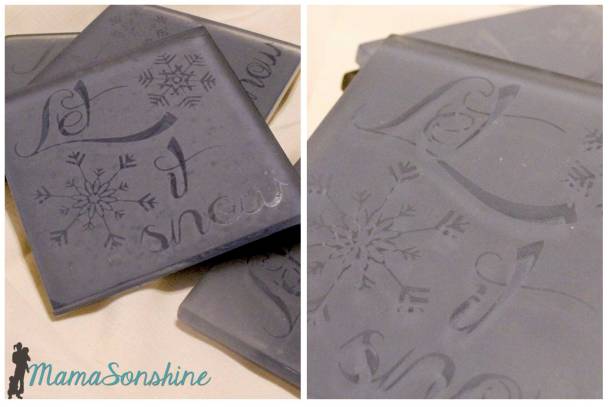
I love making etched glass items and thought how great it would work on glass tiles.  I found these blue glass tiles, they are clear glass with a backing that is colored, and knew they would be perfect for a snow themed coaster.

MSS_glass tiles with stencil

Since the tile would be a coaster I wanted the majority of the surface to be rough with the design smooth.  I cut my design out of scrap vinyl, I have been told contact paper works too, and transferred the design on to the tile.

MSS_glass etching in action

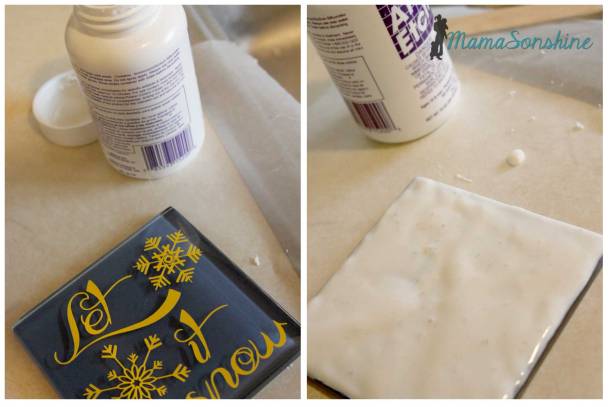
I like to apply my etching cream right next to the sink.  I lay down wax paper for a work surface, and use gloves to protect my skin.  At the end of the etching time I try to scrape the etching cream back into the bottle.  No need to waste!  Rinse the rest of the cream off the tile under cold running water.  Peel off the stencil and wash again with soap and water.

Please follow the directions on your etching cream and be safe.

MSS_Etched Glass Tile Coasters


MSS_Etched Glass Tile Coasters

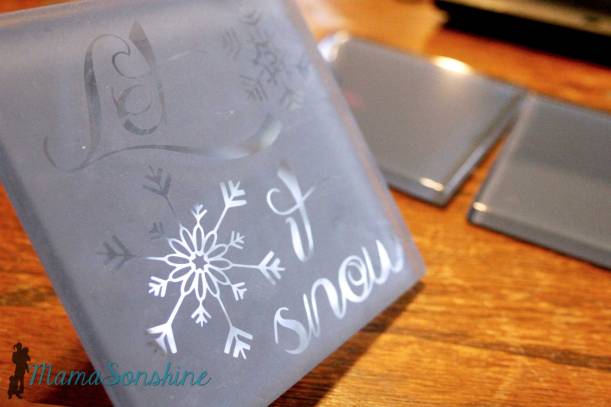
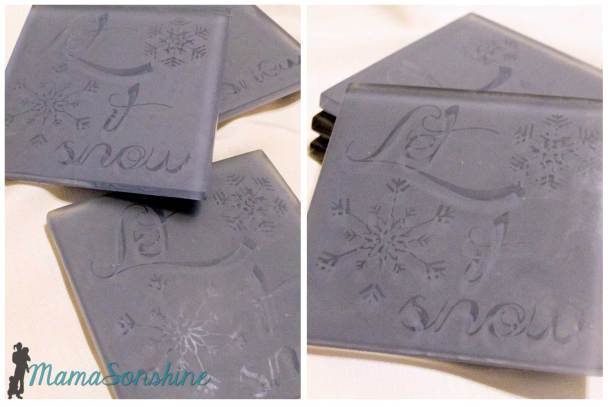
Because the tile is thick glass the unetched parts refract the light and distort the design when trying to take a picture.

MSS_Etched Glass Tile Coasters

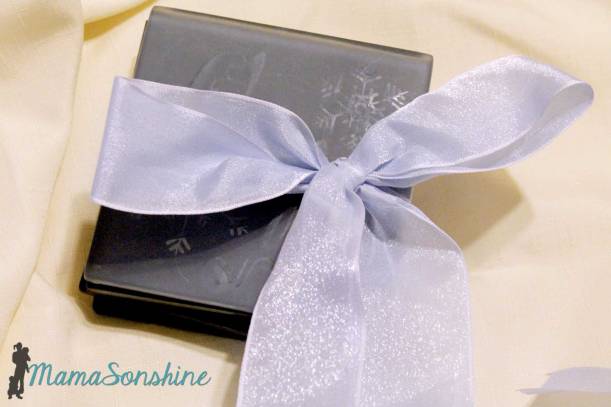
I absolutely love how these turned out, but the elegance of them is lost in translation.  They do look lovely all wrapped up in a bow.

MSS_Etched Glass Tile Coasters Gifts


Did you know that etching cream will also take the glaze off ceramic tiles?

This is even harder to photograph because of how subtle it is.

MSS_Etched Tile Coasters

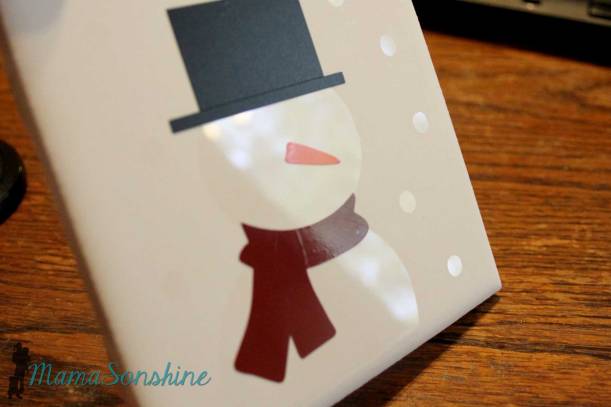
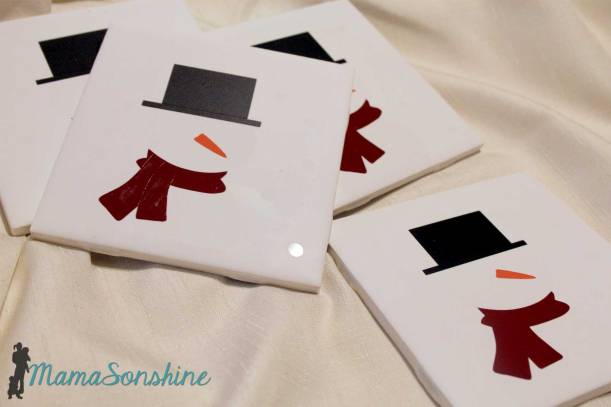
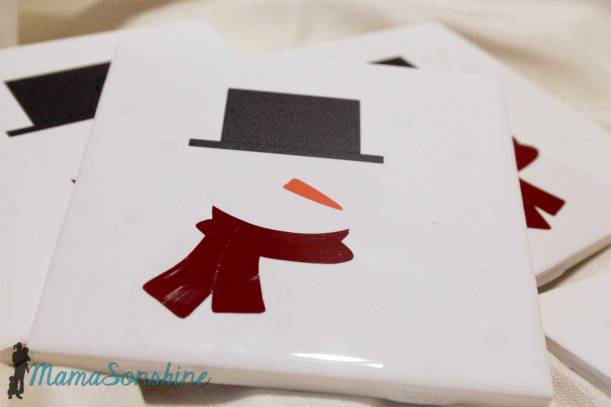
My first thought was to make a minimalist snowman design with vinyl, but then I decided to take it one step further.  I used a vinyl stencil for the snowman base and a few circles of falling snow.  I then applied the etching cream to the entire coaster as above.  This left a rough background with a shiny snowman and snow.

MSS_Etched Tile Coasters

After etching, washing and allowing to dry for at least a day, I applied the vinyl decorations, using outdoor vinyl if I had it.  I love how these turned out, they are impressive with just the vinyl but when you look close you can see the subtle outline of the snowman and snow.

MSS_Etched Tile Coasters


But why stop there?  Sharpies on ceramics are always a fun craft.

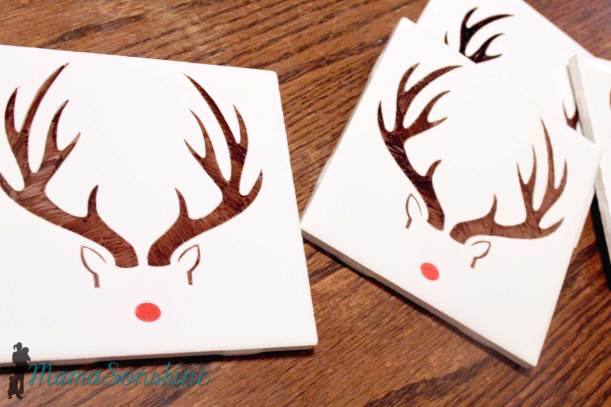
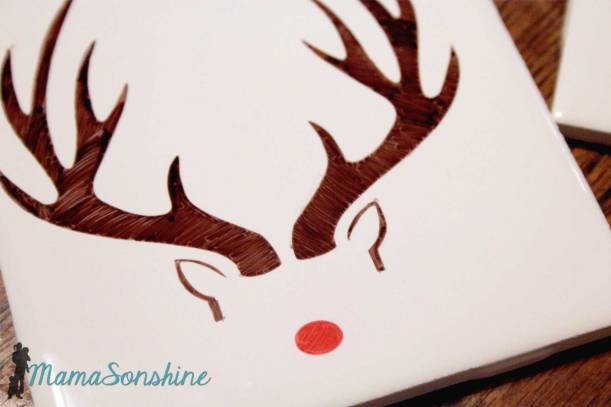
Since I am pretty sure my 4-year-old draws better than me, I use my Silhouette to cut out stencils for all my Sharpie work as well.  As I did with these Rudolph coasters and they are fantastic!

MSS_Sharipe Colored Tile Coasters

After coloring I cured the ink by placing the coasters in a cold over, turning on the heat to 350°F, baking for about 30 minutes, turning the oven off and letting the coasters come back to room temperature slowly.

MSS_Sharipe Colored Tile Coasters


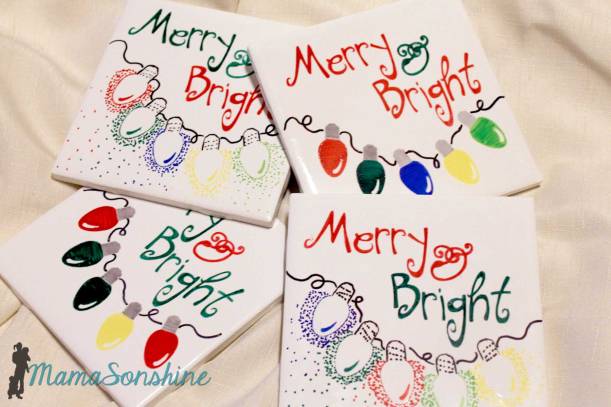
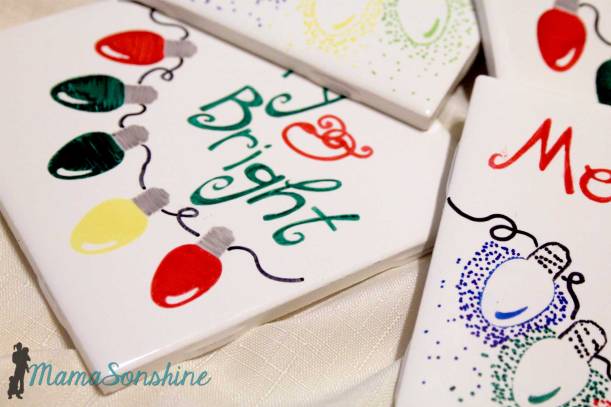
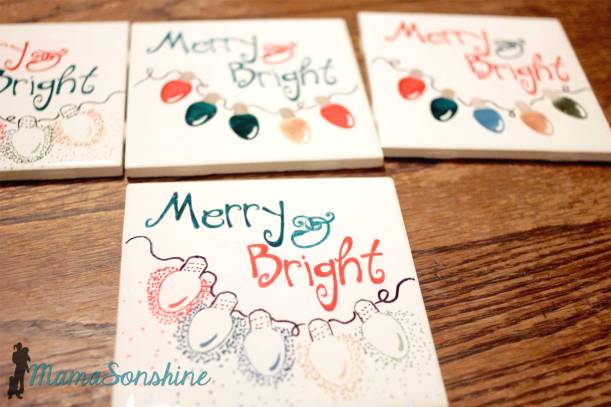
Using the same sharpie and stencil method I made some Christmas light coasters as well.

MSS_Sharipe Colored Tile Coasters

On one set of coasters I simply colored the lights in.  On the other set I used the negative of the stencil and used scattered dots to draw the lights.  I should tell you that I did not use oil based markers or ceramic pens.  I cured them just as I did with the Rudolph ones.

MSS_Sharipe Colored Tile Coasters

Some of the colors (uh, all but the red and green) did not hold up as well with the curing process.  *sigh, lesson learned.  So, if you are going to cure them in the oven, use ceramic markers.  Another option would be to seal them after coloring with a clear waterproof sealant.  Sealing them is still probably a good idea anyway.

MSS_Sharipe Colored Tile Coasters

Not to worry though.  They can just be recolored and then sealed.  (which admittedly I have not yet done, but plan on doing)

These coaster would make great gift to with a new mug and box of hot chocolate, coffee or tea.  *spoiler alert

MSS_DIYCoasters

Silhouette Giveaway!

I know, I know, here is the part of the post you are most excited about.  As I said above, my Silhouette Challenge buddies in partnership with Silhouette America are hosting a mega-huge giveaway for not one…but two winners!  The prizes up for grabs?

First prize: The NEW Silhouette Cameo Machine and Designer Edition Super Bundle!  $406.93 value.

  • Silhouette CAMEO®
  • Designer Edition Software
  • Dust Cover
  • $25 Download Card
  • Four Essential Silhouette Tools (hook, spatula, scraper, pick-me-up™)

Second prize: Silhouette Portrait Machine and Rhinestone Starter Kit!  $219.98 value.

Pretty sweet, huh?  We want you to have the chance to get that Silhouette machine that might still be on your wish list.

To enter: just click on the image below or on this link, either will take you to the entry form.  Because of my many blog friends who helped make this giveaway possible, you have 42 potential entries, which means a lot of winning power.  So, hurry up and enter!

{This giveaway runs from today through Monday, December 15th at 11:59p eastern and is open to anyone 18 years of age or older with a U.S. or Canada mailing address. You can read the rest of the terms and conditions in the giveaway window. You only need to enter the giveaway on one blog.}

A Rafflecopter Giveaway

decembergiveaway250

click on me to go to entry form


Want to Check Out More Silhouette Projects?

My Silhouette Challenge buddies and I are all sharing projects on our blogs today, so pursue the projects below for a wealth of Silhouette inspiration!

Reinvented Elf on a Shelf Book Cat-Shaped Ornament Stamped Christmas Towels M&M Milk Bottle Teacher Gift 3D Holly Berry Ornament Deer Silhouette Mirror Silhouette Christmas Craft with Double-Sided Adhesive Winter Village Display Wood Grain Nativity DIY Rustic Pallet Christmas Tree 2014 Christmas Card + Giveaway Gift Tags Chalkboard Vinyl Christmas Signs Personalized Christmas Ornament DIY Wood Slice Christmas Ornaments DIY Nativity Candle Jar Sleeve Chalkboard Charger Inspiration + Giveaway Christmas Countodwn Festive Advent Christmas Decor AND A Giveaway! All Hearts Go Home Luminarias Deer Silhouette Vinyl Wood Slice Ornaments Some People are Worth Melting For Olaf (Frozen Inspired) Ornament Personalized Pajamas with HTV 3D Reindeer Shield Decoration Trendy Christmas Cards with Silhouette + Free Cut Files Let It Snow Mitten Banner DIY Christmas Coasters Elf on the Shelf Wardrobe Simple Ornaments Stenciled Santa Sack Put on your Yamika! Reindeer Photo Ornament Christmas Card DIY Nativity Shadowboxes Monogrammed Drop Cloth Christmas Tree Skirt Canvas Wall Art for the Holidays

1. Pineapples and Pinecones // 2. Simply Kelly Designs // 3. Architecture of a Mom // 4. Just a Girl and Her Blog // 5. Two Purple Couches // 6. Chicken Scratch NY // 7. Creative Ramblings // 8. One Dog Woof // 9. Ginger Snap Crafts // 10. The Thinking Closet // 11. Please Excuse My Craftermath… // 12. Designer Trapped in a Lawyer’s Body // 13. weekend craft // 14. Dragonfly & Lily Pads // 15. Practically Functional // 16. Living My Given Life // 17. My Paper Craze // 18. The Kim Six Fix // 19. Home At Eight // 20. Queen of Everything // 21. Tried & True // 22. McCall Manor // 23. unOriginal Mom // 24. Create it. Go! // 25. From Wine to Whine // 26. GetSilvered // 27. It’s Always Ruetten // 28. Nearly Handmade // 29. Mama Sonshine // 30. Silhouette School // 31. It Happens in a Blink // 32. Create & Babble // 33. Sowdering About // 34. Where The Smiles Have Been // 35. My Favorite Finds // 36. Lil’ Mrs. Tori // 37. Designed Decor

Dawn Marie

facebook instagram pinterest parties by mamasonshine etsy bloglovin google+ email twitter Image Map