I had an older brother who loved Star Wars, so I too, loved Star Wars.
When you are the youngest sibling and your older sibling becomes obsessed with something, you will go one of two ways. You will either loath it or love it. I went with the latter option.
We watched, we played with the action figures, ate off the dishware, wore the underoos, slept with the stuffed animals on the sheets, and reenacted our favorite scenes. When you love Star Wars, you always love Star Wars. It doesn’t fade with time, it actually gets stronger.
As a result my siblings and I have passed on this love to our children. My eldest son could name all the main characters before he was two.
But let me clarify something, while we all love Star Wars, we are not fanatics. I do not know all things Star Wars, nor do I know the names of obscure characters or their back histories. We’re not that bad.
Thanks to the internet and media there is now a ‘holiday’ for Star Wars. It is May 4th, why you ask (as if you don’t already know), because when you say “May the Fourth” it sounds like “May the Force“. I know, I know, geekdome at its highest.
As a result a SVG company (SVG Cutting Files) hosted a May the Fourth blog hop, and I received some fun Star Wars cutting files from them. (The hop was only the one day, so you can no longer participate or receive the files, sorry).
I used a couple of files to make some birthday cards for my Star Wars loving nieces.
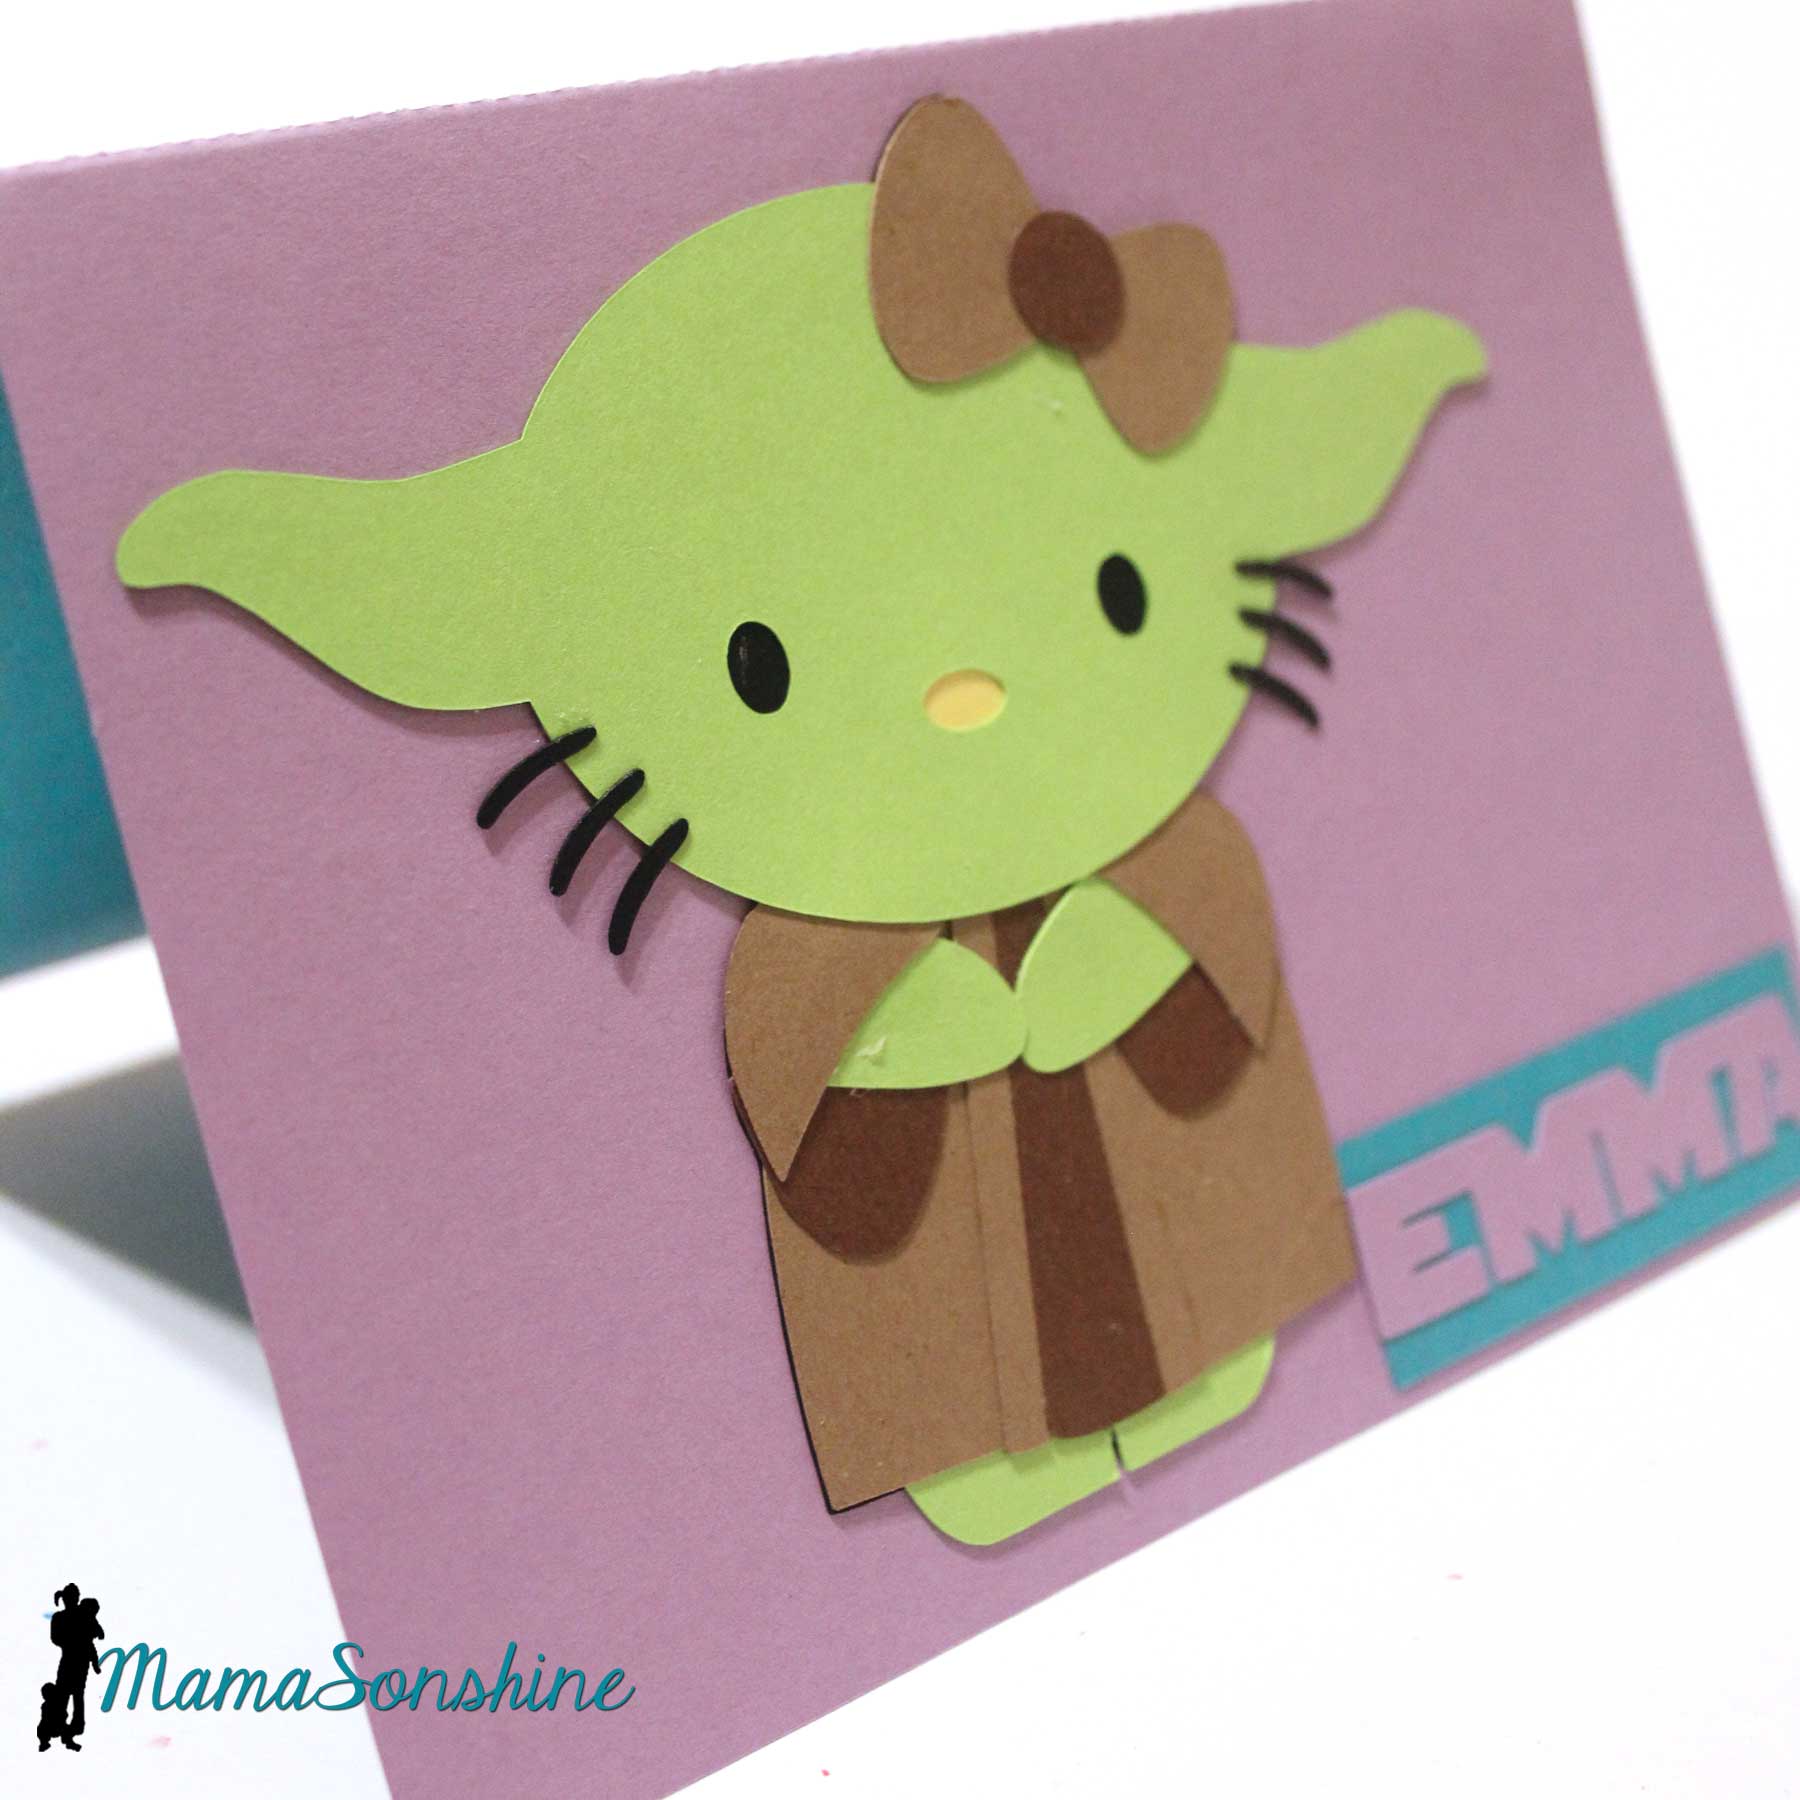
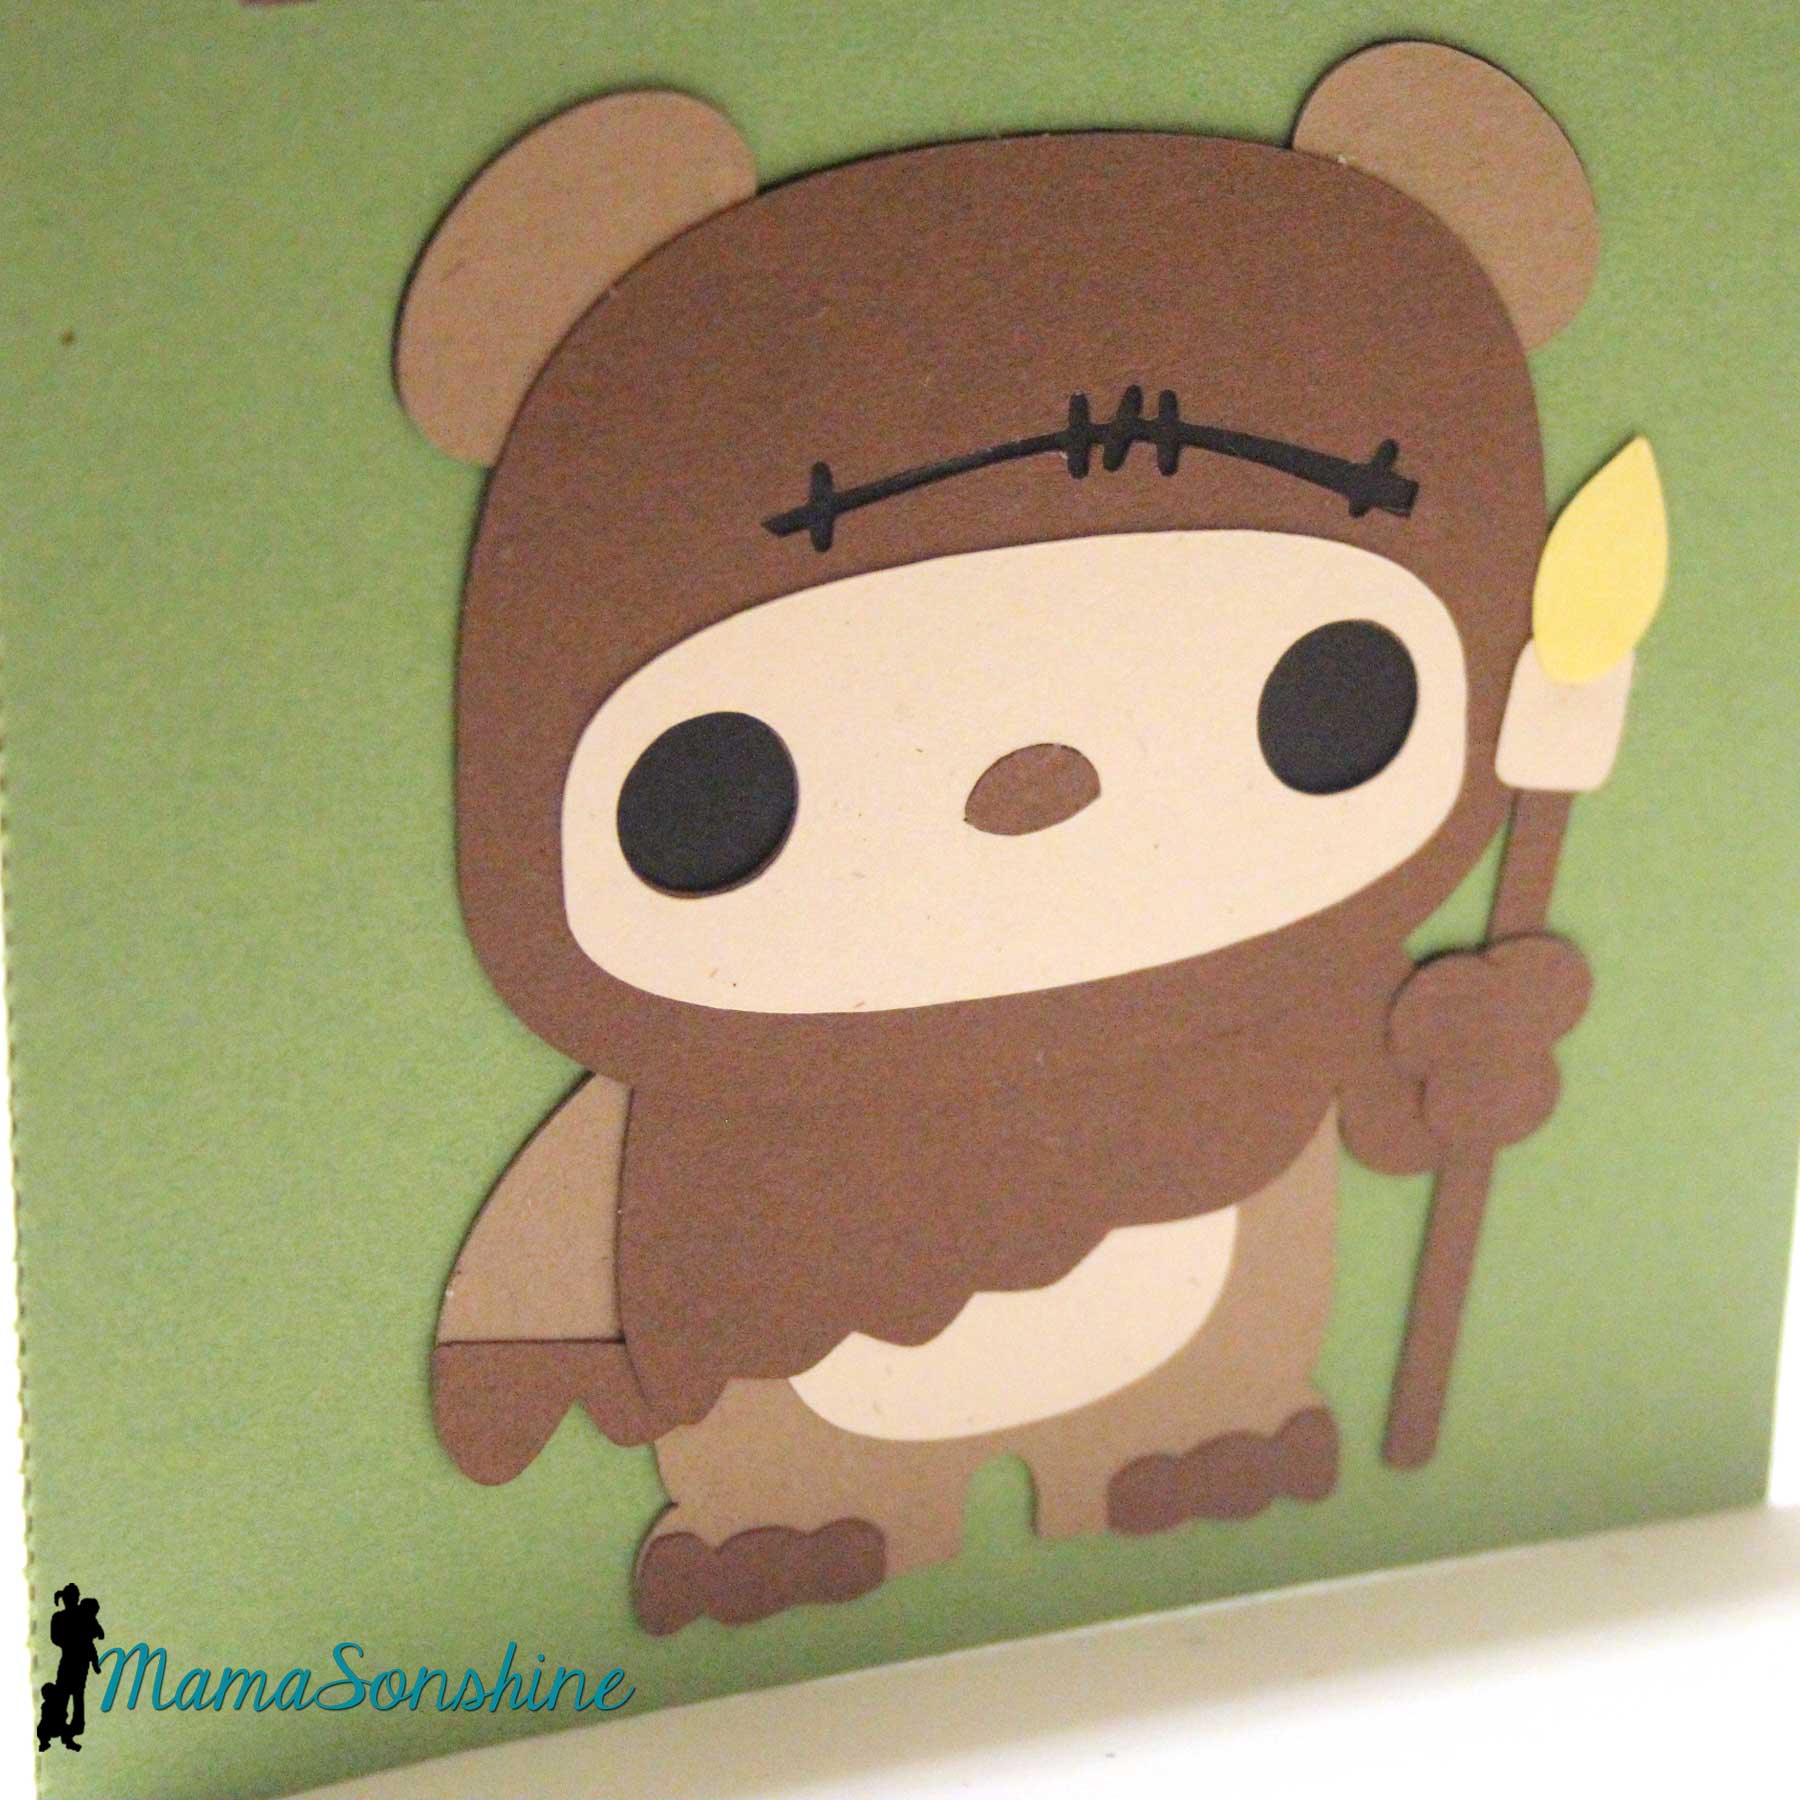
One of my nieces also loves Hello Kitty, so the Hello Kitty Yoda was perfect for her. Both of my nieces, and everyone, loves Ewoks, so I made my other niece a card with the cute little Ewok.
I had intended cut out her name on the front, so that the inside color would show through, but I was having some major operator errors that day. I kept doing it backwards, upside down, etc. When I messed up with the last piece of cardstock, the night before I needed them, I had to improviser. I cut a rectangle out of the inside color and used the negative of her name.
Inside the Hello Kitty Yoda I phrased the ‘happy birthday’ sentiment just the way Yoda would.
You can actually translate words from Ewokese to English and back. Ewokese doesn’t have words for every English word, but they have enough. However, they do not have a phrase for “Happy Birthday” or anything close that I could use to convey that message. So the sentiment on the front of the card translates to “wow! Gee Whiz” or “Oh My Goodness!” as a way to show excitement.
In a similar design as the Yoda card, it just says “Happy Birthday” inside.
The girls loved them, and said they would keep them forever.
Happy Crafting
This month’s Silhouette challenge had to involve flowers. With it also being the month of Mother’s day I decided to combine the two topics.
This year I made three mother’s day cards and one Grandmother card (but the Grandma one doesn’t have flowers on it).
All of these cards were made with the help of my Silhouette Cameo.
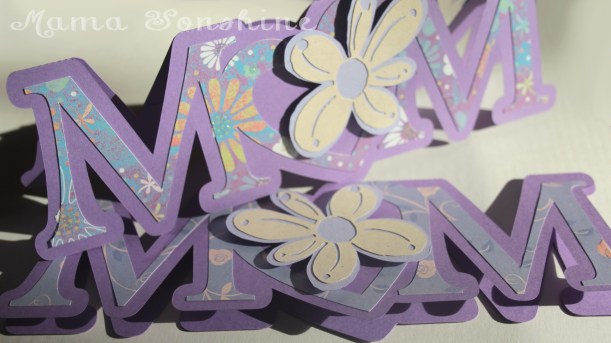
The first card I made was a shape in the word MOM, but I replaced the O with a heart. I added a layer of floral scrapbook paper and to give it more depth I cut out a two layered flower which was attached with dimensional foam tabs. Because of the font I used for the letters, there wasn’t a whole lot of room to write inside the card, so the sentiment is a simple “Happy Mother’s Day.”
This was my first shape card and while I am pleased with the results, I won’t make the Ms so thin next time.
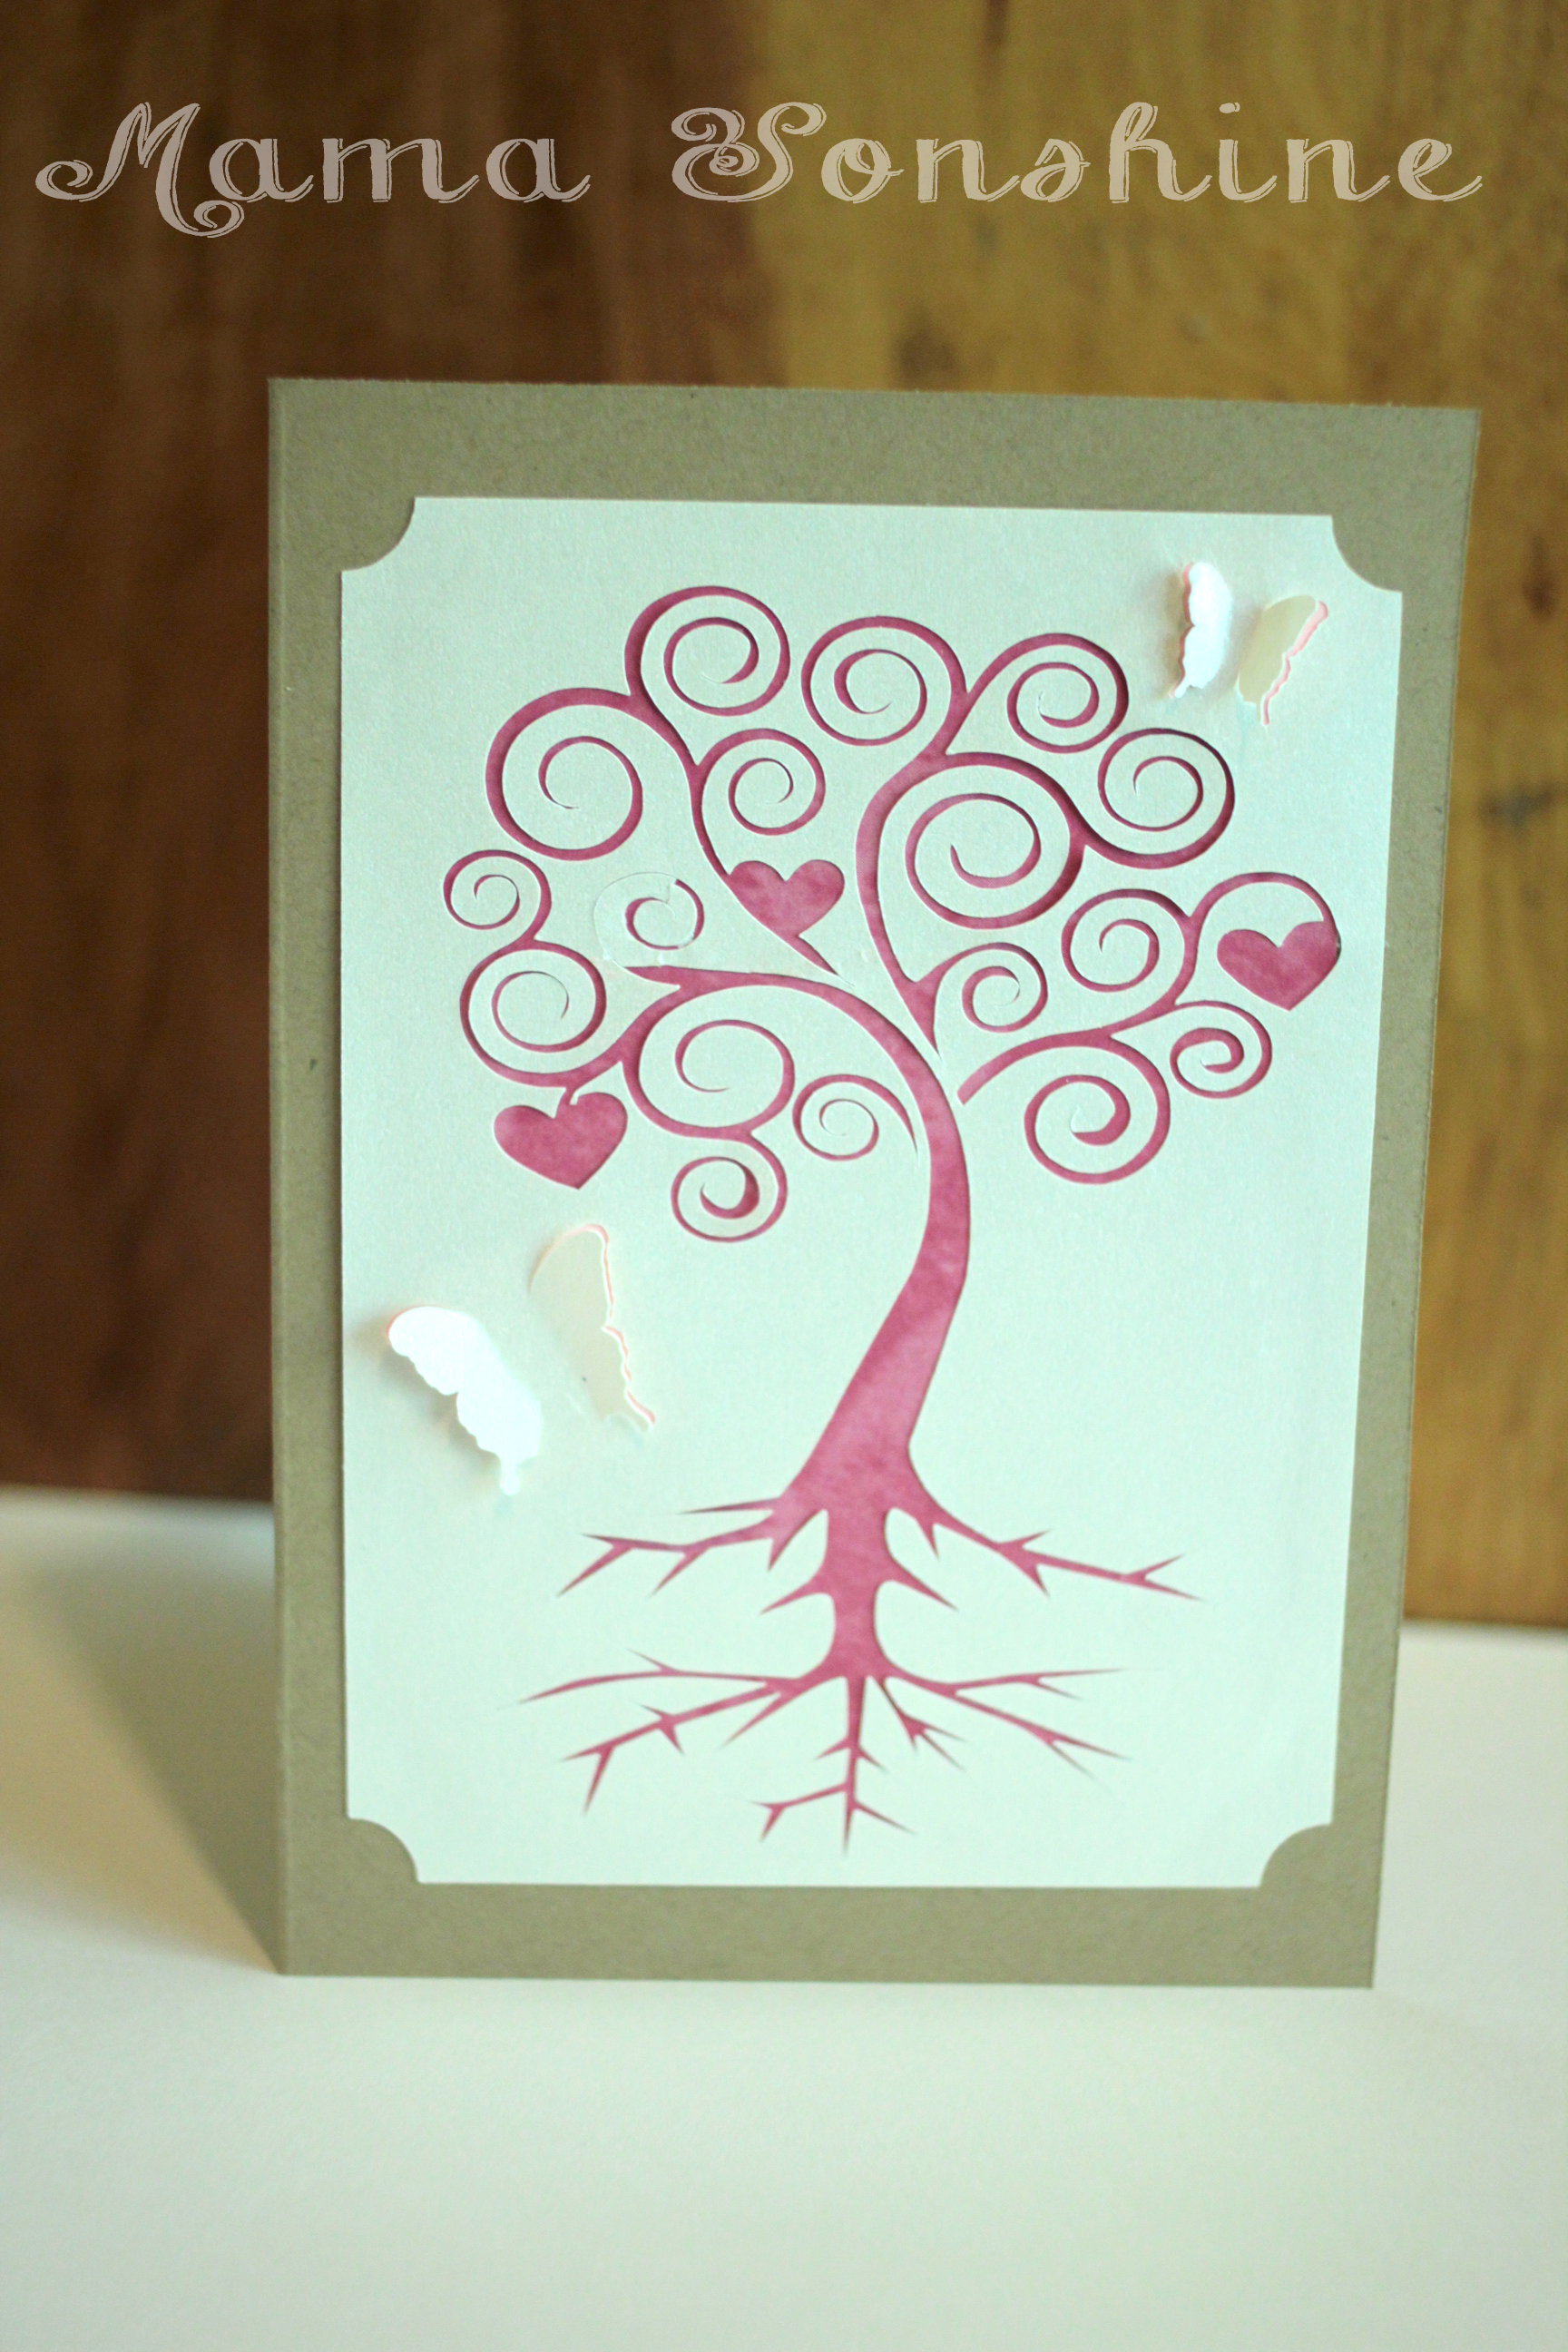
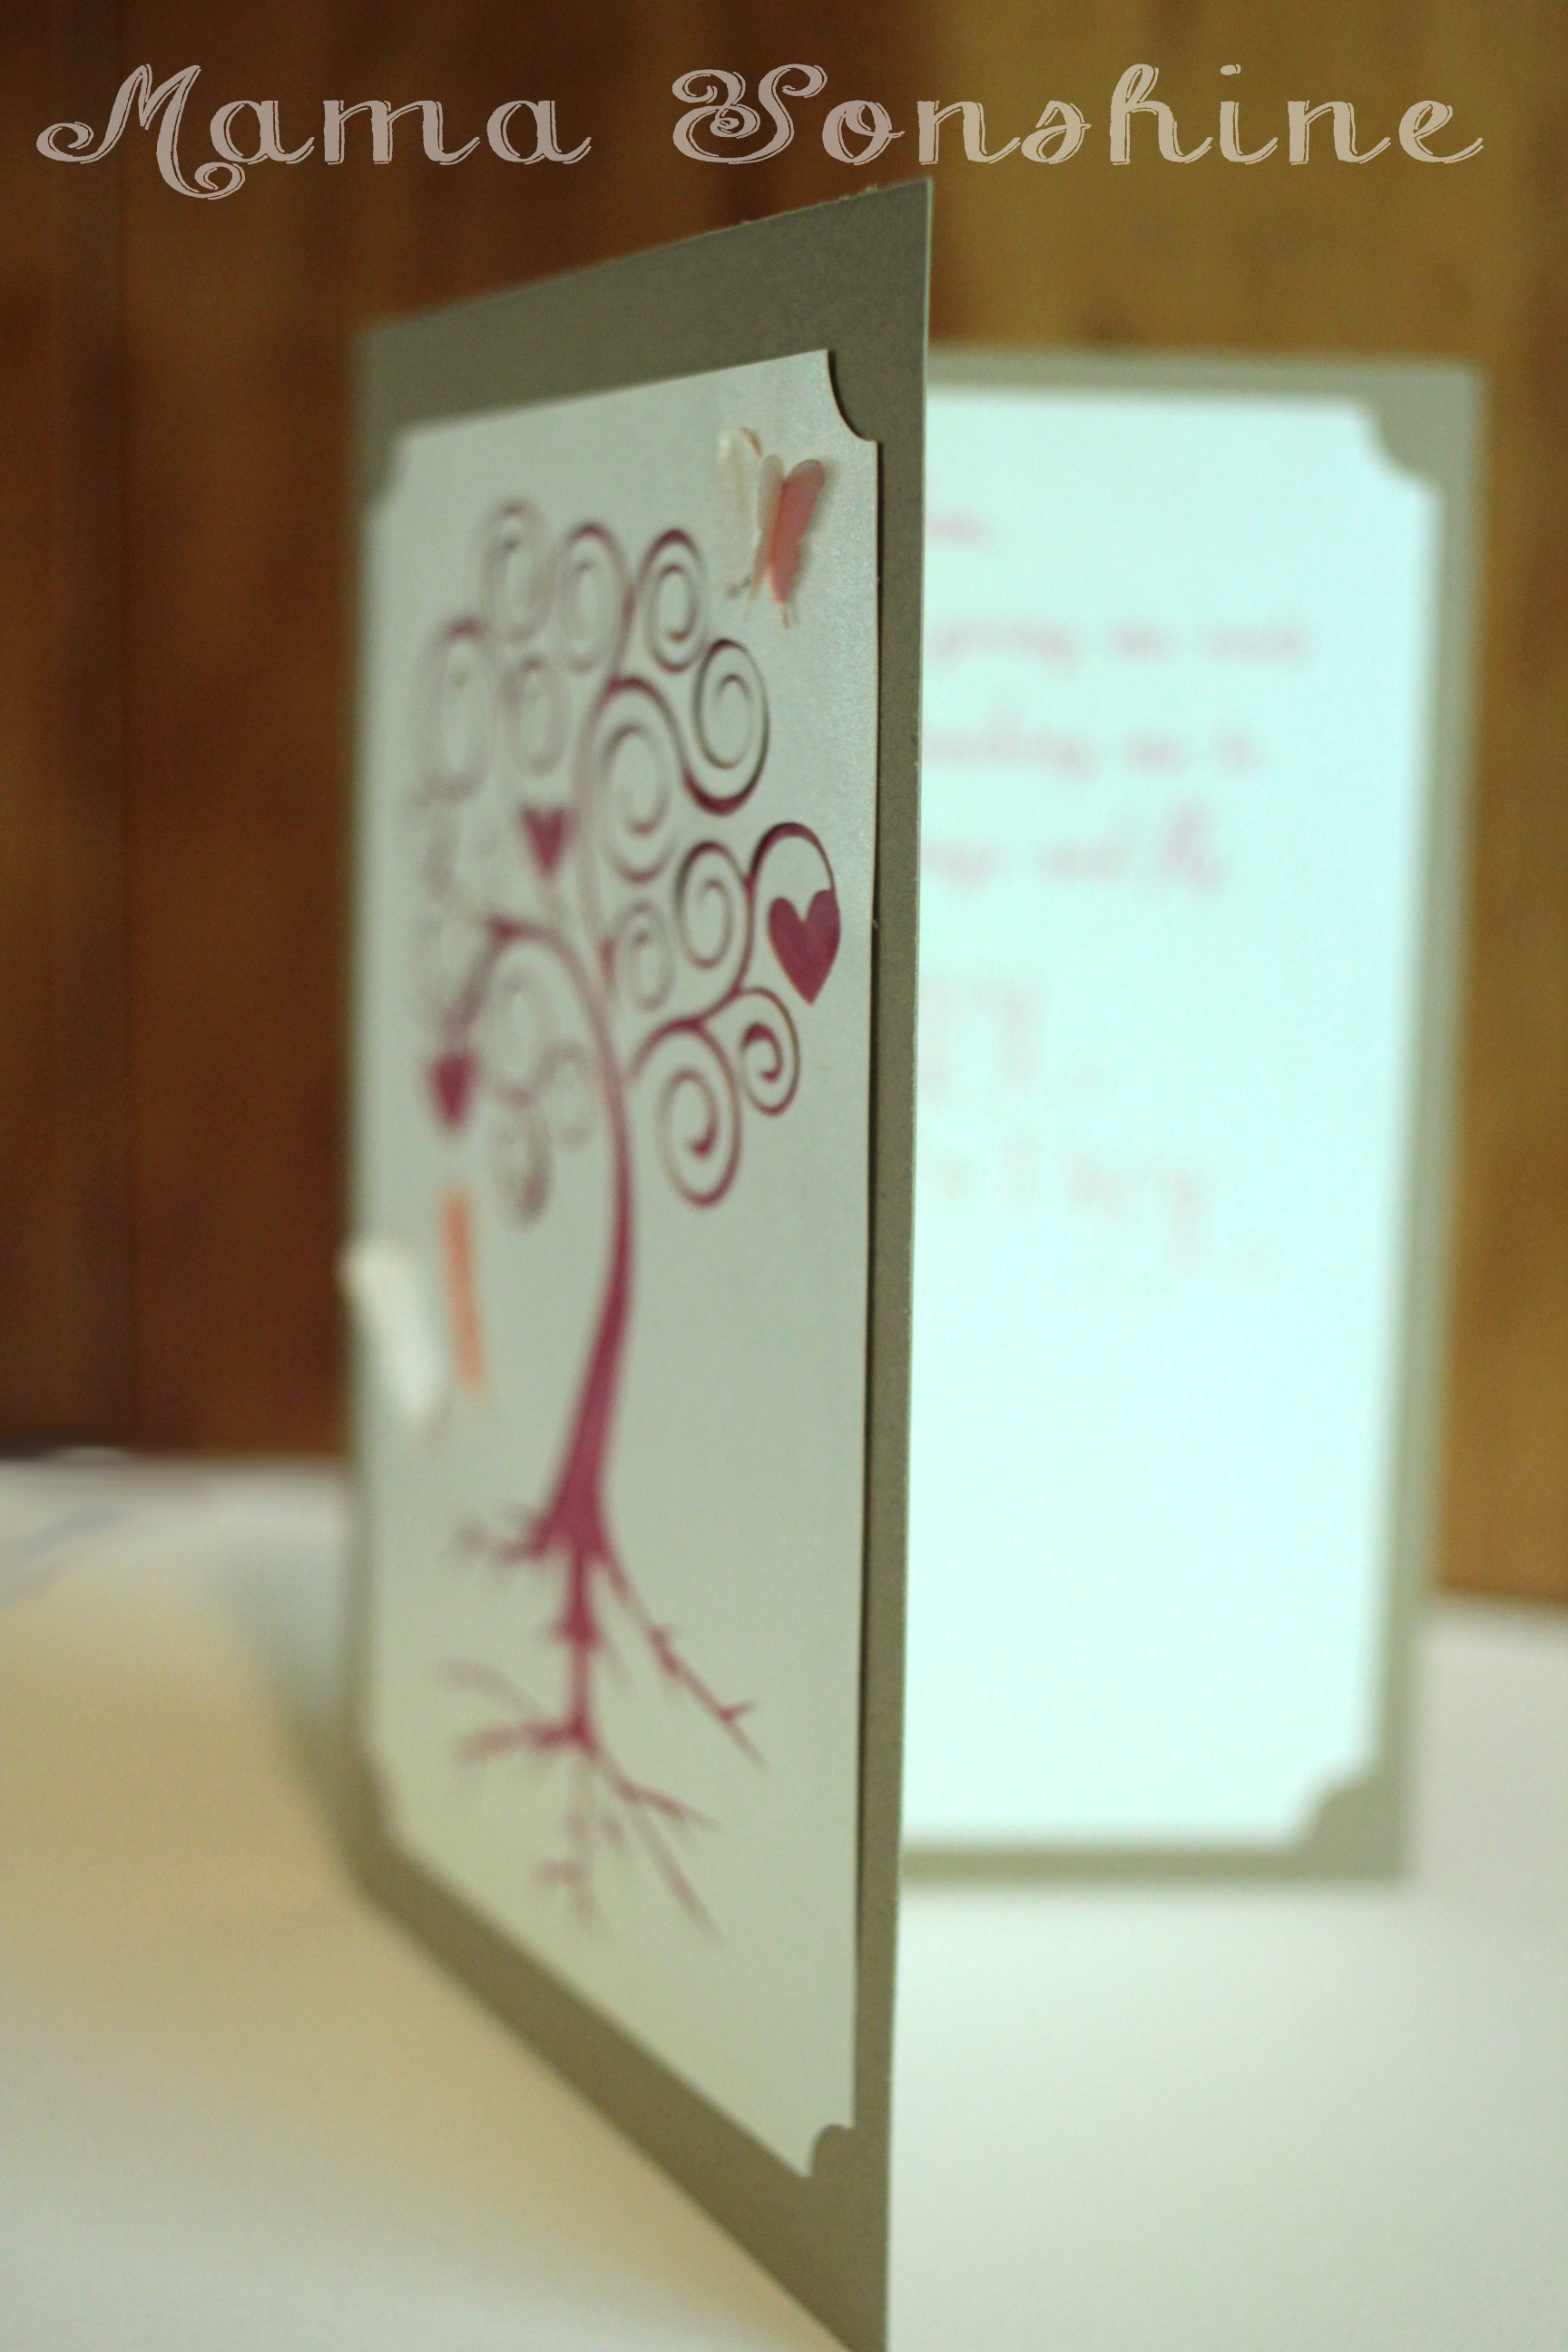
I came up with this next card after seeing the quote “There are two gifts we should give our children; one is roots and the other is wings” on-line while looking for mother’s day quotes. Turns out my mom has had this quote hanging in her house for decades….and I had no idea.
I used a champagne metallic paper for the top layer and on the inside of the card. I used Silhouette’s print and cut feature to write the sentiment and cut out a frame that matches the one on the front of the card. I used different colors for behind the butterflies and the tree. I only had the machine make a cut on the outer edge of the butterfly wings, so they just pop out a little.
The sentiment on the inside says “Mom, Thank you for giving me roots to grow and teaching me to spread my wings and fly. Happy Mother’s Day” While this one was probably the easiest to put together, it is my favorite. I think it is elegant in its simplicity.
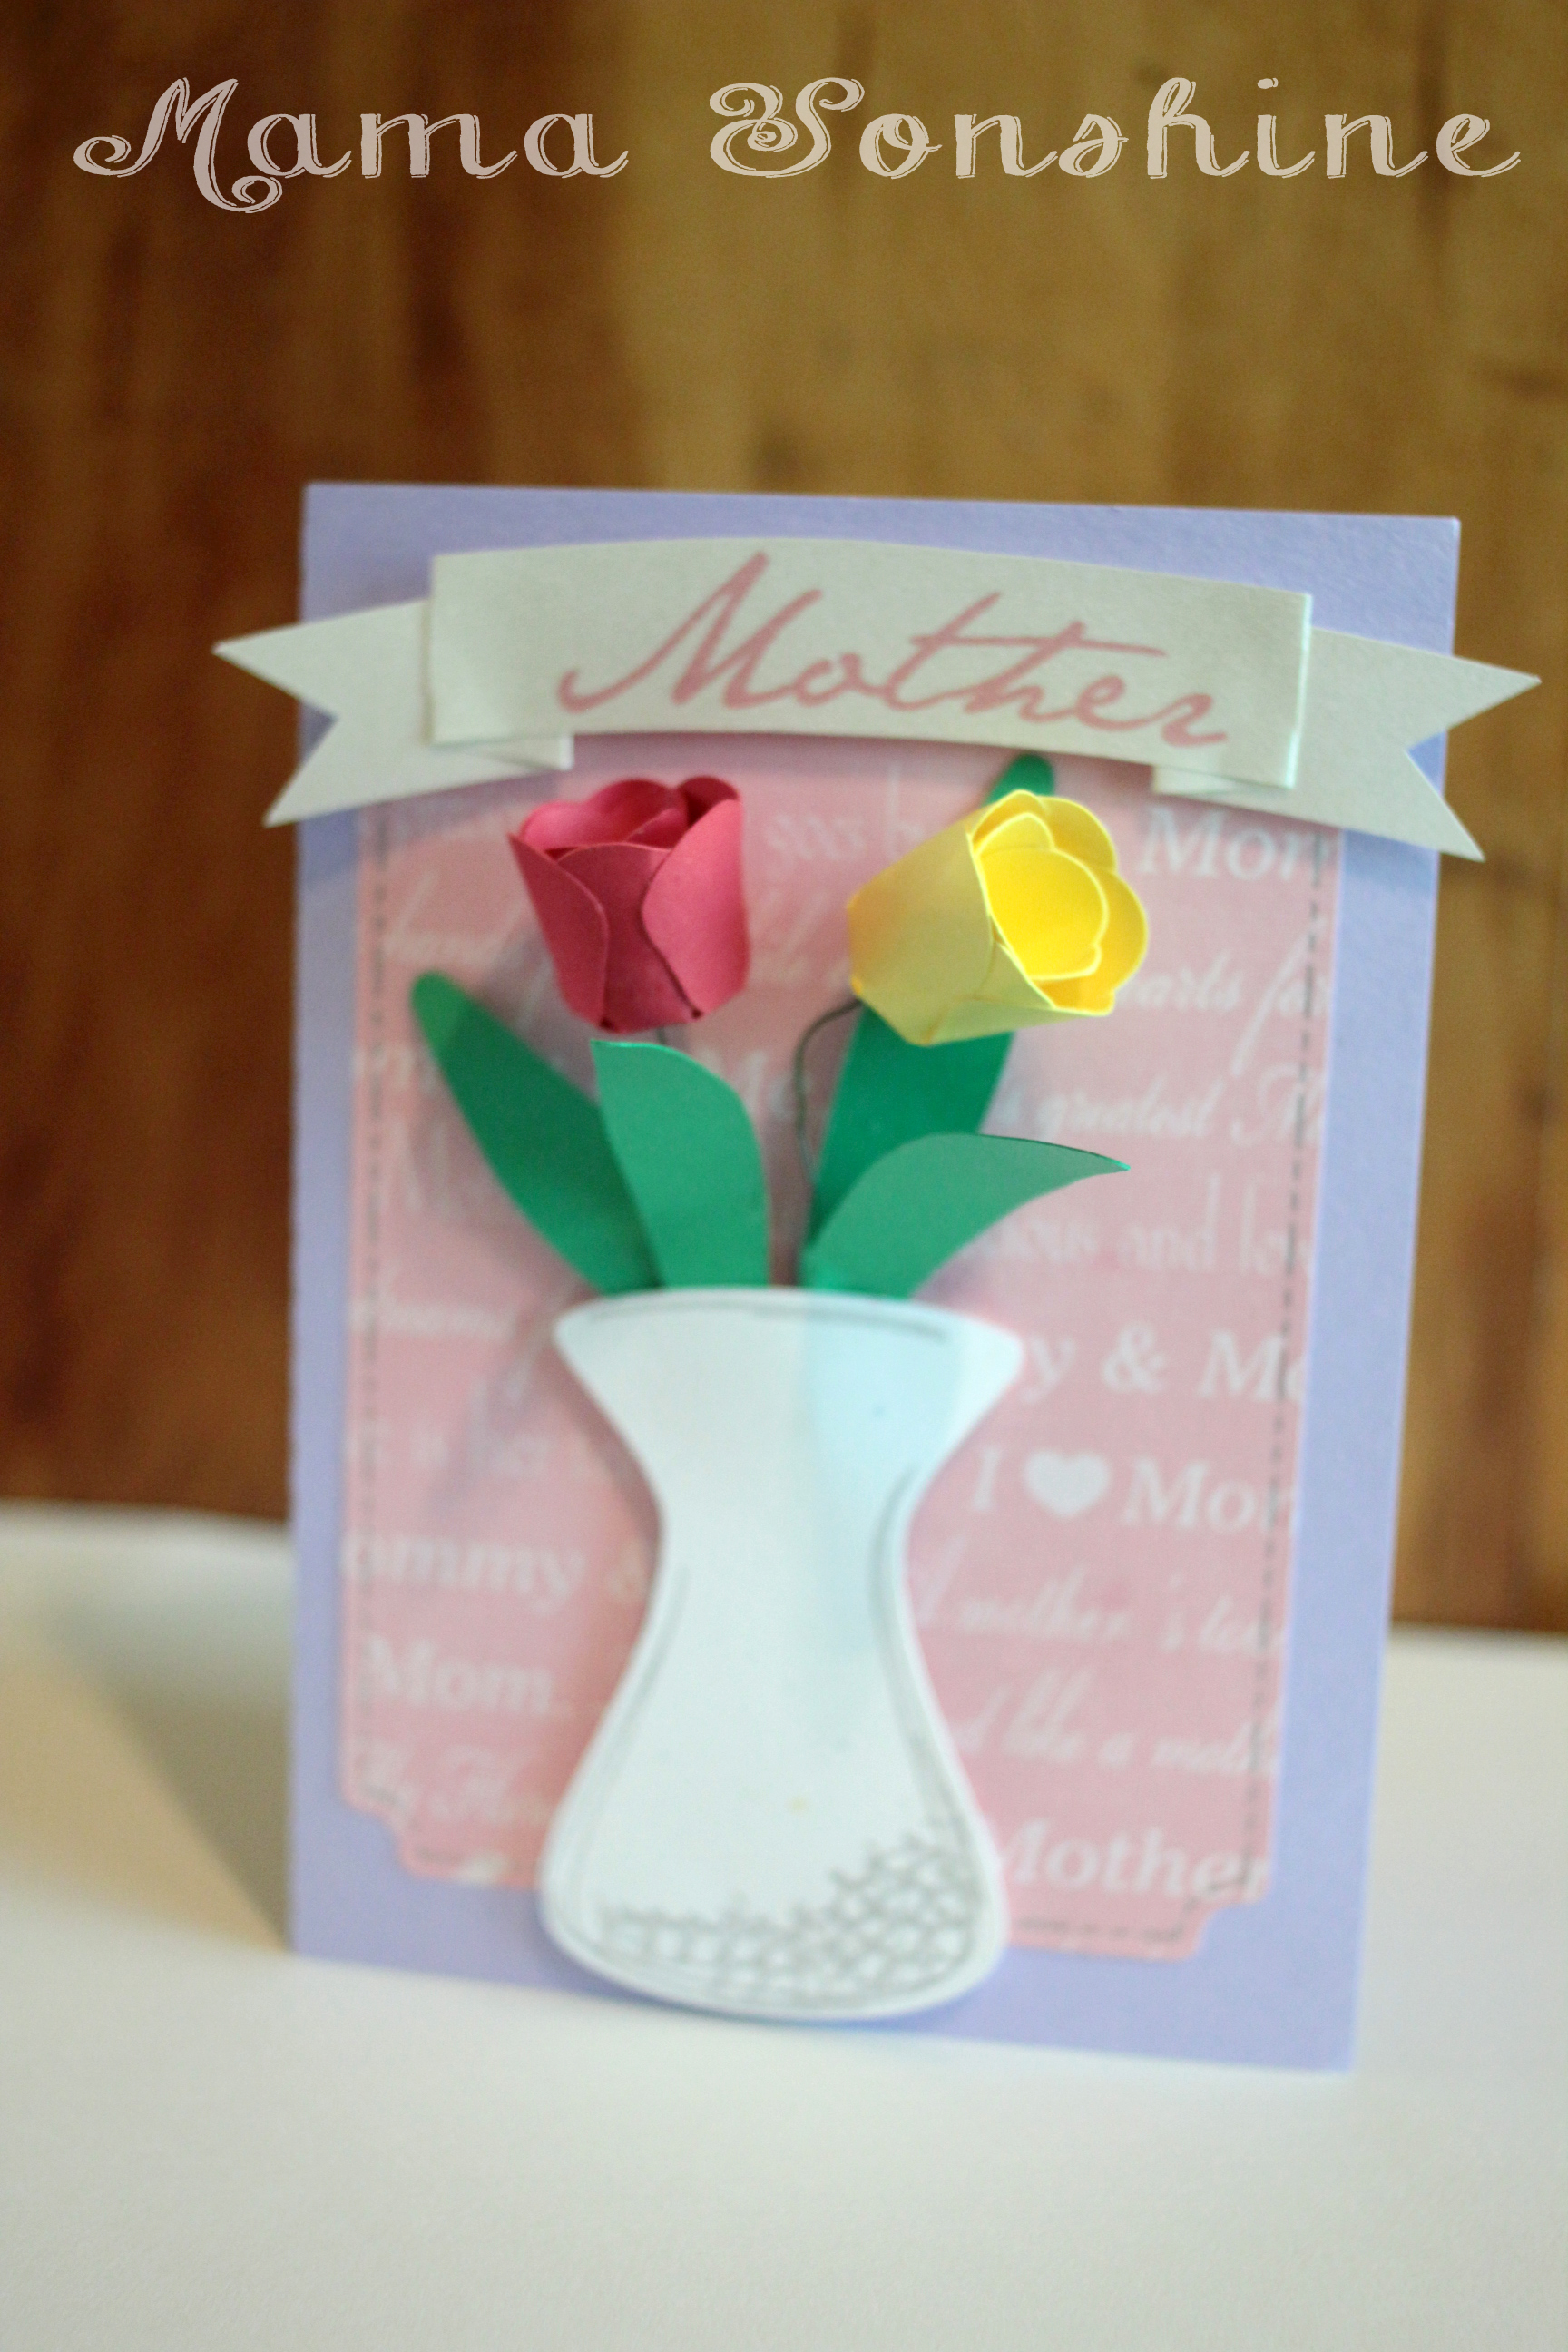
When I decided to make a floral themed mother’s day card, this next card is what I had in mind. I wanted to make a vase of flowers on the front of the card. The tulips would have been too difficult to put together if I had made them any smaller, and at that size, only two would fit in the vase.
In the end, two was the perfect number, because it didn’t clutter up the card. I used pre-printed mother scrapbooking paper for the background and a silver sketch pen for the faux stitching. For the “Mother” banner I used the champagne metallic paper and the print and cut feature. I tried using sketch pens, but it just wasn’t the right look.
I originally had thought about using velum or some kind of clear paper for the vase, to give it the look of glass, but then you could see the floral wire in the vase, and all the hot glue. Not a pretty sight.
I still didn’t like the vase, just made with plain paper, so I used the sketch pens to add some dimension to it. In the Designer Edition there is a sketch feature that allows you to fill in shapes, or change lines, to make the shape look more hand drawn, which is what I did to the vase.
I am very pleased with how this card turned out. On the inside it says “May all the love you give to others come back to you on this special day. Happy Mother’s Day”
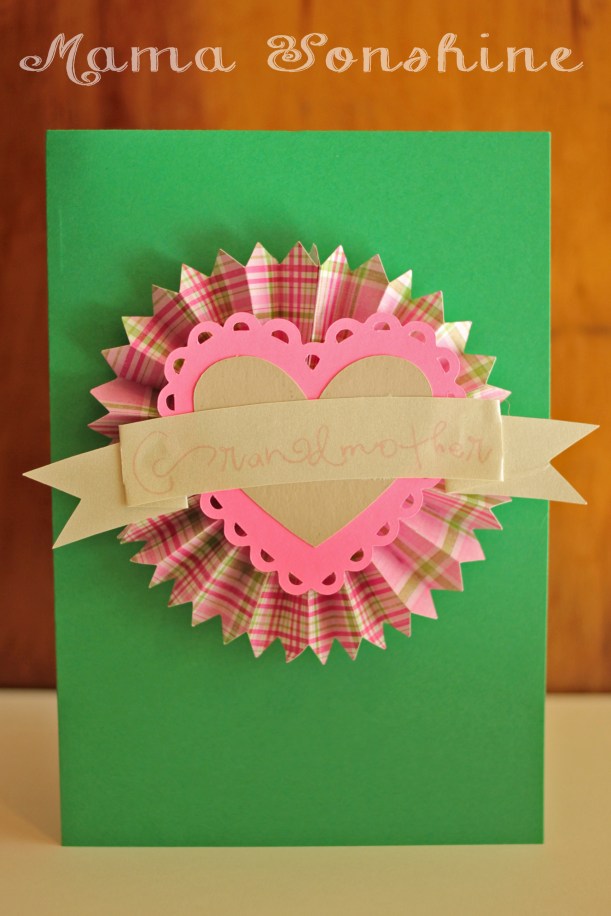
I didn’t want to leave the Grandmas out. So I made this card too, although it doesn’t have any flowers on it. I also made one in different colors. It is very cute, but thick, so it doesn’t really mail well.
Inside it says “Only the best moms get promoted to Grandmother. Happy Mother’s Day”
Happy Crafting
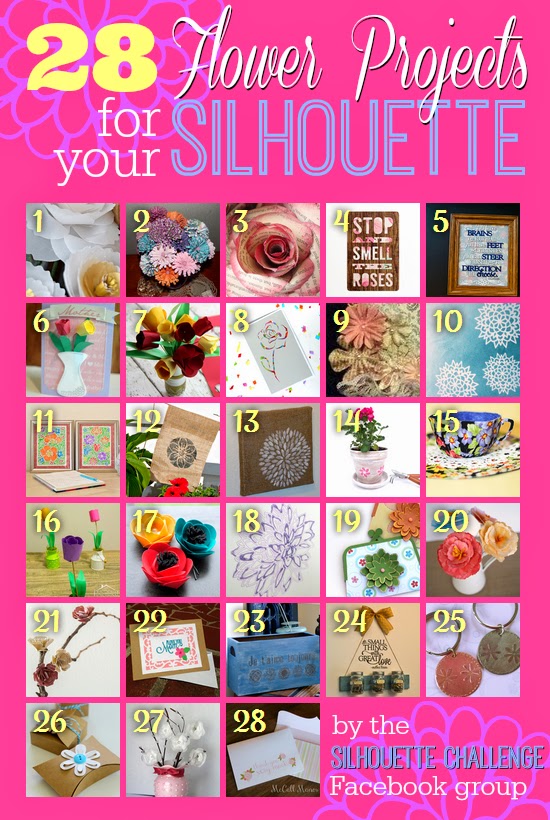
Want to Check Out More Silhouette Projects?
My Silhouette Challenge buddies and I are all sharing projects on our blogs today, so pursue the projects below for a wealth of Silhouette inspiration!
I belong to a few Silhouette related Facebook pages. They are a wonderful support group for beginners and experienced users.
More and more I see questions about tracing images in the Silhouette software in order to make them cut files. This is one of the main reasons I decided to go with the Silhouette brand cutting machine.
You are able to take any image and make your own cutting file. I make a lot of decorations and invitations in Photoshop, then cut them with my Silhouette.
However, the tracing tool in the software is not that intuitive, so there is usually a number of questions about tracing. I put together this power point to help someone with tracing and thought I would share it with everybody.
Please note, I have the second version of the software, as I have not taken the plunge and upgraded to the third version. While the settings and option are the same, their location and how you do things might be different. I also have the designer edition, but everything in the tutorial is available in the standard addition.
One great feature of the Silhouette machines is the Sketch feature.
You replace the blade with a pen and it draws instead of cuts. This gives the project a hand drawn feel instead of one that came off a printer. This feature is also usefully for writing sentiments in cards or labels. Actually the possibilities are endless.
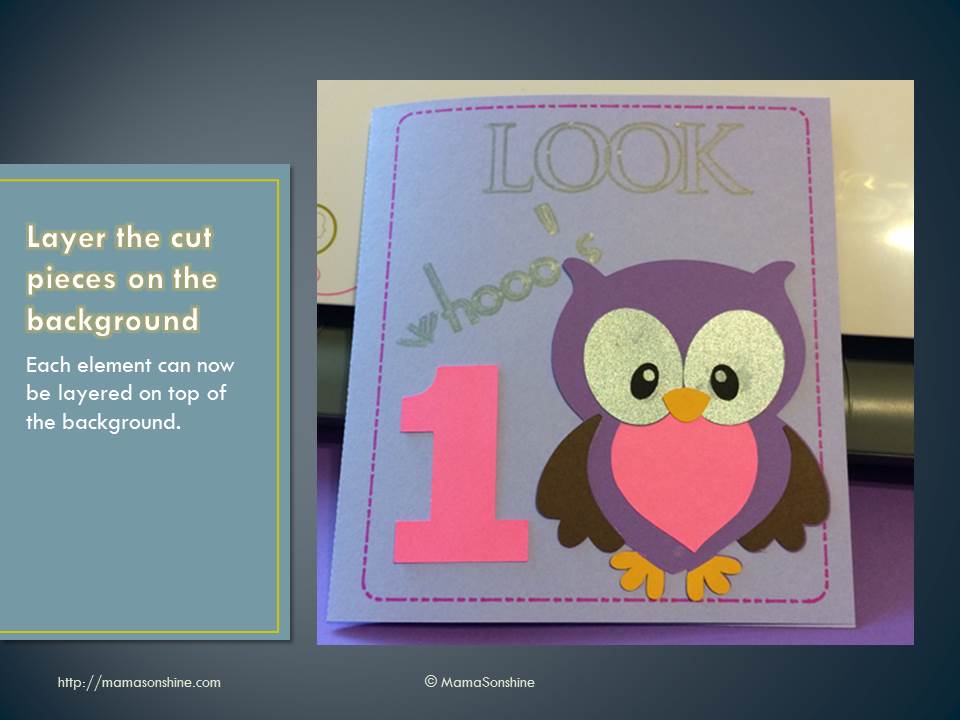
I made this card for a friend’s daughter using the sketch feature.
First you need to go online and find a coloring book page that you want to sketch using your Silhouette.
Here is the one I will be using.
Click picture for source
Please remember that this is for personal use only. I do not condone using or selling other people’s art/work without permission.
You want to find one that is at a fairly high-resolution that you can download. The benefit of the coloring pages it that it is more easily traced than an image with coloring.
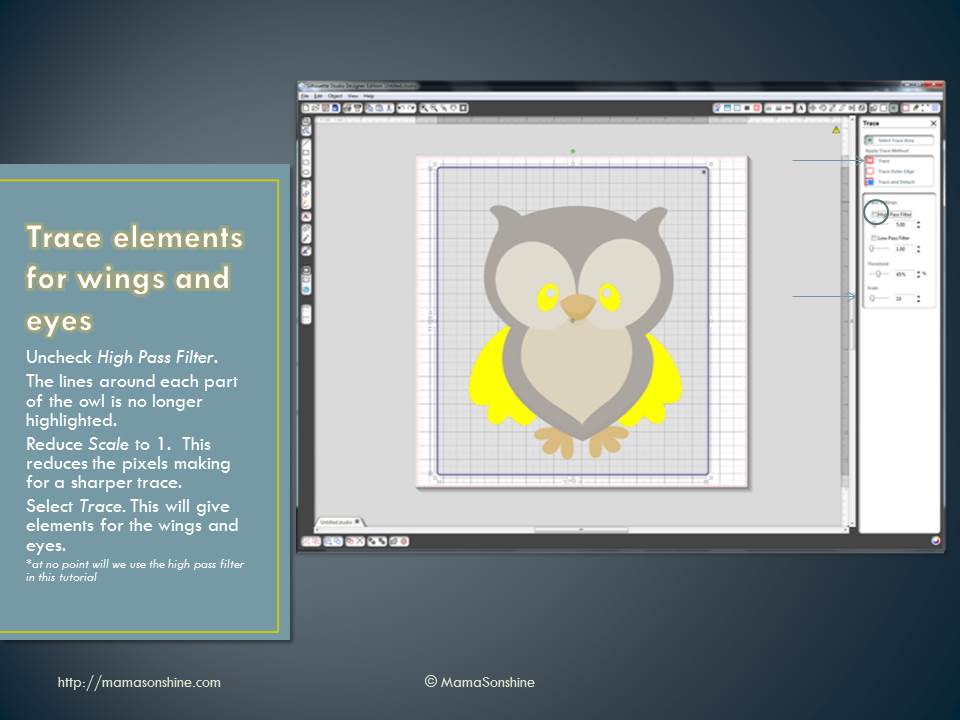
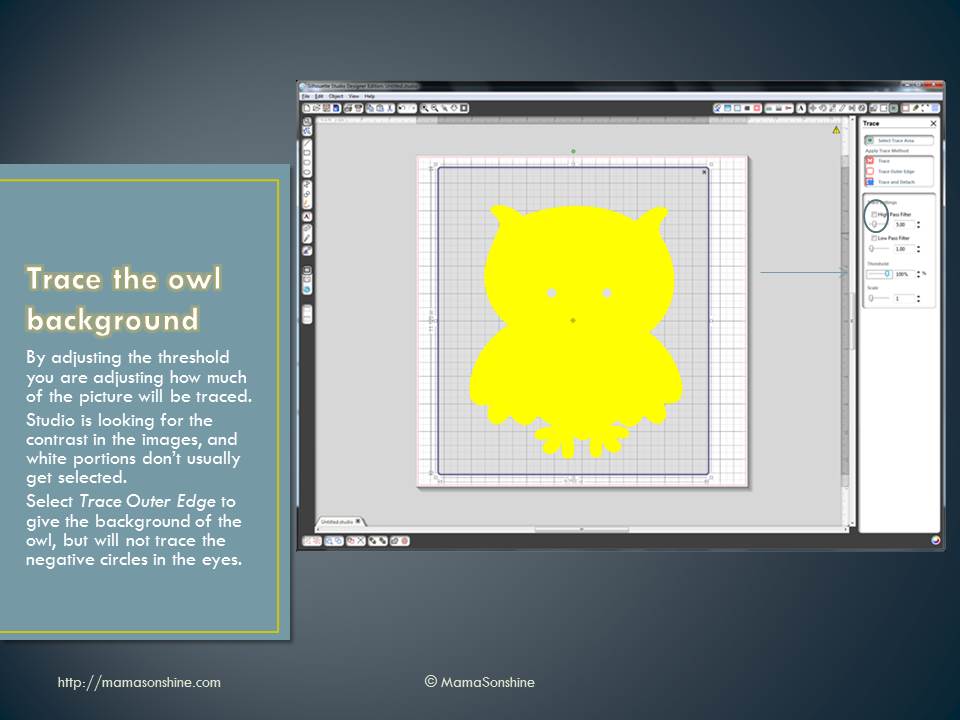
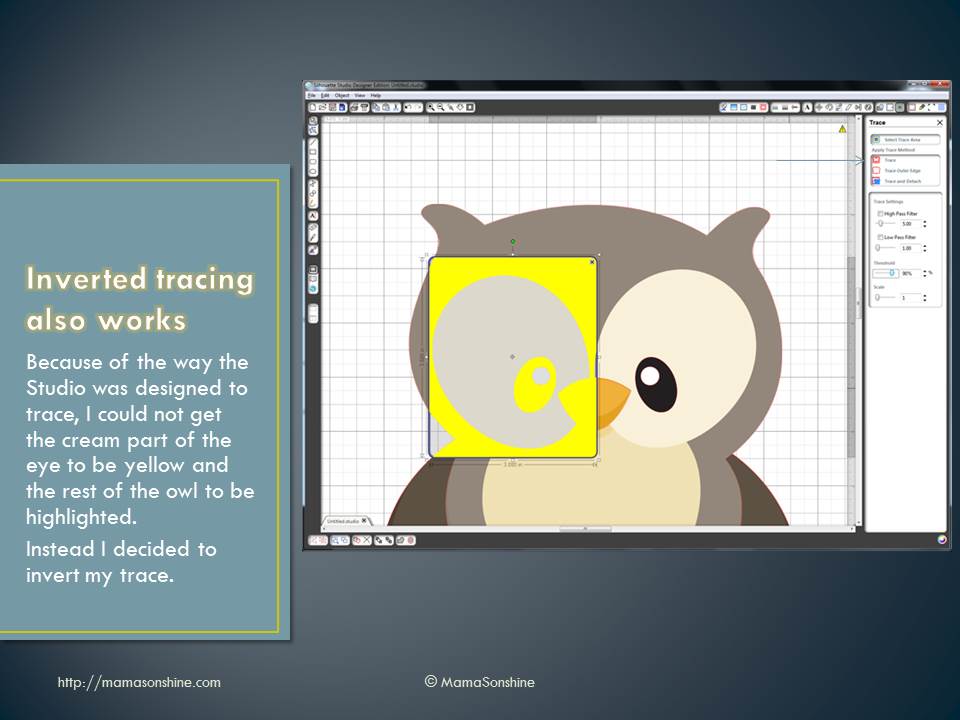
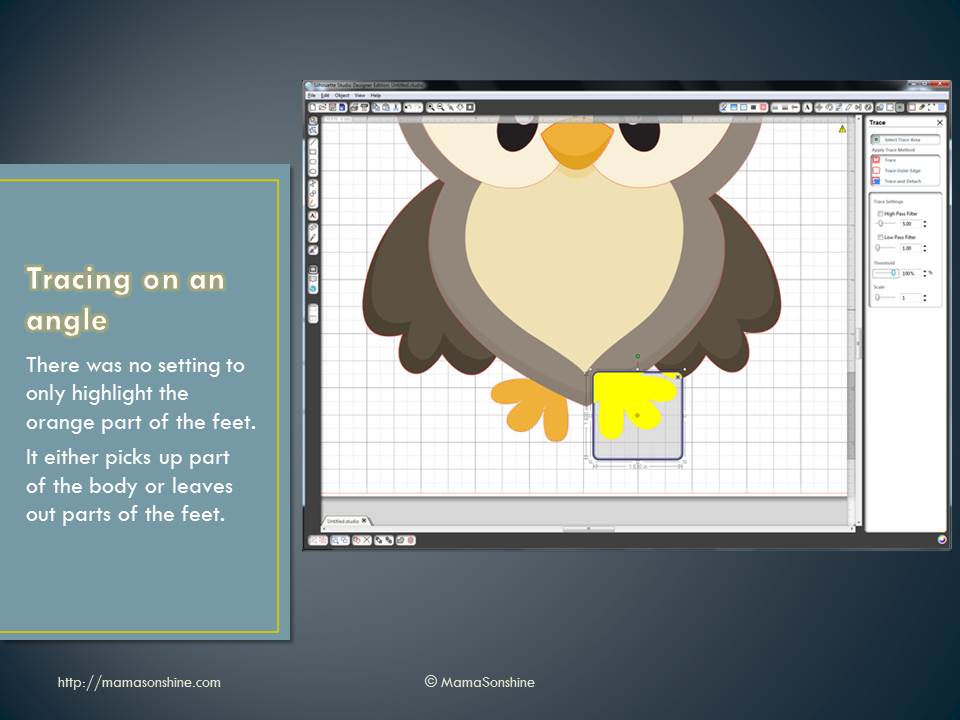
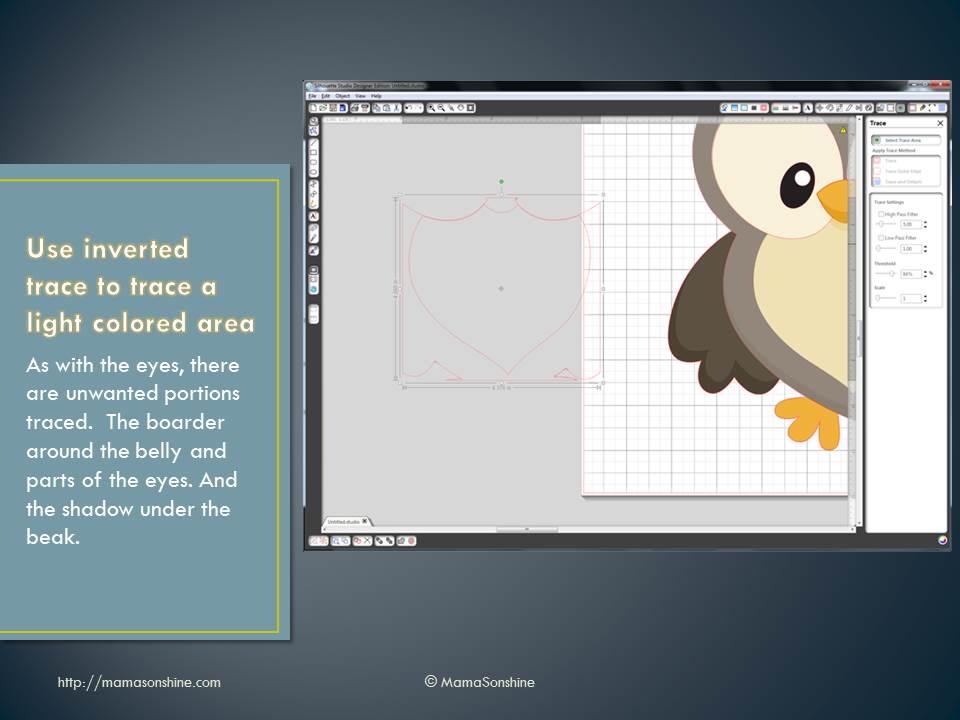
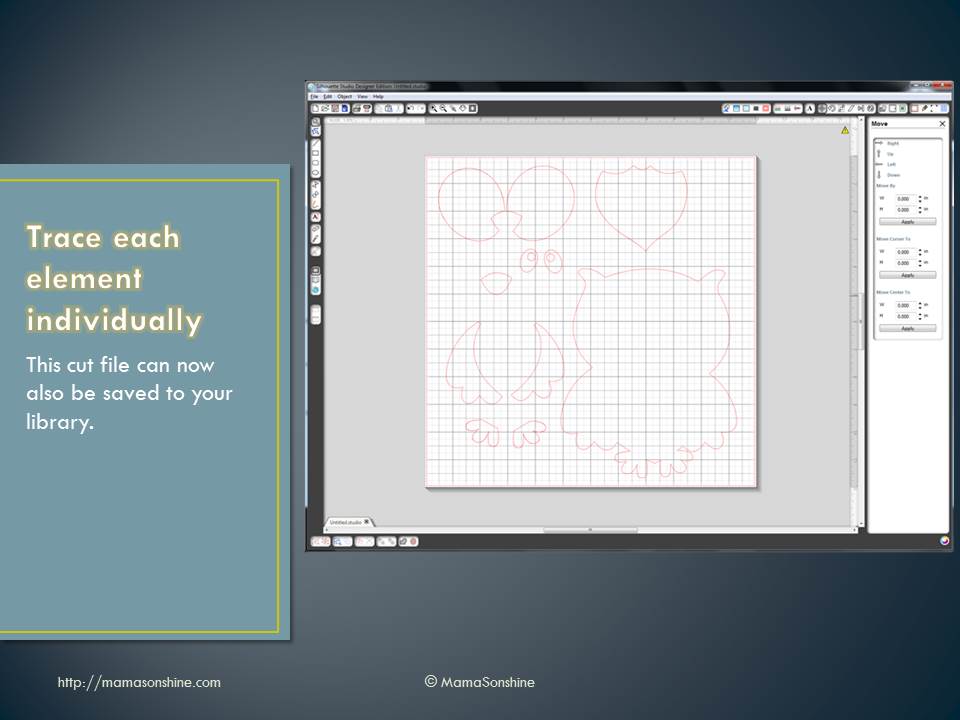
The down side of the Silhouette Studio software is that when you open the image and attempt to trace it you get this.
The software is tracing both sides of the black line. You can work with this, by ungrouping, releasing compound paths, point editing, cutting and erasing. All of which is really time-consuming.
There are other software programs that can do center line tracing. I use Adobe Illustrator, but not everybody has that program. Kristy at Please Excuse my Craftermath has three posts on center-line tracing using Illustrator, Wintopo and AutoTrace, the last two are free. Wintopo is a freeware and AutoTrace is an online program. I won’t go into details about how to do the trace, because Kristy does an excellent job. What you end up with is a SVG file that you can open in Studio that has a single line. If you do not have the Designer Edition you can save as the new files as DXF files, which should open in the regular edition.
This tutorial will be about what to do now that you have a single stroke path file. The new SVG file will have thick lines, which make it easier to see, but when you go to sketch will need to be changed (I will explain later).
While the image looks like it is one line it is really made up of a bunch of little lines. Which is also fine if you want to sketch in one color, but that was not look I wanted.
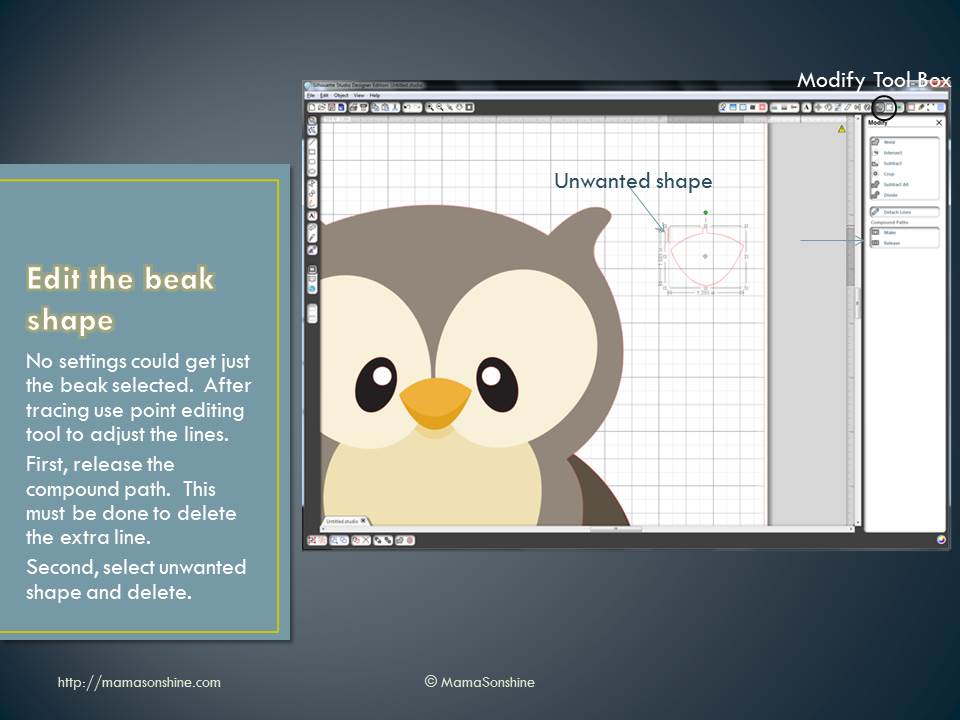
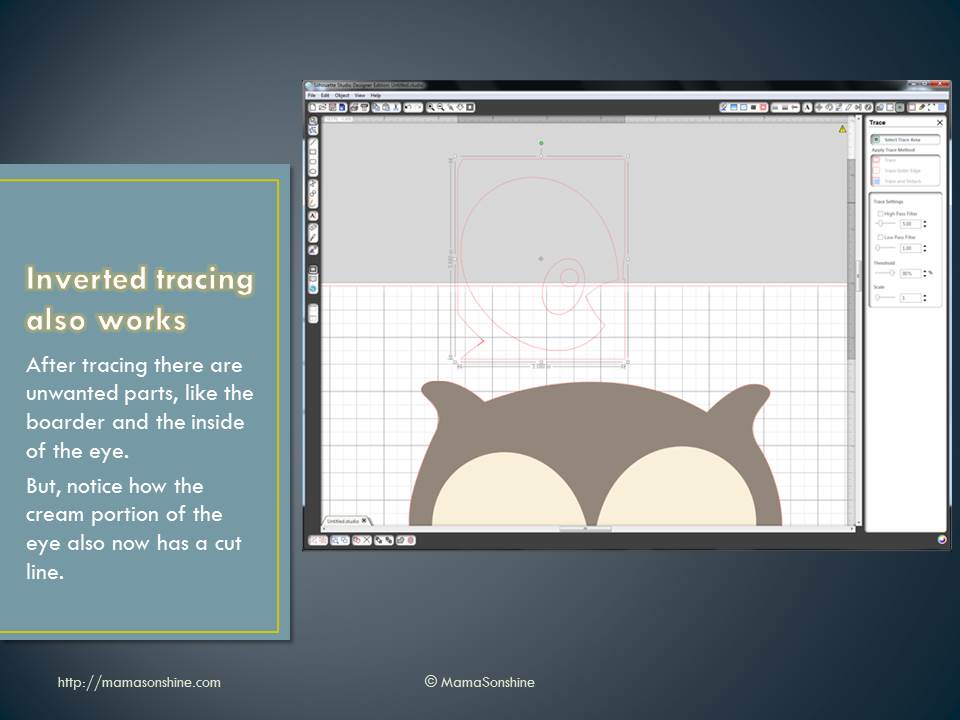
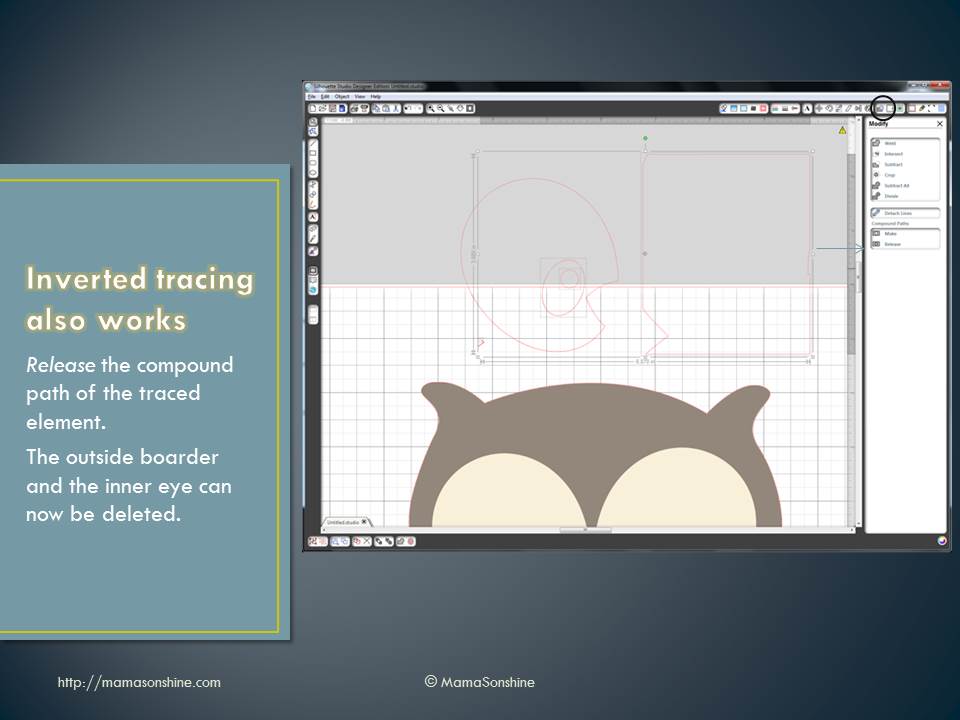
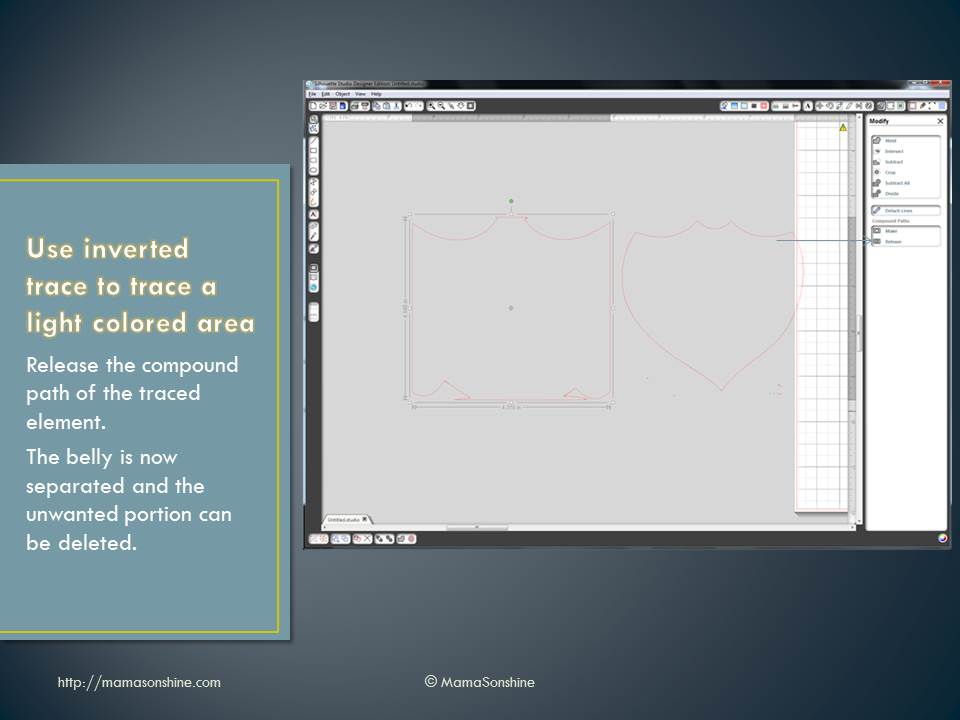
Fist you want to release the compound path, and ungroup until it is no longer an option. This way you can remove the black border around your image. You will be able to see the multiple bounding boxes around all the lines.
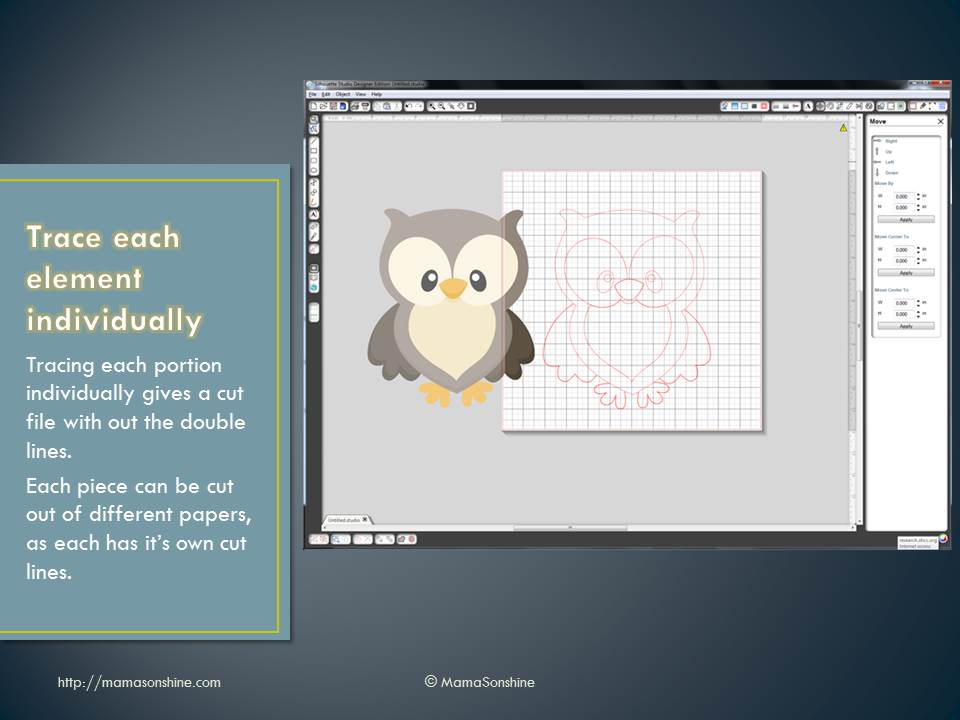
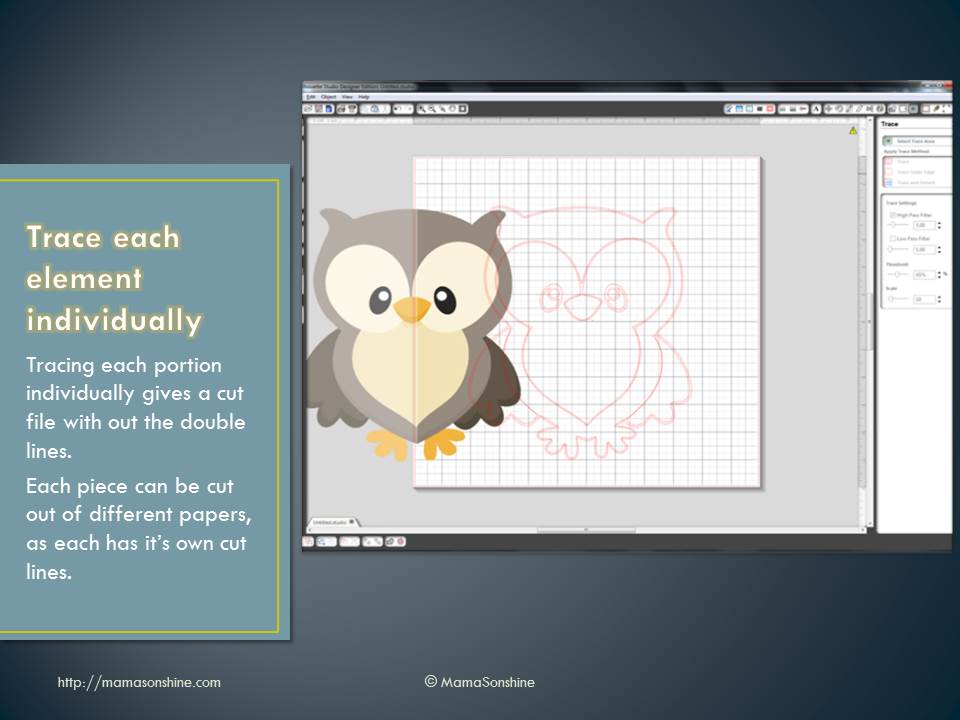
I found it was easier if I made each section a different color. I want the outline of her extremities, face, torso, etc. one color. Her hair a different color, her clothes different colors, and so on.
It doesn’t have to match the color I want in the end, because the final color will depend on what color pen I use. This just helps distinguish each portion, and makes it easier when I go to select which area to sketch.
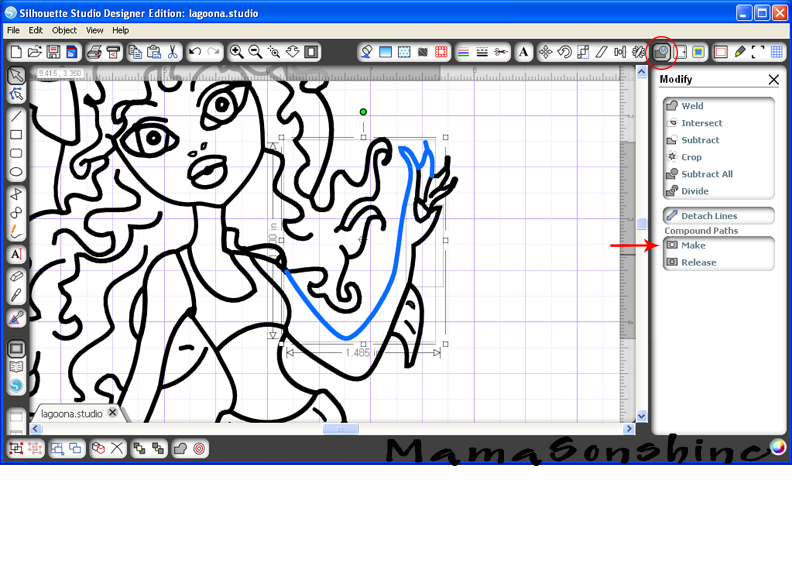
First choose one line and change the color.
While fist line is still selected hold the shift key and select another line (or multiple lines)
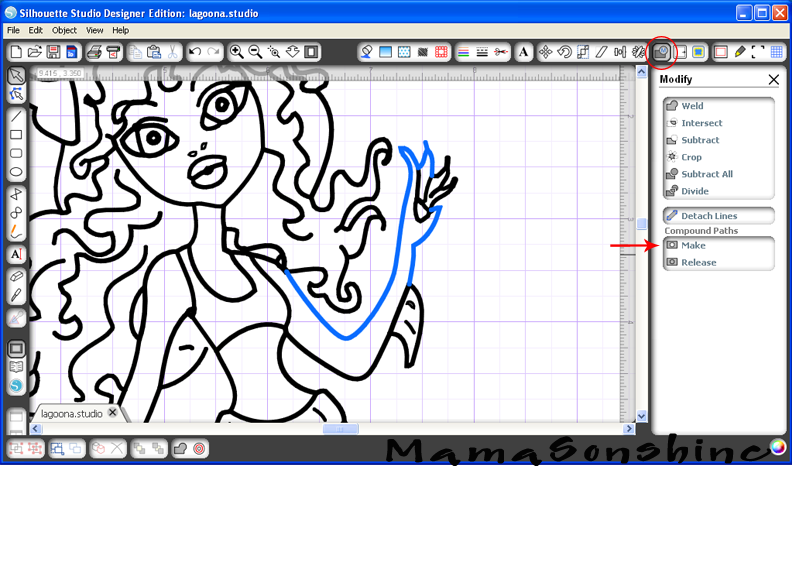
You want to make the selection a compound path, through the “modify window,” selecting object ->make compound path, or right clicking on your mouse (Sorry, I don’t have a Mac, so I don’t know the commands for it). When it is a compound path, the new line colors will be changed to the color you selected for your first line.
Continue to do this until you have made everything you want in that color one compound path.
Repeat the steps on the next section and again until the picture is color coordinated.
This makes it easier for me to select which portion to sketch. I can just select the body to be sketched in one color, send to Silhouette, change the pen, got to cut style window, select a different part to be sketch, send to Silhouette and repeat.
The new compound path for the body is selected, so it will all be drawn at once, and I only have to select one line.
If you need to resize or move the image, you simply group the different elements together. But you will have to ungroup them to sketch them at different times.
You will also need to change the line thickness to zero, if left as is, the Silhouette will do a ‘double cut’ or more accurately will draw two lines to get the set thickness.
Keep in mind, that while you have made the lines compound paths, they are still disconnected. This means that they can not yet be filled with a color or pattern.
This slideshow requires JavaScript.
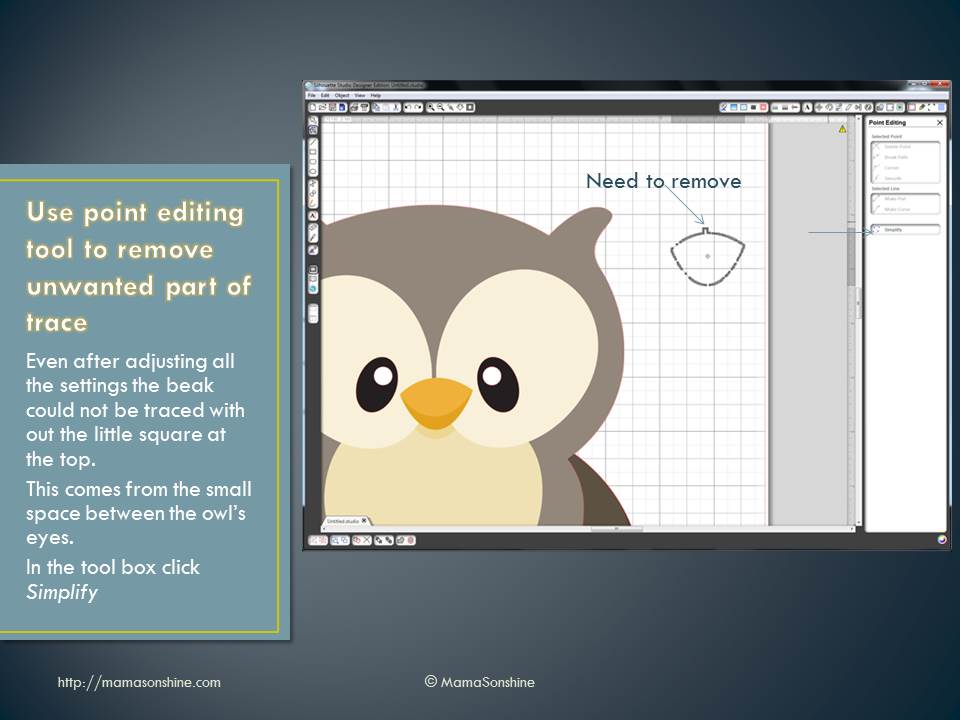
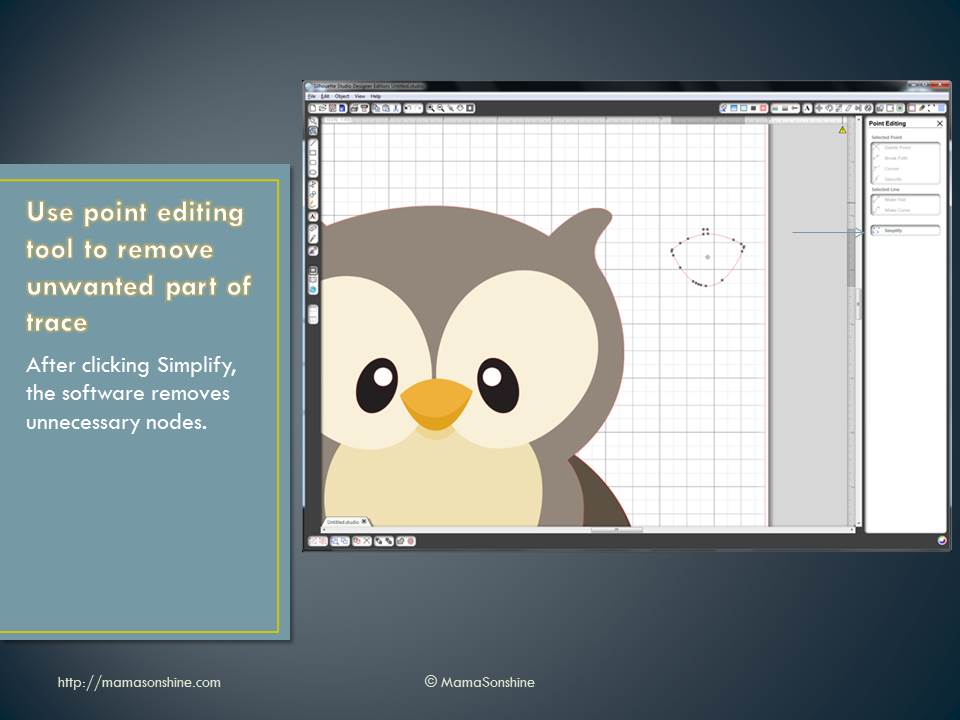
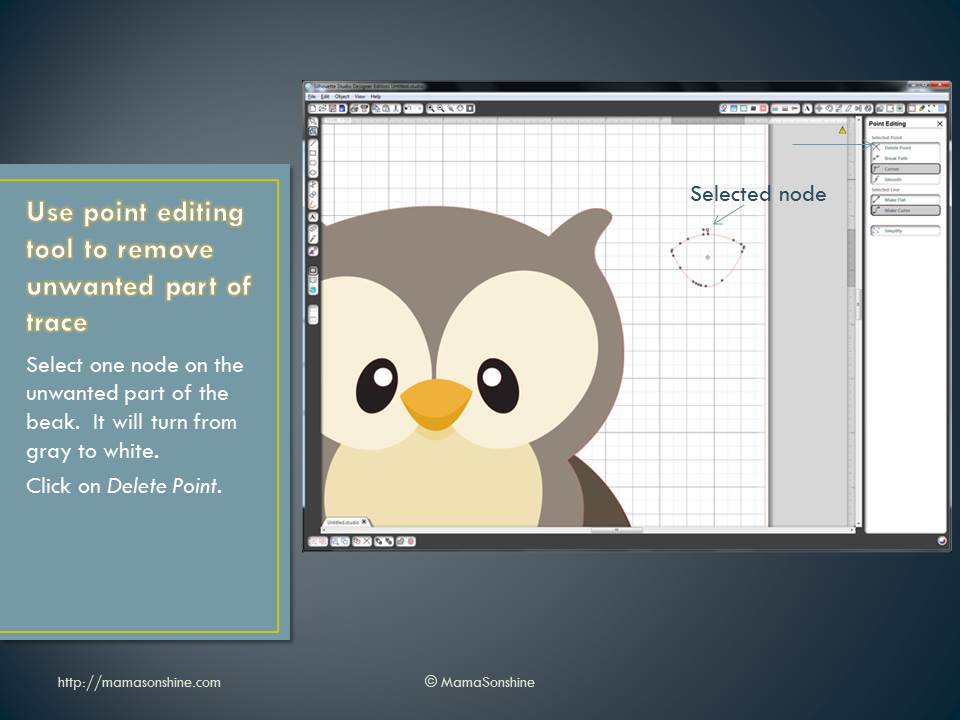
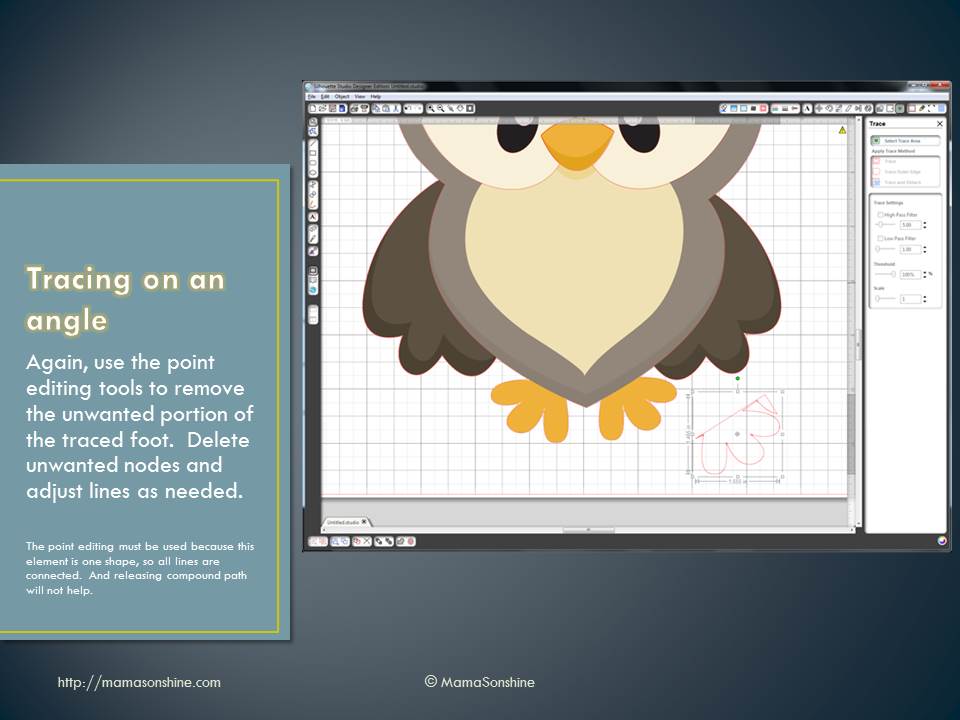
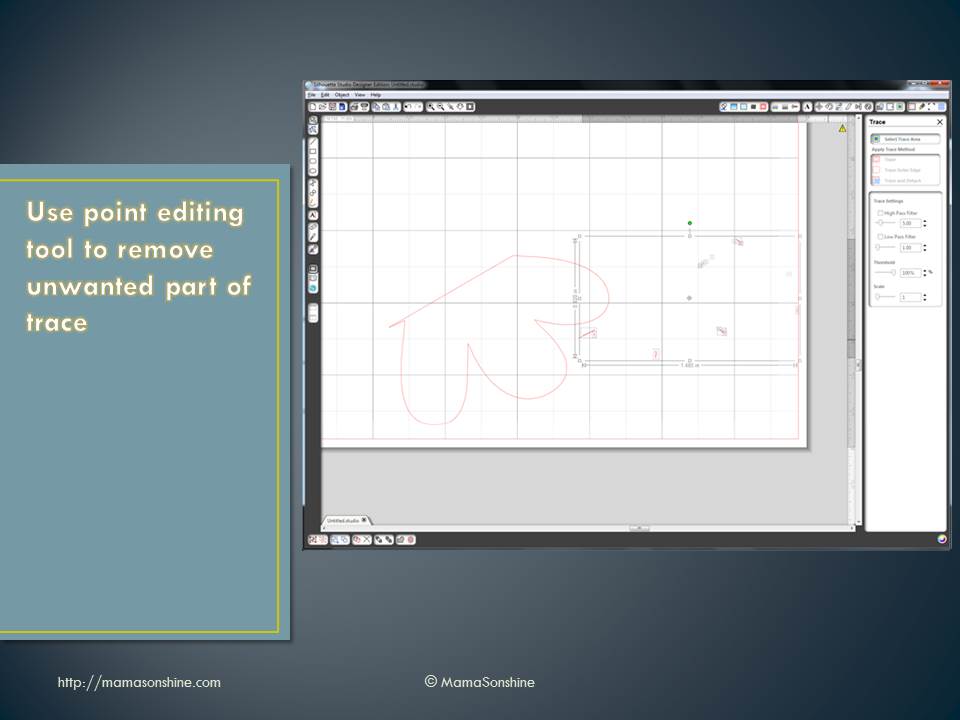
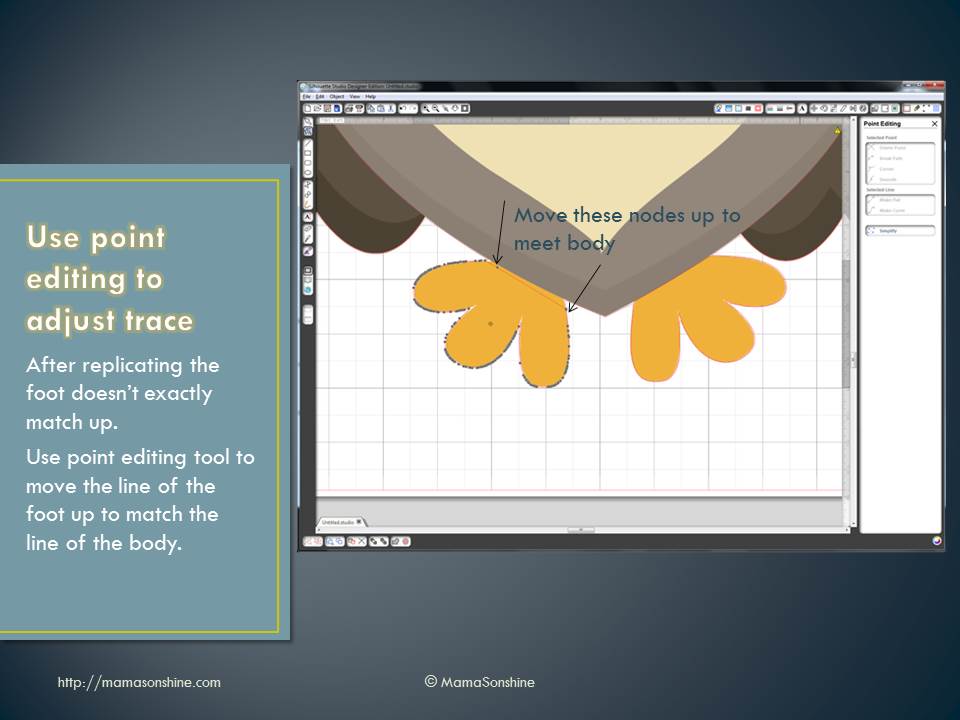
You will need to go back and connect the lines together using the point editing window. Sometimes you may need to delete some points, break paths, or move things depending on how it looks. This might also change the outcome if you try to cut, instead of draw. I can’t attest to that, because I have not tried to cut while the lines were unconnected.
This slideshow requires JavaScript.
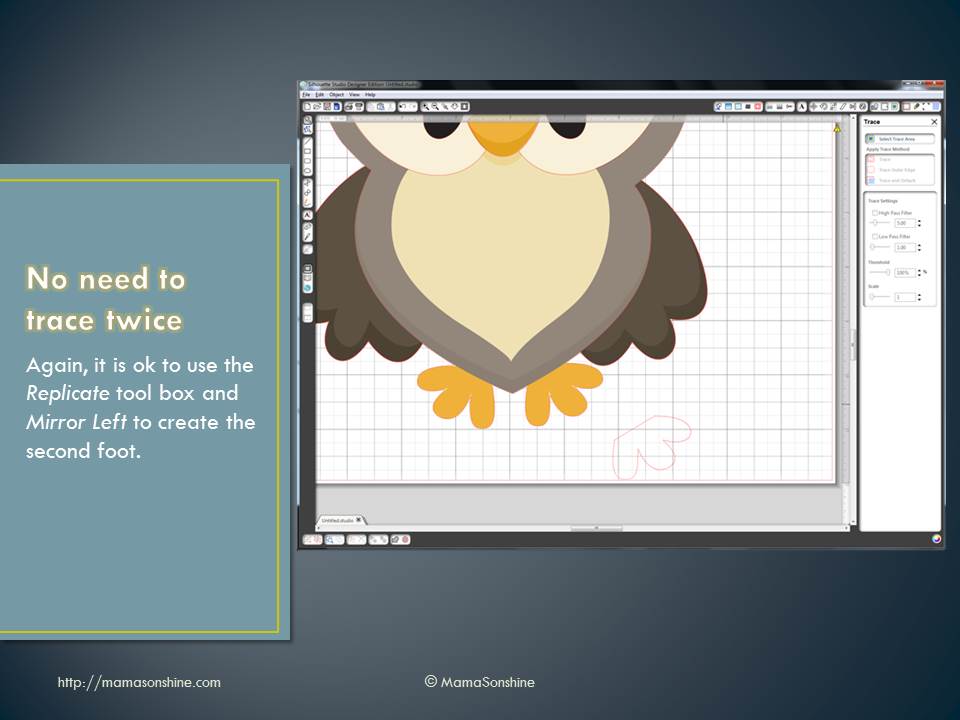
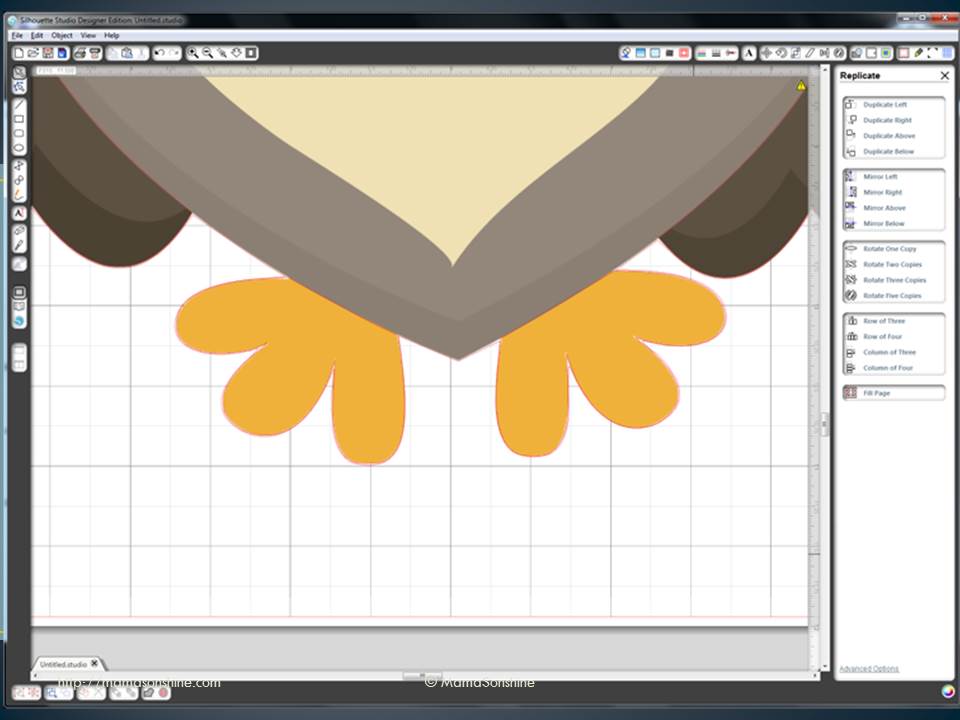
For this card I wanted to add dimension and I didn’t want her clothes to be just an outline. So I duplicated the clothes, fishbowl and flower elements. I connected the outside lines using the point editing tool and cut them out of colored cardstock, and clear sticker paper for the fishbowl.
I used the sketch pens to make the faux stitching around the border and write the sentiment inside the card.
This slideshow requires JavaScript.
I hope this has helped you take a black & white coloring page and turn it into a custom drawing.