I Tri and Craft

thoughts from a mother of boys, a marathoner, a triathlete, a crafter, a wife, and a scientist


2 Comments

Easter Rolls and Menu Plan Monday 4/1

Happy April’s Fools Day!

I wanted to play a prank on you, but I am not that witty and can’t think of anything that has not been done before, so this is just a boring food post.

You’re welcome.

I was, and usually am, in charge of rolls for Easter Dinner, or any dinner.

This year we, well my sister, decided we should have a full turkey dinner for Easter.  During Thanksgiving time we ended up with 3 turkeys, two of them free.

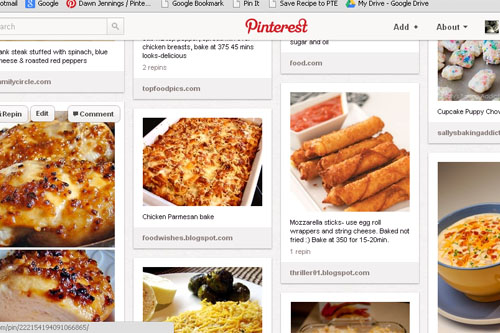
I saw this pin on Pinterest

Source: flickr.com viaDawn Marie on Pinterest

and thought they were adorable!

The pin says just use a yeast roll recipe, pinch up the ears and poke holes for eyes.

Easy.  Right?

Wrong….

So the link on the pin takes you to someone’s Flickr account and there is just a picture.

To find some directions I Googled ‘Easter bunny rolls’ and found a bread making blog, Artisan Bread in Five Minutes.  What a perfect blog!  I am going to have to go back and search through it, because there is nothing I love more than bread!

Back to the rolls.  They wrote a post about these cute little bunnies, and they claim the above pin is really a COOKIE!

I know! I guess you can’t believe everything to see on the internet…

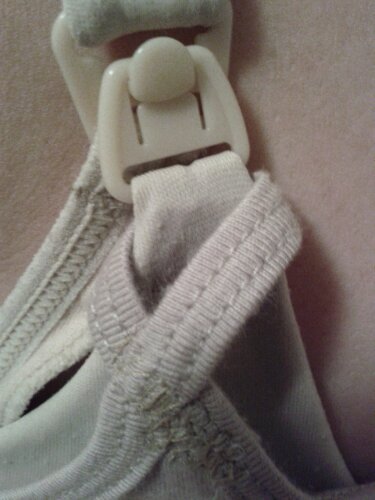
But I tried anyway, as they also did.
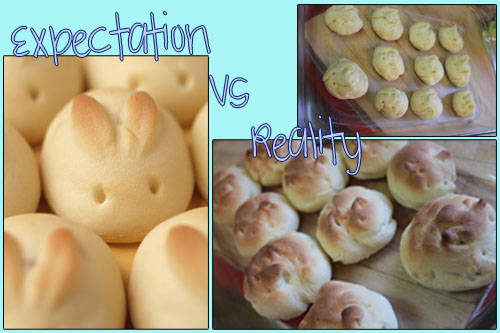
EasterRolls

Nailed IT!

However, if you would like to attempt these rolls the people from Bread in 5 give some tips on how to accomplish them.

Menu Plan 4/1-4/7

Mon: Fresh Fish, my husband caught this past weekend, with pasta

Tue: We will be gone

Wed: One-Pot Chicken & Brown Rice

Thr: Sesame Beef

Fri: Pesto Chicken Tortellini Soup (but made with chicken in the soup and cheese tortellini instead)

Sat: Leftovers shall be consumed

Sun: Easy Pork Chops and Rice
Happy Cooking

signature-black

Need something to help plan your meals?  I use the Plan to Eat online meal planner.  Try it free for 30 days

Simple Meal Planning - Plan to Eat

Find more recipes at I’m an Organizing Junkie


Leave a comment

Pinterest Tuesday March 5

On the first Tuesday of every month I will post about something I found on Pinterest that I actually did!  Sometimes it will be about a craft project, sometimes about food and sometimes about a ‘miracle’ cleaning product.

Holy CRAP! When did it become March?  Yes, yes I know, five days ago, right?

Before I joined Pinterest I found this post about making homemade laundry soap.  I went back to it after finding similar post all over Pinterest, so I could try it out.

Source: beingcreativetokeepmysanity.blogspot.com via Dawn Marie on Pinterest

Last spring I made this soap but didn’t make a record of it because, well at the time I wasn’t aware I would be sharing these things with you.  So I waited until I need to make more and this time I took some pictures.

Frugal_Soap05

Here is what you will need:

  • 3 bars Fels-naptha soap
  • 1-2 containers oxyclean or store brand oxyclean 3-4 lbs
  • 1 box Borax 4 lb 12 oz box (2.15 kg or 76 oz)
  • 1 box Arm & Hammer Baking Soda 4 lb (1.81 kg)
  • 1 box Arm & Hammer Super Washing Soda 55 oz (3 lb 7 oz)
  • 1 bottle Downy Unstopables 13.2 oz (375 g)

Frugal_Soap01The original post didn’t use the scent booster but I didn’t really like the scent of the Fels-Naptha soap.  You can also use Purex Crystals or Gain Scent Booster, or leave it out.  There is also some debate about which bar soap to use.  It doesn’t really matter as long as it is a laundry soap.  It would not be good to use bath soap as the ingredients are different.

Directions:

Add all the ingredients, excluding the bar soap, in a clean 5 gallon bucket.  It would be ideal if it had a lid, but I just lined mine with a garbage bag, which I can close for storage.  You want to do this part in a well ventilated area, or outside, because you don’t want to inhale the fine dust particles.

Place one bar of soap in a microwave safe dish and microwave on high for 2-3 minutes.

Frugal_Soap02

You want to make sure there are no smooth surfaces, that the whole bar looks like this:

Frugal_Soap03

Let the whole bar cool to room temperature, this might take a little while.  Once it is cooled it breaks apart in to a powder.  If you find hot spots just let it cool a little longer.

If there are still smooth surfaces on the bar or it is not cool, it will not crumble into a powder.  It will break into small pieces, just not a powder.  You can see some of the bigger pieces in my picture.  The larger pieces don’t always dissolve completely in cold water.

Alternatively you can grate the soap or run it through the grating blade on your food processor (not a chopper or blender).  That is too much work for me!

Add the soap to the rest of the ingredients and mix well.  It is advisable to do the mixing in a well ventilated area as well.

I store smaller amounts in one of the oxyclean containers for easy use.

Use 1-2 table spoons per load, if using a front-loading washing machine add to the drum not the detergent basket.  Or just follow your washer’s instructions on using a powdered detergent.

Frugal_Soap04

Now the smell of microwaved soap might not appeal to you.  My husband was not happy about it and neither was I.  Afterwards I microwaved a bowl of baking soda with water and vinegar.  I would run it for a few minutes to heat up the liquid and then let it sit.  I did this three or four times adding more liquid as needed.  I then wiped out my microwave and left the door open to air it out.

This batch will last 9-12 months depending on how much you use.  I probably use more than I should, but my husband works in construction and I have two boys….

Happy Pinning

signature-black


Leave a comment

Pinterest Recipes & Meal Plan Monday 2/11

As we all know Pinterest has an abundance of recipes!

Typically I don’t pin the recipes I find, I just go to the original site and save it in Plan to Eat recipe book.  Lately I have felt in a cooking rut and needed some new recipes so I, of course, turned to Pinterest.

I started a new recipe board and started pinning.

Pinterest Recipe Board

Know what I found out?

Pinterest people LOVE chicken!

I thought about planning this weeks menu with nothing but new Pinterest recipes but it was too much chicken.  So there are four out of the six cooking days that are recipes from Pinterest.

I don’t have that many recipes on there yet, in my defense it takes a long time to filter through all the dessert recipes.


Meal Plan Monday Feb 11-Feb 17th

Mon: Buffalo Balls with rice

Tue: Creamy Italian Potato soup

Wed: Garlic Cheddar Chicken with Creamy Garlic Pasta

Thr: Wine Gazed Steak with Parmesan Rice (my new FAVORITE rice)

Fri: Do-Ahead Ravioli Sausage Lasagna

Sat: I ain’t cookin’

Sun: Buffalo Chicken Bake

I wasn’t able to eat Buffalo Sauce while I was pregnant, I got really bad heartburn, but then again I got heartburn from water….

I had something with Buffalo Sauce the other day and realized how much I missed it.  No reason I can’t eat it now!  So, yes there are two recipes that calls for Frank’s Red Hot Sauce!


Happy Cooking

signature-black

Need something to help plan your meals?  I use the Plan to Eat online meal planner.  Try it free for 30 days

Simple Meal Planning - Plan to Eat

Find more recipes at I’m an Organizing Junkie


Leave a comment

Pinterest Tuesday Feb 5

On the first Tuesday of every month I will post about something I found on Pinterest that I actually did!  Sometimes it will be about a craft project, sometimes about food and sometimes about a ‘miracle’ cleaning product.

So this months Pinterest Post is actually something I didn’t make, but enlisted my to do so for me.  While I probably could have fumbled my way through this project, it was much quicker to ask my mom.

It is all about nursing!

I saw this pin:

and knew I needed to do this.

One of the things I hated about nursing was the exposed stomach and/or back.  I have a few nursing tops that fix that problem, but they are expensive.

I also have a few of these nursing tank tops from Target.  Which I love, but let’s be honest, there is no support for anyone larger than a B cup.  Plus they are thick and so not very good for wearing under shirts.  But I do live in them at home.

I have a nursing cover, so that takes care of the front, but I still hated thinking my back was exposed.  Not to mention when I am pumping, while no one can really see my torso, it gets uncomfortable and cold.  I thought this was a great solution.

I am not going to post a tutorial because I want you to visit her site to get it.  It is really easy to do, you don’t really even need to know how to sew.

Basically you start with a tank top/cami, I got mine at Forever 21 and only paid about $3 a piece.  I guess everyone knew about their cheap cami prices, but it was news to me!

I then printed the tutorial out for my mom and gave her the camis.

This is what she gave back to me:

Pinterest-Cami01

My finished cami

I  had her add a little bit of elastic to the back to help hold it up.  They actually stay up just fine as long as the tank is not too big, but it makes me feel better to have the elastic.

Pinterest Cami02

How my cami hooks to my bra

I just attach to my bra and go!  They are not really good for layering if you have a low-cut top because they do sit kind of low on your bust line.

The tutorial is really easy to follow and these are so easy to make!

My mom is so handy with a sewing machine!  I also had my mom make me one of these when I had my first son:

She just used whatever fabric and bra clasp she had around. It fits more like a bikini top then the ones you can buy.  If you are handy with a sewing machine it is fairly easy to make.  Sorry, I wish I had directions on how to do it, but my mom was the one who put it together.  If I have her make me another one I will post it.  She really made me more than one, but I ended up giving them away!

This is another great tutorial for us nursing mamas:

Source: hourglassy.com via Dawn Marie on Pinterest

It is hard to find a good bra, let alone a good nursing one.  So it is great that you can take a normal bra that fist the way it should and turn it in to a nursing one.  I haven’t made this one yet, but the tutorial  makes it look easy.

Happy Pinning

signature-black