I Tri and Craft

thoughts from a mother of boys, a marathoner, a triathlete, a crafter, a wife, and a scientist


1 Comment

How to Sketch from a Coloring Book Page with your Silhouette

One great feature of the Silhouette machines is the Sketch feature.

You replace the blade with a pen and it draws instead of cuts.  This gives the project a hand drawn feel instead of one that came off a printer.  This feature is also usefully for writing sentiments in cards or labels.  Actually the possibilities are endless.

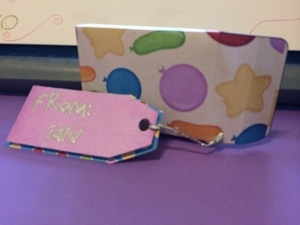
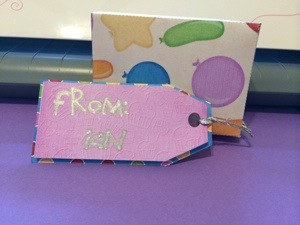
I made this card for a friend’s daughter using the sketch feature.

MSS_MH_LagoonaCard

First you need to go online and find a coloring book page that you want to sketch using your Silhouette.

Here is the one I will be using.


Lagoona Blue Coloring Page from cartoonjr.com

Click picture for source

Please remember that this is for personal use only.  I do not condone using or selling other people’s art/work without permission.

You want to find one that is at a fairly high-resolution that you can download.  The benefit of the coloring pages it that it is more easily traced than an image with coloring.

The down side of the Silhouette Studio software is that when you open the image and attempt to trace it you get this.

MSS_SilSketchTut_MH01

The software is tracing both sides of the black line.  You can work with this, by ungrouping, releasing compound paths, point editing, cutting and erasing.  All of which is really time-consuming.

There are other software programs that can do center line tracing.  I use Adobe Illustrator, but not everybody has that program.  Kristy at Please Excuse my Craftermath has three posts on center-line tracing using Illustrator, Wintopo and AutoTrace, the last two are free.  Wintopo is a freeware and AutoTrace is an online program.  I won’t go into details about how to do the trace, because Kristy does an excellent job.  What you end up with is a SVG file that you can open in Studio that has a single line.  If you do not have the Designer Edition you can save as the new files as DXF files, which should open in the regular edition.

This tutorial will be about what to do now that you have a single stroke path file.  The new SVG file will have thick lines, which make it easier to see, but when you go to sketch will need to be changed (I will explain later).

MSS_SilSketchTut_MH02

While the image looks like it is one line it is really made up of a bunch of little lines.  Which is also fine if you want to sketch in one color, but that was not look I wanted.

Fist you want to release the compound path, and ungroup until it is no longer an option.  This way you can remove the black border around your image.  You will be able to see the multiple bounding boxes around all the lines.

MSS_SilSketchTut_MH03

I found it was easier if I made each section a different color.  I want the outline of her extremities, face, torso, etc. one color.  Her hair a different color, her clothes different colors, and so on.

It doesn’t have to match the color I want in the end, because the final color will depend on what color pen I use.  This just helps distinguish each portion, and makes it easier when I go to select which area to sketch.

First choose one line and change the color.

MSS_SilSketchTut_MH04

While fist line is still selected hold the shift key and select another line (or multiple lines)

MSS_SilSketchTut_MH05

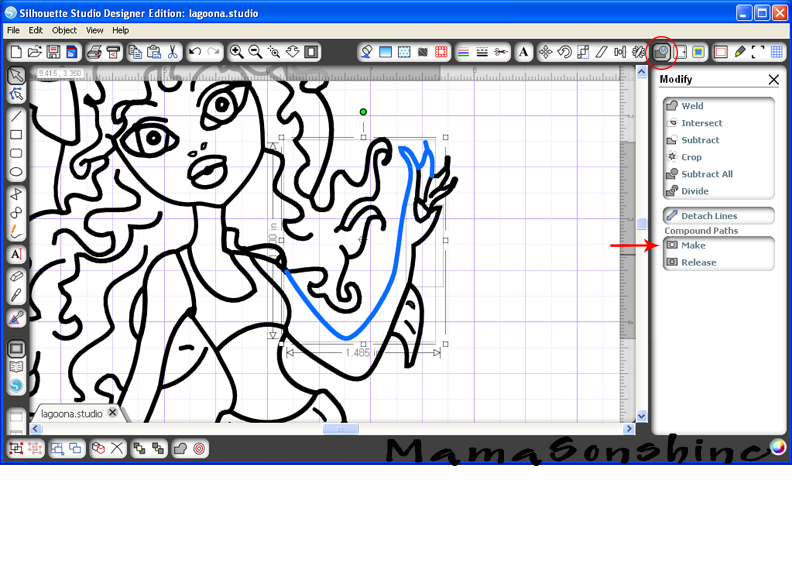
You want to make the selection a compound path, through the “modify window,” selecting object ->make compound path, or right clicking on your mouse (Sorry, I don’t have a Mac, so I don’t know the commands for it).  When it is a compound path, the new line colors will be changed to the color you selected for your first line.

MSS_SilSketchTut_MH06

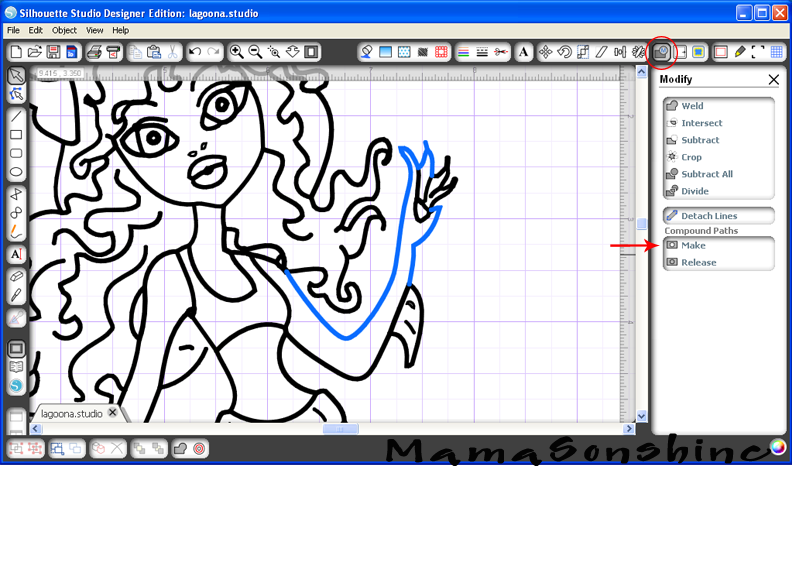
Continue to do this until you have made everything you want in that color one compound path.

Repeat the steps on the next section and again until the picture is color coordinated.

MSS_SilSketchTut_MH07

This makes it easier for me to select which portion to sketch.  I can just select the body to be sketched in one color, send to Silhouette, change the pen, got to cut style window, select a different part to be sketch, send to Silhouette and repeat.

The new compound path for the body is selected, so it will all be drawn at once, and I only have to select one line.

MSS_SilSketchTut_MH08

If you need to resize or move the image, you simply group the different elements together.  But you will have to ungroup them to sketch them at different times.

MSS_SilSketchTut_MH09

You will also need to change the line thickness to zero, if left as is, the Silhouette will do a ‘double cut’ or more accurately will draw two lines to get the set thickness.


Keep in mind, that while you have made the lines compound paths, they are still disconnected.  This means that they can not yet be filled with a color or pattern.

This slideshow requires JavaScript.


You will need to go back and connect the lines together using the point editing window.  Sometimes you may need to delete some points, break paths, or move things depending on how it looks.  This might also change the outcome if you try to cut, instead of draw.  I can’t attest to that, because I have not tried to cut while the lines were unconnected.

This slideshow requires JavaScript.

For this card I wanted to add dimension and I didn’t want her clothes to be just an outline.  So I duplicated the clothes, fishbowl and flower elements.  I connected the outside lines using the point editing tool and cut them out of colored cardstock, and clear sticker paper for the fishbowl.

MSS_SilSketchTut_MH15


MSS_MH_LagoonaCard03

MSS_MH_LagoonaCard02


I used the sketch pens to make the faux stitching around the border and write the sentiment inside the card.


This slideshow requires JavaScript.

I hope this has helped you take a black & white coloring page and turn it into a custom drawing.


Happy Crafting


signature-black
facebook instagram pinterest parties by mamasonshine etsy bloglovin google+ email twitter Image Map
Enhanced by Zemanta


Leave a comment

Gift Card Birthday Box ~ Free download

It is Birthday Party Season!


OK. So there is really no Birthday Party Season, most people can’t really plan on when a birthday is.  But it seems like we had a lot of birthday parties to attend in the months of March & April.

For one such birthday I was unsure if we were going to be able to attend.  Kids were sick and so I put off getting a gift, then I decided to stop on the way to the party.

Don’t judge me, you all have done that too.

But, as the saying goes, the best laid plans of mice and men….

The day got away from me and I wouldn’t have time to run in and find a present.  Alone with the kids in tow.  But I could stop and grab a gift card.

You know, there needs to be more dive thru services for things like this.  A gift card ATM.  Go ahead, run with my idea.  Just include me in the royalties.

I also knew I wasn’t going to be able to stand around the card isle finding the perfect gift card holder.  But as the baby was sleeping, I did have time to make a little box with a tag.

20140411-150753.jpg


I made a box template and tags in Silhouette Studio and filled them with some digital paper in birthday pattern.

I used the sketch pen feature to address the tag.

It is a little deeper than a gift card, but I filled the space with tissue paper.  I wanted something a little more substantial than an envelope.

The boys and I ran into the store, bought a gift card conveniently located next to the check out counter, and made it to the party on time.

20140411-150727.jpg

For those of you who might find yourself in the same kind of rush you may download this box here.

You will need Adobe Reader, a printer, scissors and glue.

Happy Crafting


Please remember this is for your own personal use only.  You may print the item as many times as you need for your own personal use but please do not forward, share, sell or in any other way distribute this file, or use for any commercial purposes or claim as your own design.  If you would like to feature this item, please do so as a link to this page.  Thank you.


signature-black
facebook instagram pinterest parties by mamasonshine etsy bloglovin google+ email twitter Image Map
Enhanced by Zemanta


Leave a comment

Teacher Appreciation Week

As adults we have fully come to understand and value teachers.

Growing up we had bad ones, ones we didn’t like, ones that might not have liked us and we had great ones.

But as an adult with kids we can fully understand the difficulty teachers face everyday trying to get our kids to learn.

How do you gets kids interested? How do you keep their attention? How do you explain super complicated things in ways they understand? How do you make them sit still and listen? How do you keep up with all the academic rules, regulation & bureaucracy?   But above all how do you not lose your desire to teach?

I don’t have the answers.  But I do know that as parents we need to take the extra step to let our children’s teacher know that we care.

Not only do we care about our children’s education, but we care about those that are providing it.  We need to give them a little thanks.

This year Teacher Appreciation Week is May 5-9.  So get on Pinterest, or Google and find an idea for a nice homemade gift or card.  Or just reach out with a call or an email.  Tell those who spend so much time with our kids trying to better their lives that we appreciate all they do.


I helped celebrate some teachers at my nieces’ school with these decorations.  The PTSO (Parent Teacher Student Organization) got the teacher dinner and dessert during conference days.  My sister (who was on the PTSO for her girls’ school) and I decorated the break room where the food was set out.

teacher privew


I designed all the decorations using graphics from Just So Scrappy‘s digital scrapbooking kit School Rules.

Of course using my Silhouette Cameo to cut out all these decorations is a real time (and hand) saver.

There wasn’t really a great place to hang the two banners we strung them from the table.

Teacher01


Teacher04

My sister made different pies, so we made folded tent cards so the teachers would know what kind of pie.

Teacher05

The mini-bunting flags were used to decorate the pies.  The flags have little tabs that fold over the string to attach more easily.

Teacher03


Teacher07


The teachers really appreciated all the decorations but of course their favorite was the Keep Calm sign.

Teacher06


Remember to thank your teachers


signature-black
facebook instagram pinterest parties by mamasonshine etsy bloglovin google+ email twitter Image Map


Enhanced by Zemanta


5 Comments

Monster High Birthday Card with the Silhouette Sketch Feature

I have been loving the sketch feature that my Silhouette Cameo has.

Being able to draw with it gives me more options than just print n’ cut.

This weekend we will be attending a birthday party for a little girl who is turning six and just loves Monster High.  Since her favorite character is Lagoona Blue I made her a personalized birthday card.


Laggona Blue Birthday Card

Lagoona Blue Birthday Card


I will be providing a tutorial on how to make this card, so tune in next week for the details.

Lagonna Blue

Lagoona Blue


I think my favorite thing about the card is the fish bowl purse.  I used clear sticker paper to give the appearance of glass.


Happy Crafting

signature-black
facebook instagram pinterest parties by mamasonshine etsy bloglovin google+ email twitter Image Map


I shared this project on the Silhouette Challenges Blog

Silhouette Challenges


Enhanced by Zemanta